Workspace Network
Network operators utilizing the Forward Platform during change management windows in large infrastructures can create Workspace networks for efficiency. A Workspace network is a copy of a selected network, containing specific sources (devices, cloud setups, and vCenters) within the scope of a change window. This feature streamlines the change management process, allowing users to save time, focus on necessary sources, complete collections efficiently, and verify changes within the context of this targeted subset.
Creating a Workspace Network
You can create a Workspace network from either the Network Selector or a Path Analysis, with the assistance of a guided wizard.
The wizard flow depends on whether credential copying is enabled for your organization. When credential copying is enabled, the wizard offers the ability to include cloud setups and vCenters in addition to classic devices, and credentials are automatically copied from the parent network. When disabled, only classic devices can be added, and credentials must be provided manually. See Workspace Network Settings for details on configuring credential copying.
Creating a Workspace Network from the Network Selector
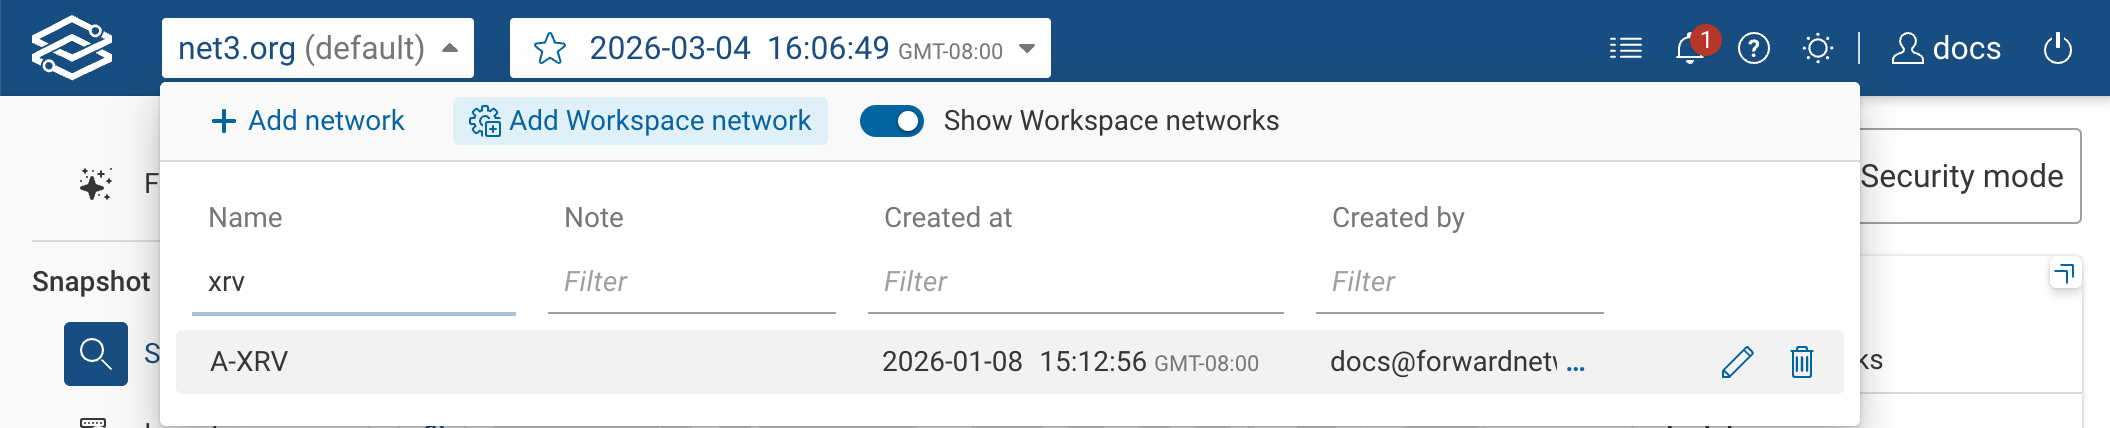
To create a Workspace network from the Network Selector, open the Network Selector dropdown and select Add Workspace network to start the guided creation process.
Step 1: Define Your Workspace Network
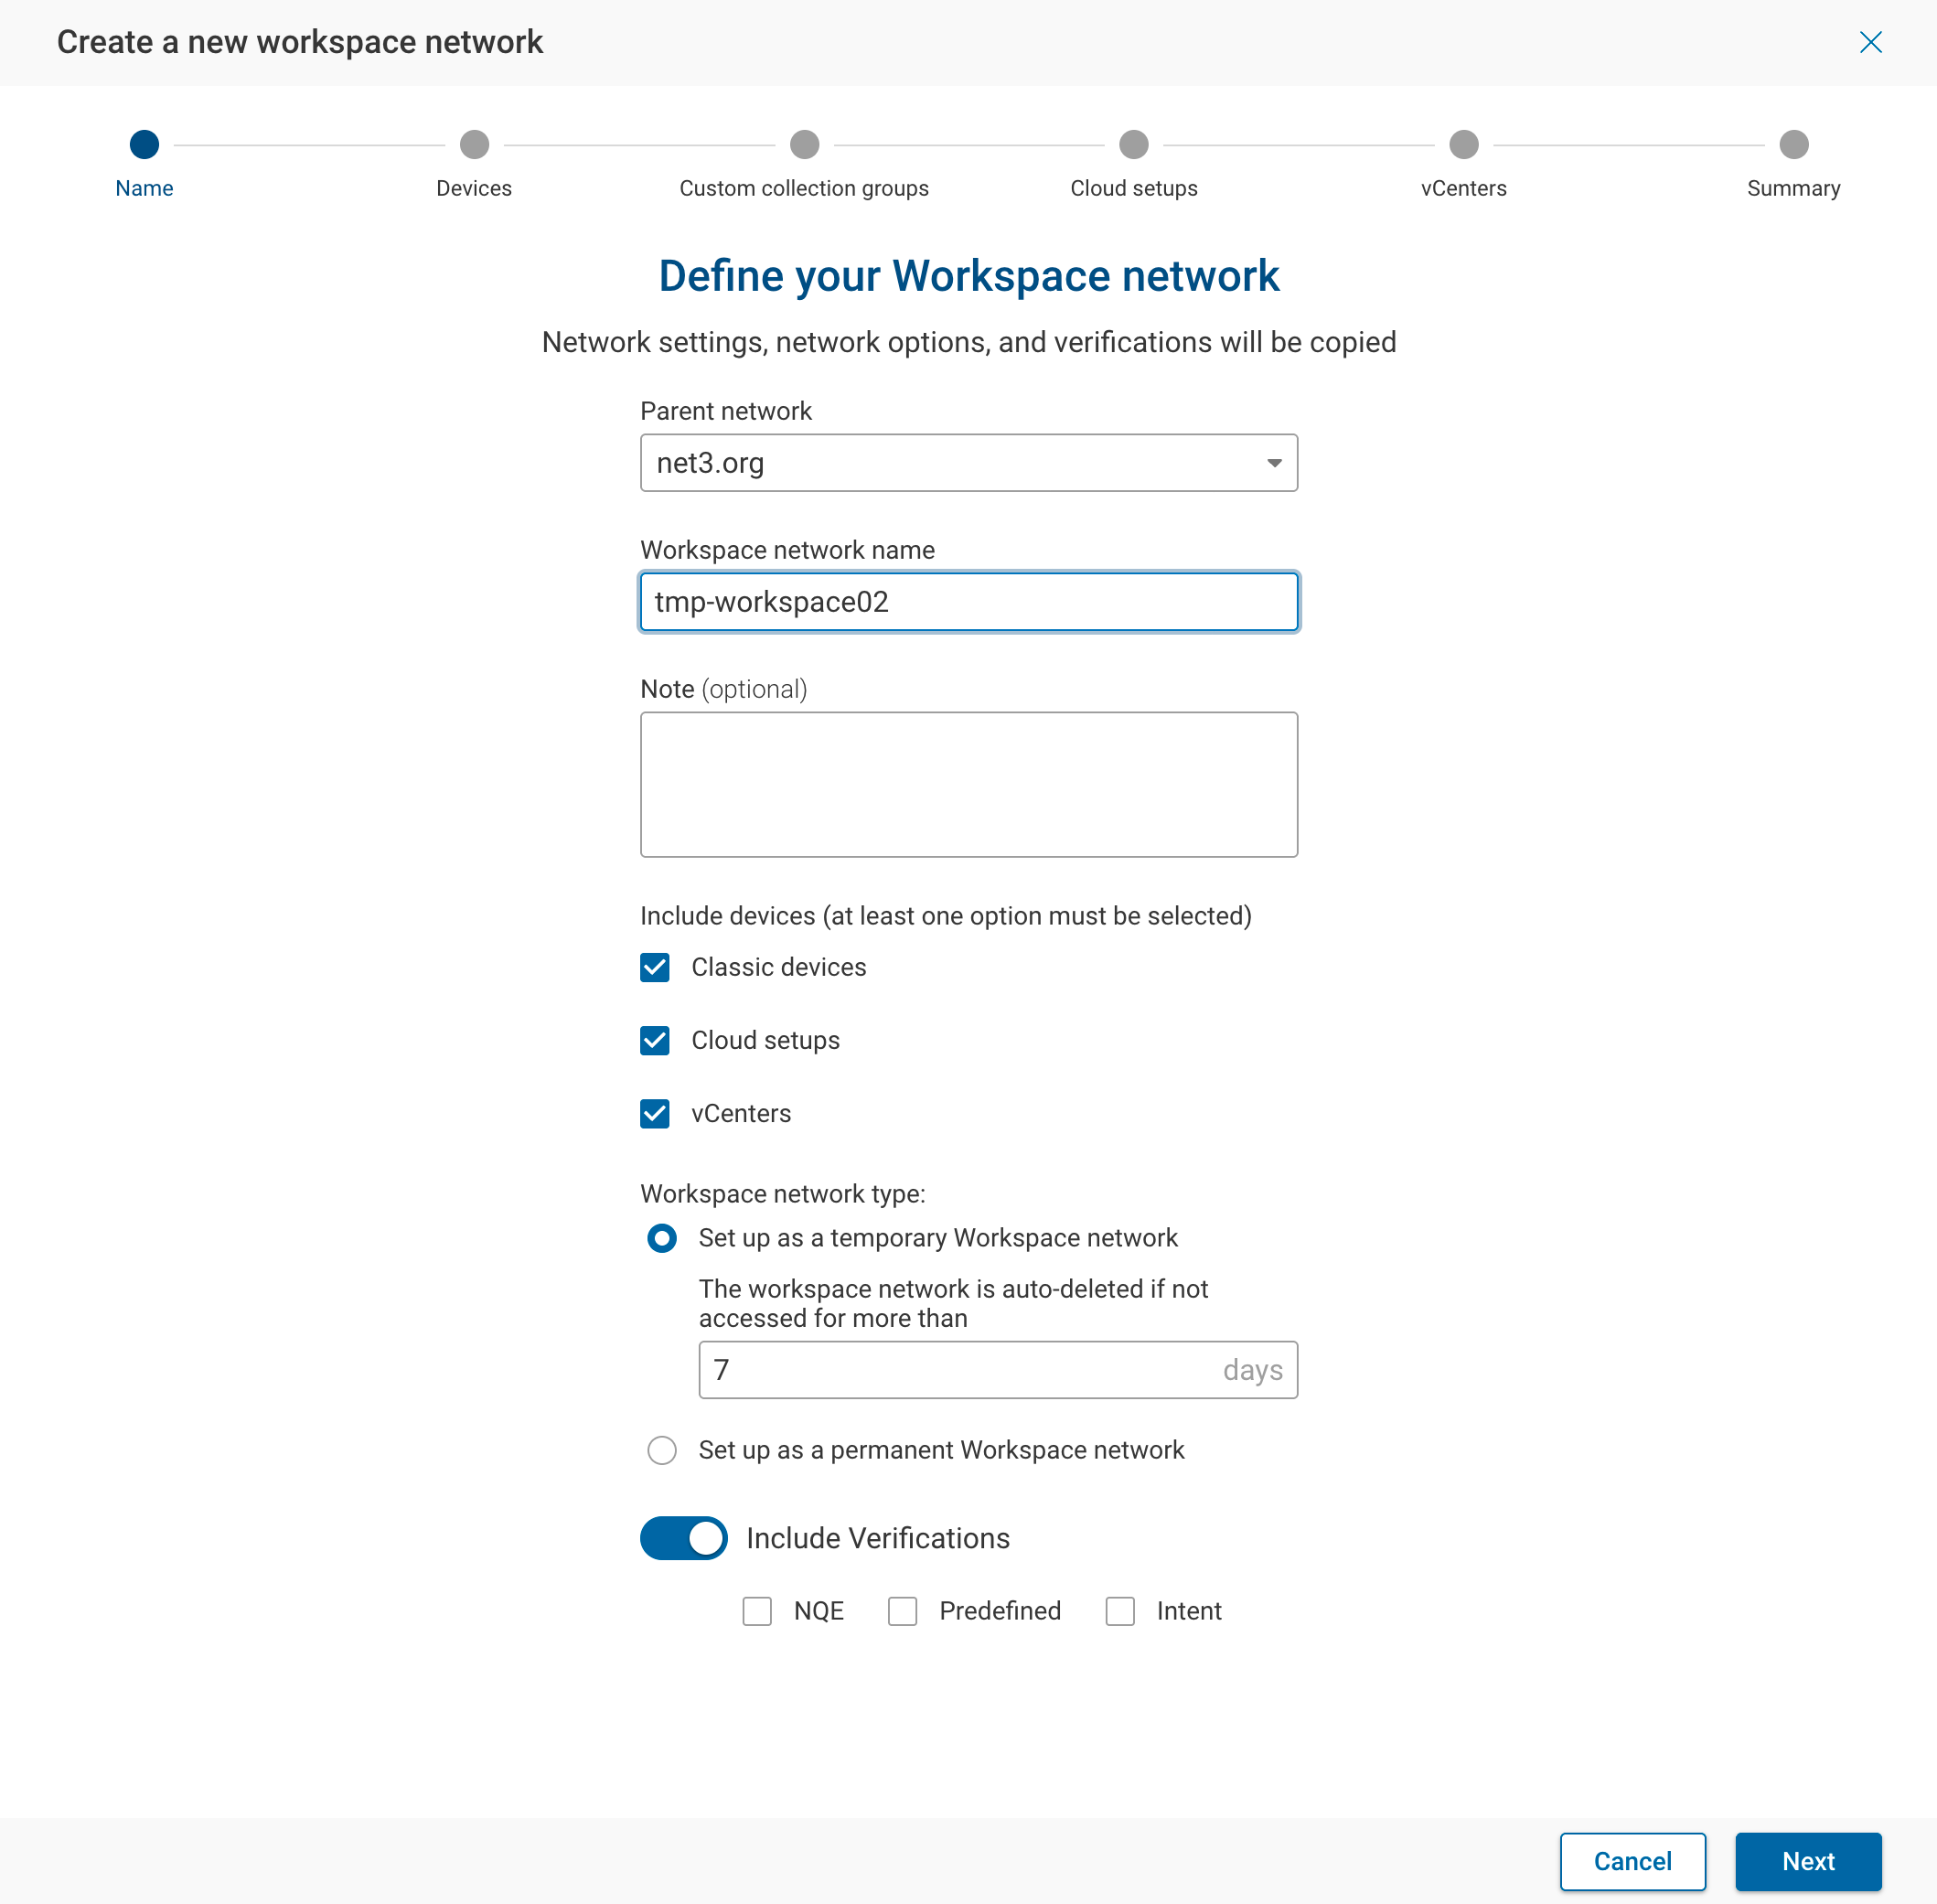
Define the Workspace network by filling in the following fields:
- Parent network — Select the parent network from the dropdown.
- Workspace network name — Provide a unique name to identify the Workspace network (max 255 characters).
- Note (optional) — Add details and information about the Workspace network.
- Include devices — Shown only when credential copying is enabled. Select at least one of the following source types
to include:
- Classic devices — Physical and virtual network devices.
- Cloud setups — Cloud accounts (AWS, Azure, GCP, Alkira, IBM Cloud).
- vCenters — VMware vCenter sources.
- Workspace network type — Choose one of the following:
- Set up as a temporary Workspace network — The workspace is automatically deleted if not accessed for a configurable number of days (default: 7 days).
- Set up as a permanent Workspace network — The workspace remains until manually deleted.
- Include Verifications — Disabled by default. When enabled, select which verification types to copy from the parent network: NQE, Predefined, and/or Intent.
When credential copying is disabled, an informational message appears explaining how to enable automatic credential import. Contact your Org Admin or navigate to Settings > System > Org preferences > Credential copying to enable it.
Step 2: Include Devices
This step appears when Classic devices is selected in Step 1, or always when credential copying is disabled.
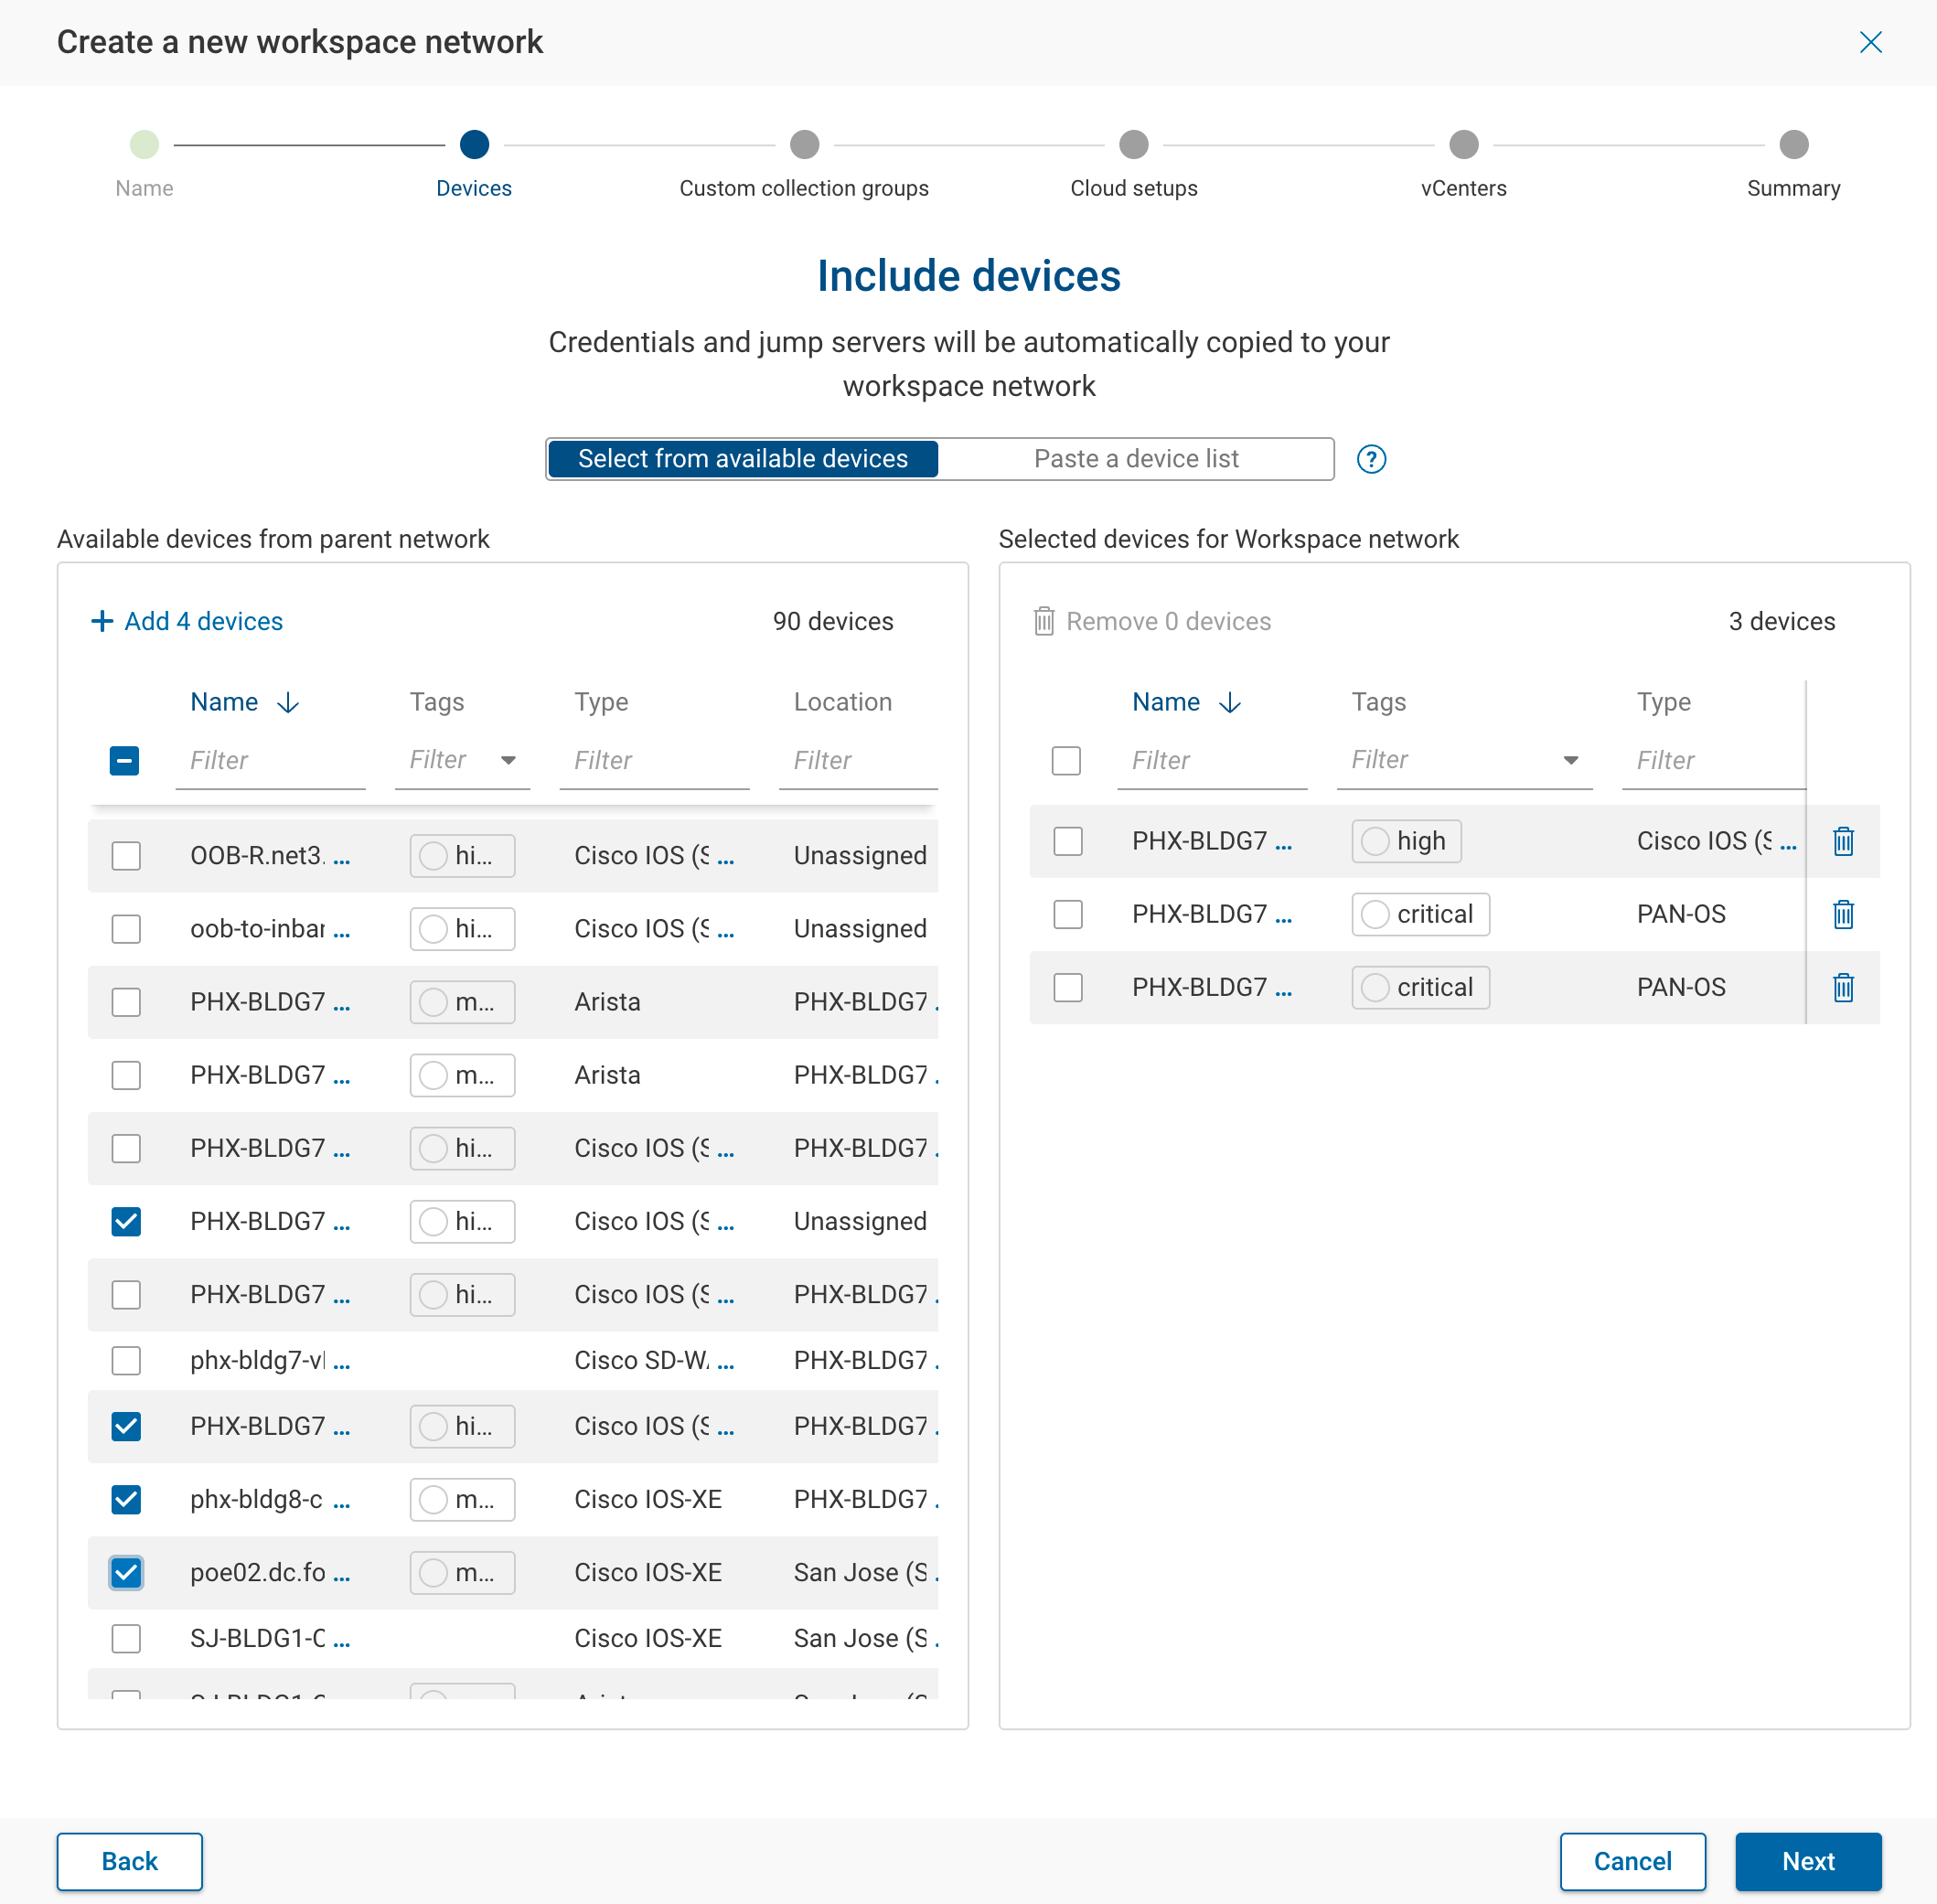
Choose a method to add devices:
- Select from available devices — Browse and select devices from a filterable, sortable table showing device name, tags, type, and location. Selected devices appear in a panel on the right. Use the bulk action button to add multiple devices at once.
- Paste a device list — Paste a list of device names into a text area. The system matches the names against available devices and highlights any unmatched entries for correction.
Only one method can be used at a time. Devices added with the currently selected method are included in the Workspace network.
Step 3 (Conditional): Import Custom Collection Groups
This step appears only when the parent network has custom collection groups configured.
The wizard displays the available custom collection groups from the parent network. Select the groups you want to import, or skip this step. You can also import custom collection groups later from the Custom collection groups page.
Step 4 (Conditional): Include Cloud Setups
This step appears when Cloud setups is selected in Step 1 (requires credential copying to be enabled).
Browse and select cloud accounts from a filterable table showing the cloud setup ID, type, and regions. Selected cloud setups appear in a panel on the right. At least one cloud setup must be selected to continue.
Step 5 (Conditional): Include vCenters
This step appears when vCenters is selected in Step 1 (requires credential copying to be enabled).
Browse and select vCenter sources from a filterable table showing the vCenter name and location. Selected vCenters appear in a panel on the right. At least one vCenter must be selected to continue.
Step 6: Summary
The summary page displays:
- Workspace network type — Whether the workspace is temporary (with the auto-deletion period) or permanent.
- Devices — The number of devices added (if any).
- Cloud accounts — The number of cloud accounts added (if any).
- vCenters — The number of vCenters added (if any).
You can review and modify sources on the Sources page after creation.
Alternative Flow: Credential Steps (When Credential Copying Is Disabled)
When credential copying is disabled, the wizard replaces Steps 4 and 5 with credential-entry steps. Immediately after Step 2: Include Devices, the workspace network is created and the following steps appear in place of the cloud setup and vCenter steps:
- Add device credentials (optional) — Select which credential types to provide: CLI login, Privileged mode, and/or HTTP login. Each selected type opens a subsequent step to enter the credentials.
- Add credentials to jump servers (conditional) — If the selected devices are associated with jump servers, this step displays the jump servers and allows you to enter usernames and passwords, or remove unnecessary jump servers.
The wizard then proceeds to the Summary step.
Cloud setups and vCenters cannot be added when credential copying is disabled, because their credentials cannot be manually specified.
Creating a Workspace Network from a Path Analysis
Workspace networks can be created directly from a path search using the devices within a specified path. To create a Workspace network from a path search, select Real-time refresh.
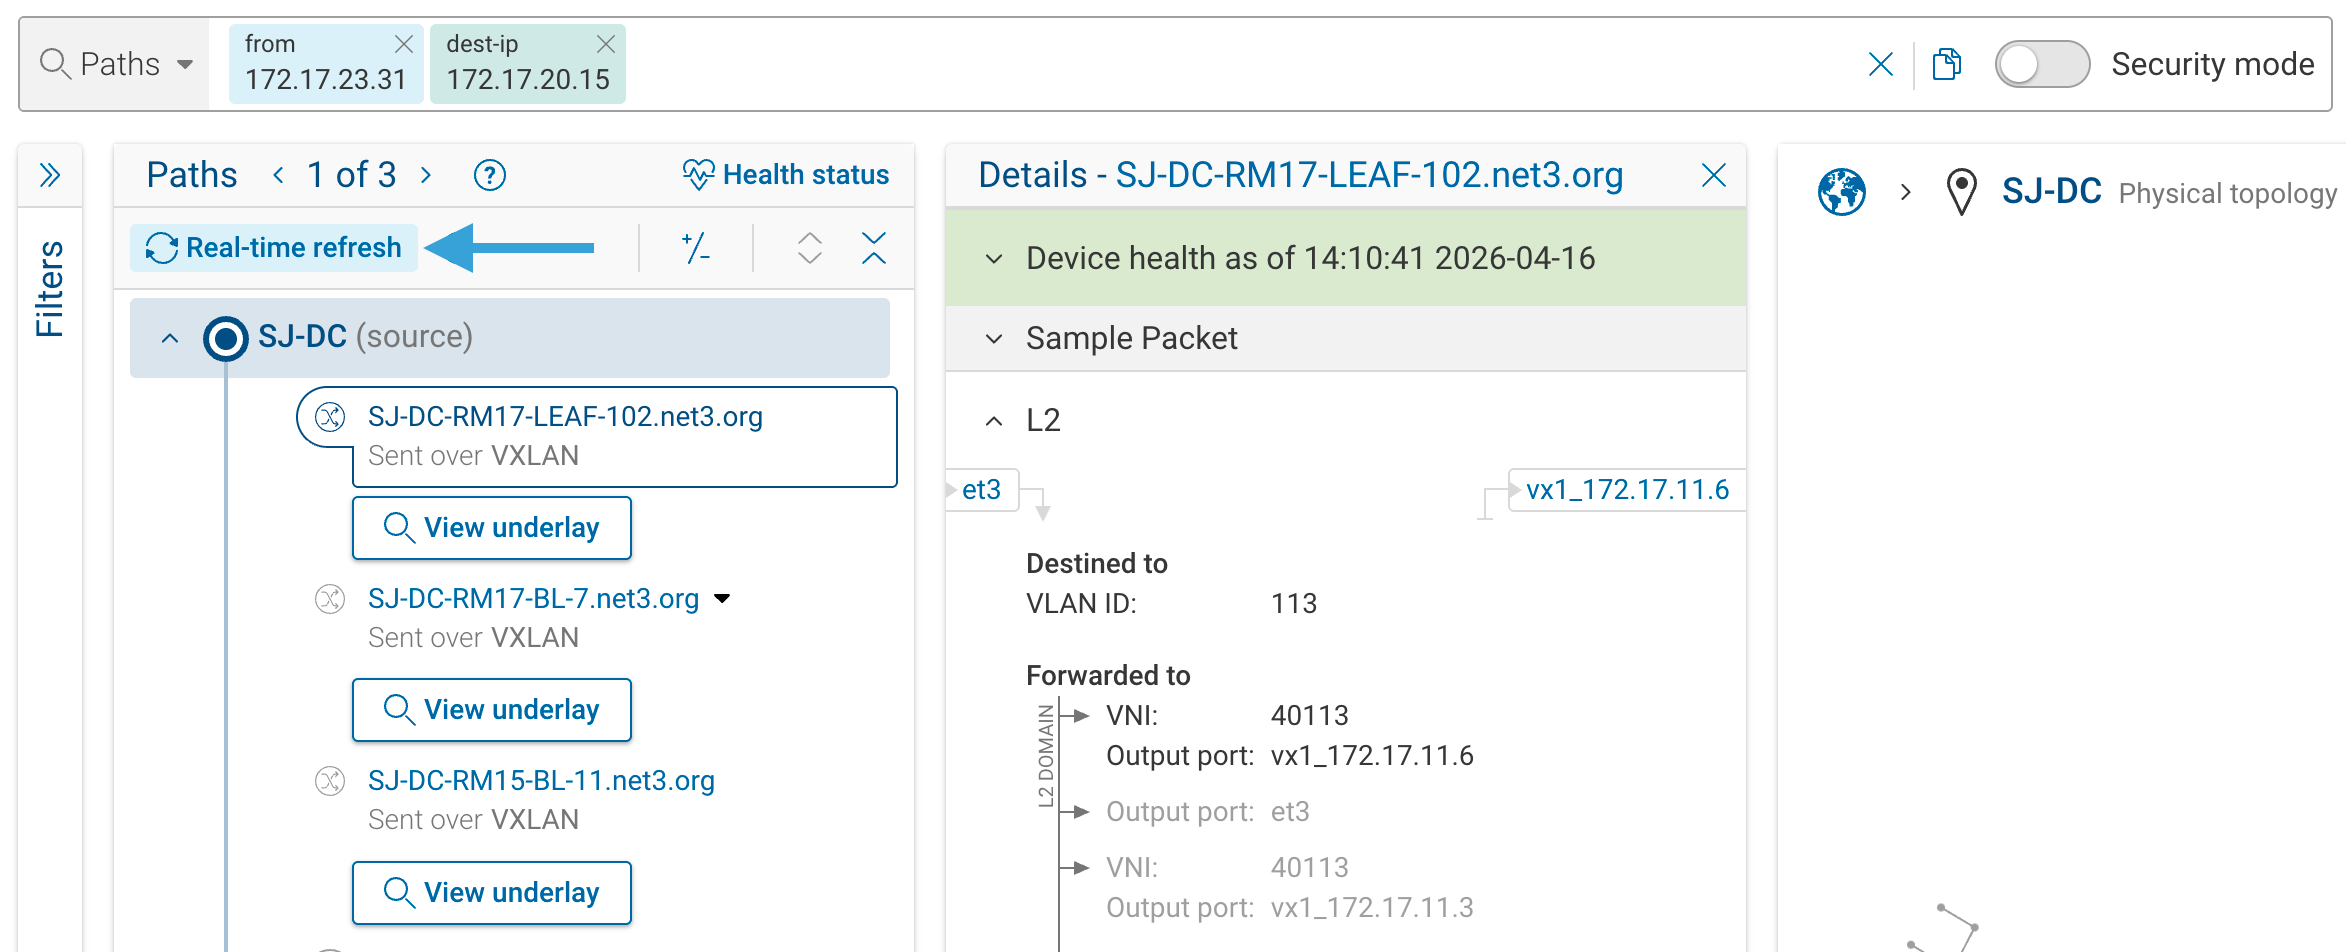
The wizard is titled Real-time refresh with Workspace and provides a streamlined flow.
Step 1: Define Your Workspace Network (Path Analysis)
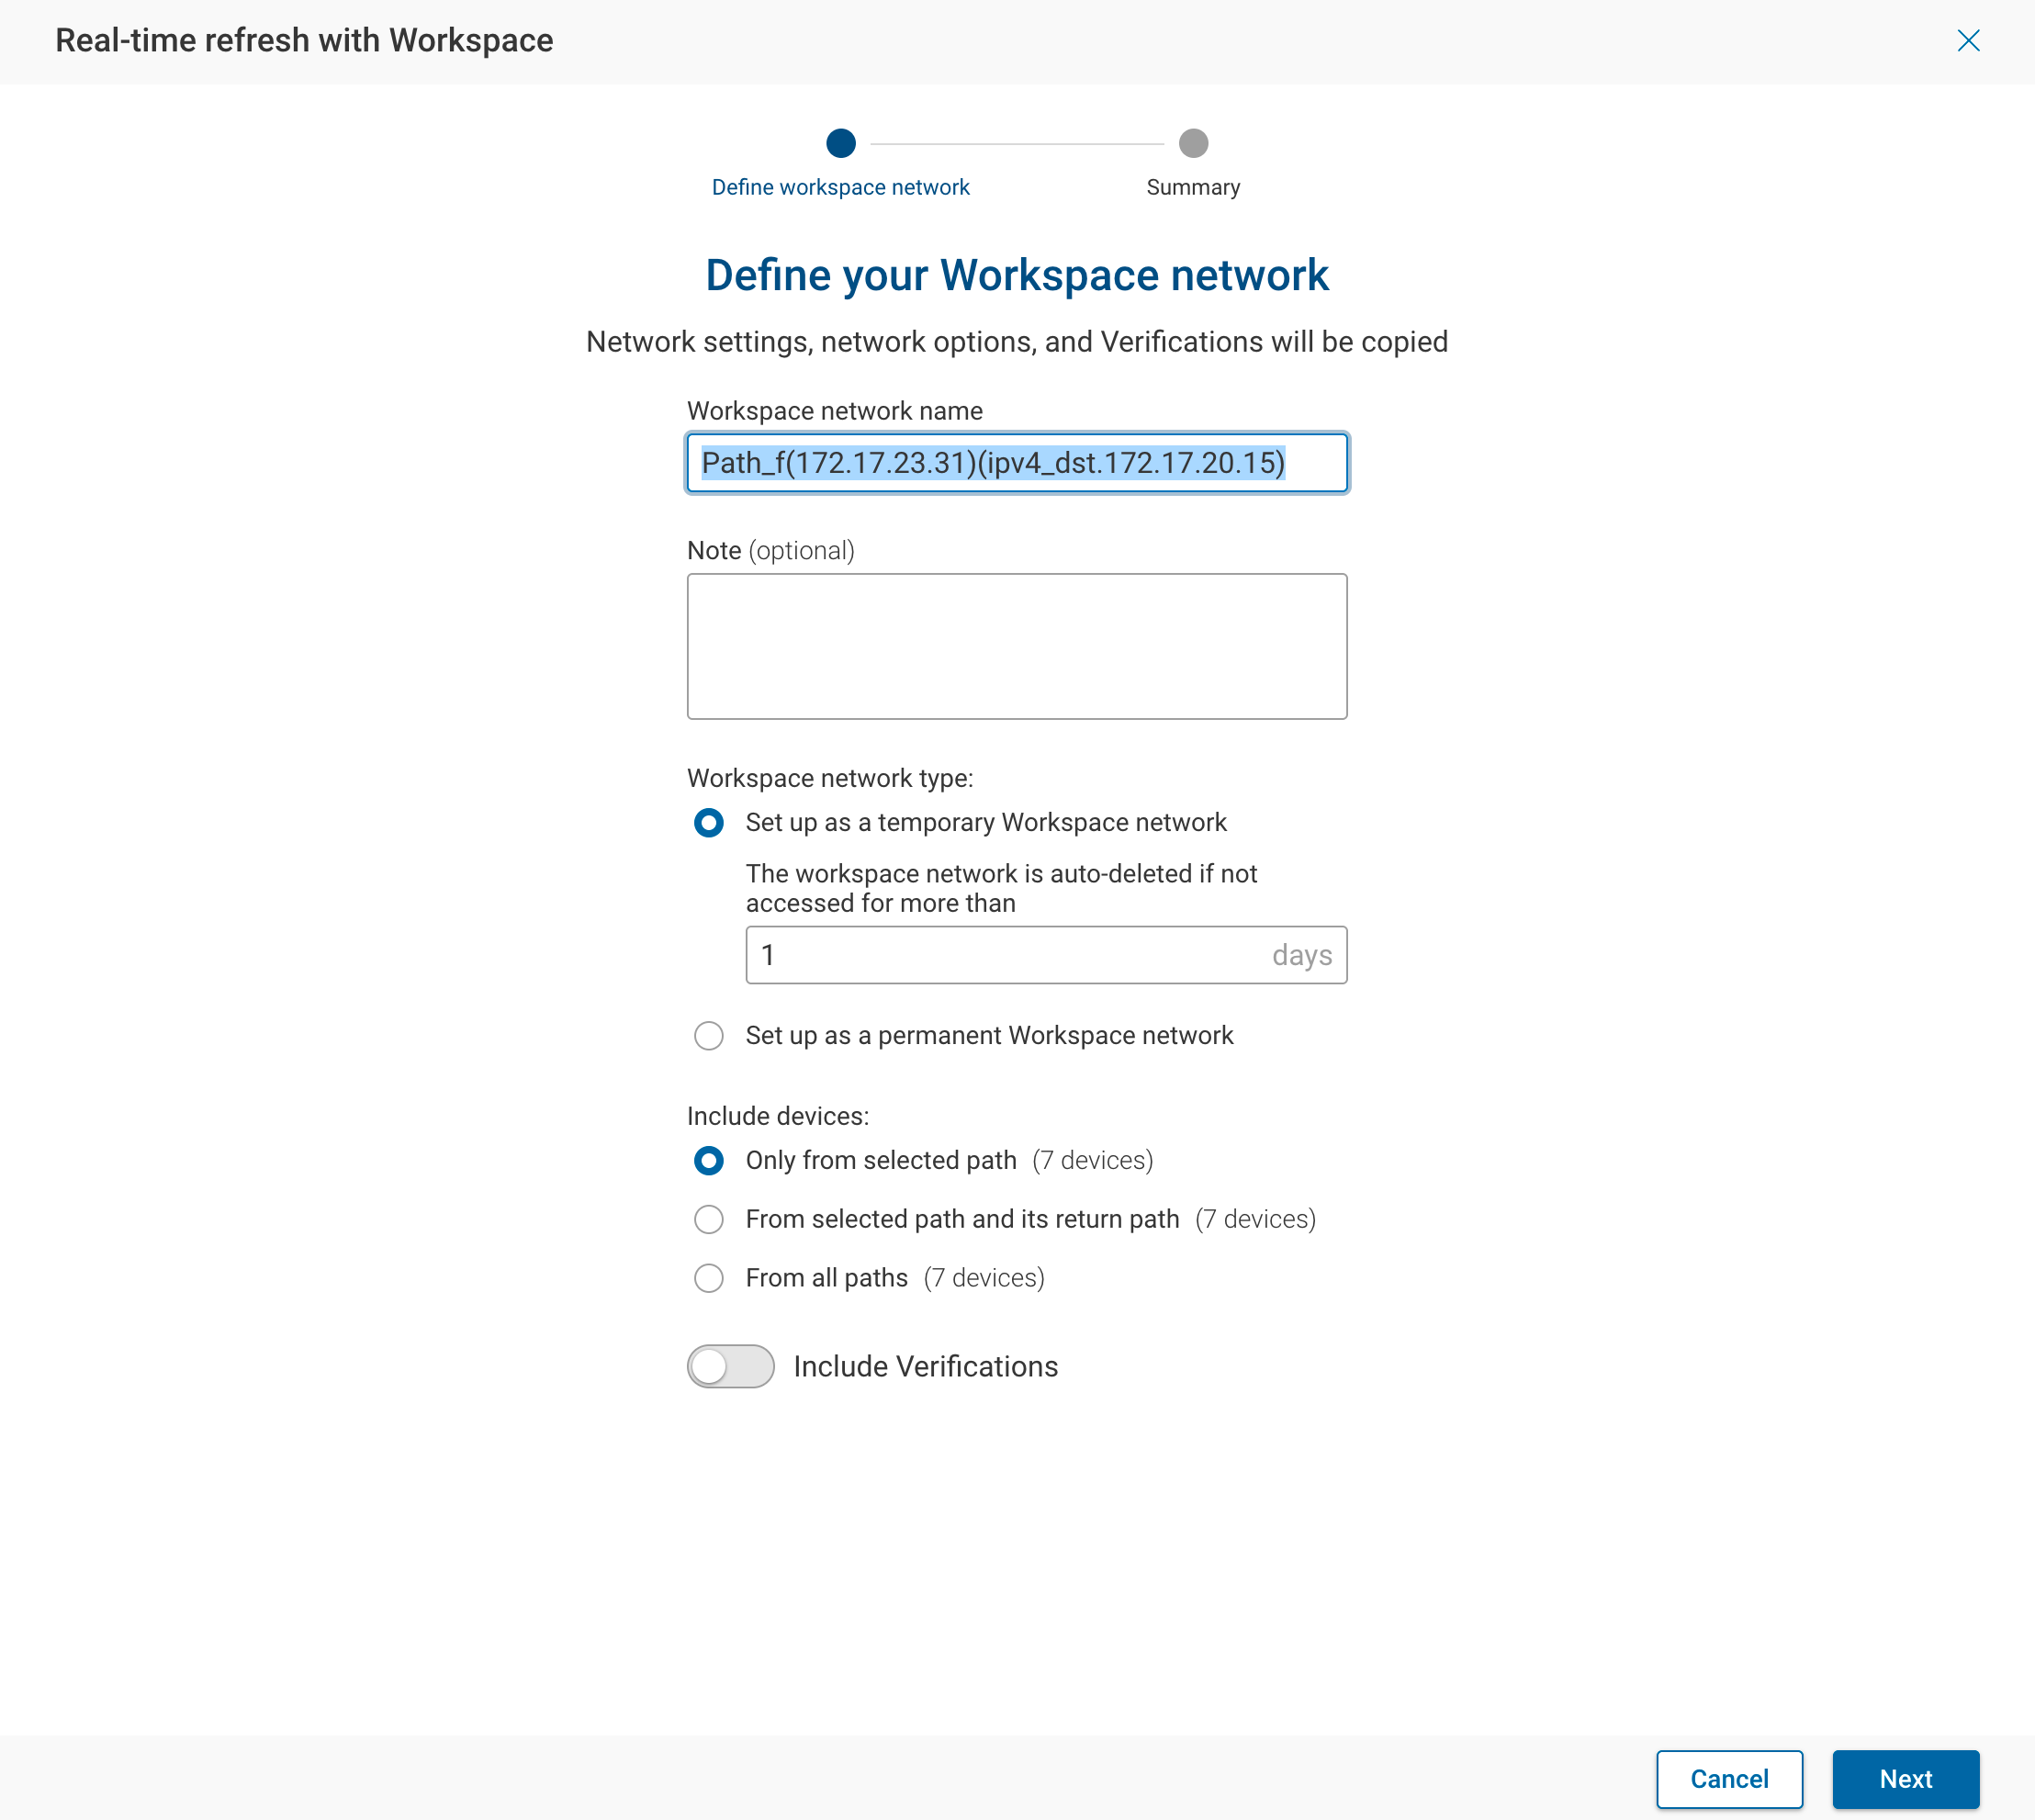
Define the Workspace network by filling in the following fields:
- Workspace network name — Auto-populated with
Path_<search query>, editable. - Note (optional) — Add details and information about the Workspace network.
- Workspace network type — Choose temporary (default: 1 day) or permanent.
- Include devices — Select which devices to include:
- Only from selected path — Devices that appear on the specific path you searched.
- From selected path and its return path — Devices from both the forward and return paths.
- From all paths — All devices covered by the search query across all path variations.
- Include Verifications — Same options as the standard wizard (NQE, Predefined, Intent).
When credential copying is disabled, cloud accounts and vCenter devices cannot be automatically added. A message explains this limitation and directs you to enable credential copying in Settings.
Step 2 (Without Credential Copying): Add Credentials
When credential copying is disabled, an optional step appears to add credentials for the selected devices. Credential types are organized by tabs: CLI login, Privileged mode, and HTTP login.
Summary
The summary displays the workspace type, device count, and (when credential copying is enabled) cloud account and vCenter counts. Two options are available:
- Finish & start collection — Creates the workspace and immediately starts a collection.
- Finish — Creates the workspace without starting a collection.
The summary also provides the original search query so you can copy it and paste it into the search bar once the snapshot is available.
Copying Devices from Parent Network
New devices can be copied from the parent network by navigating to the Sources page. Choose the specific devices to copy and select Copy. Pick the destination Workspace network from the available network list in the drawer.
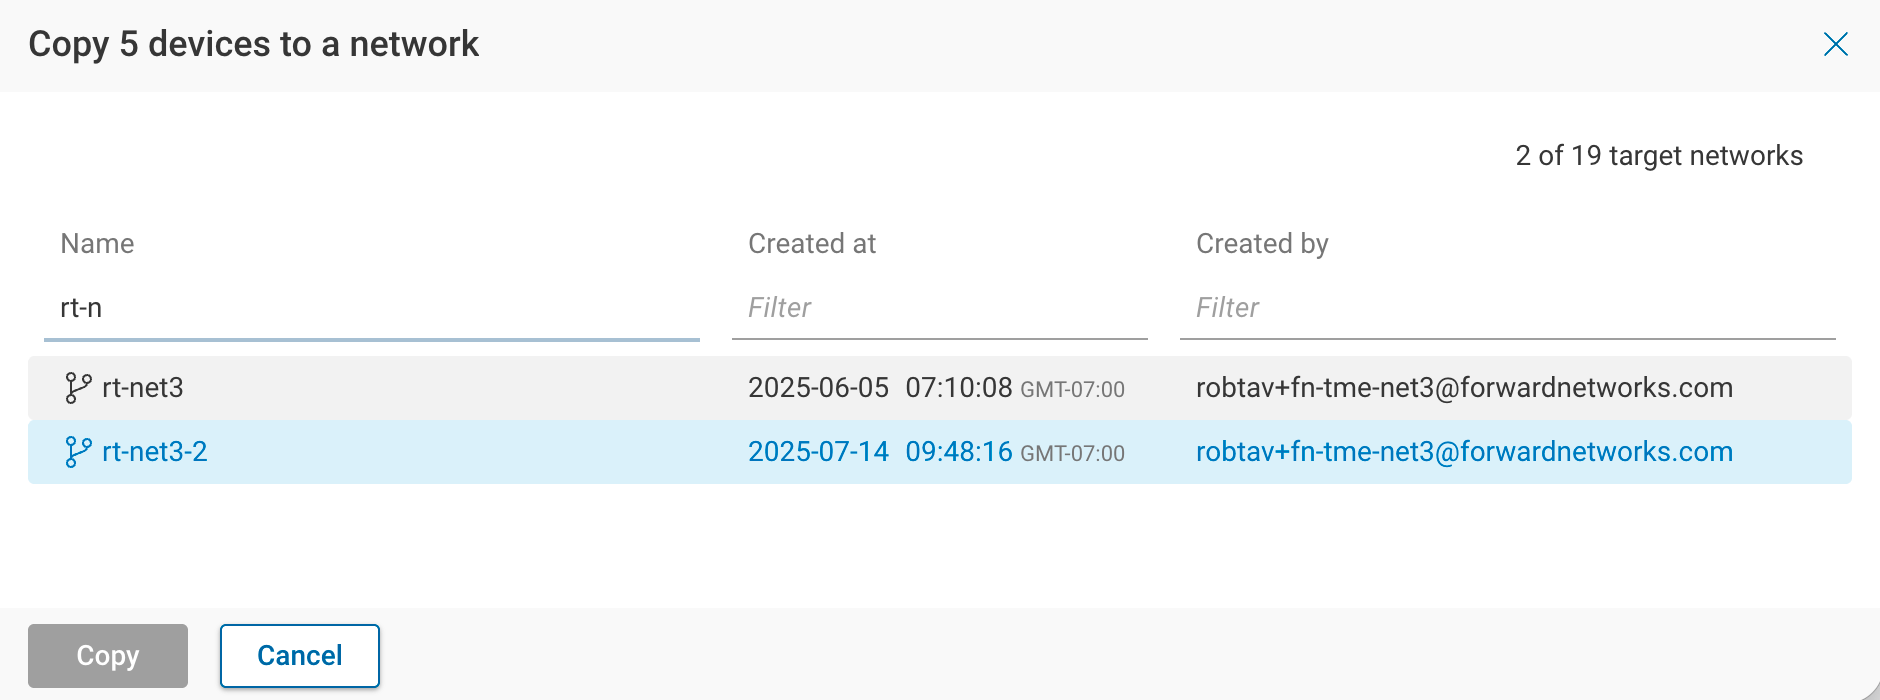
The platform identifies any duplicate devices between the parent network and the Workspace network. Select the devices you wish to replace, proceed by clicking Next, then select the duplicate credentials you would like to copy over and click Done.
A confirmation banner displays the count of devices successfully copied to the Workspace network.
Options and Settings
Role-Based Access Control (RBAC)
The Workspace network follows the role-based access control (RBAC) outlined for the parent network. The role assigned to the workspace creator depends on their role in the parent network and whether credential copying is enabled:
- Org Admin or Network Admin in the parent network — Always receives Network Admin on the workspace, regardless of the credential copying setting.
- Network Operator in the parent network, credential copying enabled — Elevated to Workspace Operator. This role sits between Network Operator and Network Admin. Workspace Operators can trigger and cancel collections, run connectivity tests, copy sources from the parent network, delete sources and snapshots, view credentials and jump servers (but not edit them), edit collection schedules, and edit snapshot and network metadata (name, note). They cannot add or edit devices, edit credentials, upload or invalidate snapshots, or modify network-level settings.
- Network Operator in the parent network, credential copying disabled — Elevated to Network Admin, since credentials must be provided manually and cannot be copied from the parent network.
Read-only and Limited Read-only users cannot create workspace networks.
The Role-Based Access Control (RBAC) page contains a detailed permissions matrix, as well as additional information on source copying rules between networks.
The Workspace Operator role applies only to newly created workspace networks. Existing workspaces are not migrated — users who were previously elevated to Network Admin on an existing workspace retain that role.
Workspace Network Settings
The following settings are available under Settings > System > Org preferences:
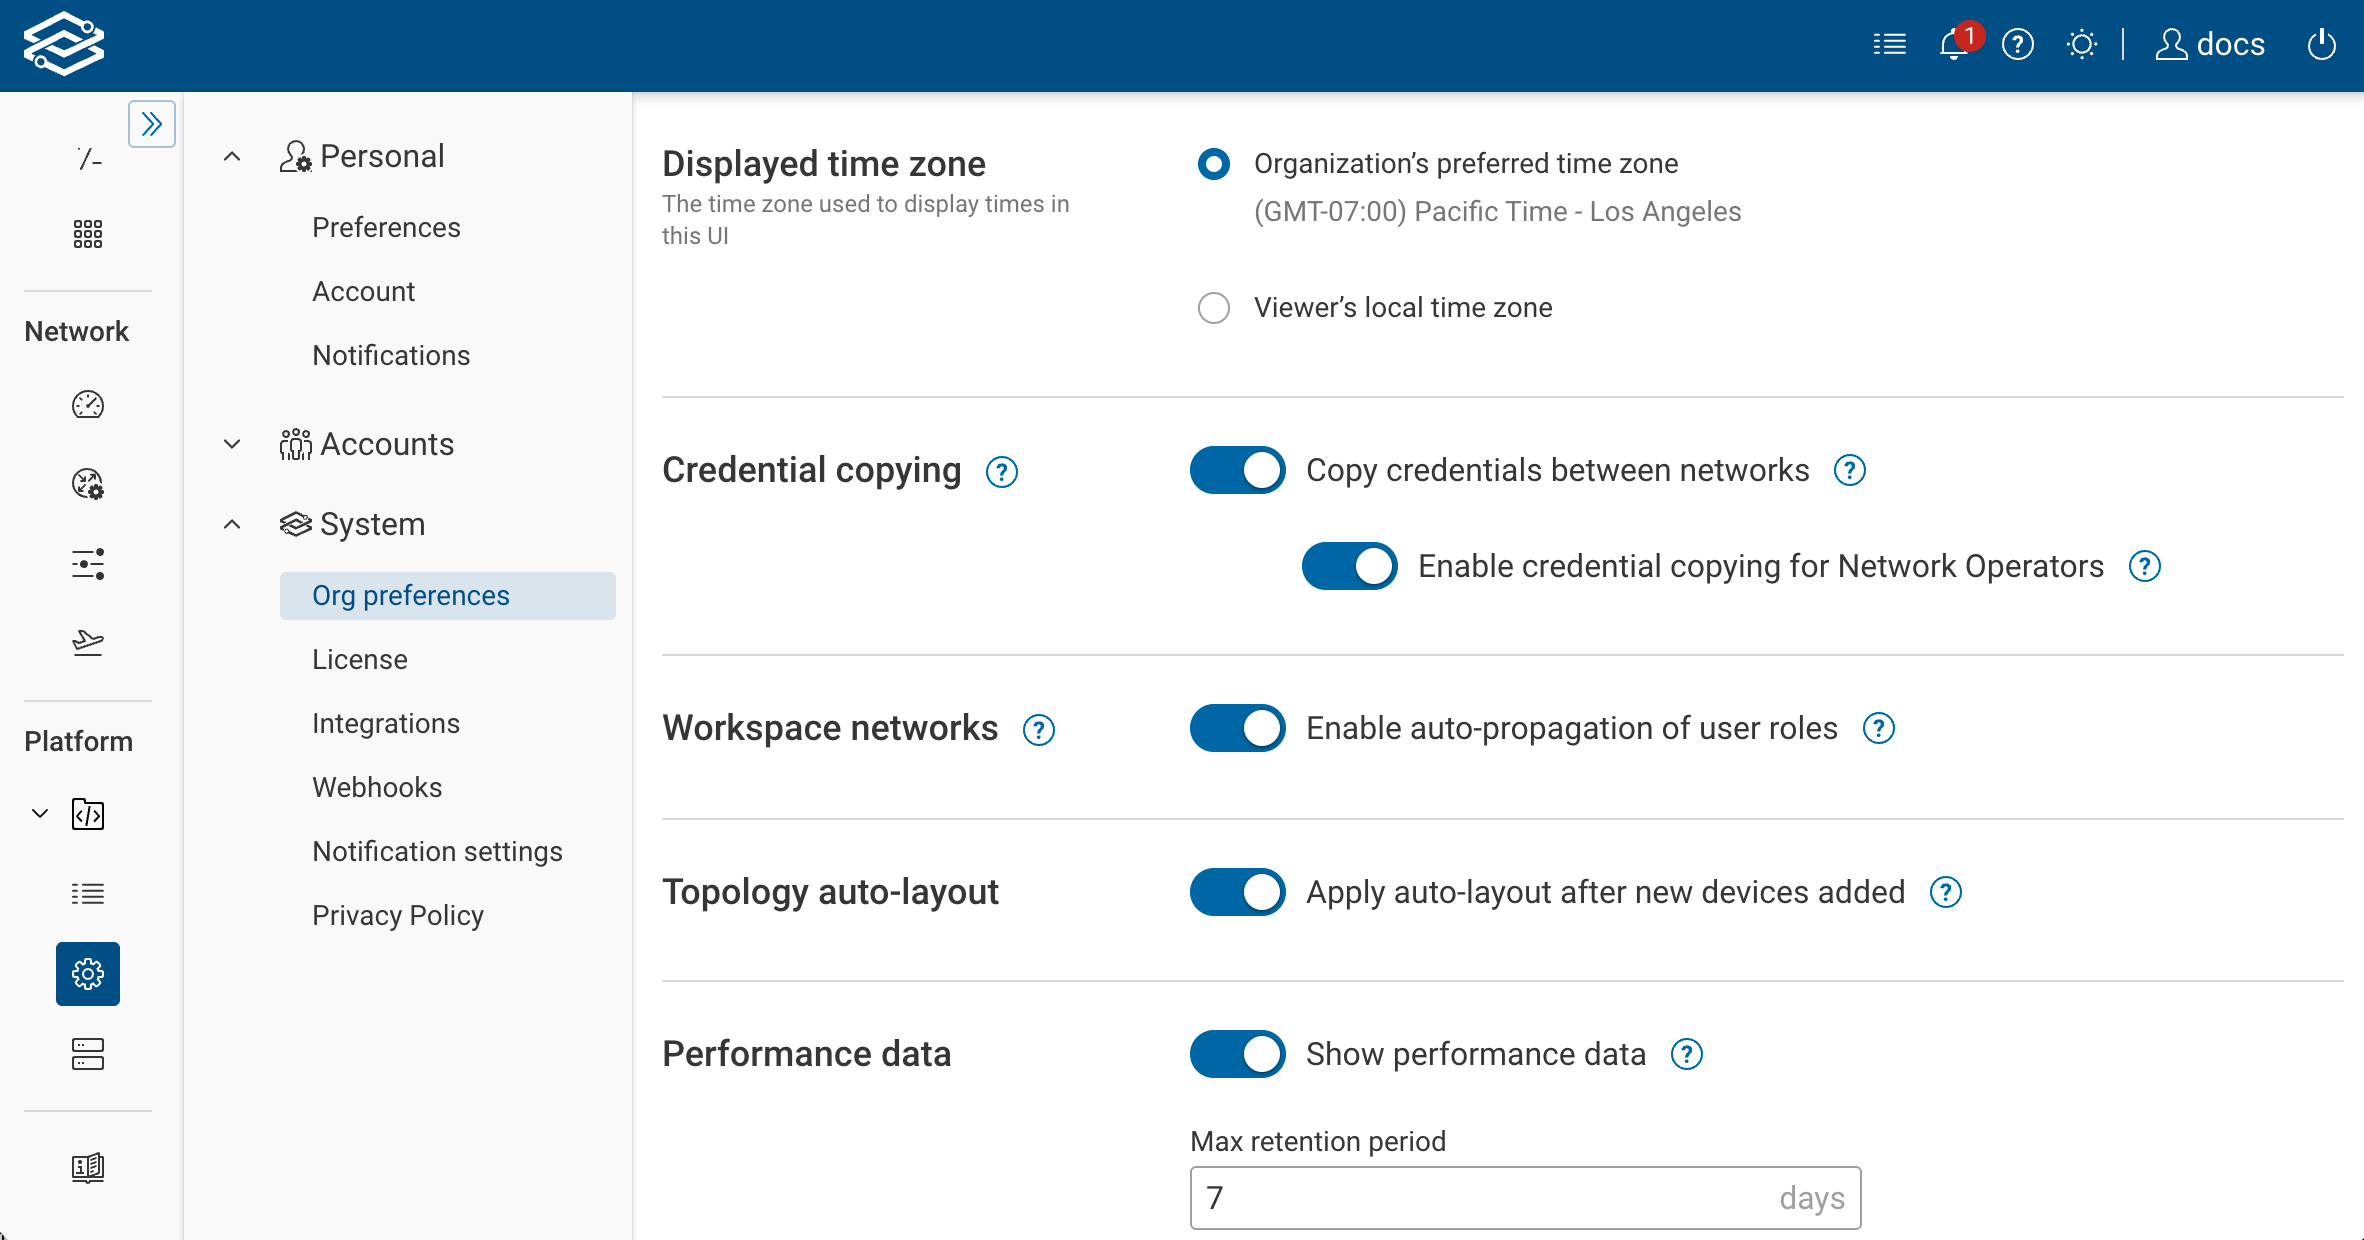
Under Credential copying:
- Copy credentials between networks — Disabled by default. When disabled, credentials must be redefined in the Workspace network, and only classic devices can be added (cloud setups and vCenters require credential copying). When you switch from enabled to disabled, a confirmation dialog explains the implications.
- Enable credential copying for Network Operators — Disabled by default. When disabled, credentials are copied only for Org Admin and Network Admin creators.
Under Workspace networks:
- Enable auto-propagation of user roles — Enabled by default. When enabled, user roles automatically propagate from the parent network to the workspace network.
Auto-Deletion
Workspaces can be configured as temporary during creation, with a per-workspace auto-deletion period. Temporary workspaces are automatically deleted if not accessed for more than the configured number of days (see Step 1: Define Your Workspace Network).
Show/Hide Workspace Networks
The Show Workspace networks toggle button allows you to show or hide Workspace networks in the Network Selector dropdown menu. This is useful when you have a large number of Workspace networks.
Working with Workspace Networks
Once a Workspace network is created:
- The system creates an initial snapshot using data from the parent network's latest snapshot for the selected devices. No new collection is triggered. Review all aspects of the new network (Devices, NQE, Checks, etc.).
- When ready, trigger the pre-change collection manually. Data collected from these devices does not refresh the parent network.
- Evaluate the pre-change snapshot as needed.
- Make the necessary changes to your infrastructure, then collect the post-change snapshot.
- Use the post-change snapshot with all Forward Enterprise applications (Search, Verify, Diffs, Security, etc.).
- Once the change management window is complete, keep or delete the Workspace network. To delete, open the Network Selector, hover over the workspace, and select the delete icon.
Important Considerations
- The Workspace network is not synced to its parent network in any capacity before or after completion.
- Collection settings (concurrency, timeouts, retries, redaction patterns, jump server overrides, and so on) come from the workspace's collector and the organization — there are no per-workspace values. The redaction algorithm is the one exception: a workspace can be assigned a different algorithm than the rest of its organization. See Per-network redaction overrides.
- Device configuration and state:
- All configuration and state is carried over from the latest available snapshot for the selected devices.
- Device layouts for topology are not carried over from the parent network.
- Clusters are not carried over.
- If a location is assigned to a device in the parent network, it is carried over. Location changes in the Workspace network are not synced back to the parent network.
- Verifications:
- By default, all verification types (NQE, Predefined, Intent) are not copied to the Workspace network.
- To include verifications, enable the Include Verifications toggle during workspace creation and select which types to copy (see Step 1: Define Your Workspace Network).