Collector Management
The Collector Management page provides a centralized view for managing all collectors within an organization. From this page, administrators can view collector details, monitor status, perform upgrades, and assign collectors to networks or workspaces.
Navigation
The Collector Management page is located in the left-hand navigation menu under Platforms.
Collector Management Overview
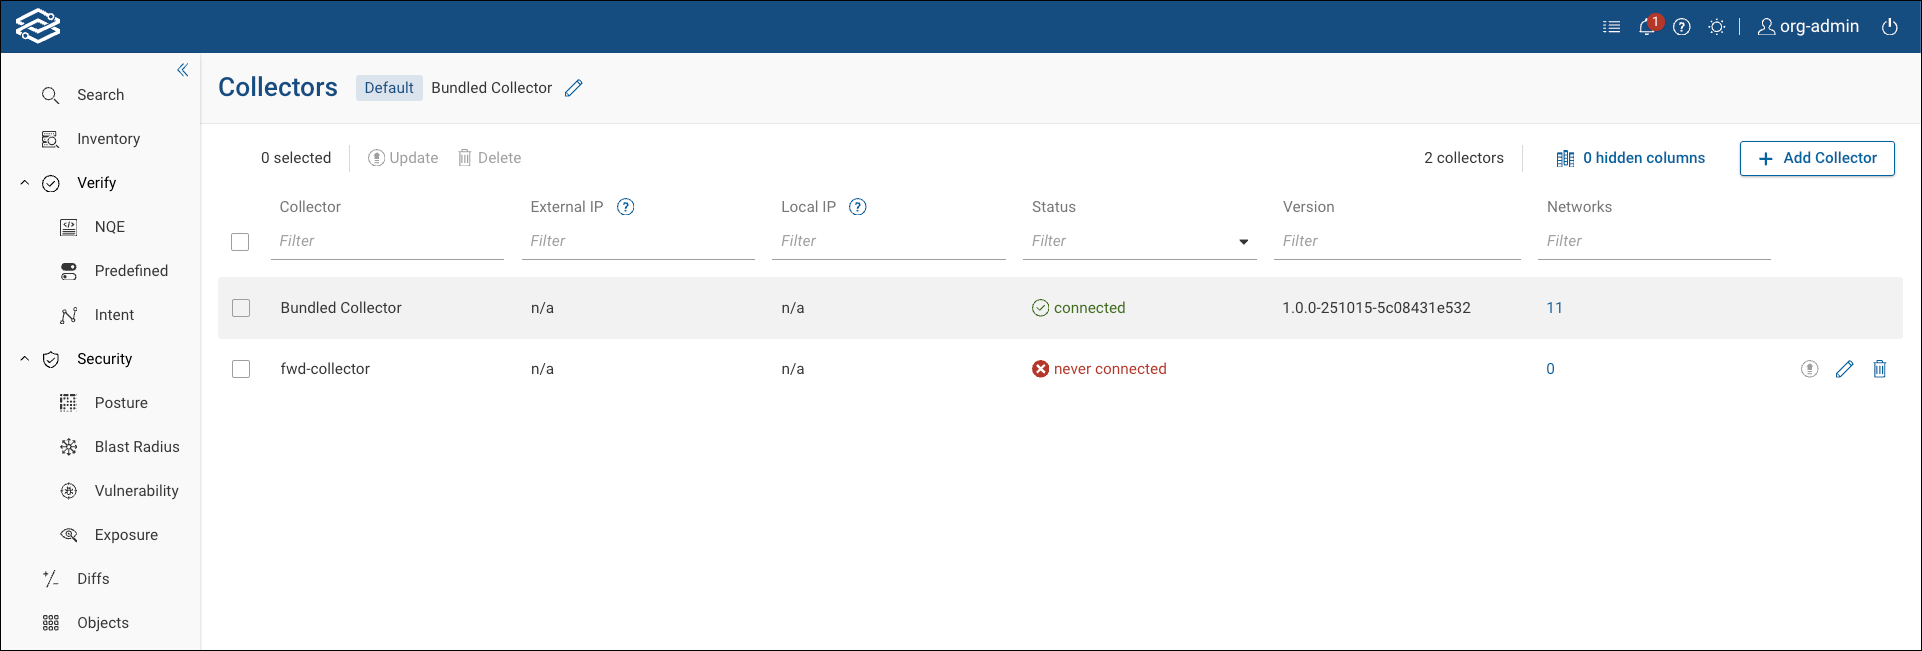
The Collector Management page provides a single-pane view for managing all collectors within an organization. Administrators can monitor collector status, perform upgrades, rename or delete collectors, and review assignments across all networks and workspaces from a single interface.
Key features include:
- View all collectors across networks and workspaces from a single-pane view.
- Display information about collectors, such as: IPs, connection status, current version, and assigned networks.
- Perform bulk operations, such as upgrades or deletions, on multiple collectors simultaneously.
- Designate a default collector that is automatically assigned to newly created networks and workspaces.
- In the network column, click on the number of the assigned networks value to view detailed network and workspace assignments for a specific collector.
Collector Table Columns
The table lists each collector along with key operational details:
| Column | Description |
|---|---|
| Collector | The name of the collector. |
| External IP | Displays the external (public) IP address of the collector. |
| Local IP | Displays one or more internal (private) IP addresses assigned to the collector. |
| Status | Indicates whether the collector is Connected or Not Connected. |
| Version | Displays the version currently installed on the collector. |
| Networks | Displays the number of networks assigned to the collector. Clicking the number displays additional details of associated networks and workspaces. |

Additional options:
| Icon | Description |
|---|---|
| Upgrade Icon | Initiates an upgrade for the selected collector. |
| Rename Icon | Opens a dialog box to rename the selected collector. |
| Delete Icon | Deletes the selected collector after confirmation. |
Collectors that are multiple versions behind the current release may show as unsupported or end-of-life, depending on their version lifecycle stage.
Managing Collectors
Adding a Collector
Only Org Admins and Network Admins can add new collectors.
To add a collector:
- Click Add Collector on the Collector Management page.
- Follow the guided installation steps for your operating system. For detailed instructions, see
Installing the Forward Collector.
- Supported platforms for on-prem deployments: Windows and Linux.
- Supported platforms for SaaS deployments: Windows, macOS, and Linux.
- After installation, the new collector appears in the table with its assigned IP address and connection status.
Upgrading Collectors
Only Org Admins can upgrade collectors.
Collectors can be upgraded directly from the Collector Management page.
To upgrade collectors:
- Select one or more collectors from the table.
- Click the Upgrade icon in the toolbar or next to an individual collector.
- Confirm the upgrade when prompted.
- The collector’s status updates to show upgrade progress. Once complete, the Version column displays the updated version.
Collectors that have reached End of Life (EOL) cannot be upgraded and must be manually reinstalled using the latest version. Forward supports only upgrades to the latest available release.
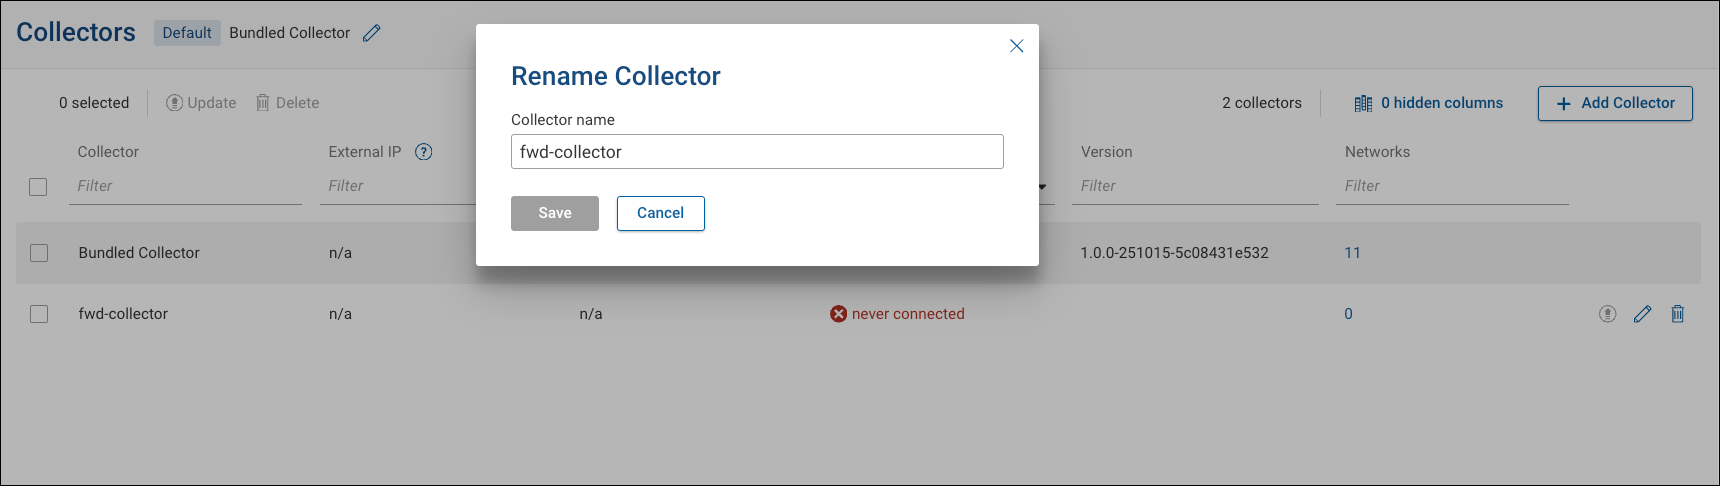
Renaming Collectors
Only Org Admins can rename collectors.
To rename a collector:
- In Collector Management, locate the collector from the table.
- Click the Rename icon, next to the collector.
- Enter the new name and click Save.
- The collector name updates in the table and anywhere it’s referenced.
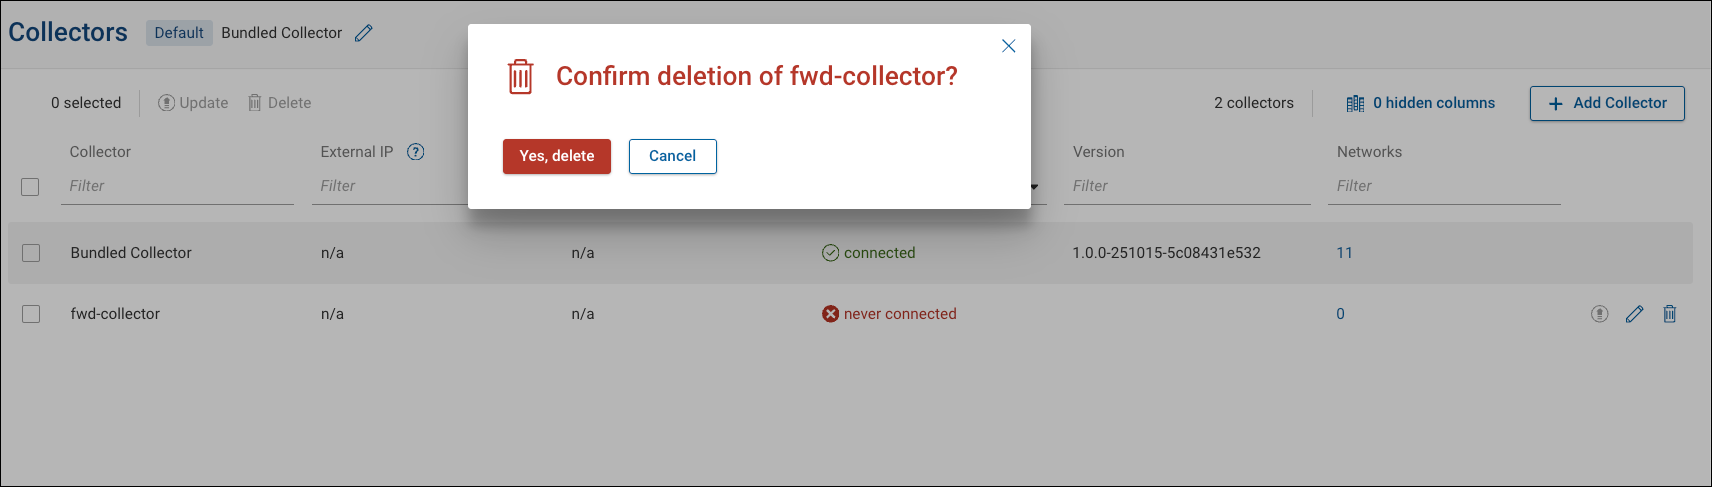
Deleting Collectors
Collectors can be deleted only by Org Admins or by Network Admins who have administrative privileges in all networks where the collector is assigned.
- Click the Delete icon next to the collector.
- Confirm the deletion when prompted.
- The collector is removed from the organization and any associated networks.
Ensure another collector is available for affected networks before deletion.
Default Collector Assignment
Administrators can specify a default collector that is automatically assigned to all newly created networks and workspaces.
To set a default collector:
- Select the edit default collector icon, located at the top of the page.
- Locate the desired collector in the table.
- Click the Set as Default option from the collector’s context menu.
- The collector is designated as the organization’s default and marked with a Default label in the table.
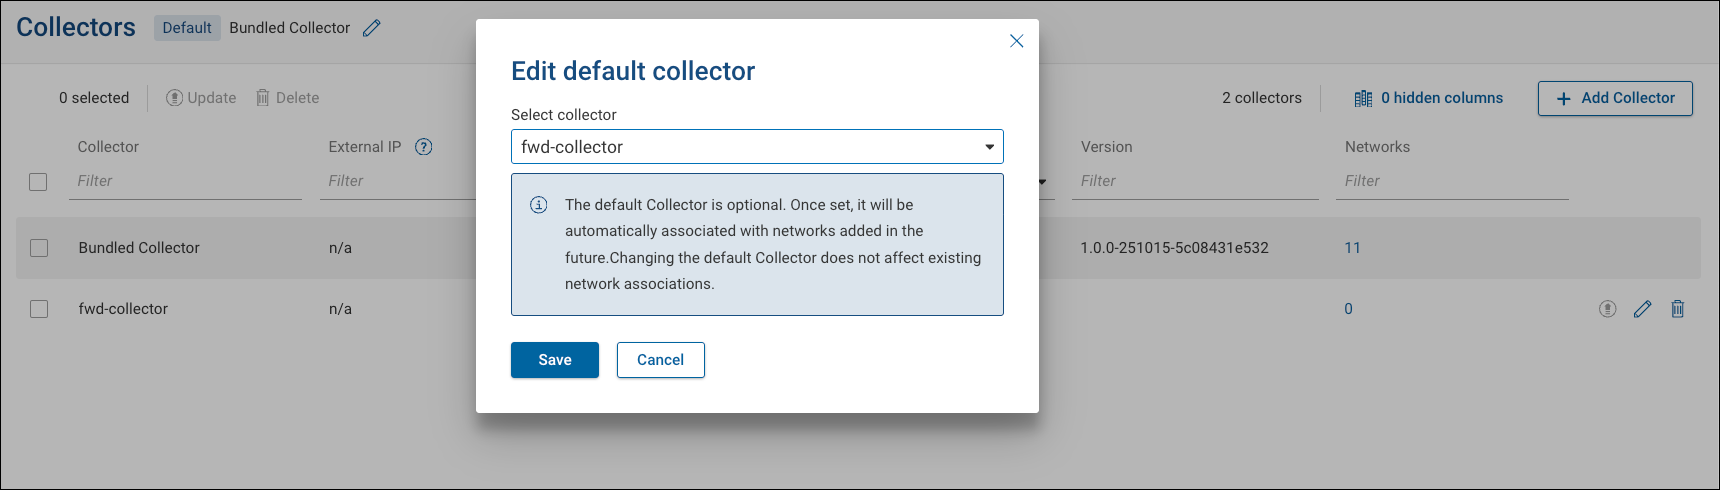
The default collector can be changed at any time. However, reassigning the default does not retroactively affect existing network assignments.
Collector Version Enforcement
Collectors must remain within supported version ranges to ensure compatibility, performance, and security. Version enforcement helps maintain consistent communication between collectors and the Forward Platform by preventing outdated collectors from operating indefinitely.
- For SaaS deployments, collectors that are three versions behind the latest release become unsupported. Unsupported collectors can still be upgraded, but collection operations may not function correctly until the collector is updated.
- For on-prem deployments, remote collectors must stay up to date; collection operations will not run on outdated on-prem remote collectors until they are upgraded.
- Collectors six versions behind the latest release are classified as End of Life (EOL) and must be manually reinstalled using the latest version. Remote upgrades are not supported for EOL collectors. For additional details, see the Forward Enterprise End-of-Life Policy.
Remote Collectors for On-Prem Deployments
Remote Collectors allow organizations using on-prem deployments to control which type of collectors can operate within the environment. Administrators can configure whether networks use only the Bundled collector, only Remote collectors, or both.
By default, this feature is disabled. It can be enabled in Settings > System > Org Preferences by adding the feature to the Experimental Features list and selecting one of the following options under Allowed on-prem collectors.
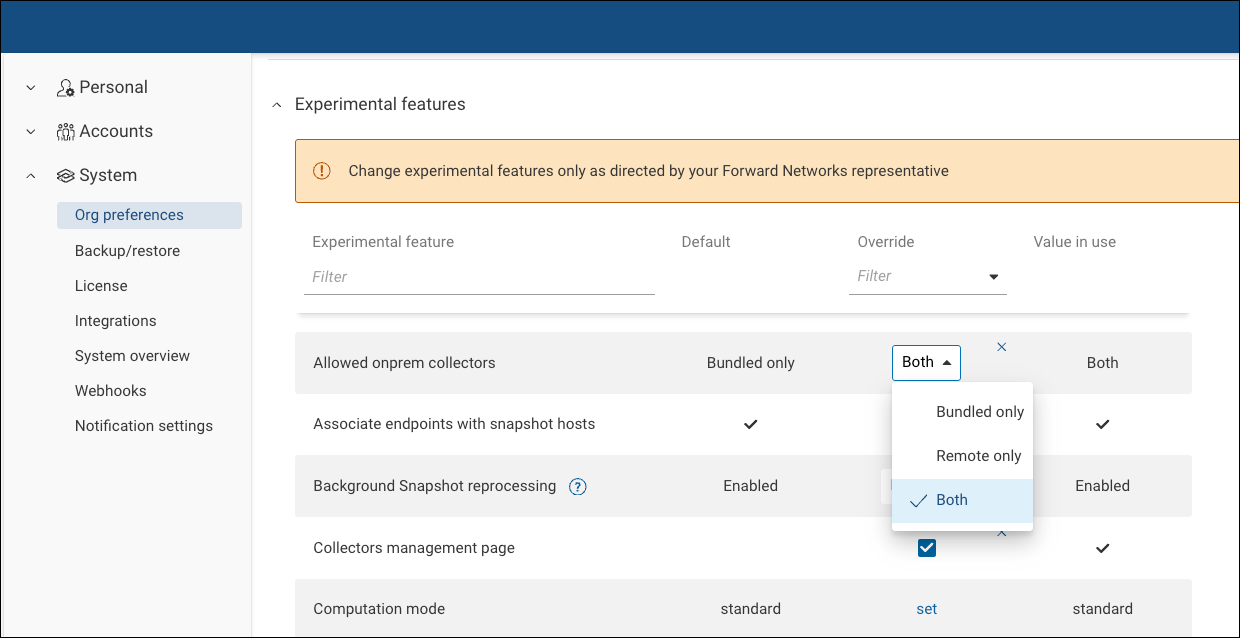
| Option | Description |
|---|---|
| Bundled only | Use only the bundled collector that is part of the on-prem cluster. Remote collectors cannot be used. |
| Remote only | Use only remote collectors. This option is useful when the bundled collector cannot reach certain remote sites due to network or security restrictions. In this configuration, a remote collector can be installed at the remote location to perform data collection and securely send the collected information to the Forward Platform over HTTPS. |
| Both | Allow both the bundled collector and remote collectors to be used. This configuration provides flexibility for environments where the bundled collector, included with the on-prem cluster, handles local network collection, while Remote collectors gather data from external or restricted sites. |
When using remote collectors, ensure that required ports and firewall rules allow communication between the Forward Platform and the remote collector instance.