Alkira Setup
The Forward Collector can discover and collect Alkira features and policies such as Cloud NAT, ACLs, routing policies (PBR), and IPv4 routing.
For a complete list of supported Alkira features, see the Feature Matrix page.
Pre-requisite
A Forward Collector should be installed on-prem.
Setup
To add an Alkira setup for collection:
- Step 1: Select Cloud Account Type
- Step 2: Set Up Access
- Step 3: Connect Alkira Cloud
- Step 4: View Discovered Cloud Exchange Points
- Step 5: View Discovered Alkira Services
- Step 6: Summary
To get started, navigate to the Sources page, open the Cloud Infra tab and click Add a cloud setup. The wizard will guide you through each step.
Step 1: Select Cloud Account Type
In the wizard, select Alkira from the list of available options.

Step 2: Set Up Access
Access must be configured in the Alkira portal before connecting the Forward Platform.
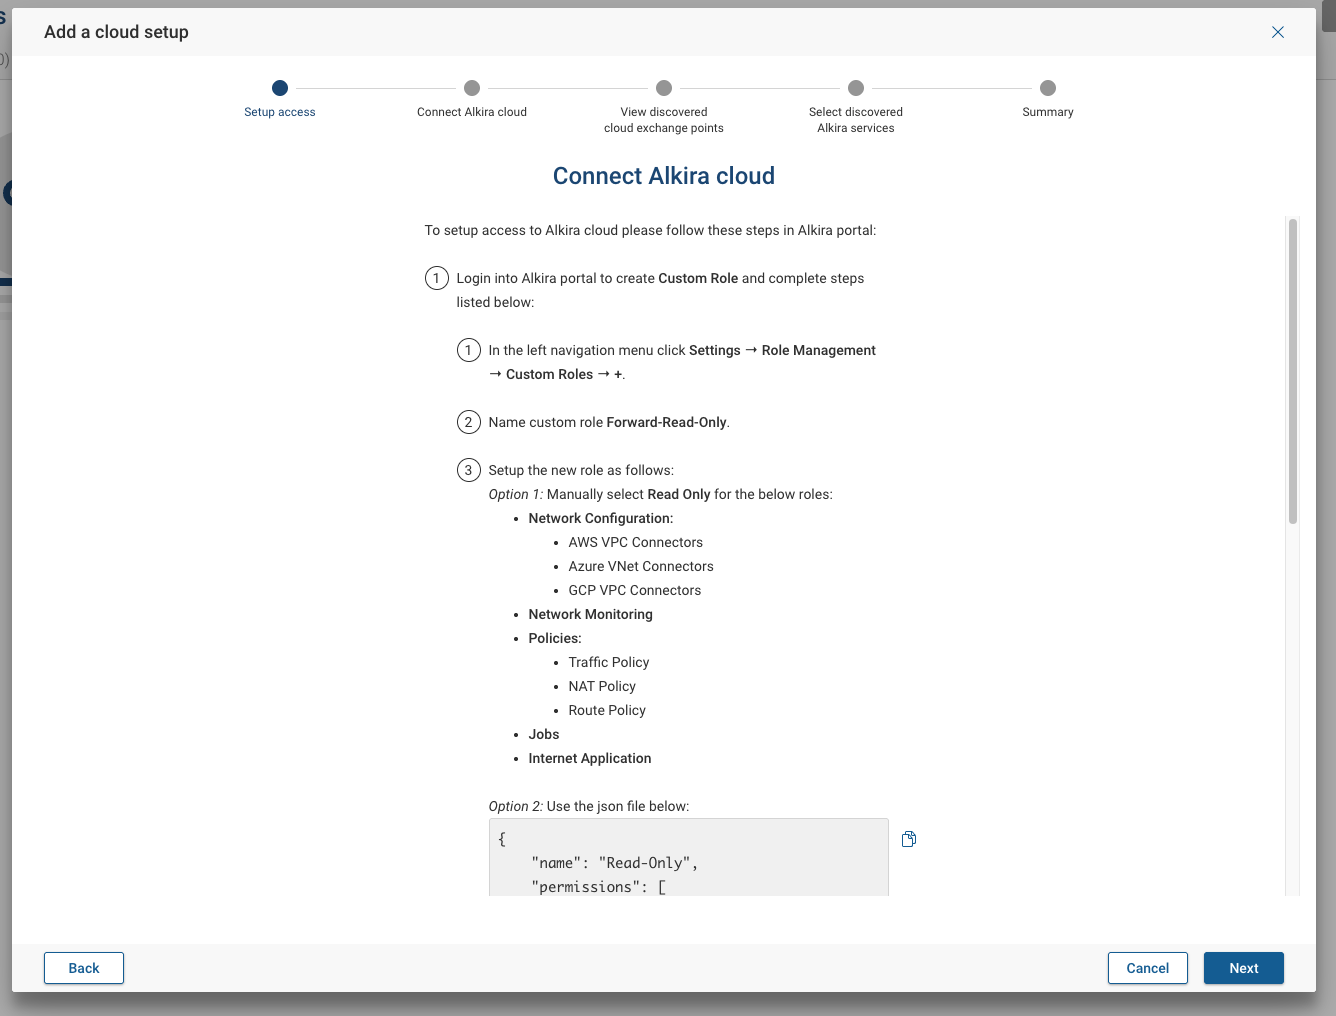
Create a Custom Role
- Log in to your Alkira portal to create Custom Role.
- In the left navigation menu, click Settings → Role Management → Custom Roles → +.
- Name custom role Forward-Read-Only.
- Setup the new role as follows:
- Option 1: Manually select Read Only for the below roles
- Network Configuration
- AWS VPC Connectors
- Azure VNet Connectors
- GCP VPC Connectors
- Network Monitoring
- Policies
- Traffic Policy
- NAT Policy
- Route Policy
- Jobs
- Internet Application
- Network Configuration
- Option 2: Import JSON definition
{
    "name": "Read-Only",
    "permissions": [
        "internet-application-read",
        "jobs-read",
        "network-configuration-read",
        "network-monitoring-read",
        "policies-read"
    ],
    "accessPolicyId": null
}
- Option 1: Manually select Read Only for the below roles
- Click Save to create the role.
Create a User
- In the left navigation menu, click Settings → User Management → +.
- Fill in all the required fields such as Name, Email, Username, Password, and select Forward-Read-Only for the role.
- Click Save to create the user.
Create an API Key
- In the left navigation menu, click Settings → User Management. Select the user created in previous step and click on the key icon next to it. The Manage API Key modal will appear.
- In the Manage API Keys modal click Create new API Key and name it Forward-API-Key.
- Click Create API Key.
- Copy and download the Secret Key.
Step 3: Connect Alkira Cloud
Use the API key from Step 2 to connect the Forward Platform to Alkira Cloud.
Enter the following information:
- Cloud Setup ID: A name for referencing the setup in Forward.
- Alkira Cloud URL
- API Key: Add a new API key or select from the list.
- Proxy Server: Enable or disable the default proxy. If enabled, select a proxy from the list.
- Test Connection: Run a connection test. Logs are available for download to assist with troubleshooting.
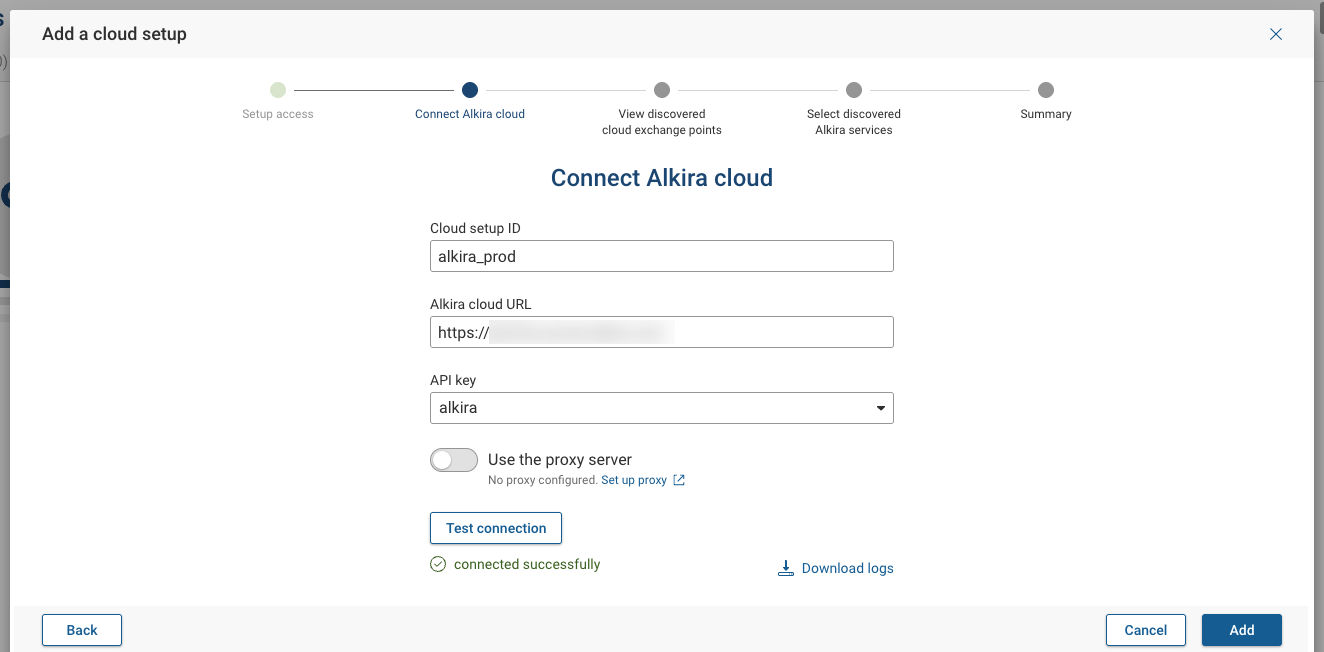
Click Add once the connection test succeeds.
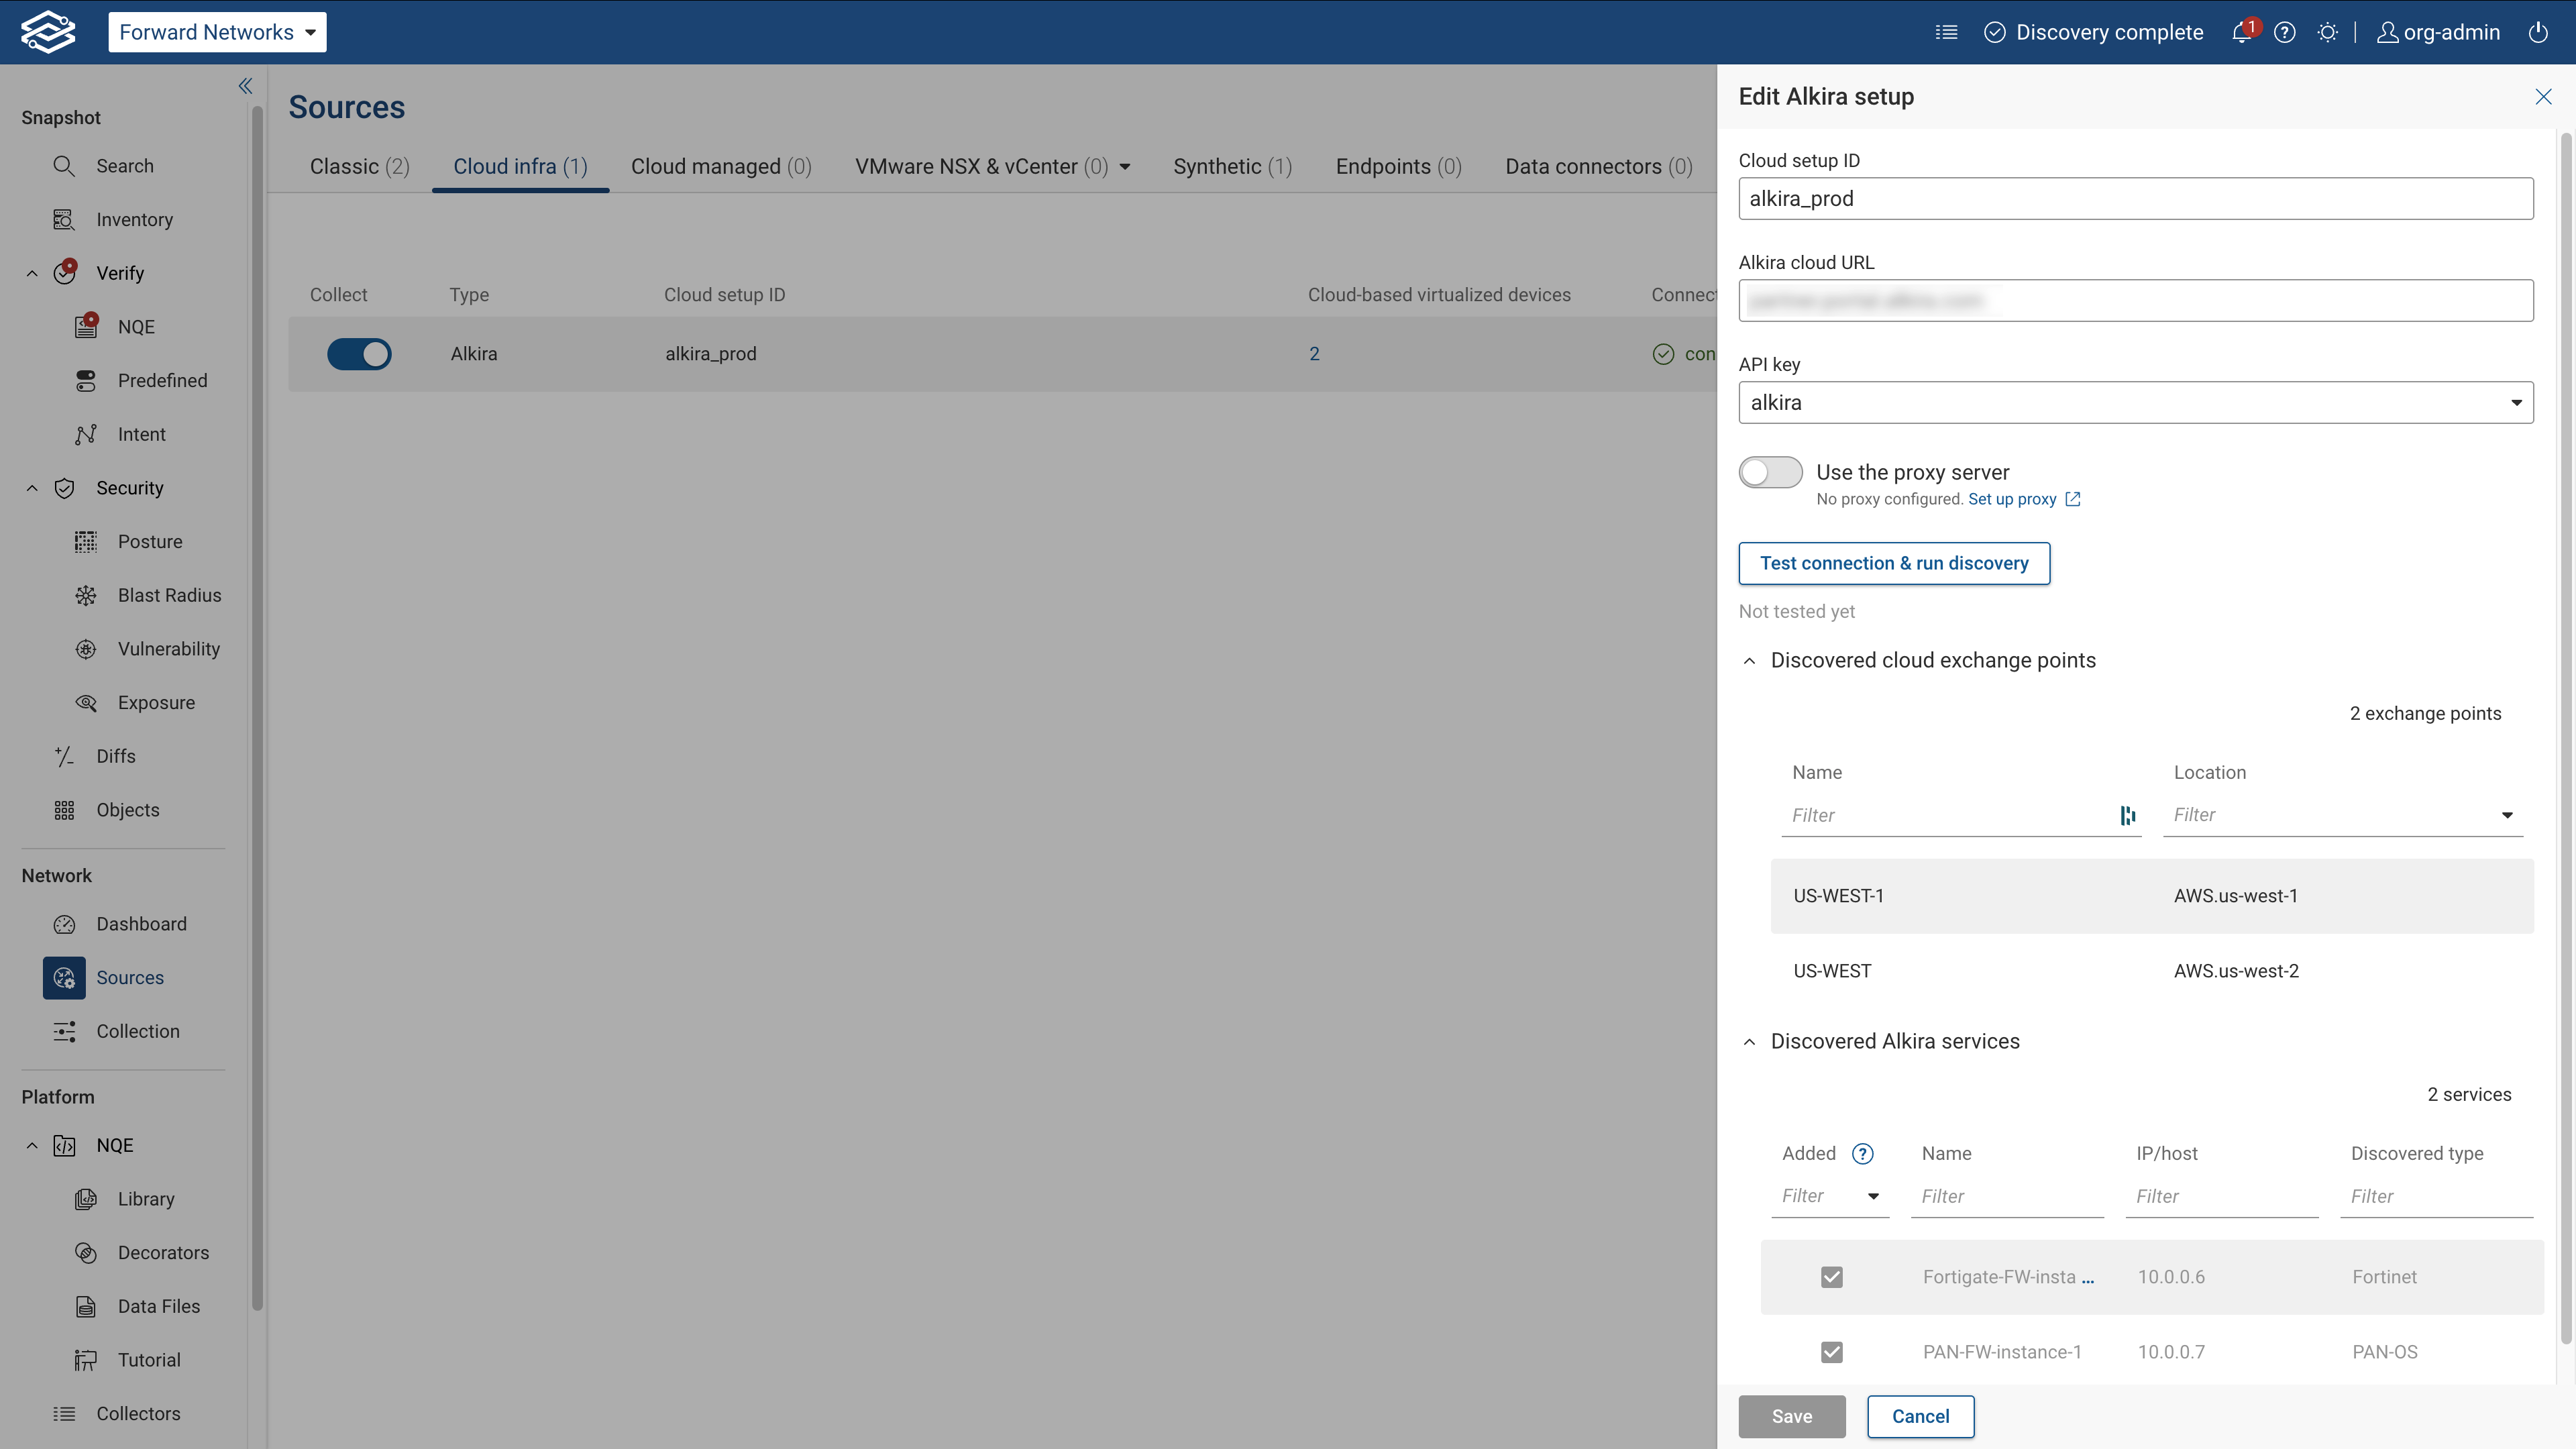
Step 4: View Discovered Cloud Exchange Points
The wizard displays discovered Alkira Cloud Exchange Points. Confirm that the expected exchange points, including their names and locations, are listed before proceeding.
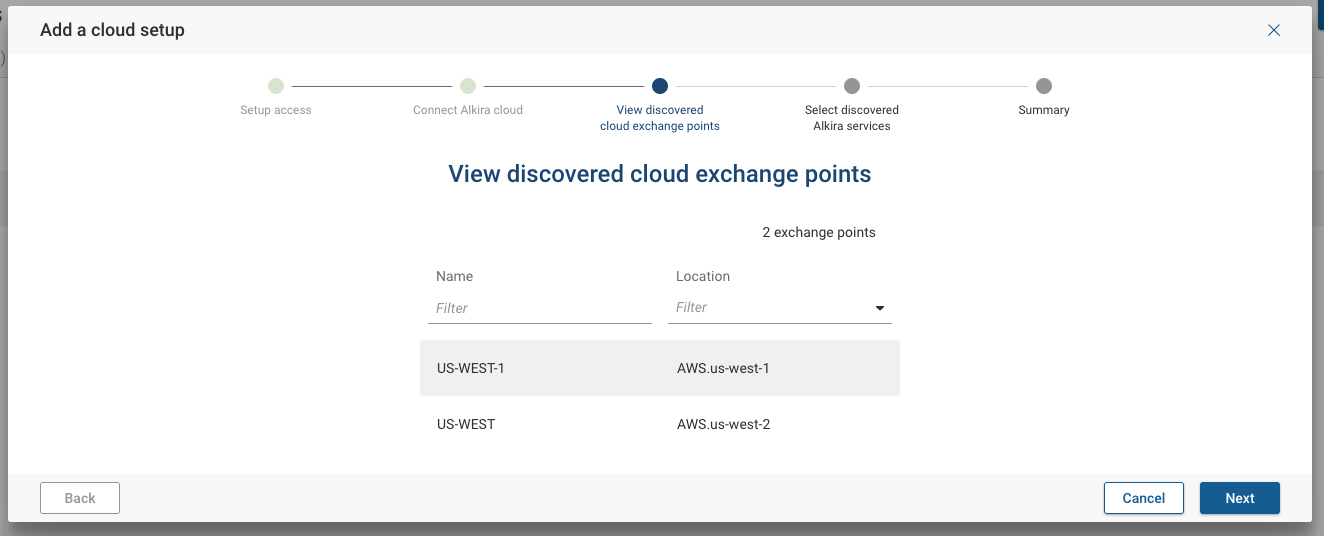
Select Next to continue.
Step 5: View Discovered Alkira Services
The wizard displays the discovered Alkira services. Verify that the expected services appear, including each service’s name, IP/host, and type, before continuing.
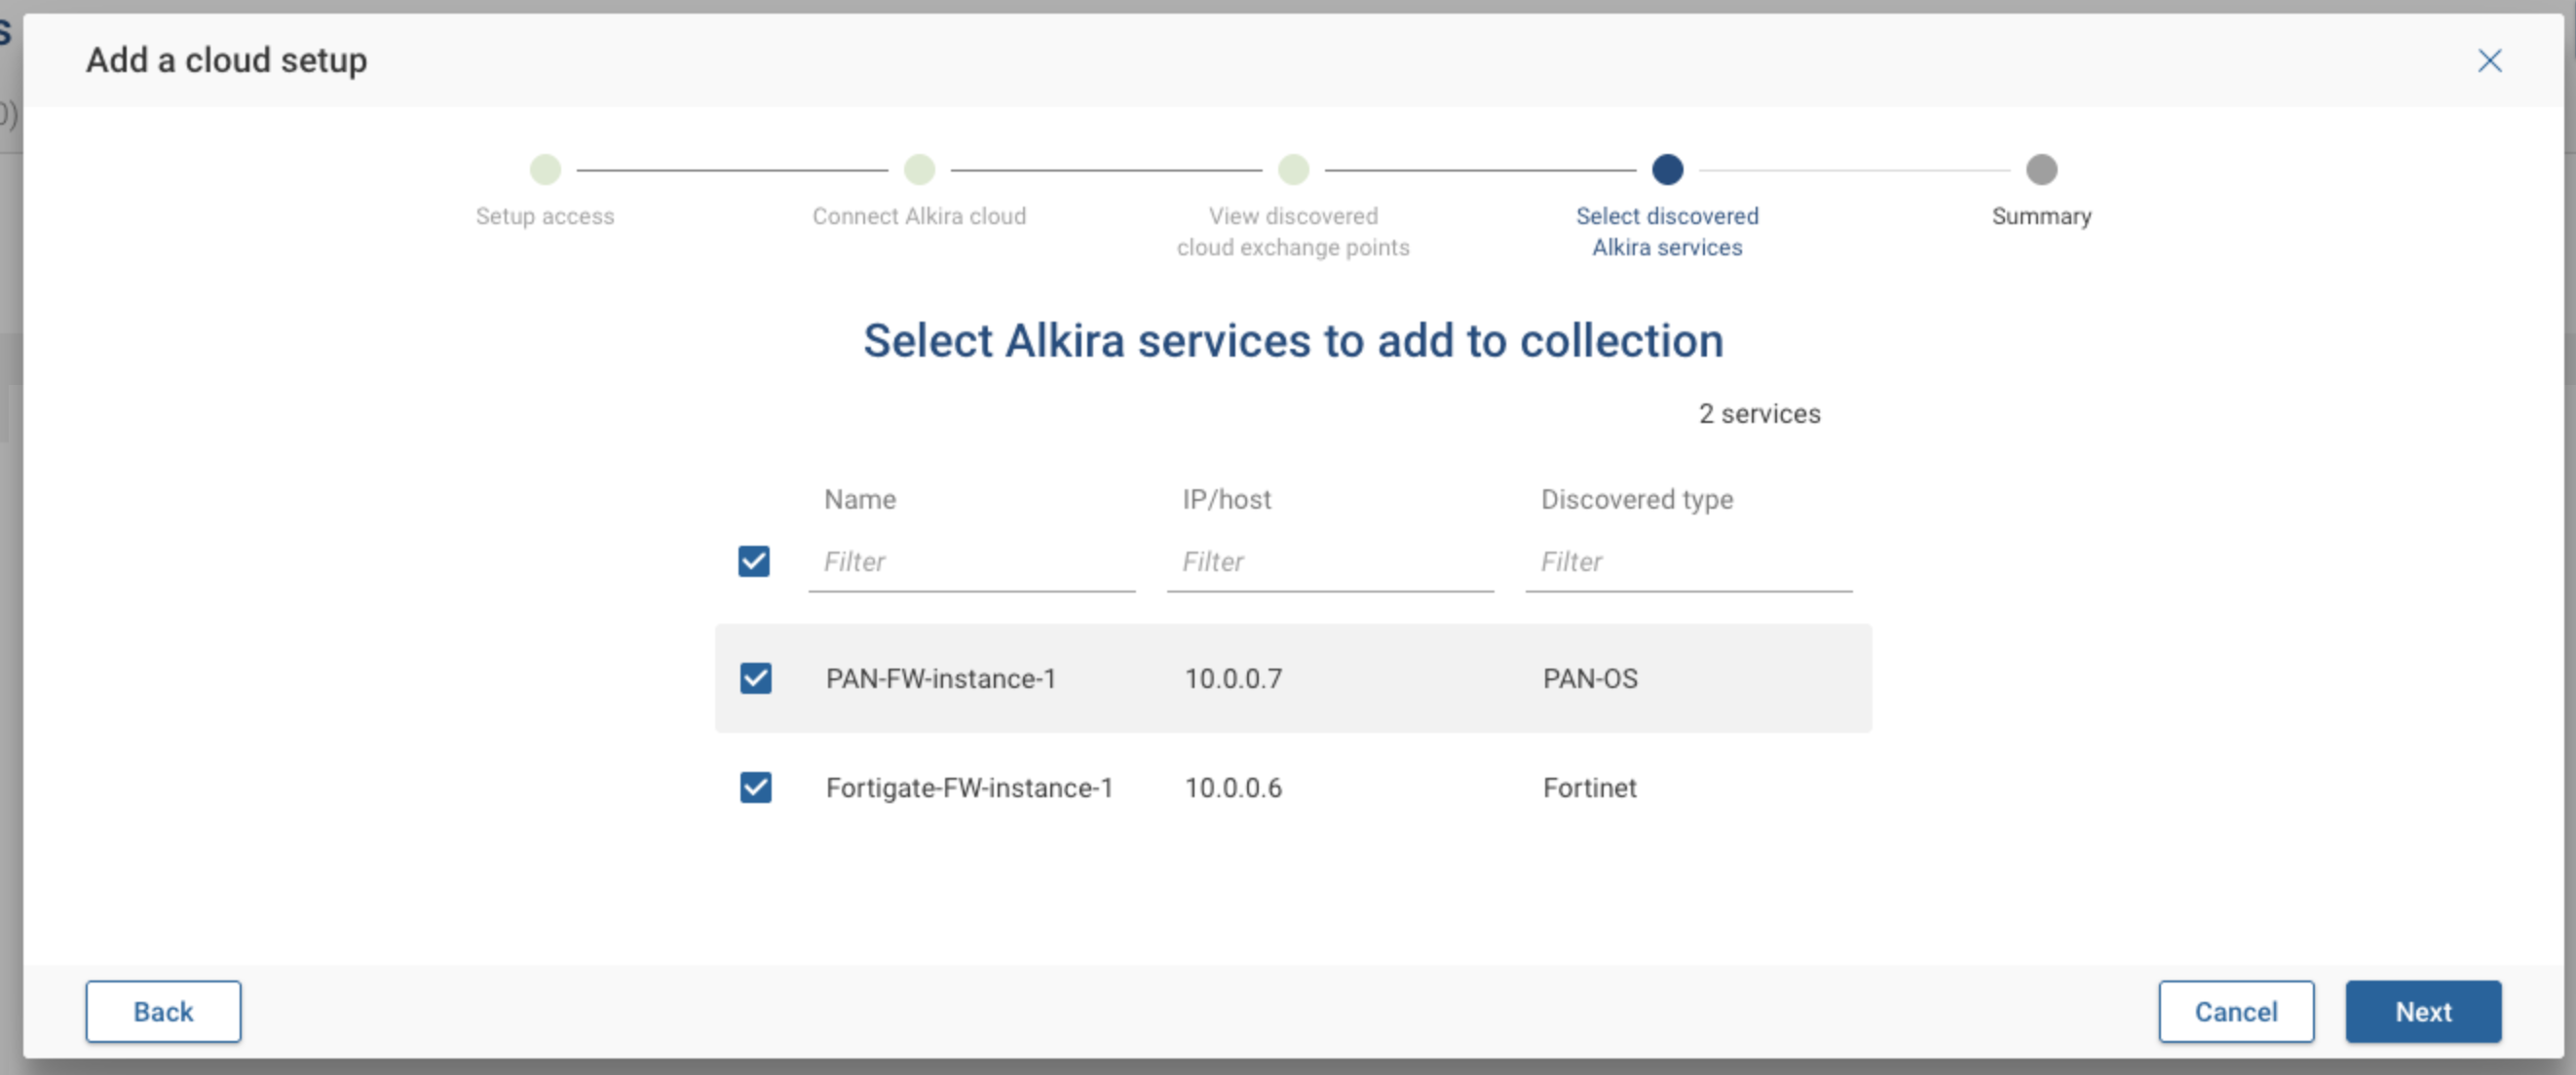
Select the Alkira services to be included in the collection and modelled, then select Next to continue.
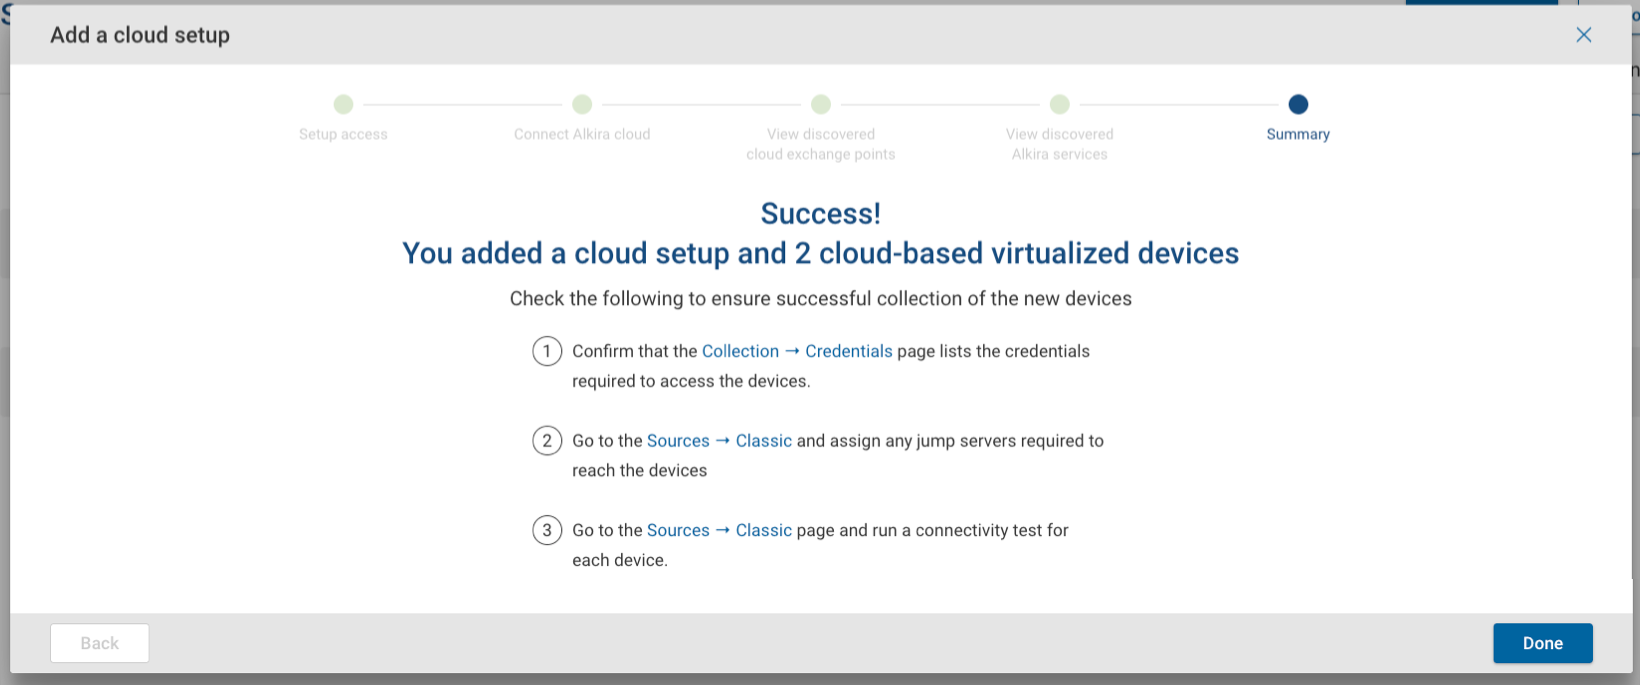
Step 6: Summary
Review the configuration summary before completing setup.
Check the following to ensure successful collection of the new devices:
- Confirm that the Collection --> Credentials page lists the credentials required to access the services.
- Go to Sources --> Classic and assign any jump server required to reach the devices.
- Go to the Sources --> Classic page and run a connectivity test for each device.
Setup Changes

Edit a Setup
To edit a setup, click the edit icon located on the right of each setup in the list to open the edit drawer.
Exclude a Setup from Collection
Click the toggle button located on the left of the each setup in the list to exclude it from collection.

Delete a Setup
Click the kebab menu on the right side of a setup, select Delete, and confirm deletion.
