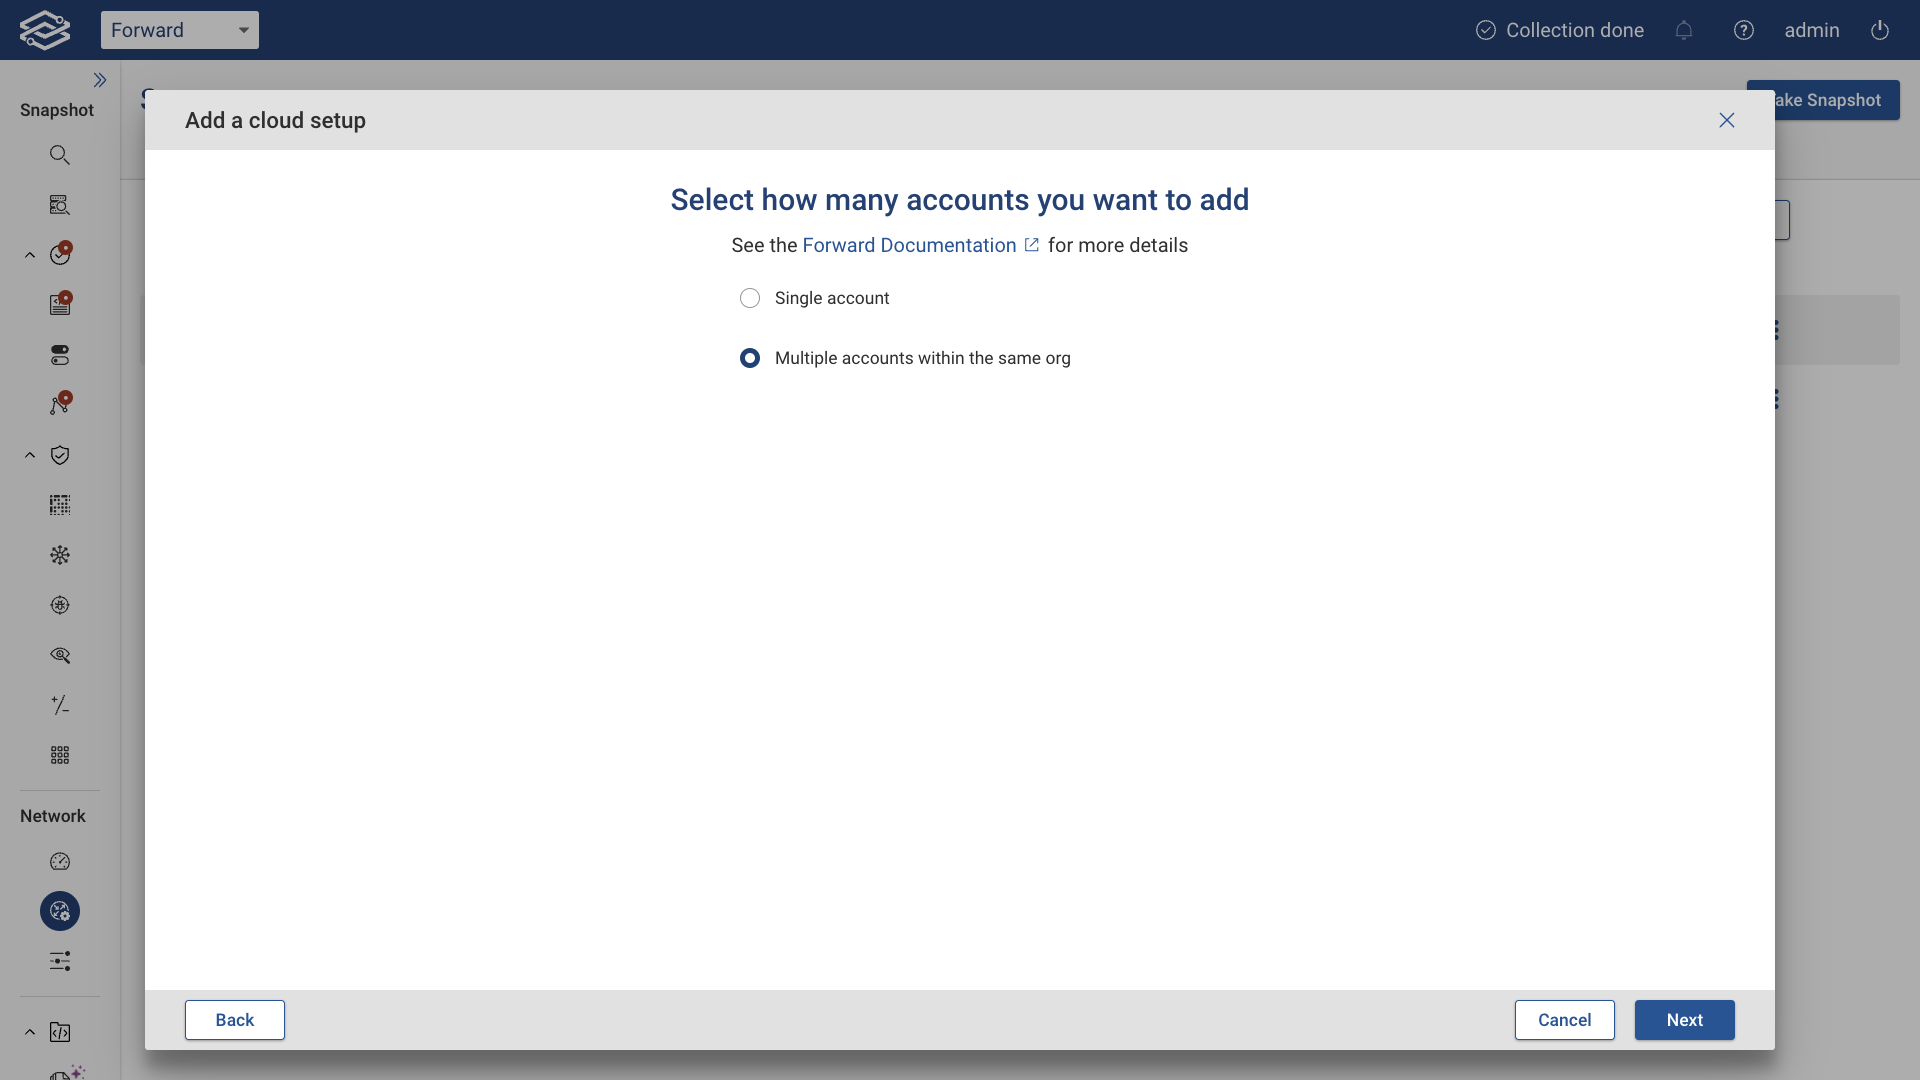
Multiple Accounts Collection
For multiple accounts within the same organization, select the option as shown below and click Next.
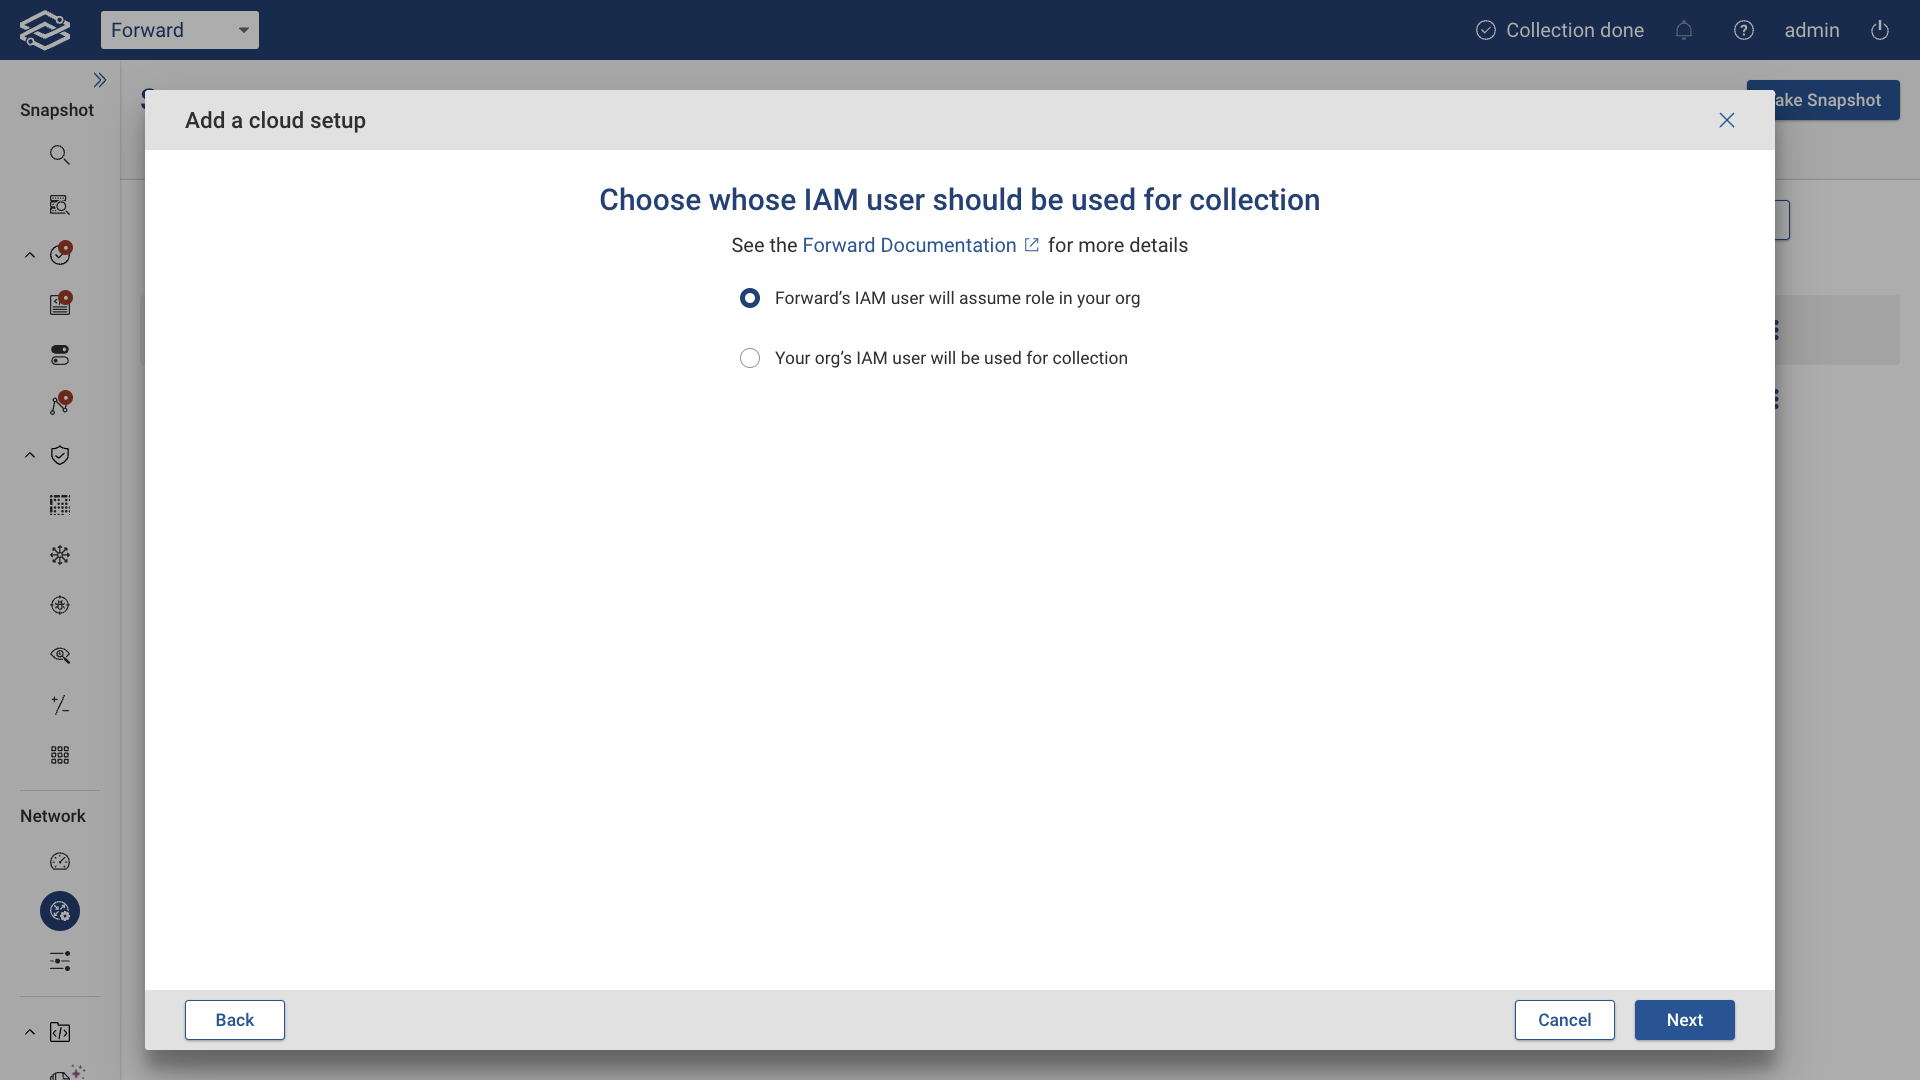
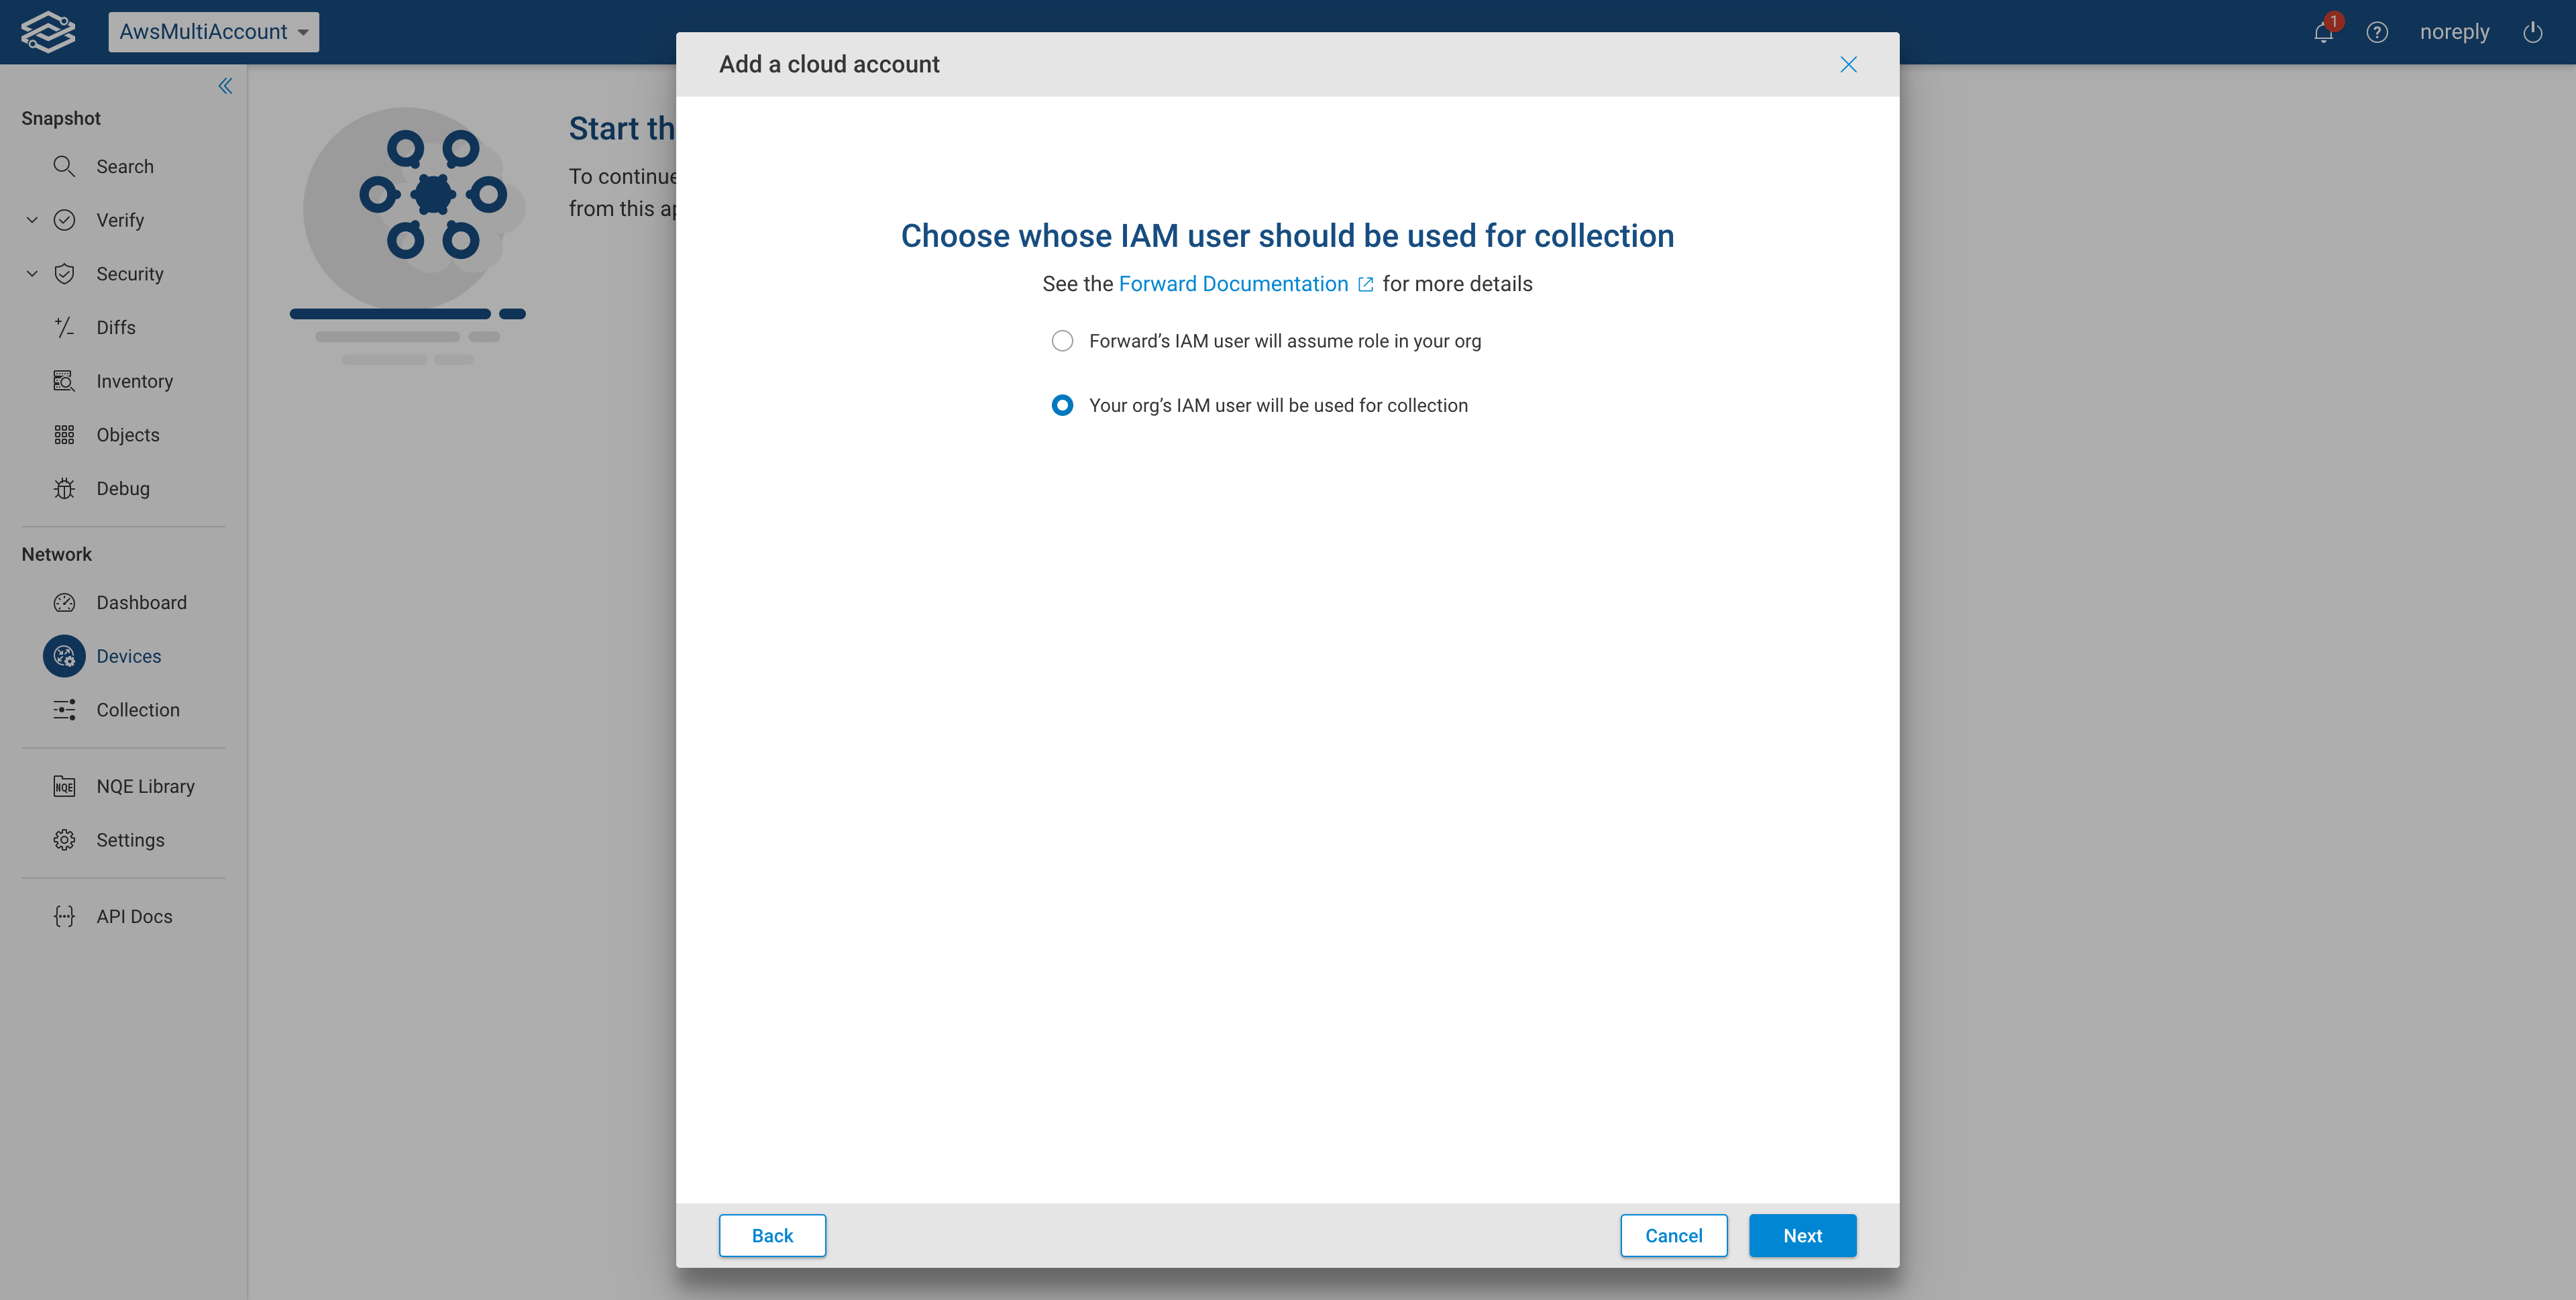
For multiple accounts within the same organization, users will have to select whose IAM user should be used for collection.
Multiple accounts: Forward's IAM user to assume role for collection
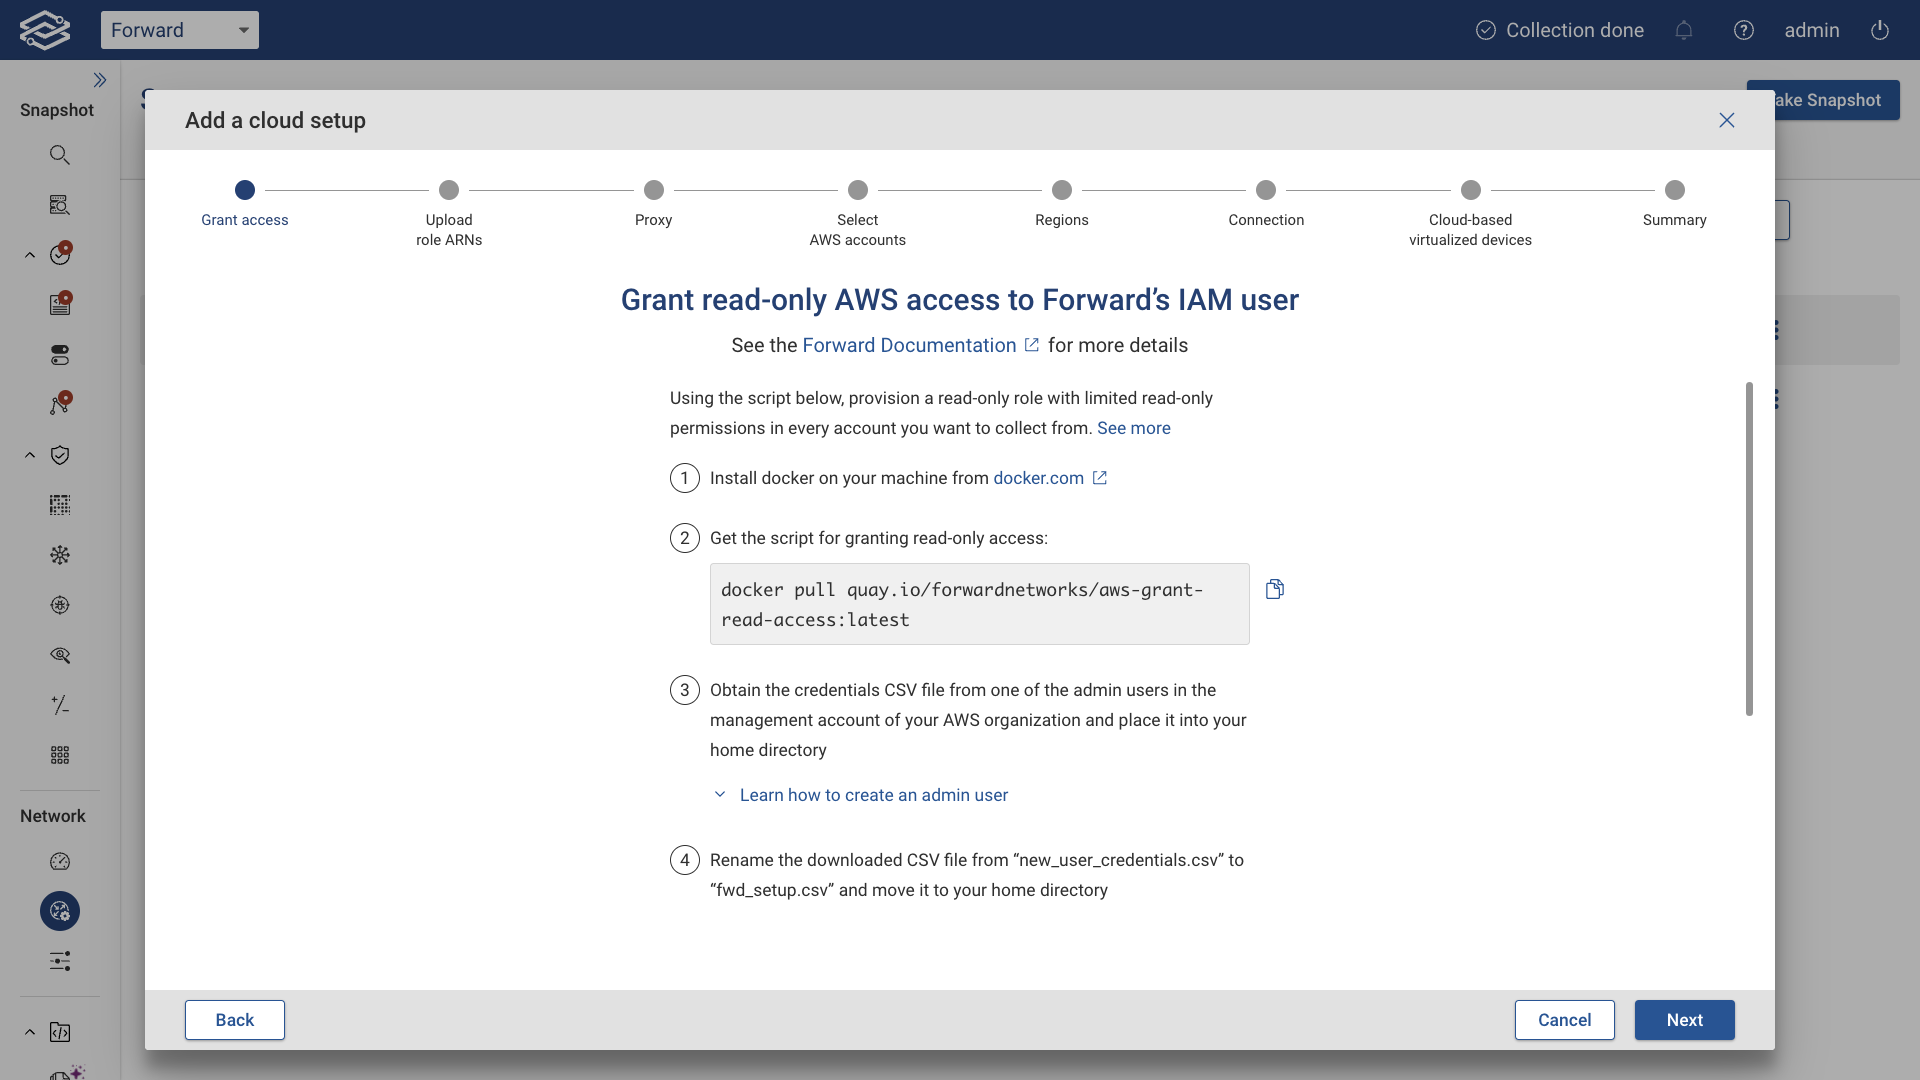
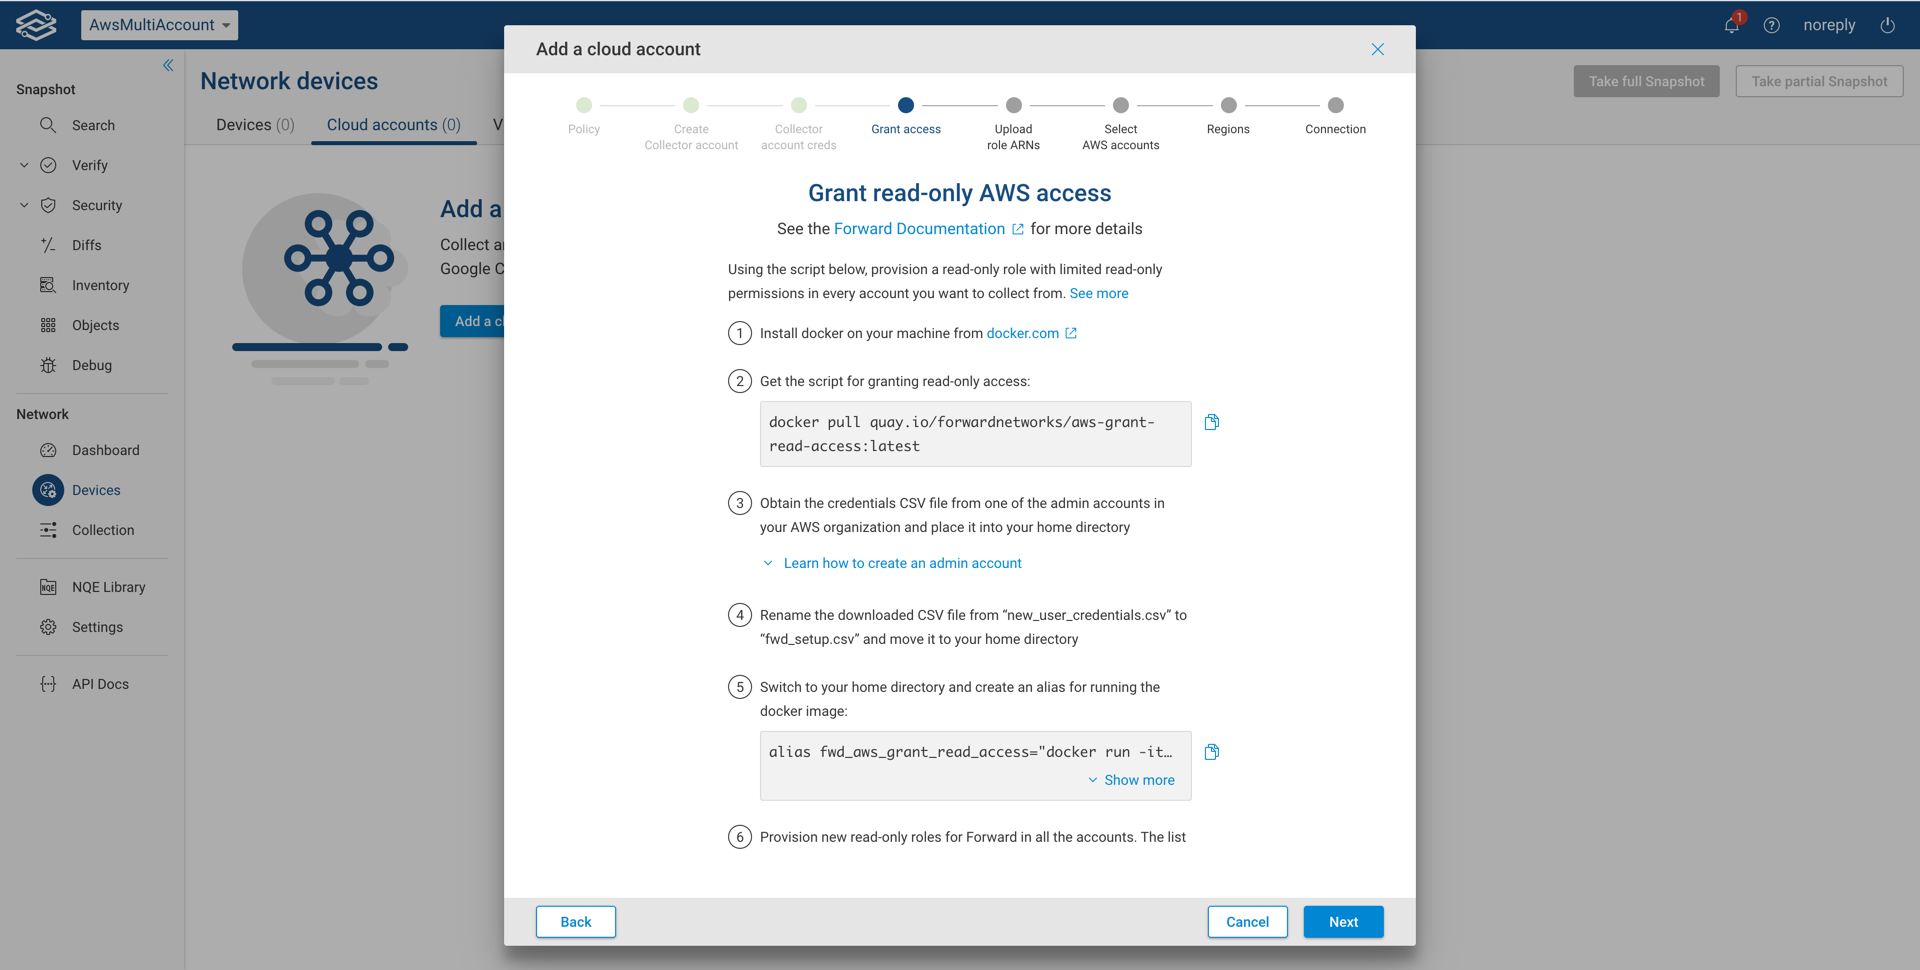
Grant read-only AWS access
If user selects Forward's IAM user to assume the role for collection in the organization, user will need to grant read-only AWS access to the forward role. In order for us to collect from all accounts in the organization, we need a read-only role with an associated read-only policy with limited permissions. The docker container below contains a script that provisions such a role. The script needs to be executed with a management account that has AWS admin permissions. Follow the steps outlined as shown below:
Upload ARNs for IAM roles
Once the dockerized setup script generates a file named fwd_accounts_data.json, upload it as shown below:
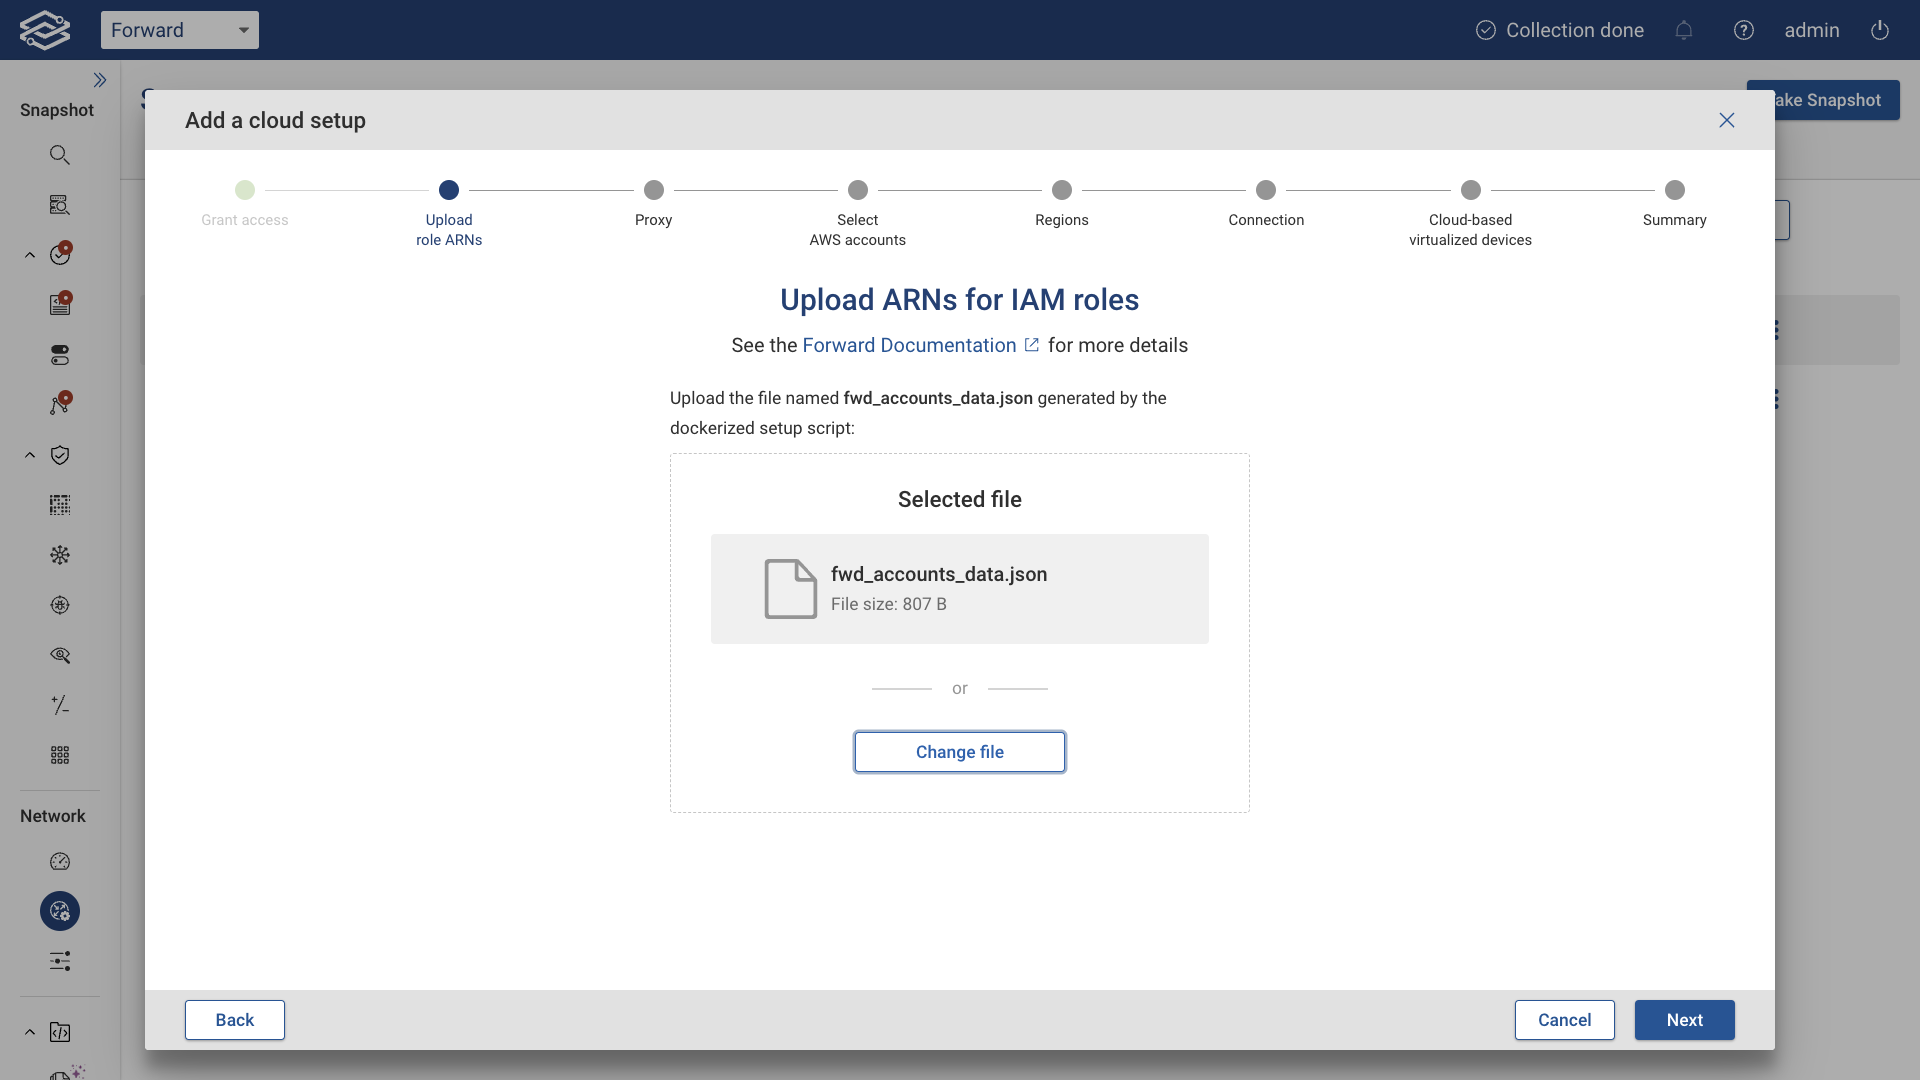
Then click Next.
Enable Default Proxy Server (optional)
Optionally, set up a proxy server and enable the Use proxy server toggle button.
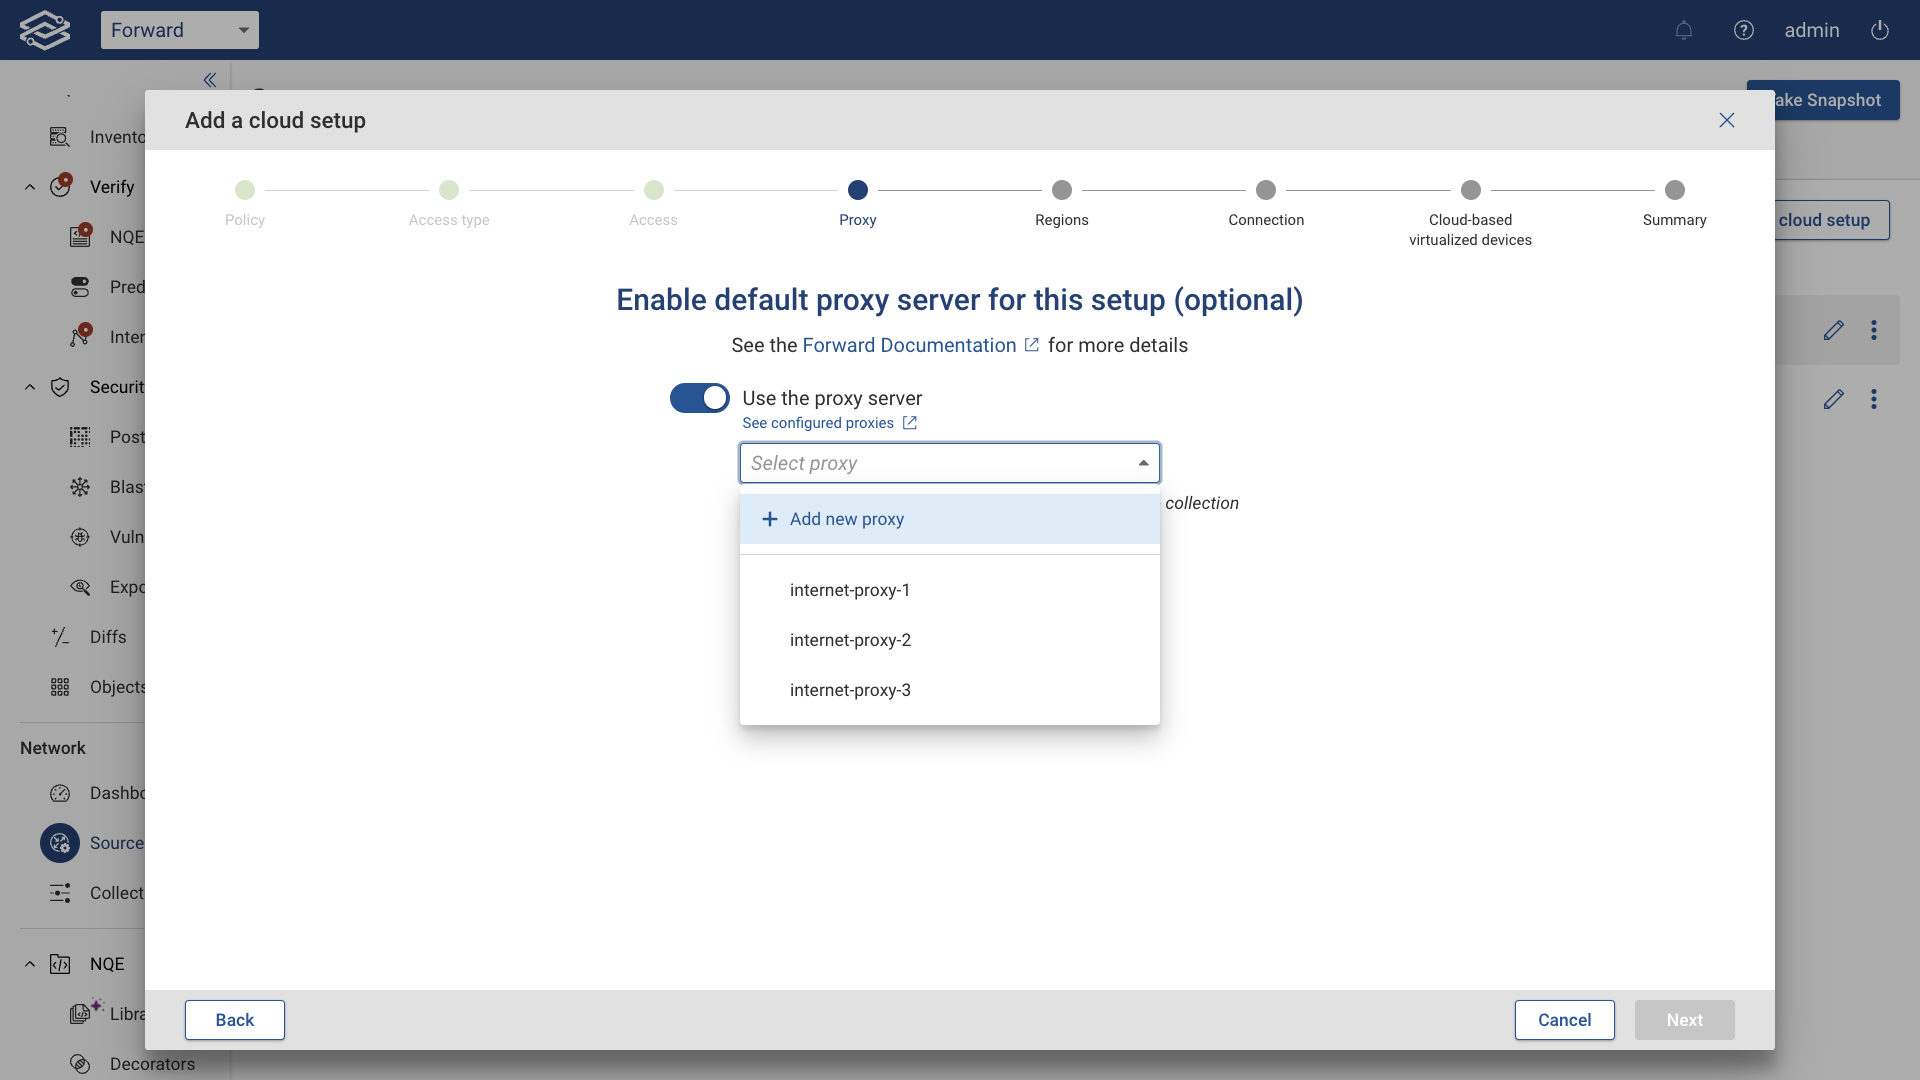
Then, click Next.
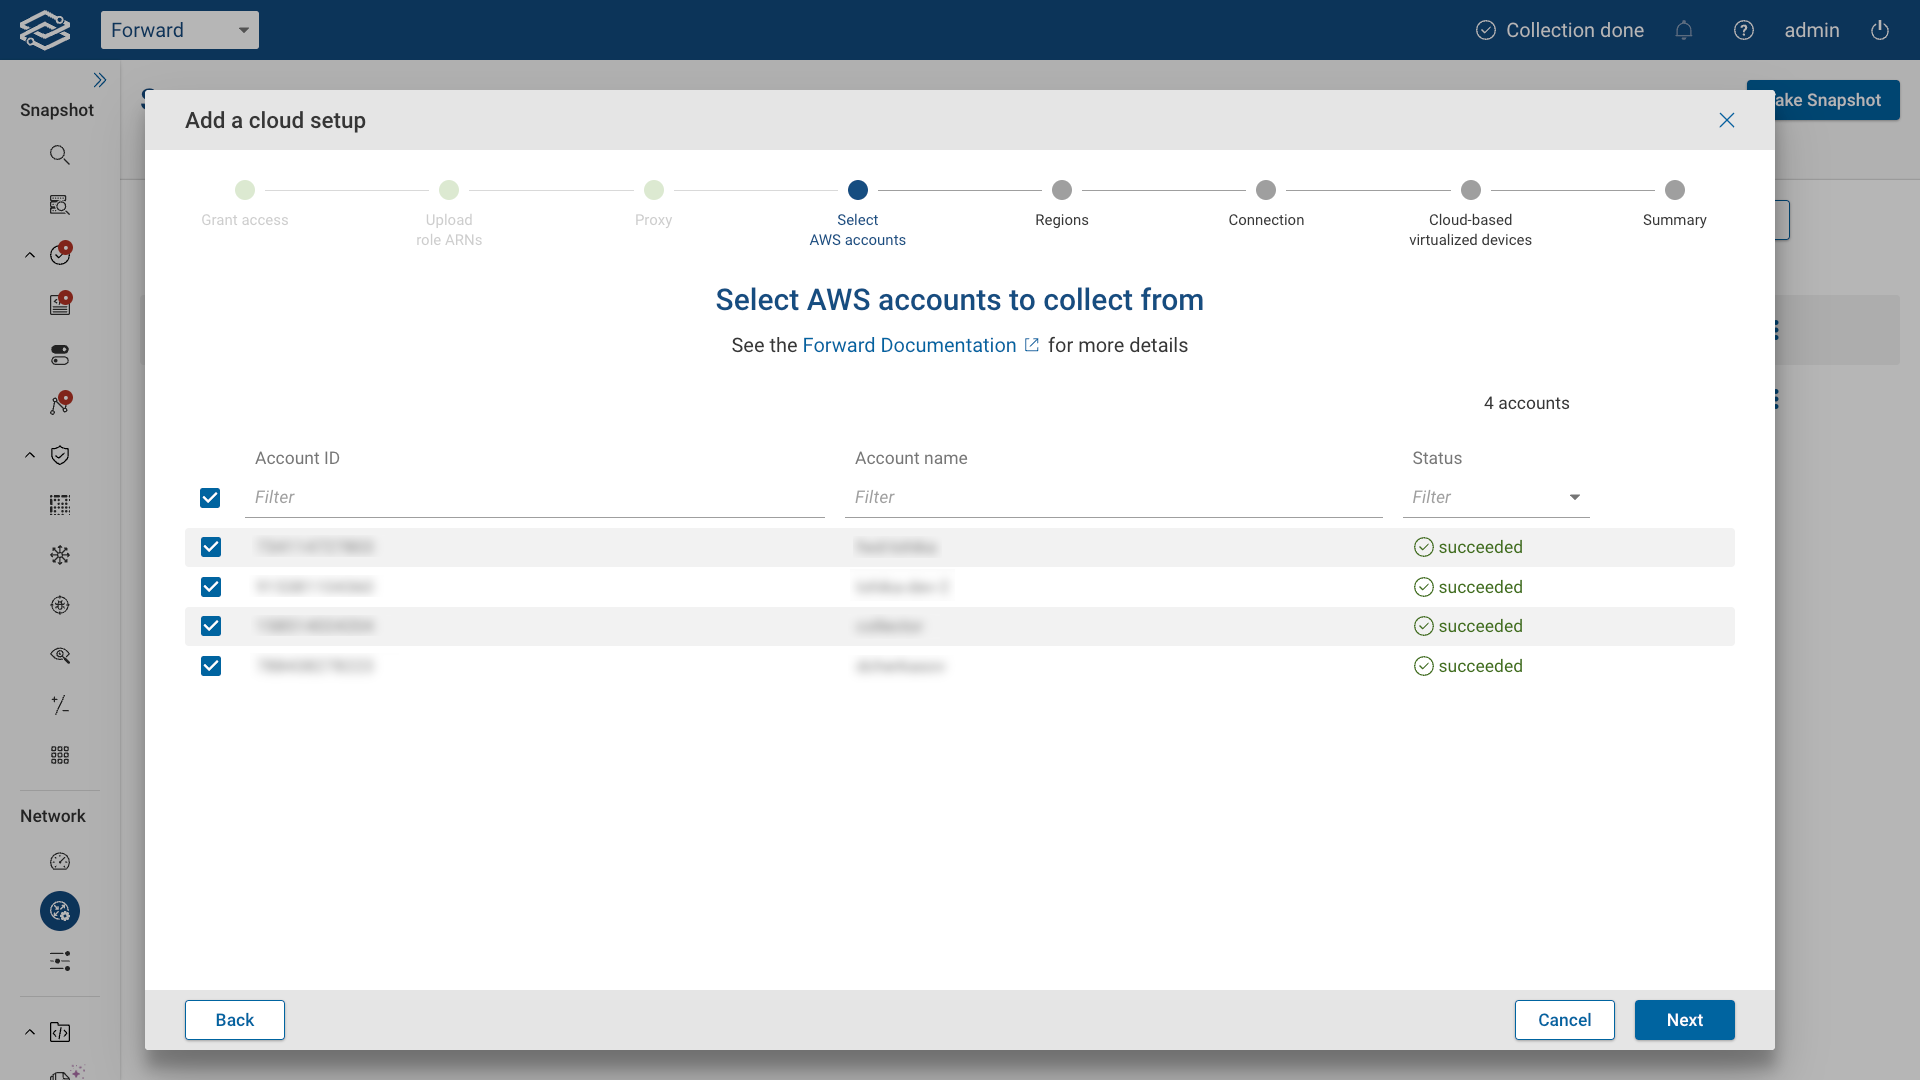
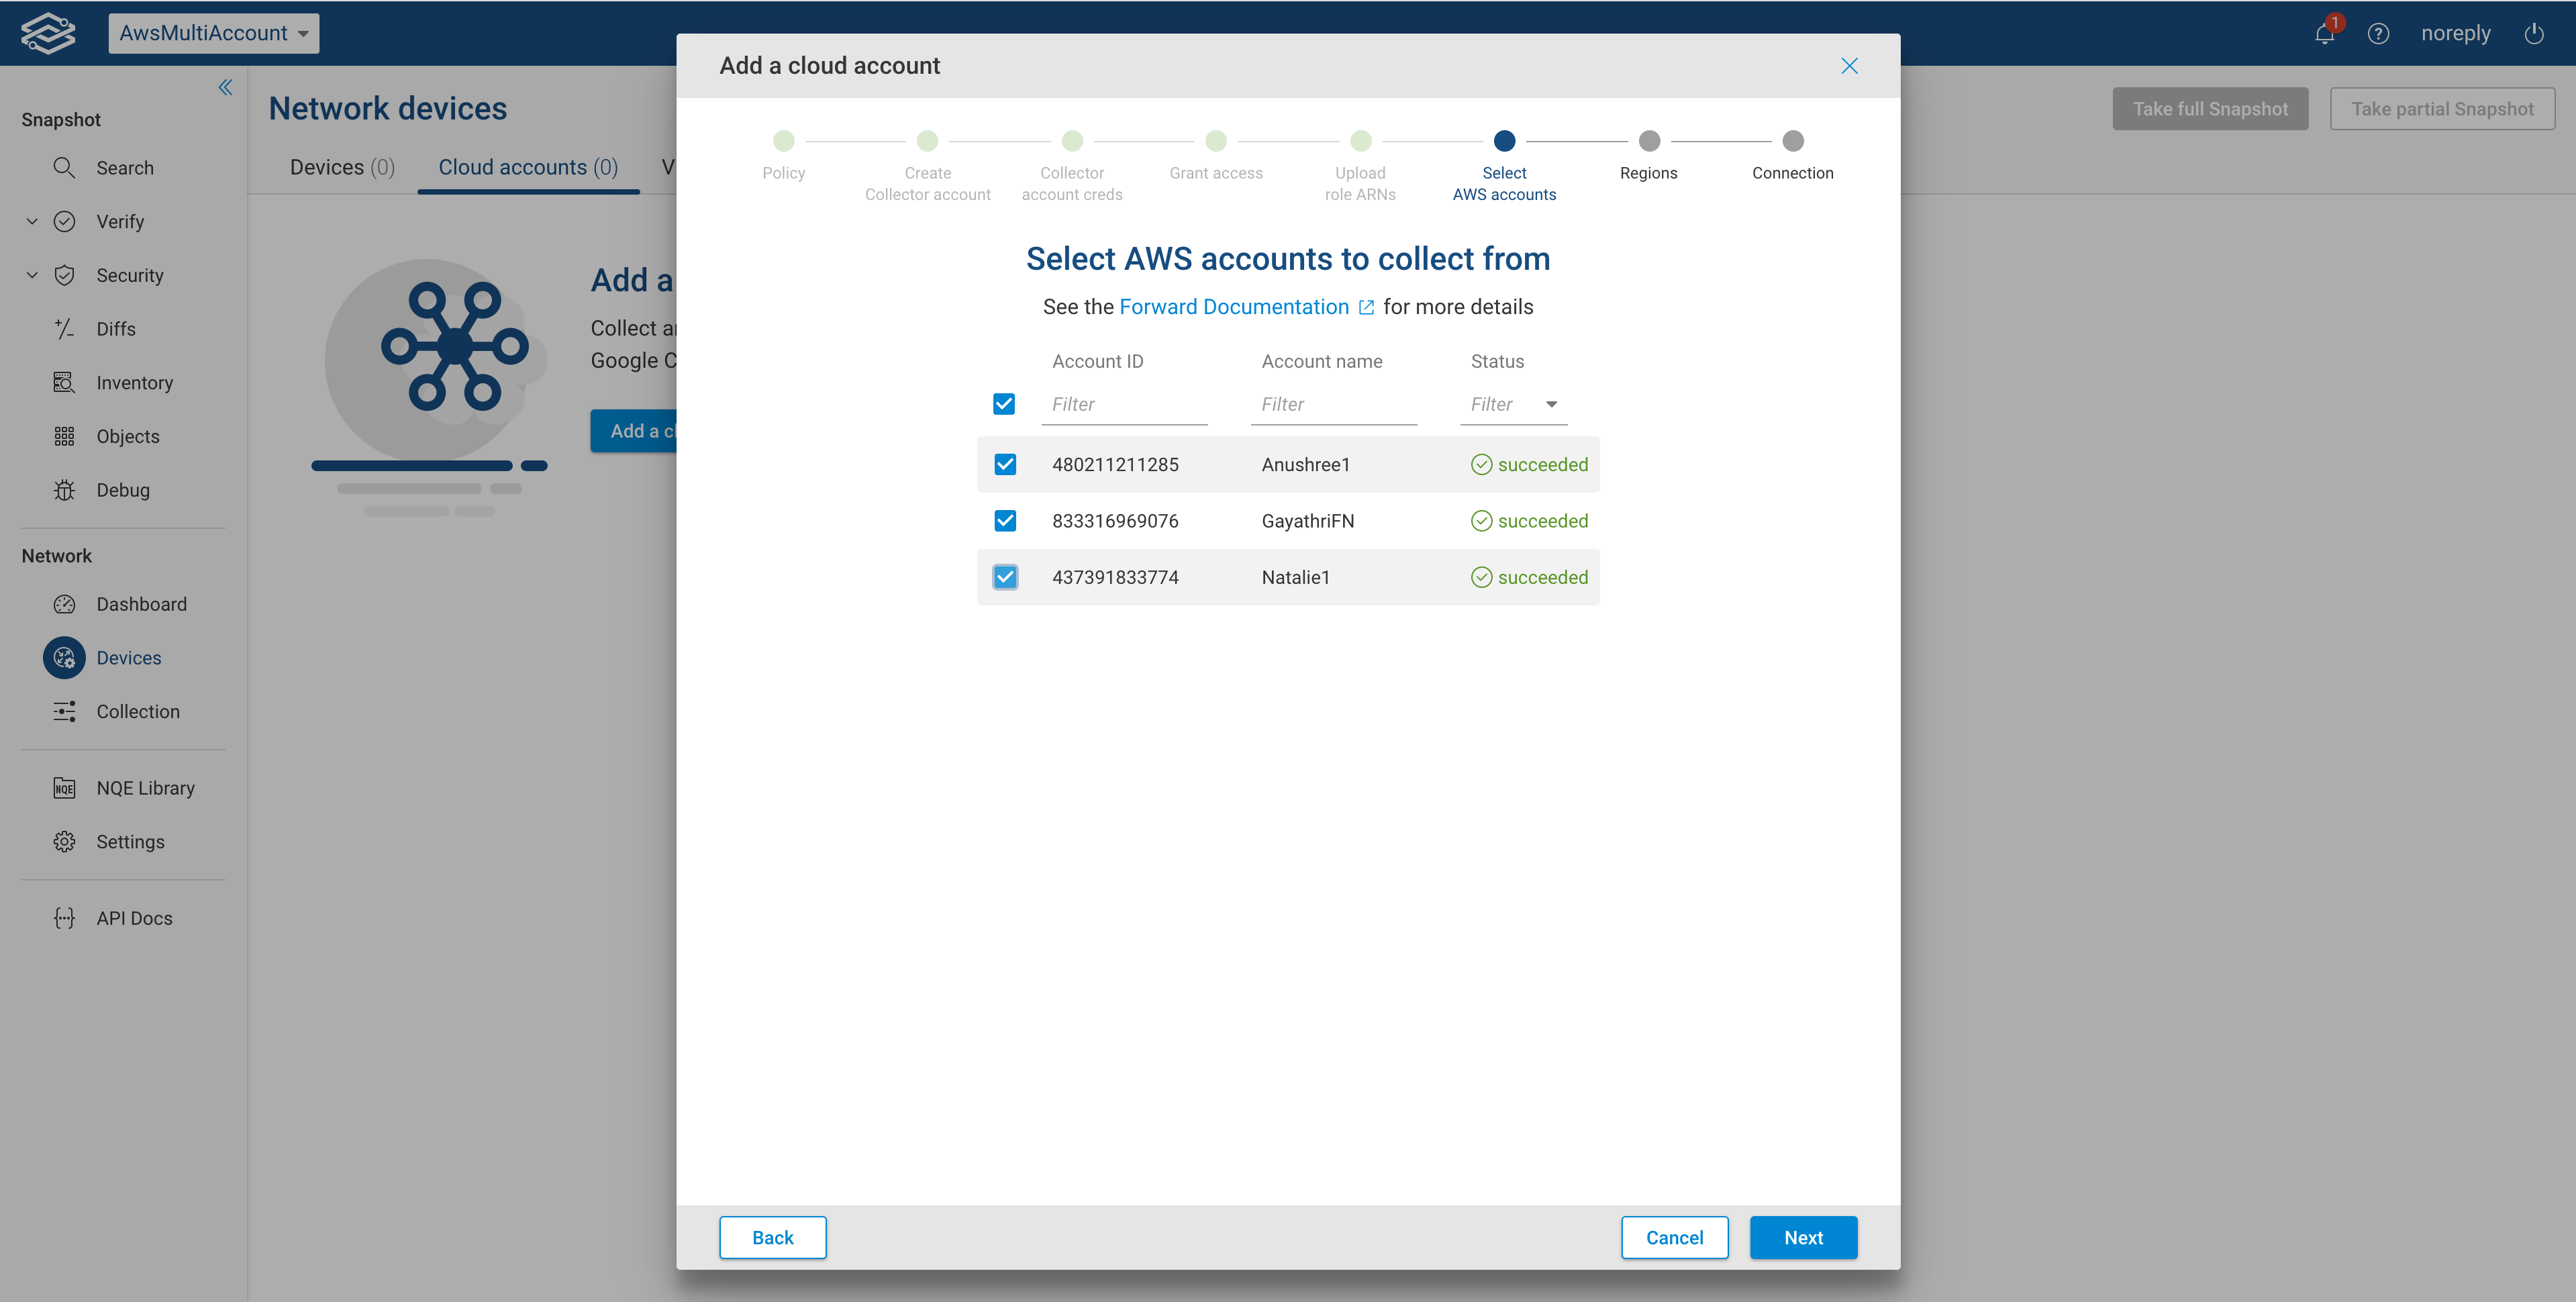
Select desired AWS accounts
Select the accounts that you would like to collect from and click Next.
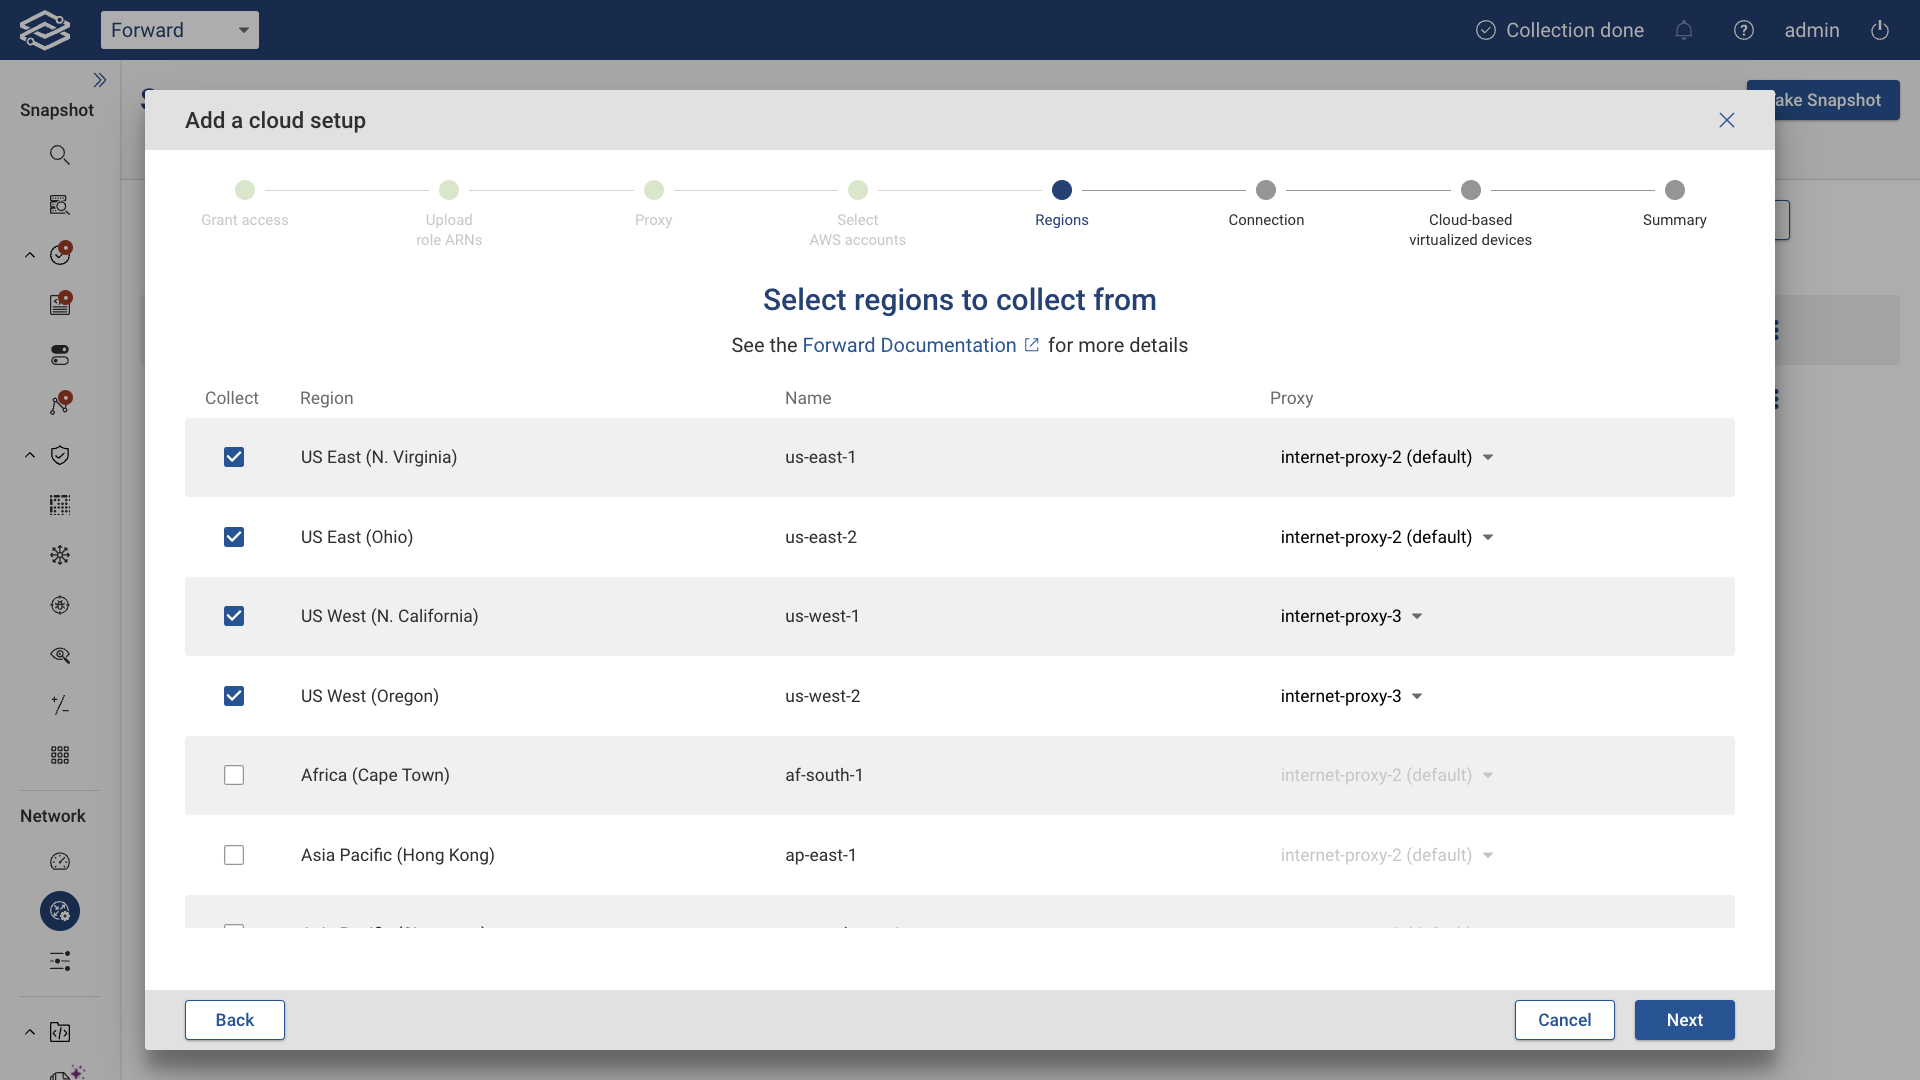
Select appropriate regions
Select the regions to collect from. If using a proxy server, the option to assign one internet proxy per region will be available. Then click the Next button:
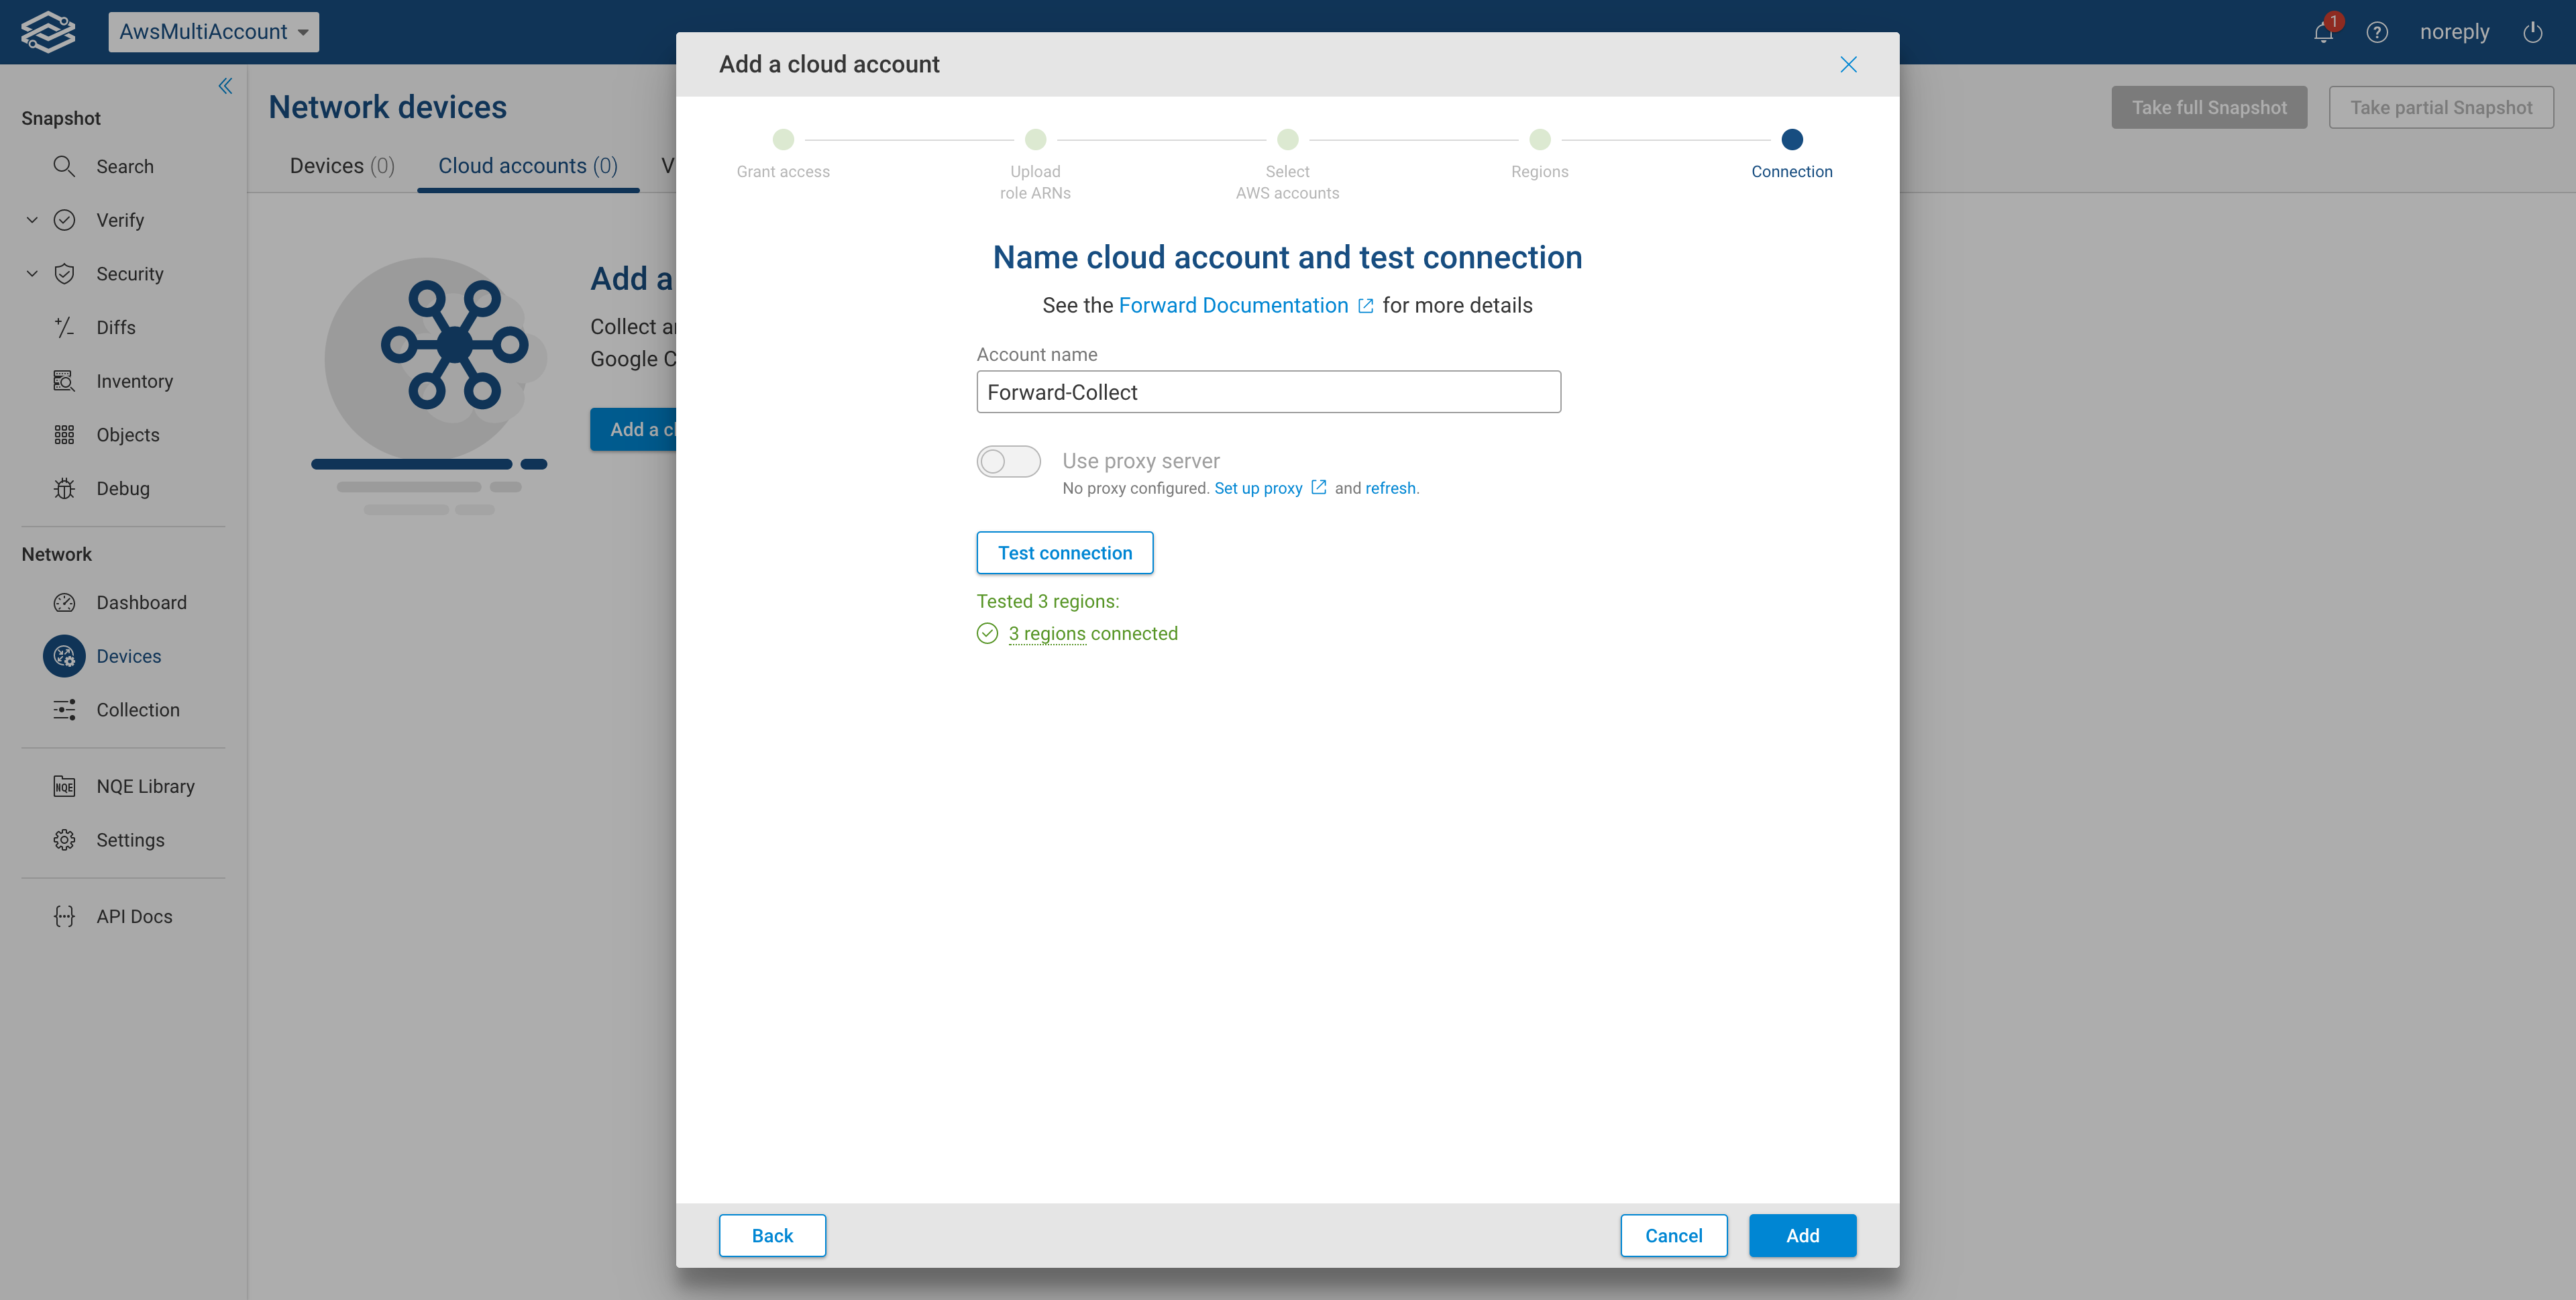
Connect the account
In the last step you need to provide a unique Account Name. Click Test Connection to test connectivity. You should see a green message showing the number of regions successfully connected. Then click Add.
Multiple accounts: Your own IAM user for collection
Select the Single Account option, then click Next.
In AWS: Define a policy for Forward Enterprise
In this section, the wizard will guide you through the steps needed to create an AWS policy named ** ForwardAccesstoAccounts**. In order to create the AWS policy you need to use the following JSON payload with no changes:
{
  "Version": "2012-10-17",
  "Statement": [
    {
      "Effect": "Allow",
      "Action": [
        "directconnect:Describe*",
        "ec2:Describe*",
        "ec2:Get*",
        "ec2:Search*",
        "elasticloadbalancing:Describe*",
        "globalaccelerator:List*",
        "network-firewall:Describe*",
        "network-firewall:List*",
        "organizations:Describe*",
        "workspaces:Describe*",
        "sts:AssumeRole",
        "sts:getCallerIdentity"
      ],
      "Resource": "*"
    }
  ]
}
You can copy the JSON payload by clicking the wizard copy icon as well.
 Then click
Next.
Then click
Next.
In AWS: Create collector account
Follow the steps outlined below and click Next once completed.

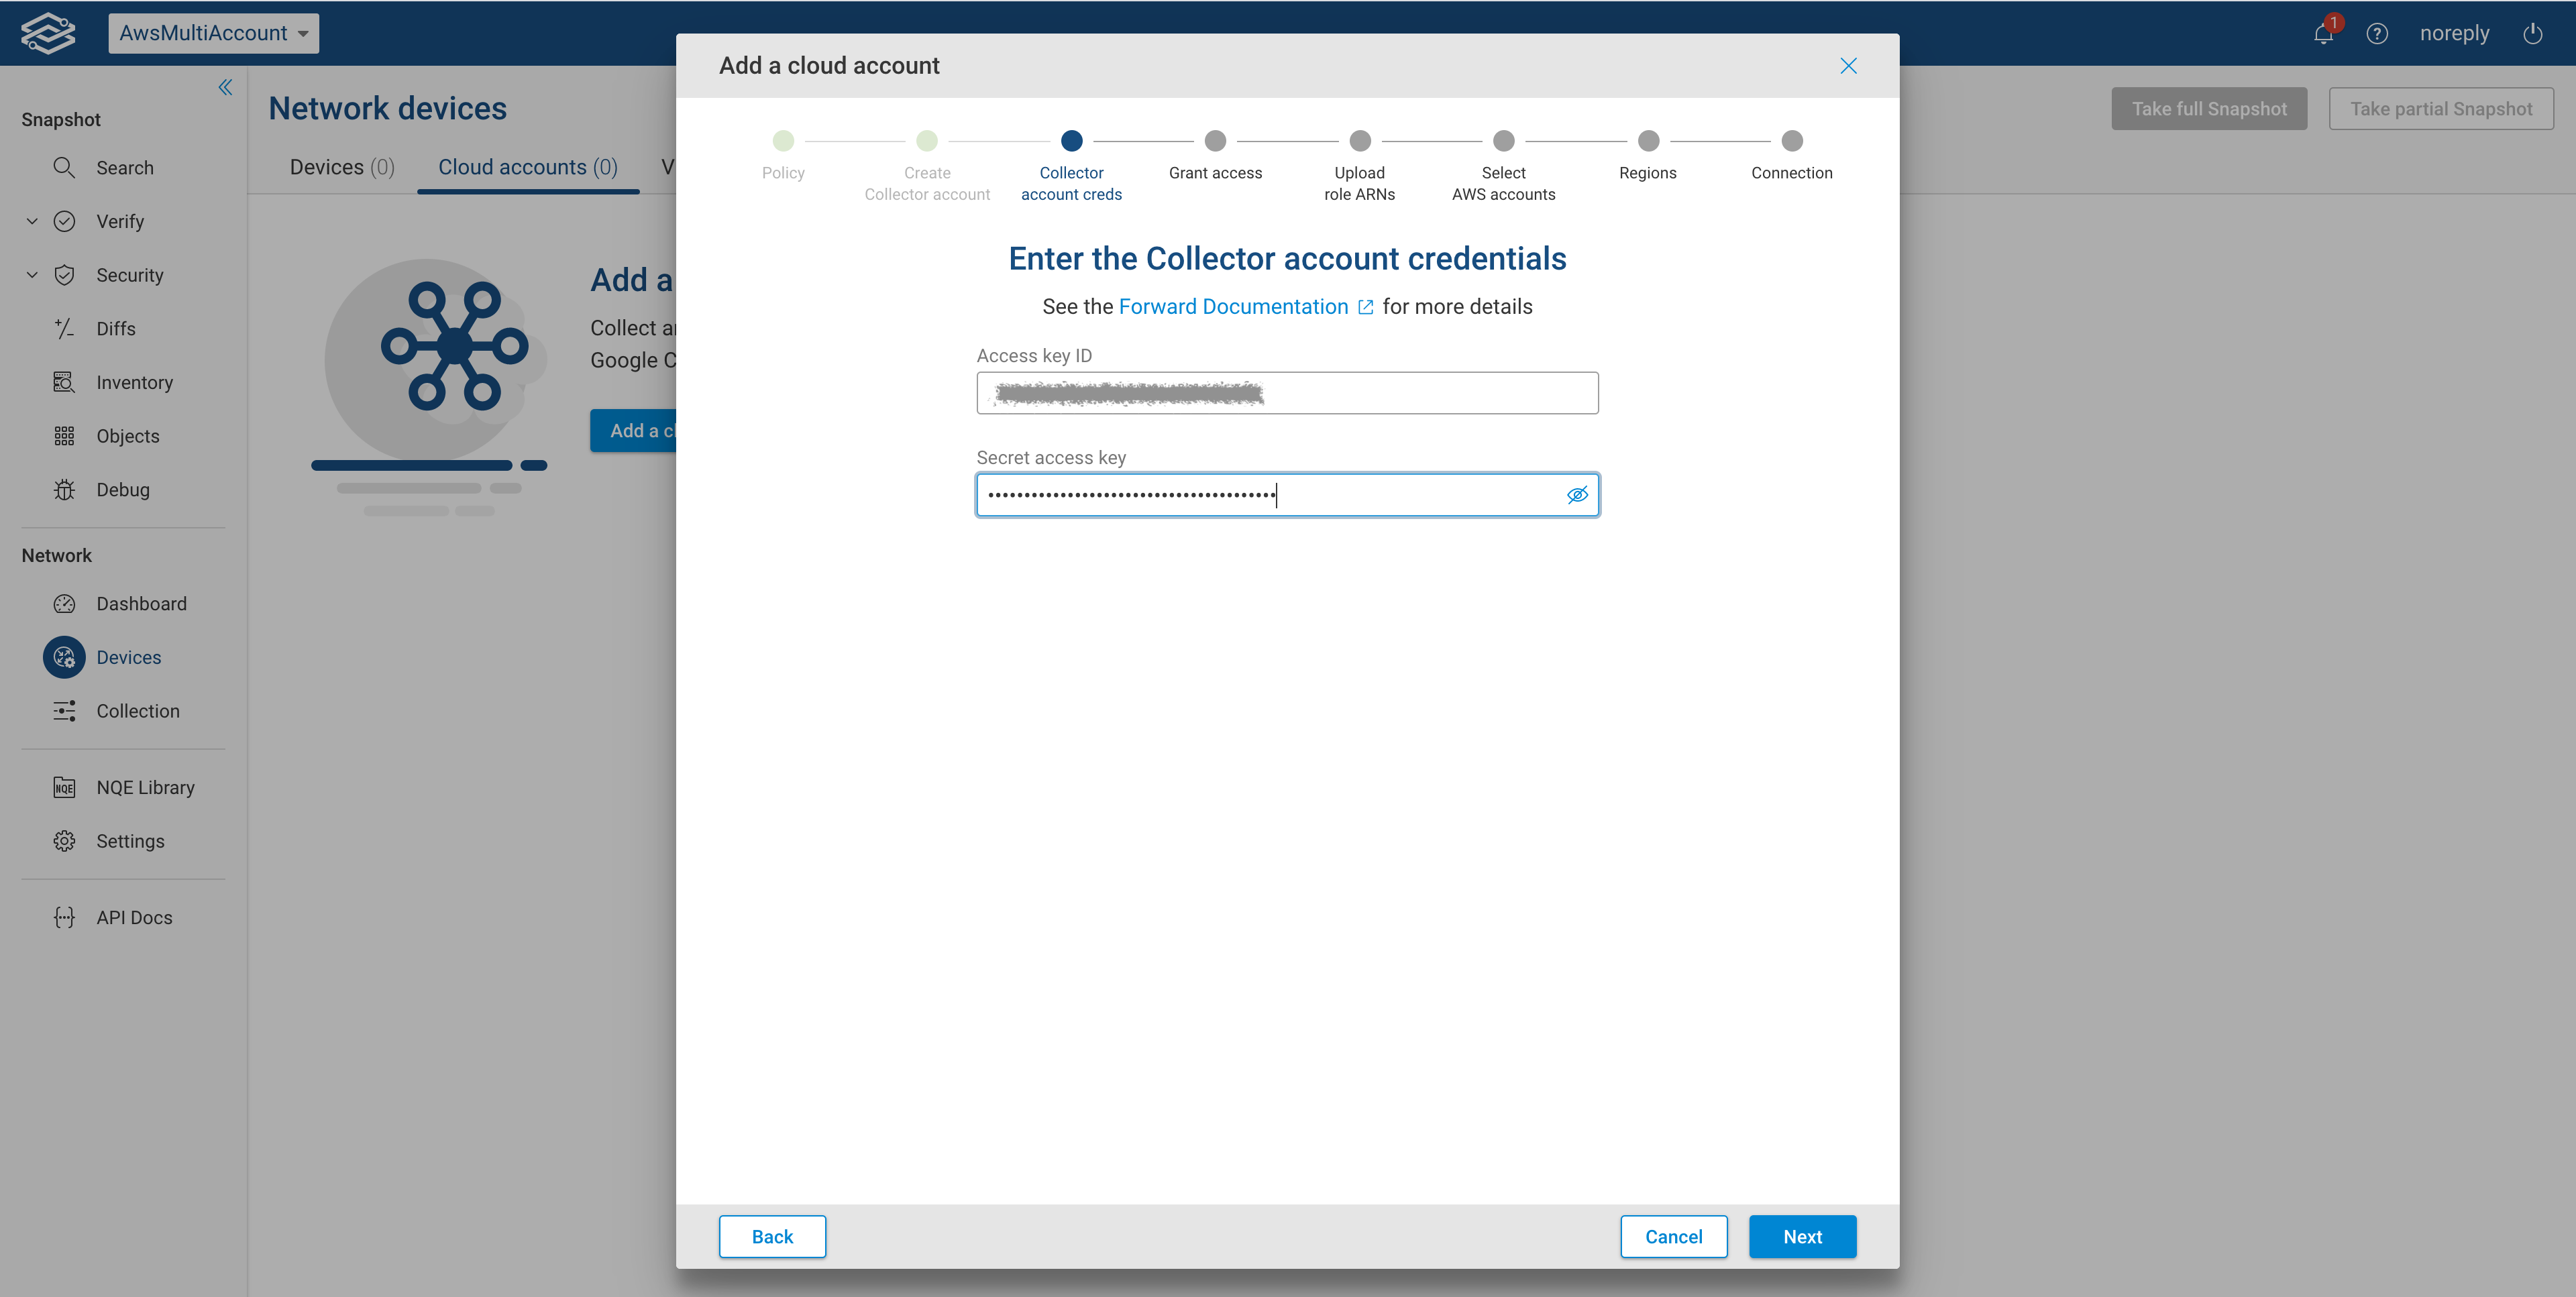
Provide collector account credentials
Enter the credentials of the collector account and click Next.
Grant read-only AWS access
Follow the steps as requested to grant read-only access to the collector account created in the previous step. Once completed, click Next.
Upload ARNs for IAM roles
Once the dockerized setup script generates a file named fwd_accounts_data.json, upload it as shown below:

Select the desired AWS accounts
Select the accounts that you would like to collect from and click Next.
Select appropriate regions
Select the regions to collect from. If using a proxy server, the option to assign one internet proxy per region will be available. Then click the Next button:

Connect AWS account to Forward Enterprise
In the last step you need to provide a unique Account Name and optionally select the proxy server. Click Test Connection to test connectivity. You should see a green message showing the number of regions successfully connected. Then click Add.

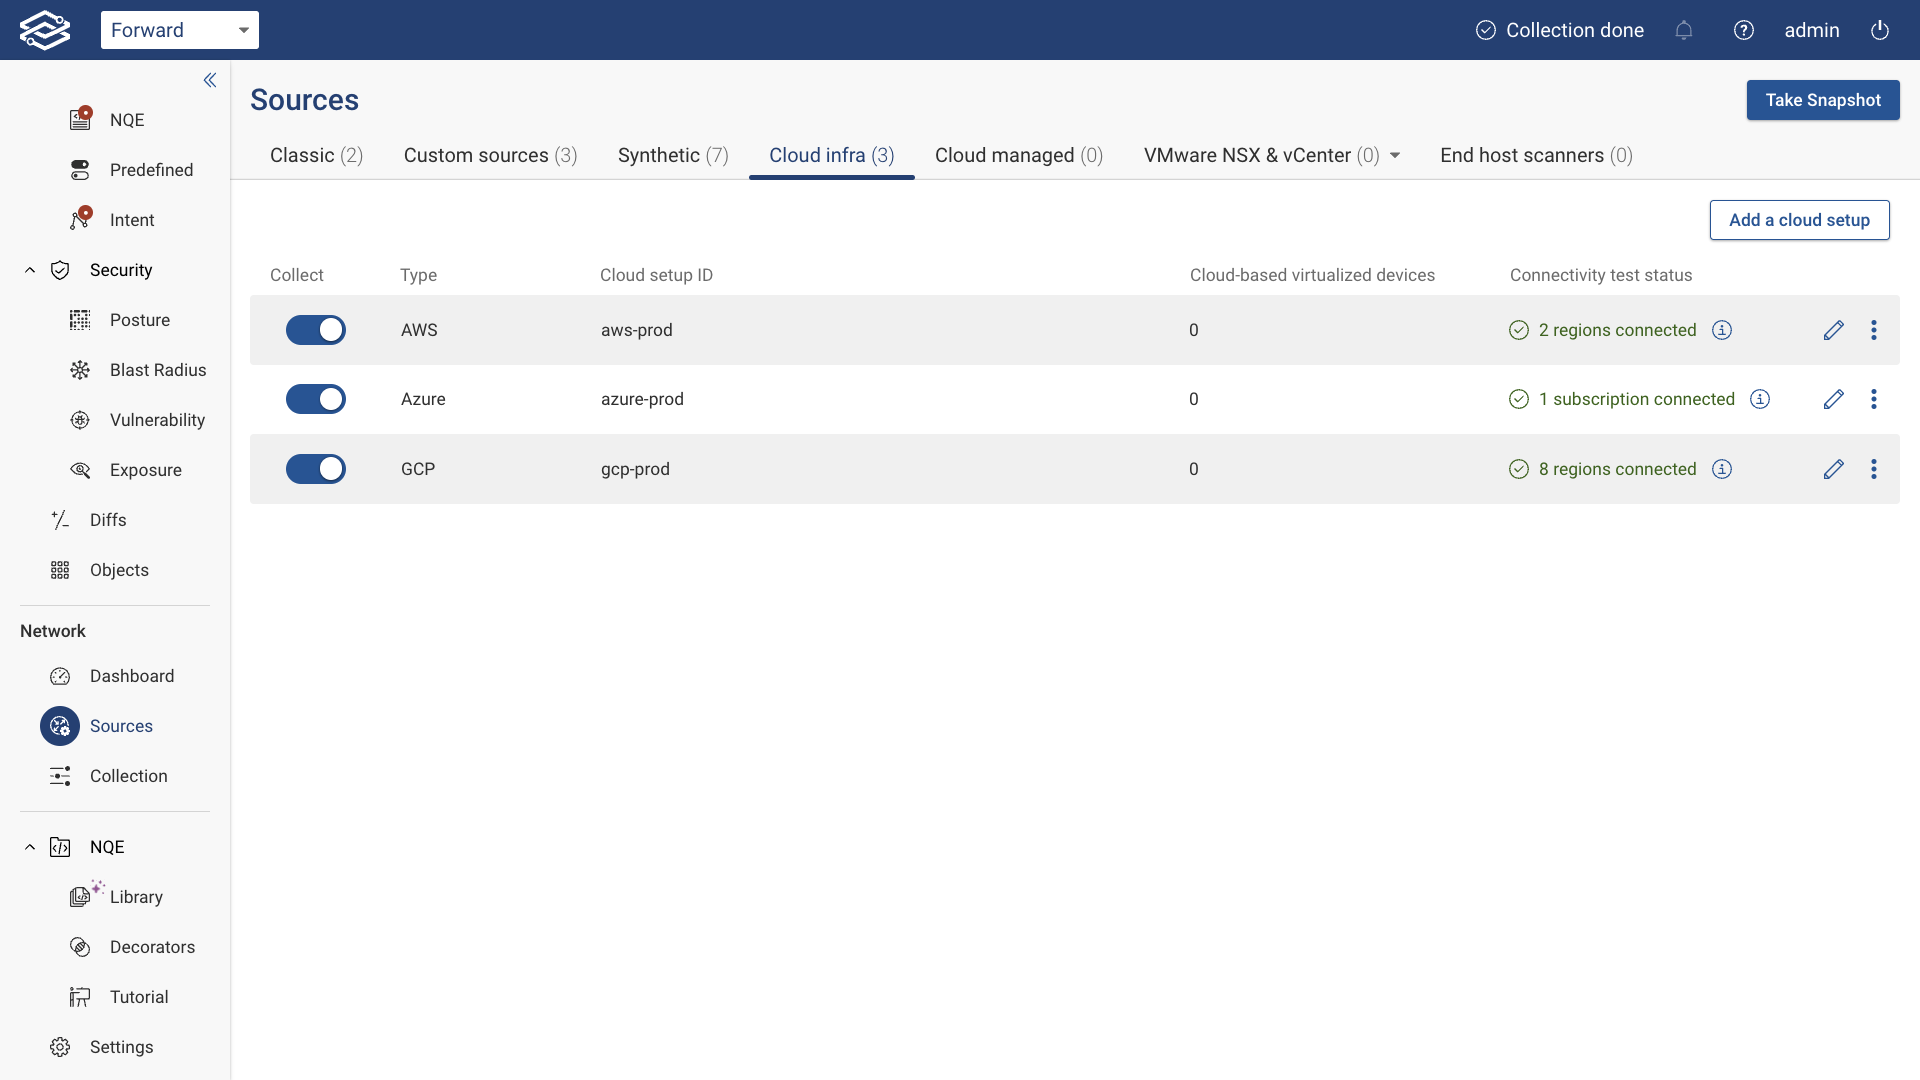
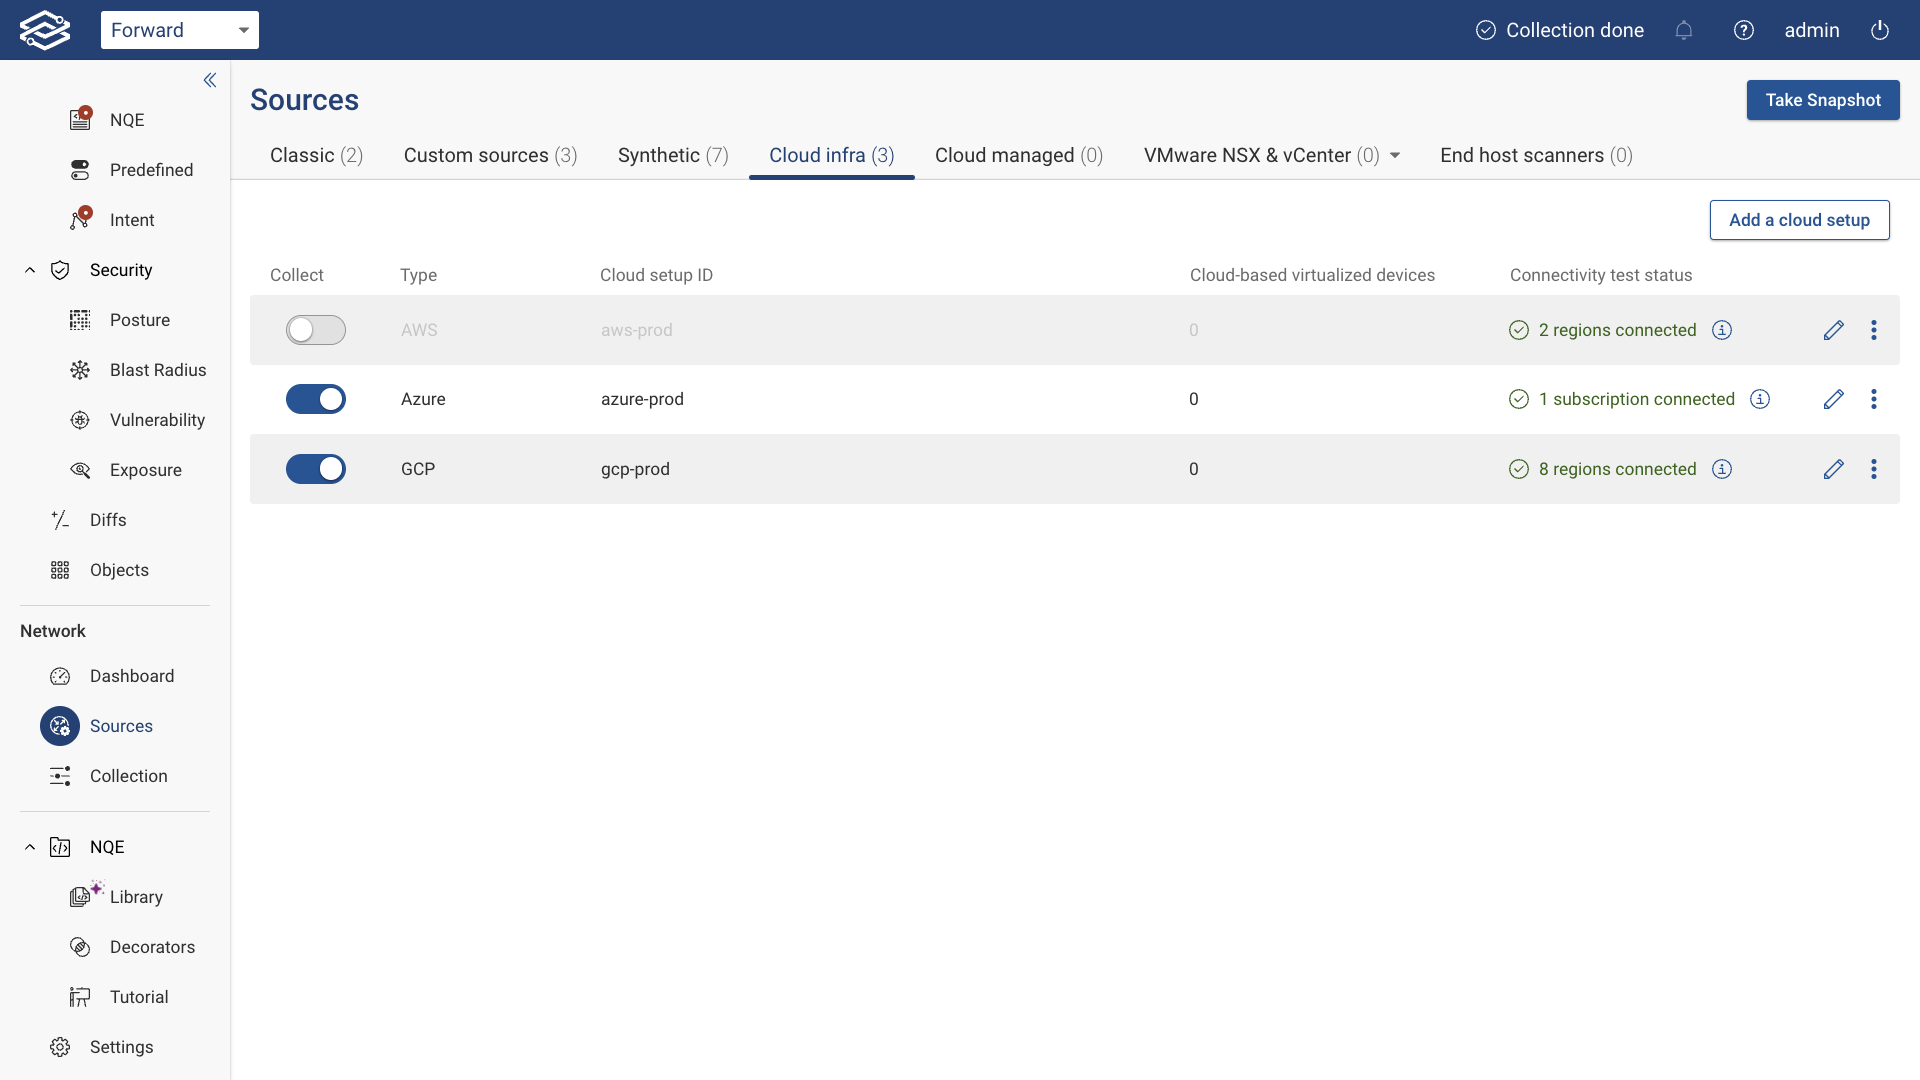
Once the account creation is completed and access is verified, the account will show as active within the Cloud accounts tab along with the status. At this point the collection can take place.
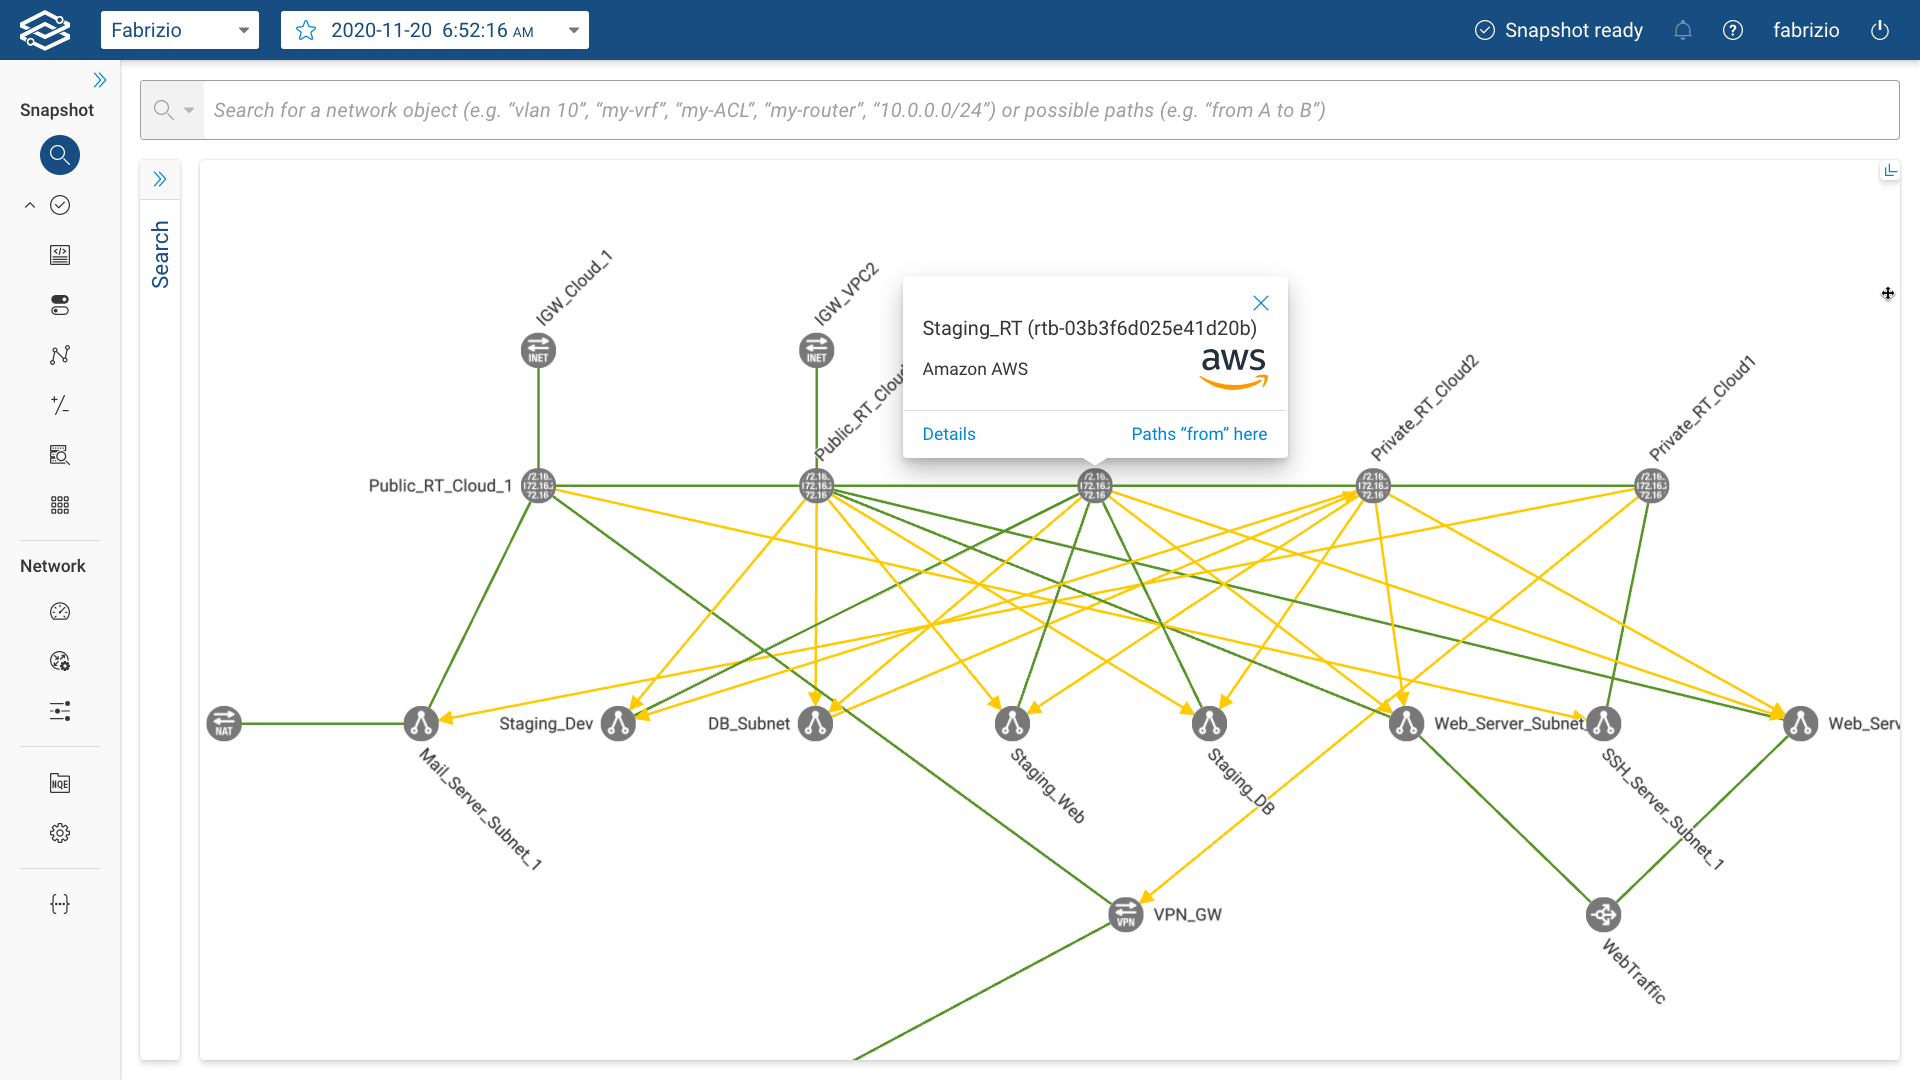
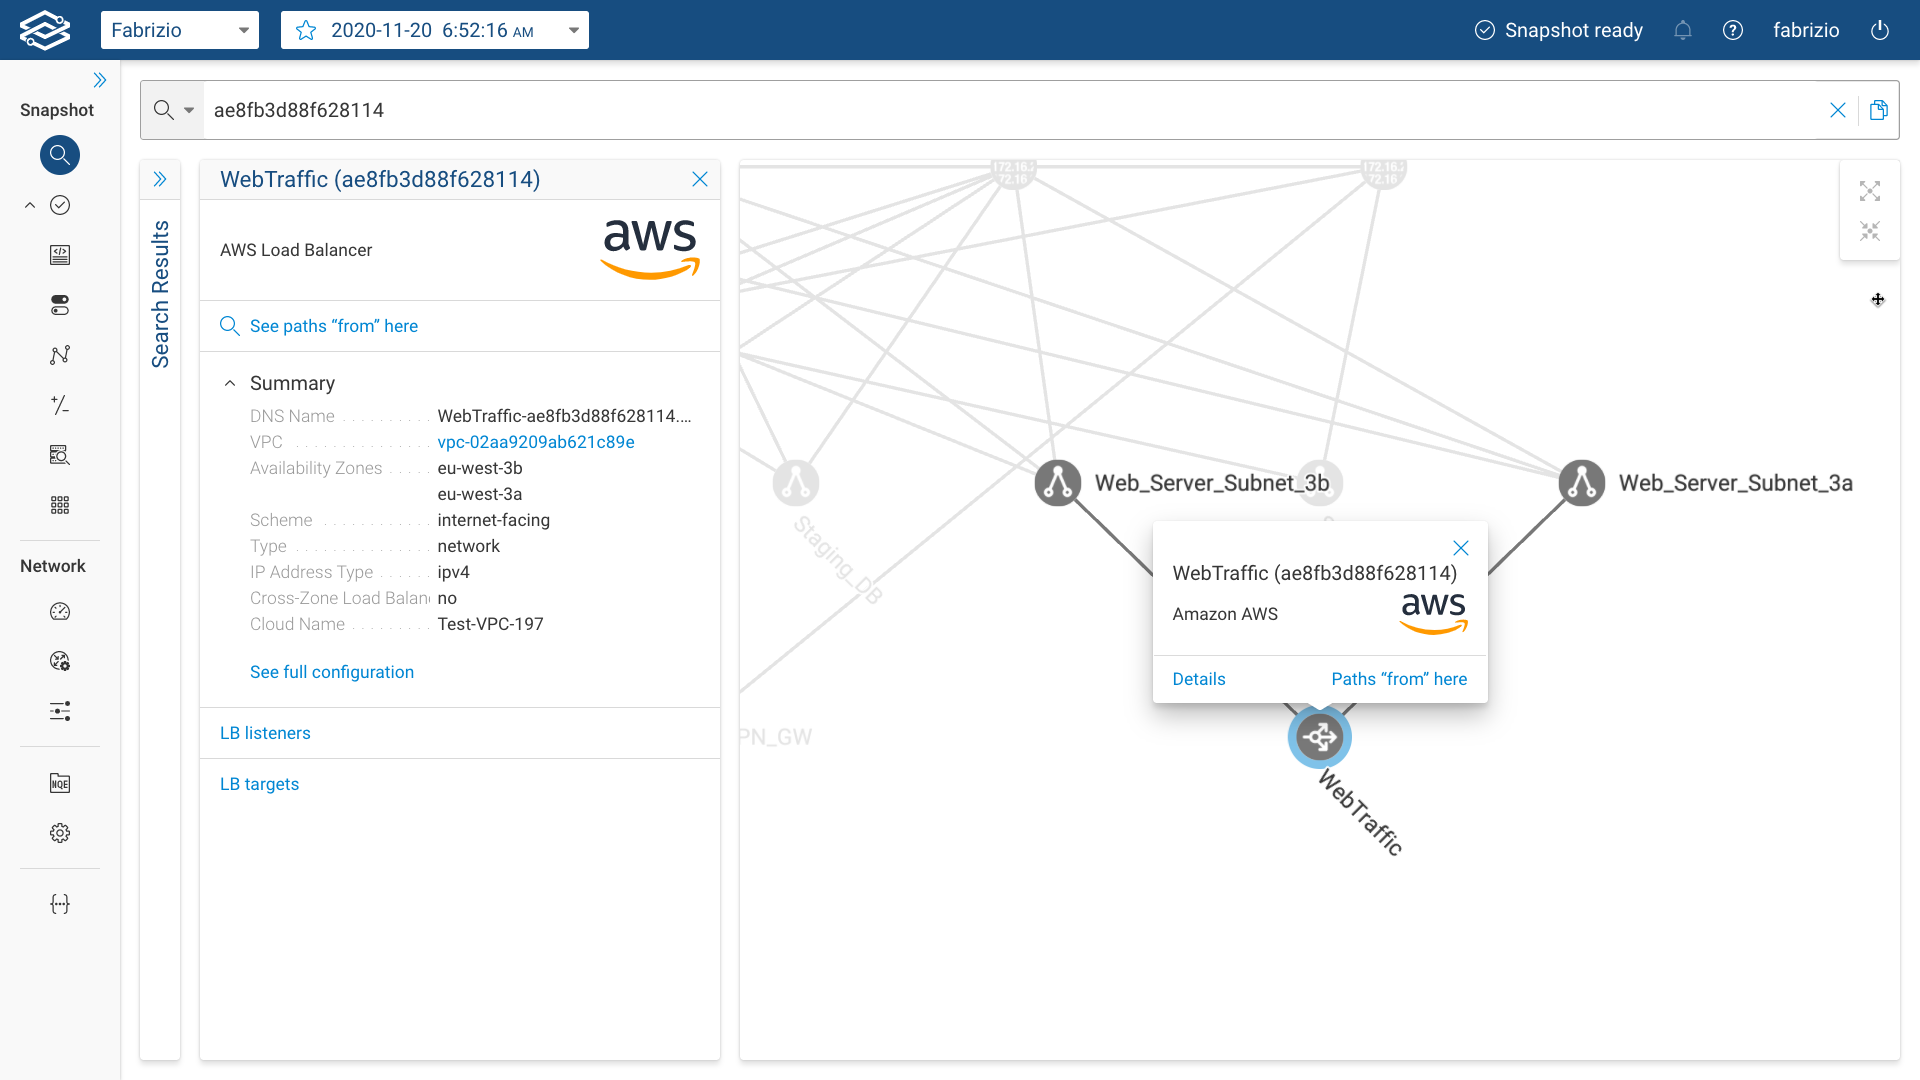
In the screenshots below you can find examples of an AWS VPC network collected by the Forward Collector that include AWS Subnets, VPN Gateways, Route Tables, Internet Gateways, a NAT Gateway and a Load Balancer.
For the AWS network; if the internet device is not collected upon initial collection, Forward Enterprise will automatically add internet node to the cloud networks for external connectivity and path completion to the rest of the network.
Setup Changes
Setup Edit
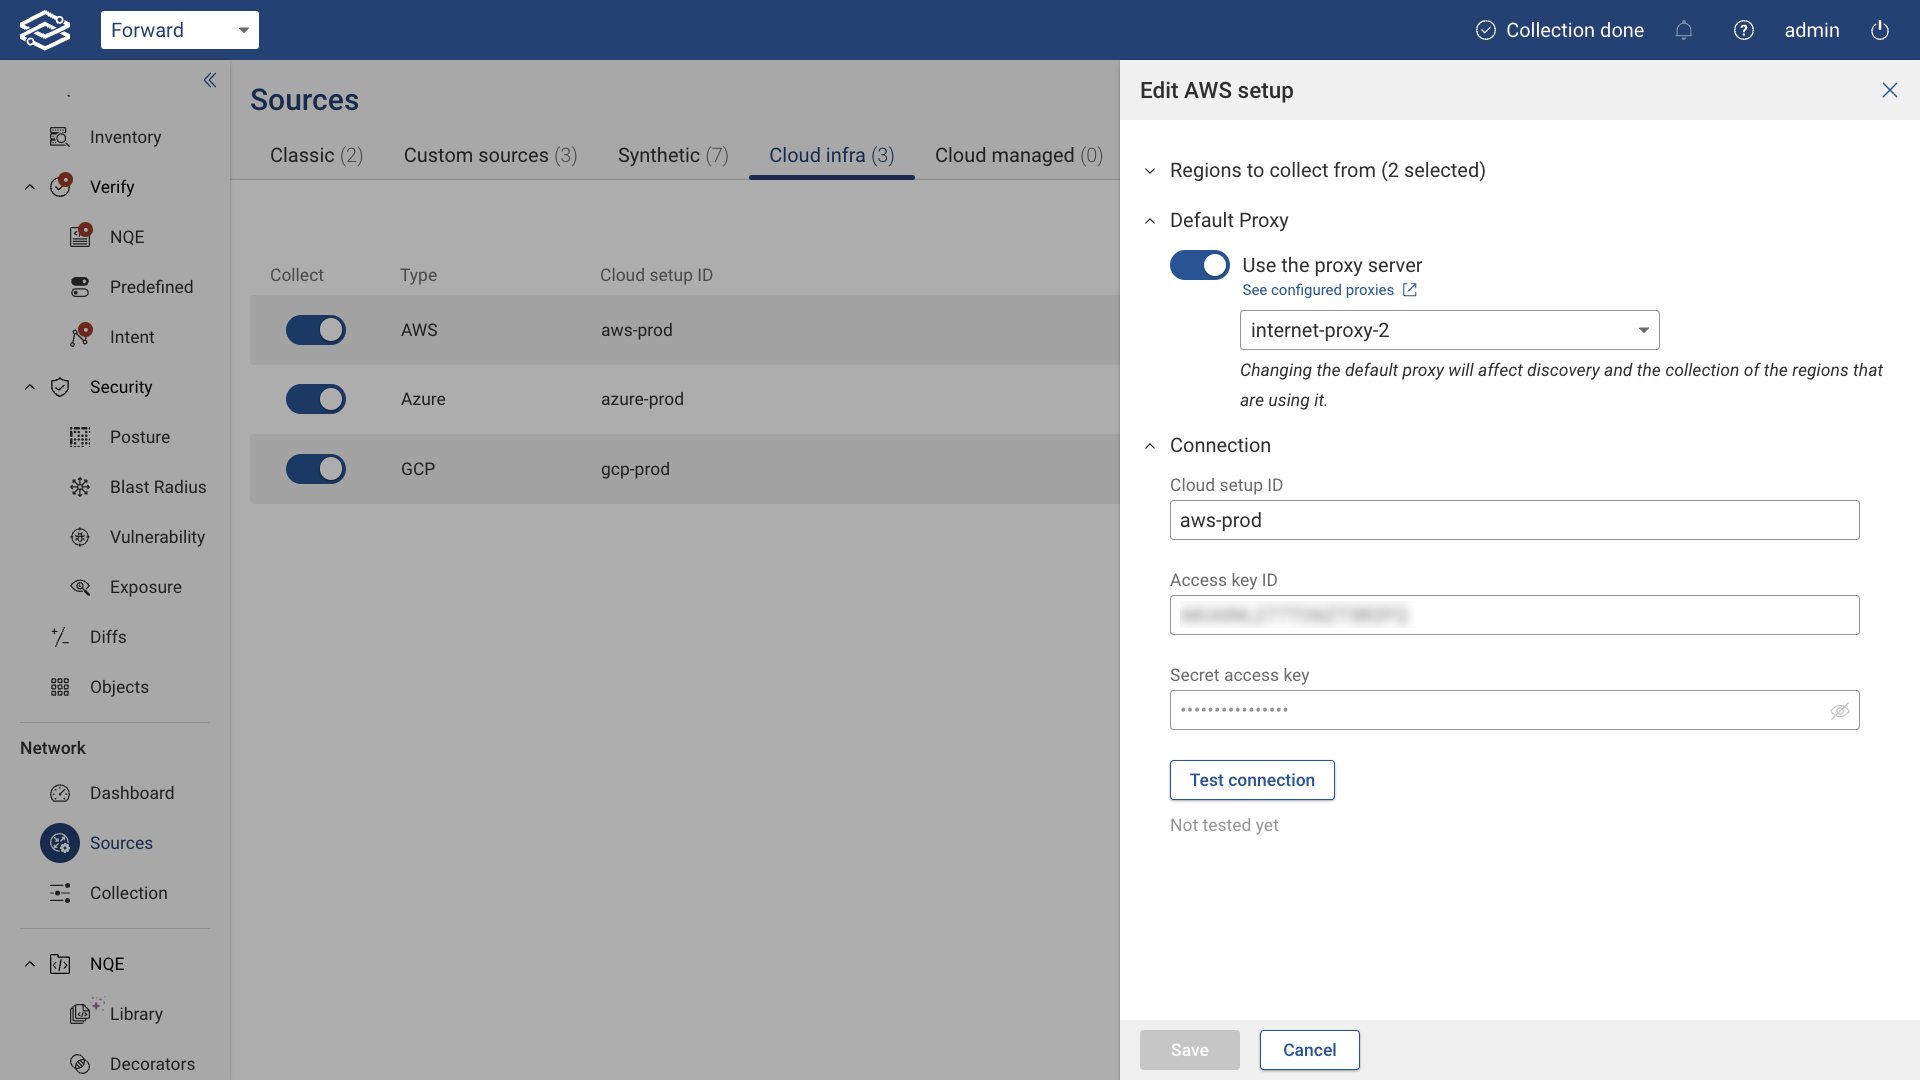
If you need to make any changes to the setup, click the edit icon on the right side of the setup. For instance, to change the regions to collect from, expand the Regions section, select a different list of regions, test the regions again by clicking Test connection, and finally, click Save to make the changes permanent.
Exclude Setup from Collection
To exclude an AWS setup from collection, simply click the toggle button on the left side of the setup.
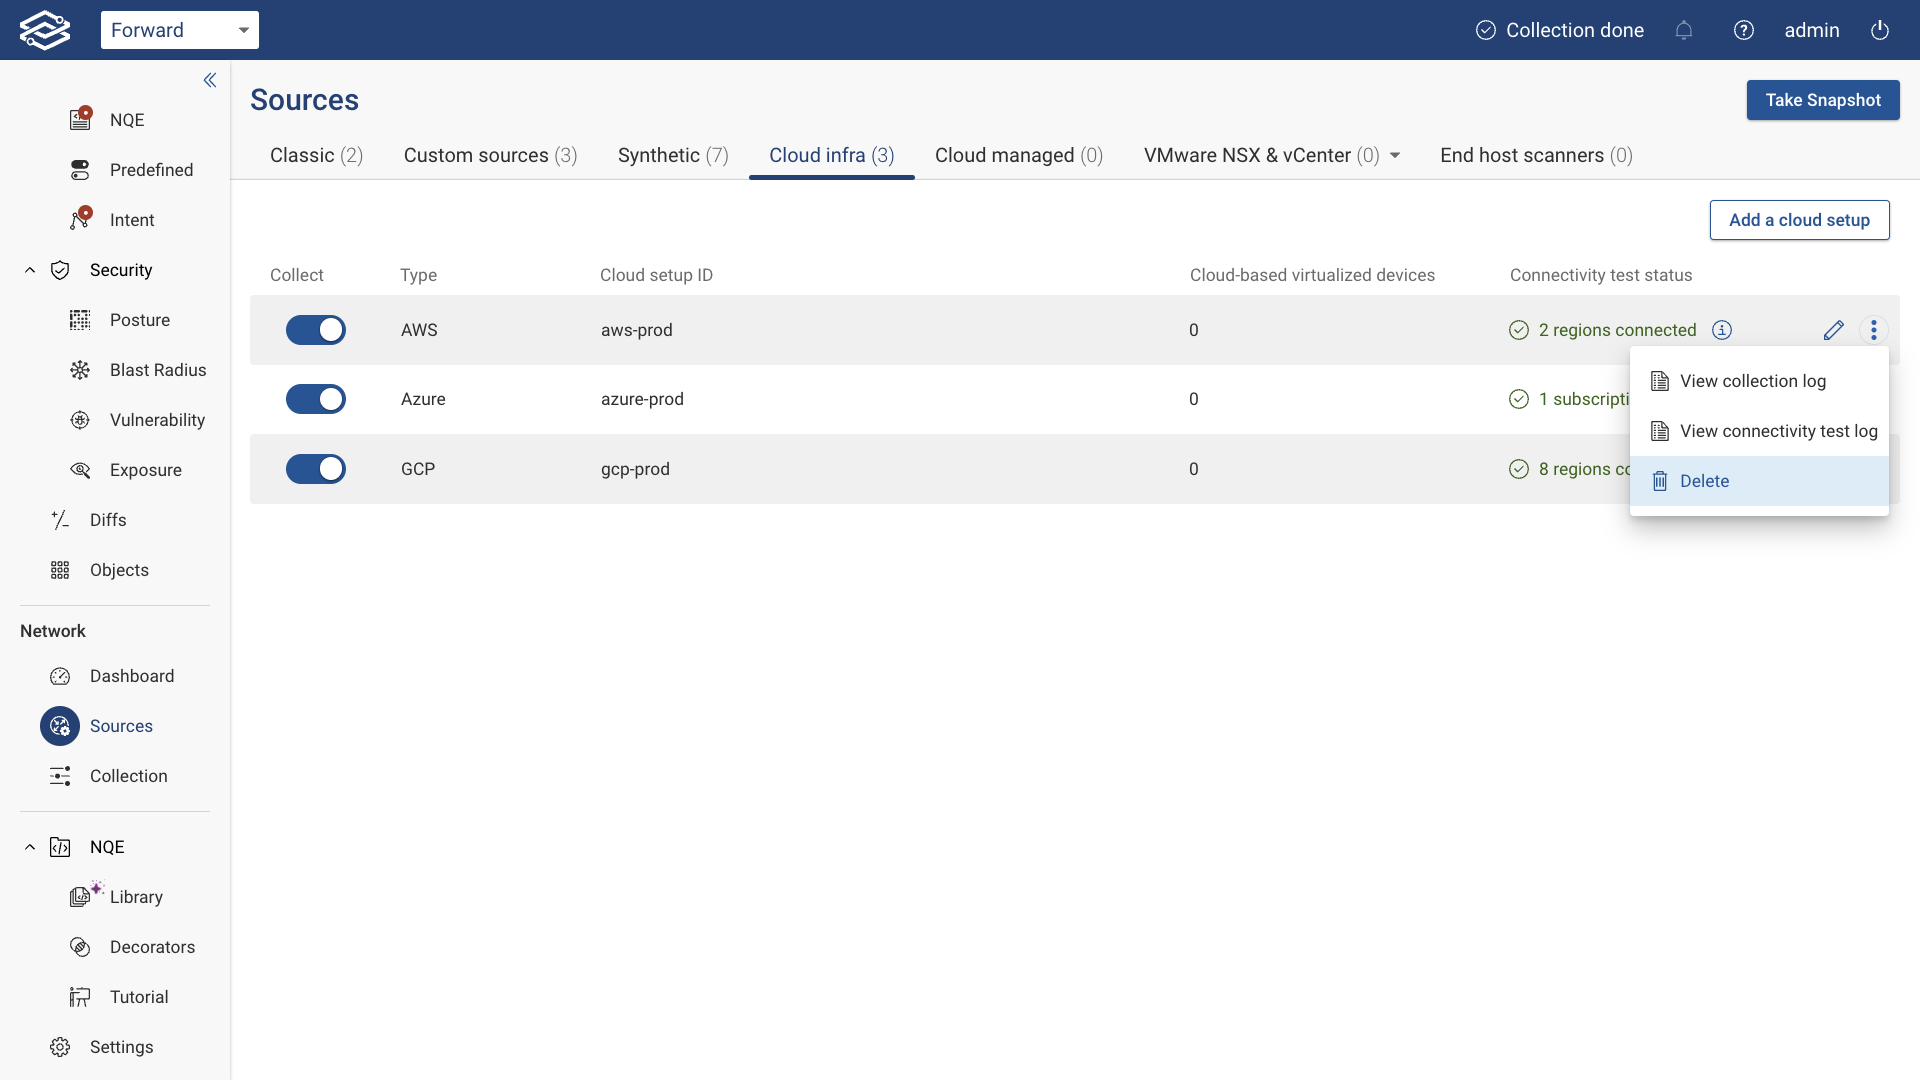
Delete Setup
To delete an AWS setup, click the kebab icon on the right side of the setup, click Delete, and confirm the setup deletion: