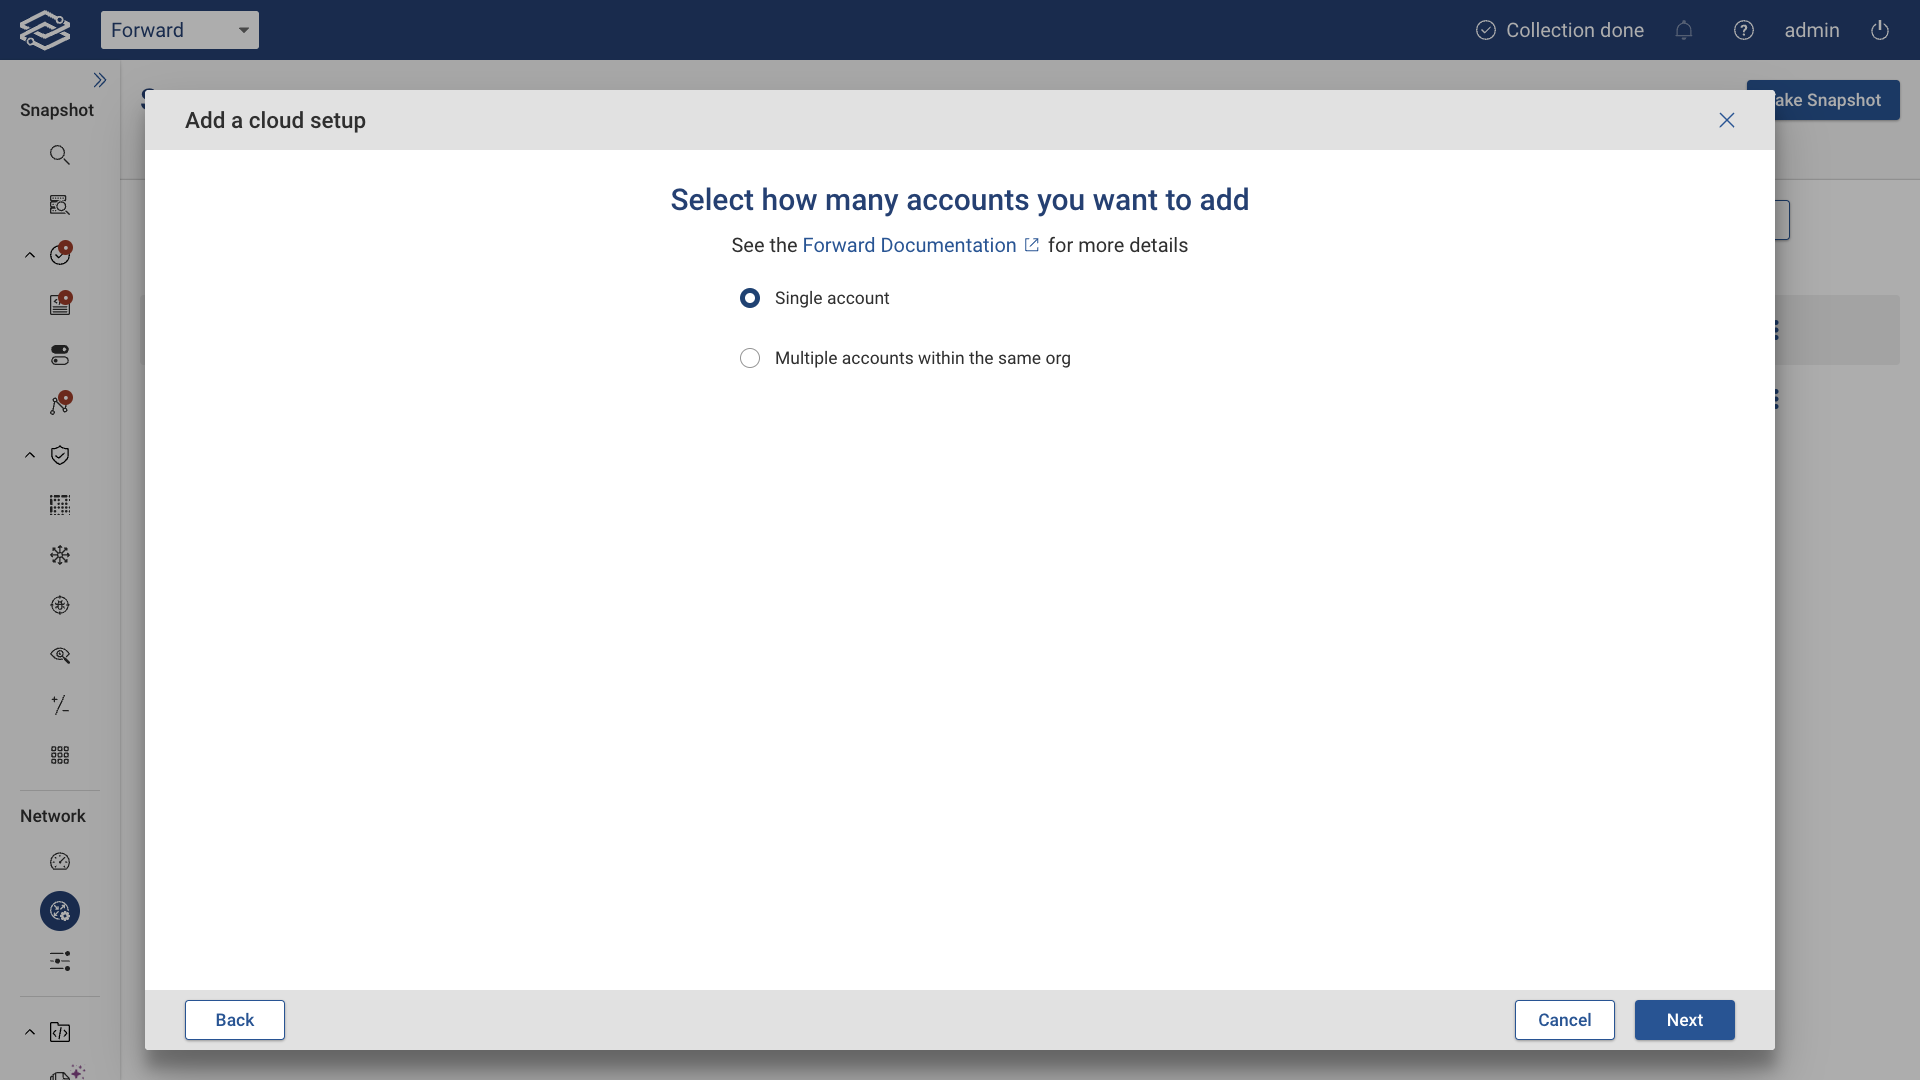
Single Account Collection
Select the Single Account option, then click Next.
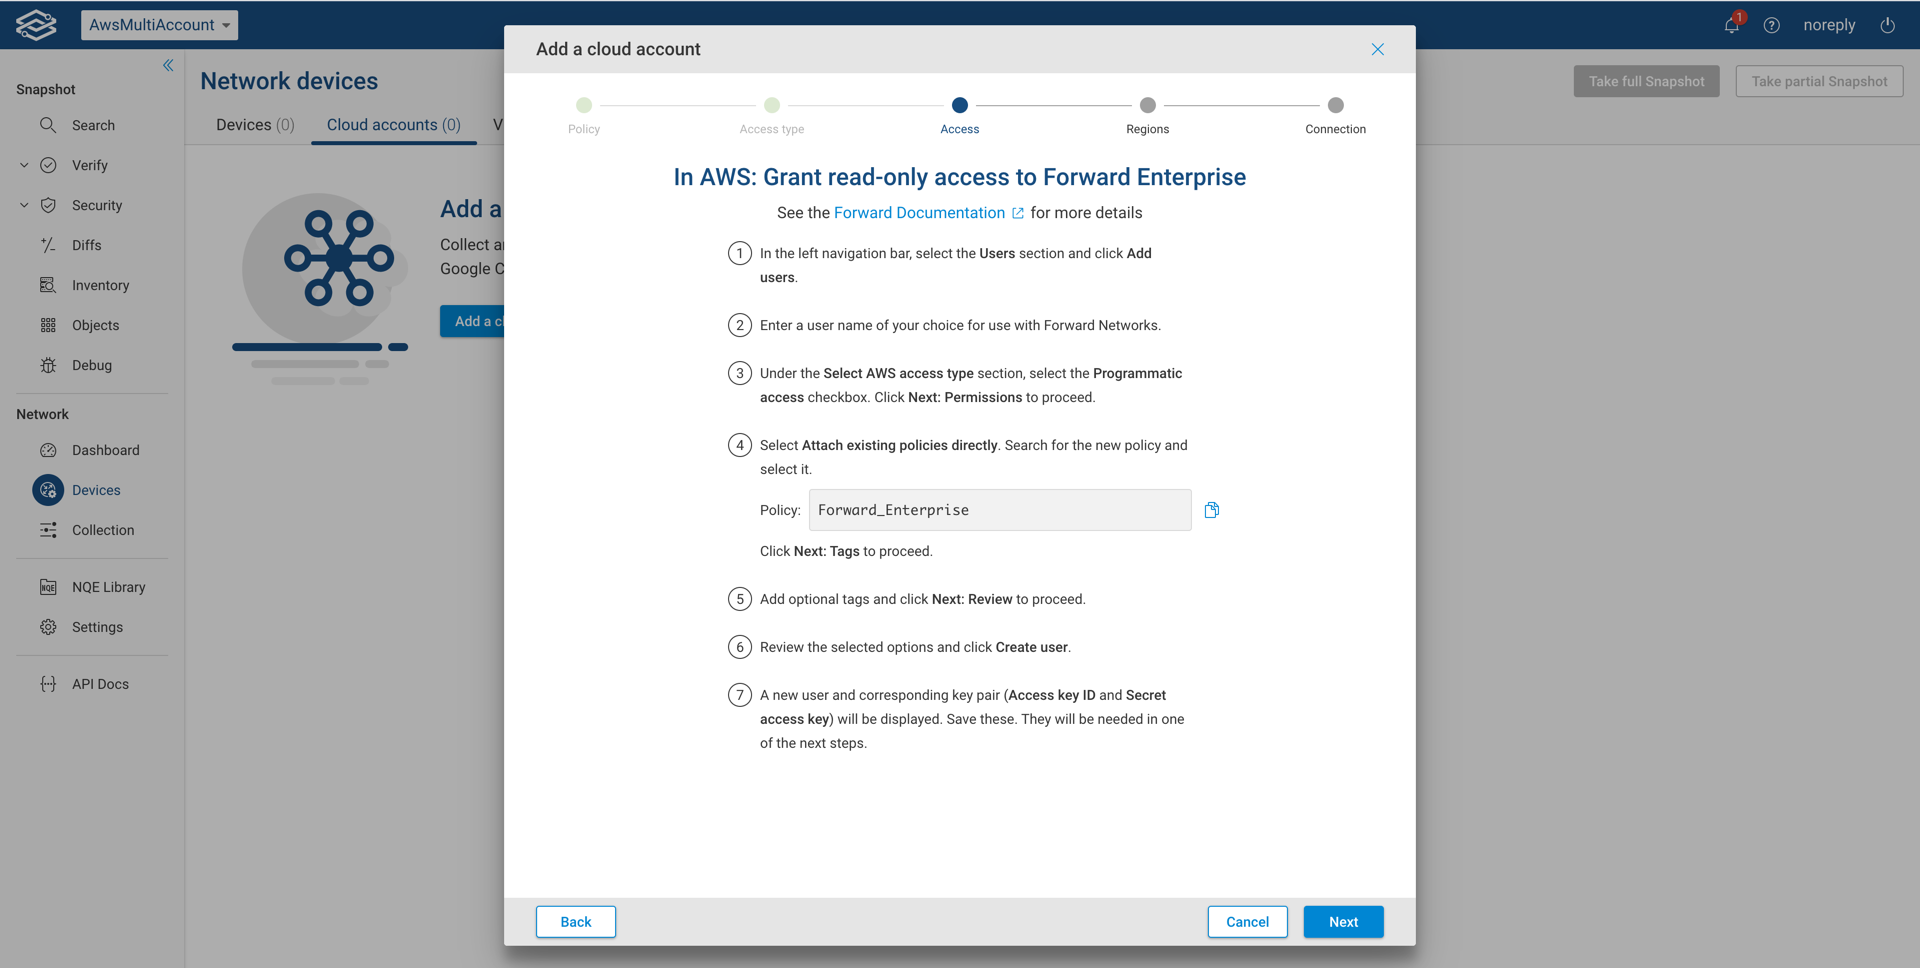
Define a Policy in AWS for Forward Enterprise
In this step, the wizard will guide you through creating an AWS policy named Forward_Enterprise.
- Sign in to your AWS account as an IAM user.
- Follow the wizard’s instructions and navigate to the Policies section.
- Use the following JSON policy document without modifications to create the AWS policy:
{
  "Version": "2012-10-17",
  "Statement": [
    {
      "Effect": "Allow",
      "Action": [
        "directconnect:Describe*",
        "ec2:Describe*",
        "ec2:Get*",
        "ec2:Search*",
        "elasticloadbalancing:Describe*",
        "globalaccelerator:List*",
        "network-firewall:Describe*",
        "network-firewall:List*",
        "organizations:Describe*",
        "workspaces:Describe*"
      ],
      "Resource": "*"
    }
  ]
}
You can also click the copy icon in the wizard to quickly copy the JSON.
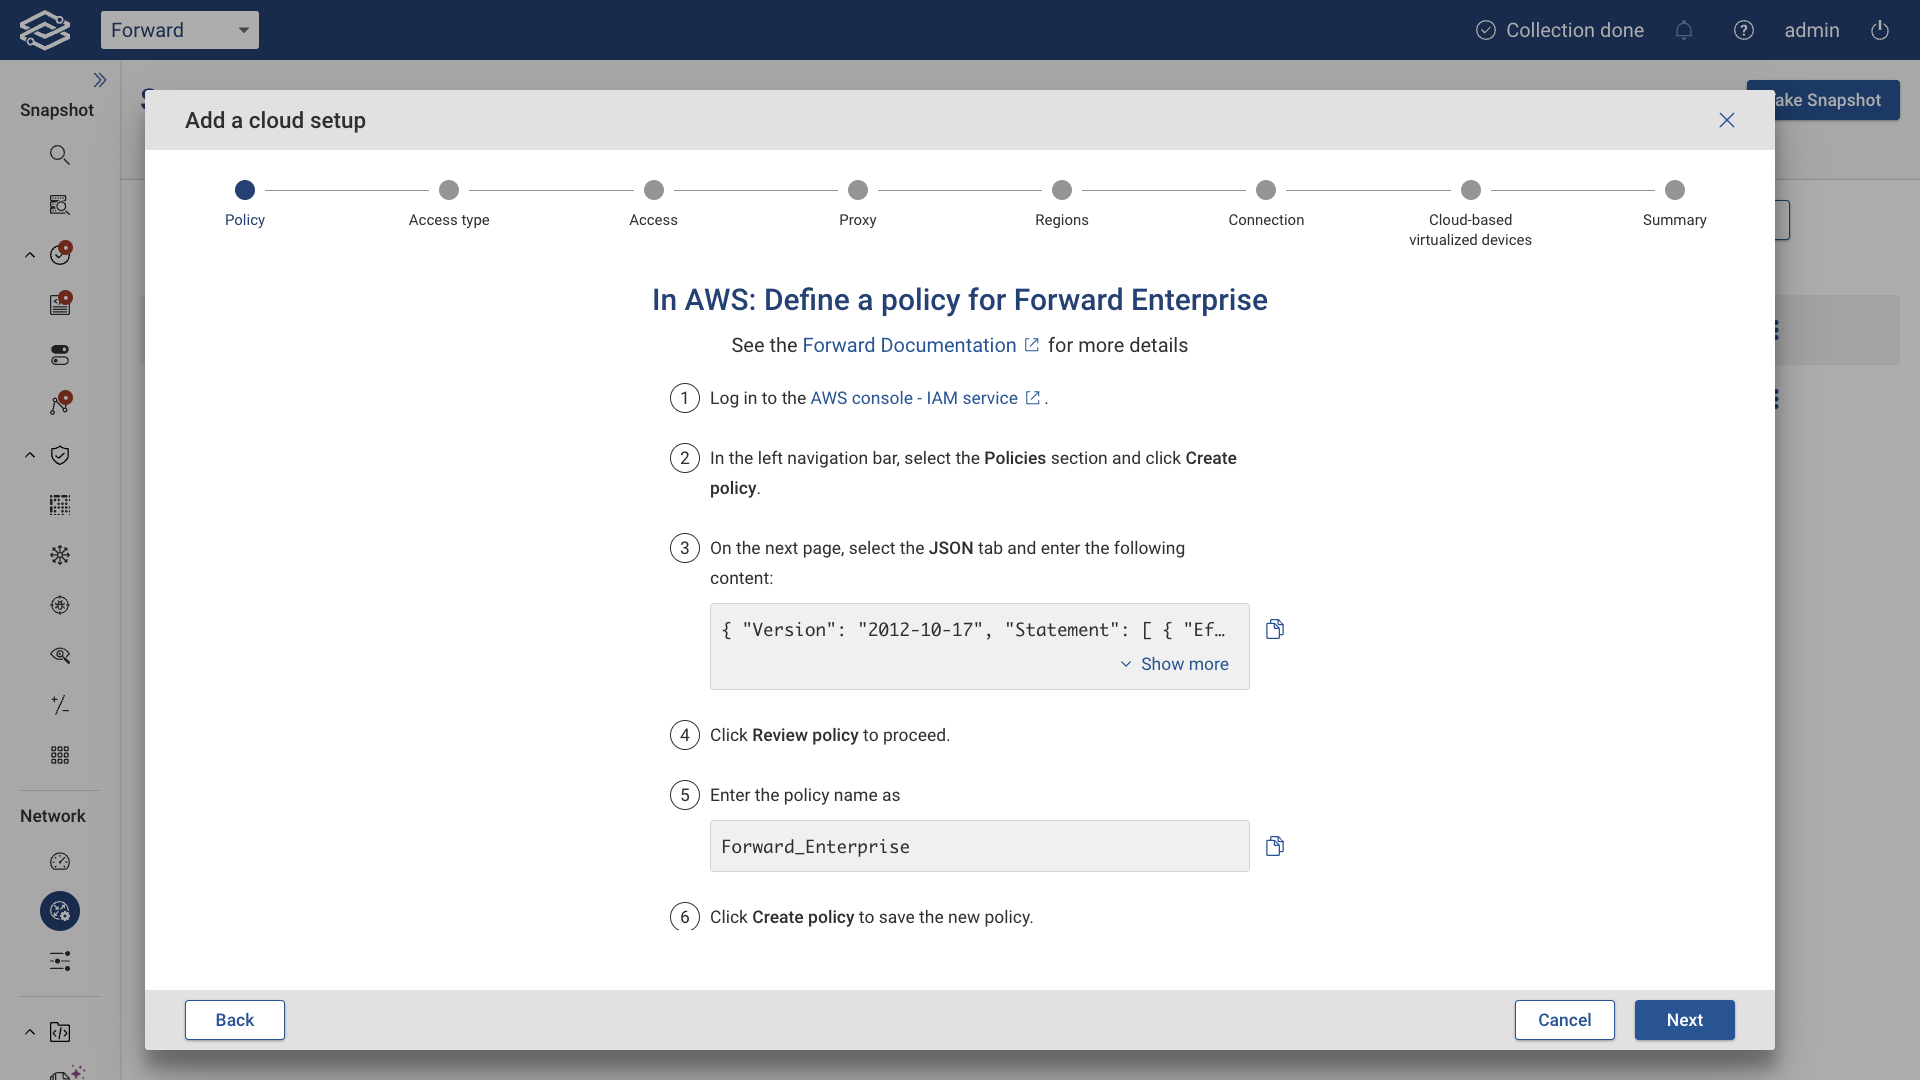
Click Next to continue.
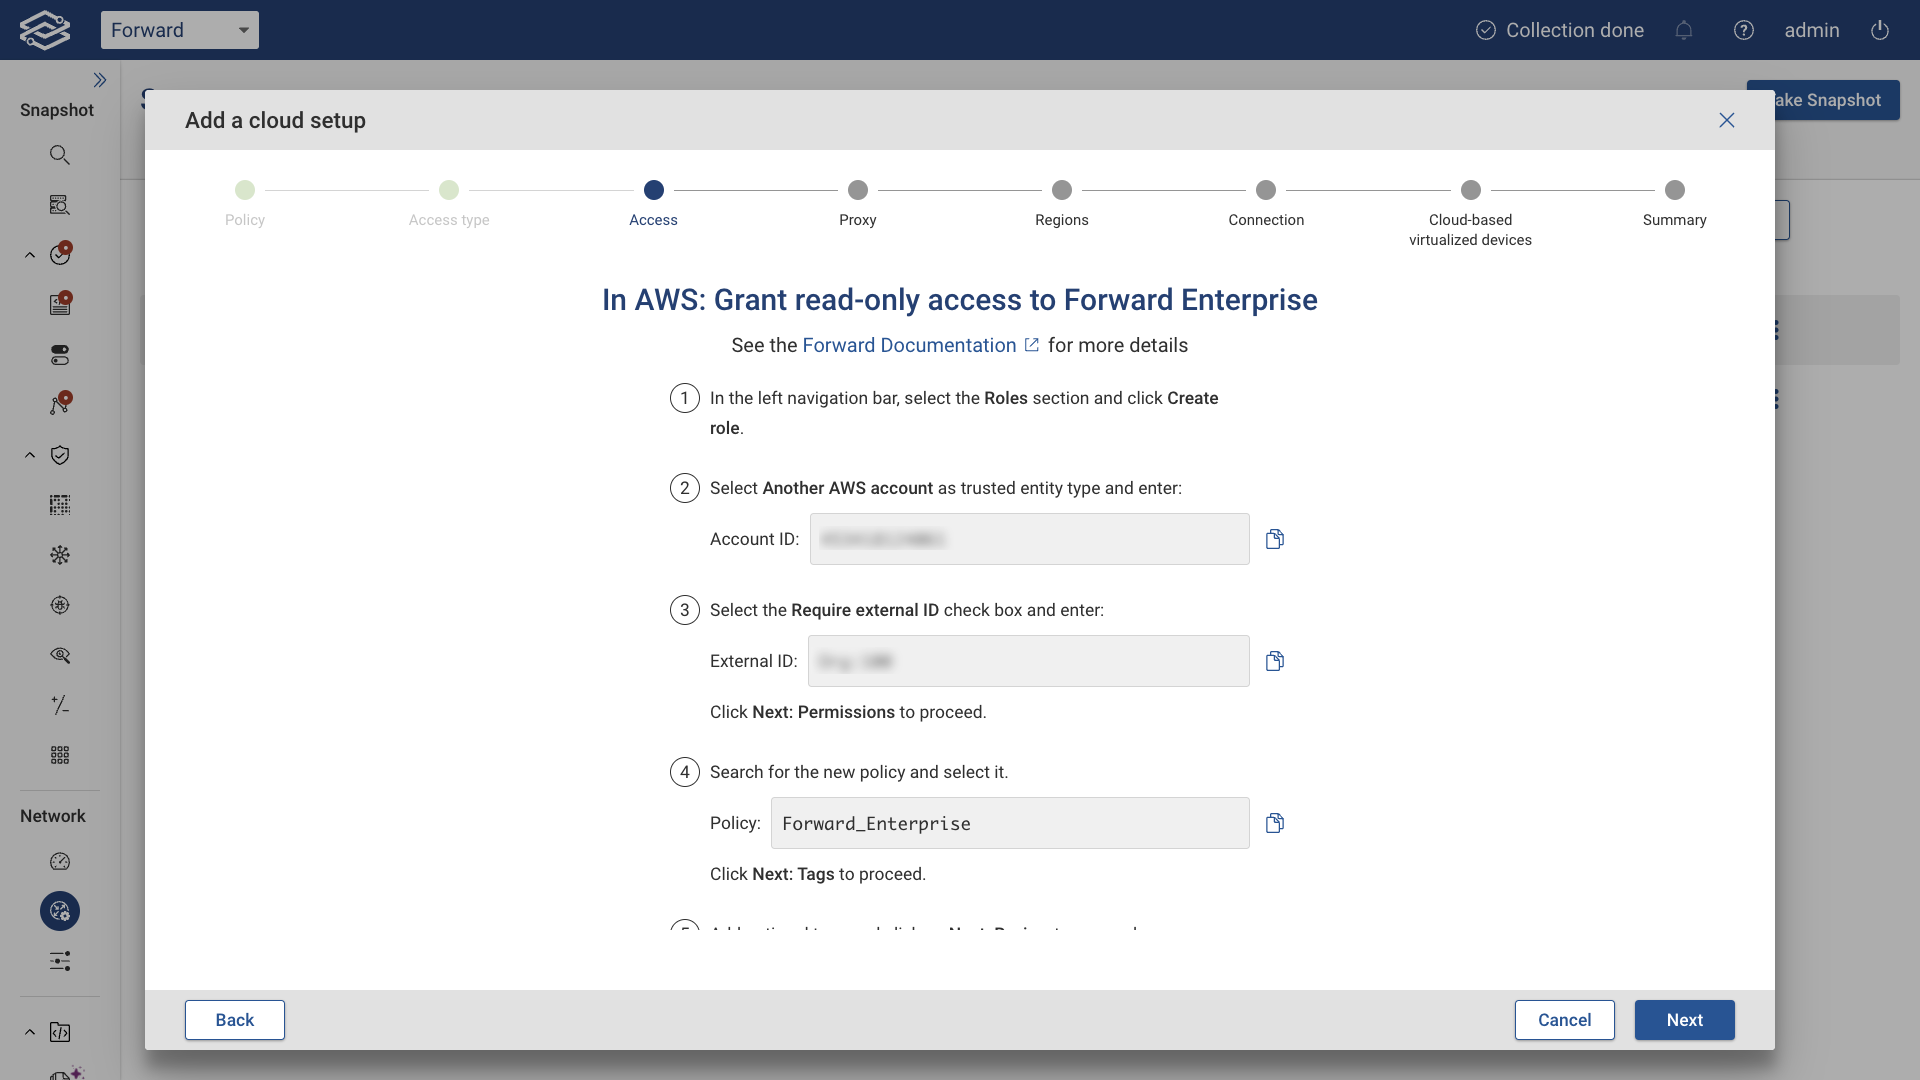
Grant Read-Only Access to Forward Enterprise in AWS
Attach the Forward_Enterprise policy to an AWS IAM user by choosing one of the following access types as shown below:

Option 1: Forward's IAM User (AWS Assume Role)
With AWS Assume Role, AWS returns a set of temporary security credentials that can be used to access AWS resources that a user might not normally have access to. These temporary credentials consist of an account ID and external ID.
Typically, Assume Role is used for cross-account access.
The AWS Assume Role option is provided for Forward SaaS accounts only.
Option 2: Your Organization's IAM User (Direct Access)
With Direct Access, you create a dedicated AWS user for Forward Networks and attach the policy created in the previous step.
(Optional) Enable a Default Proxy Server
To use a proxy, set up a proxy server and enable the Use proxy server toggle.
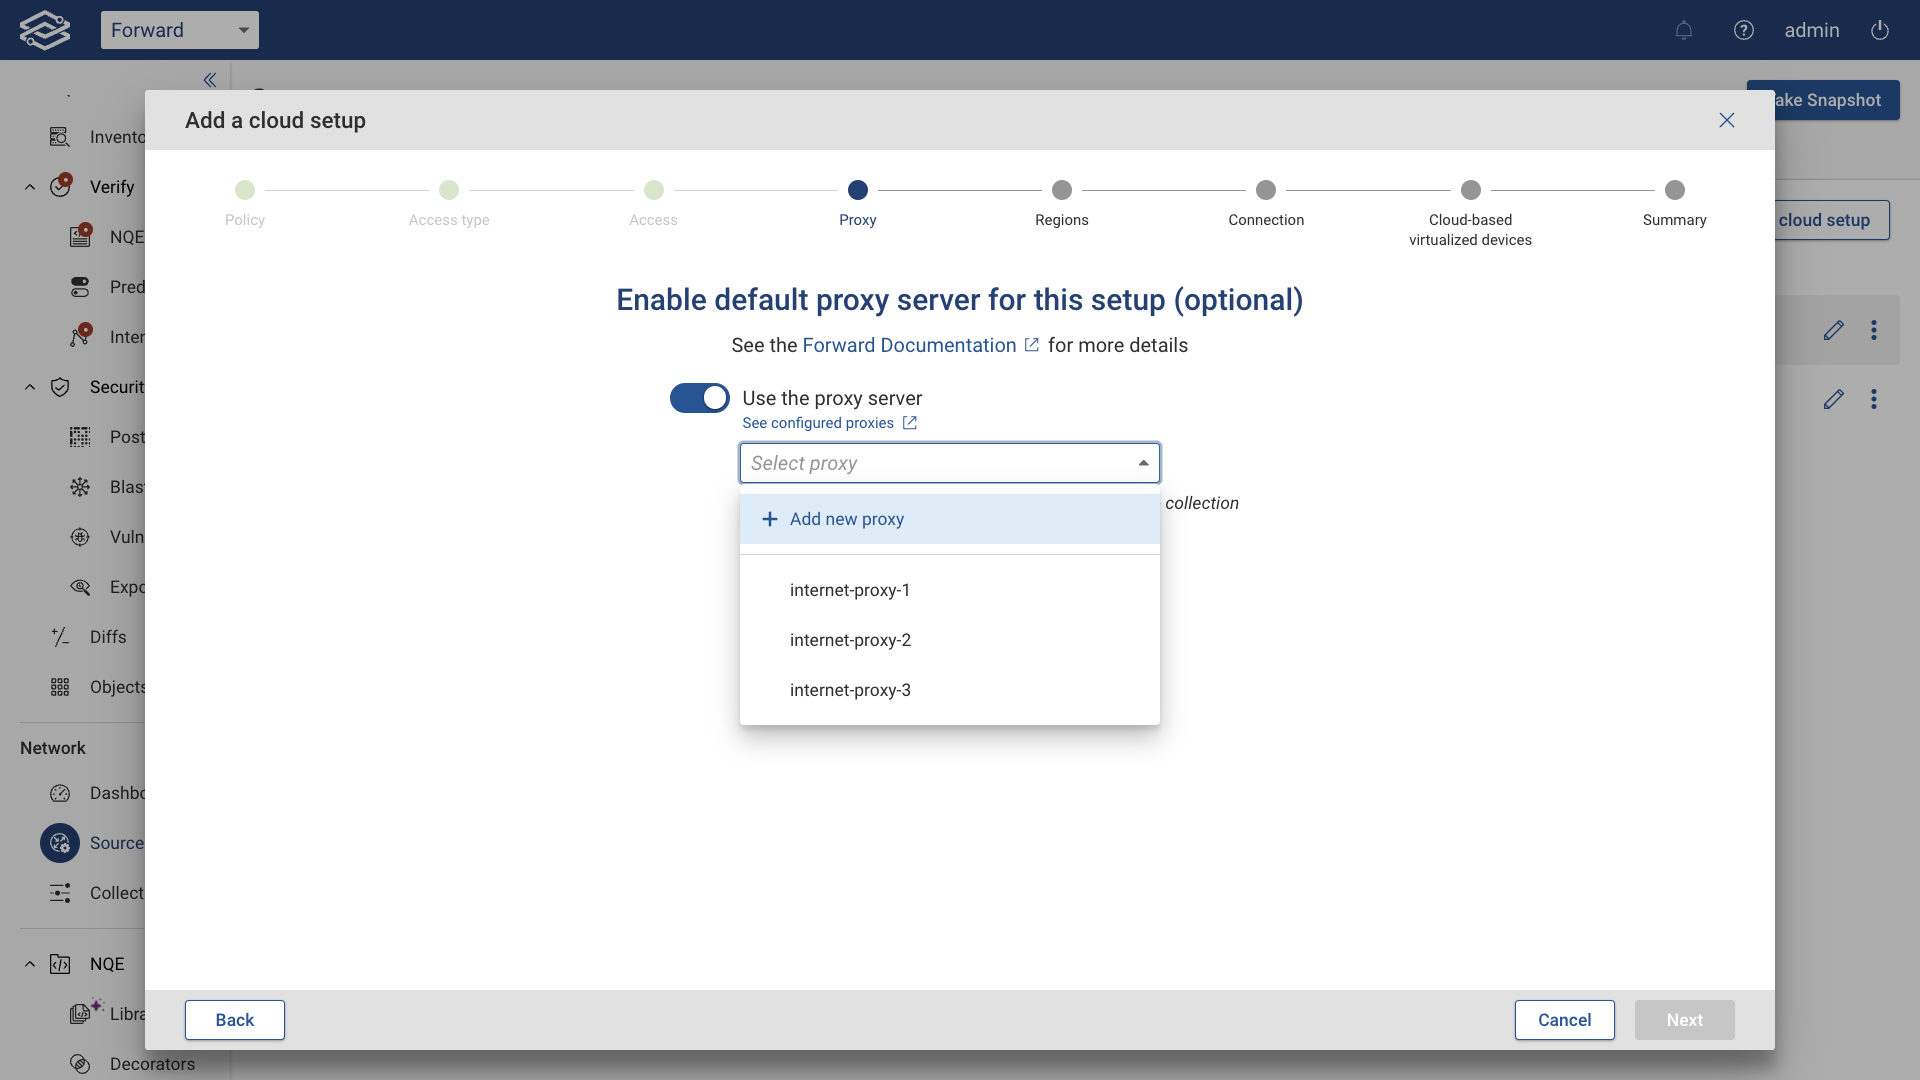
Click Next to proceed.
Select AWS Regions
Select the AWS regions you want to collect from. If using a proxy server, you can assign a different internet proxy to each region.
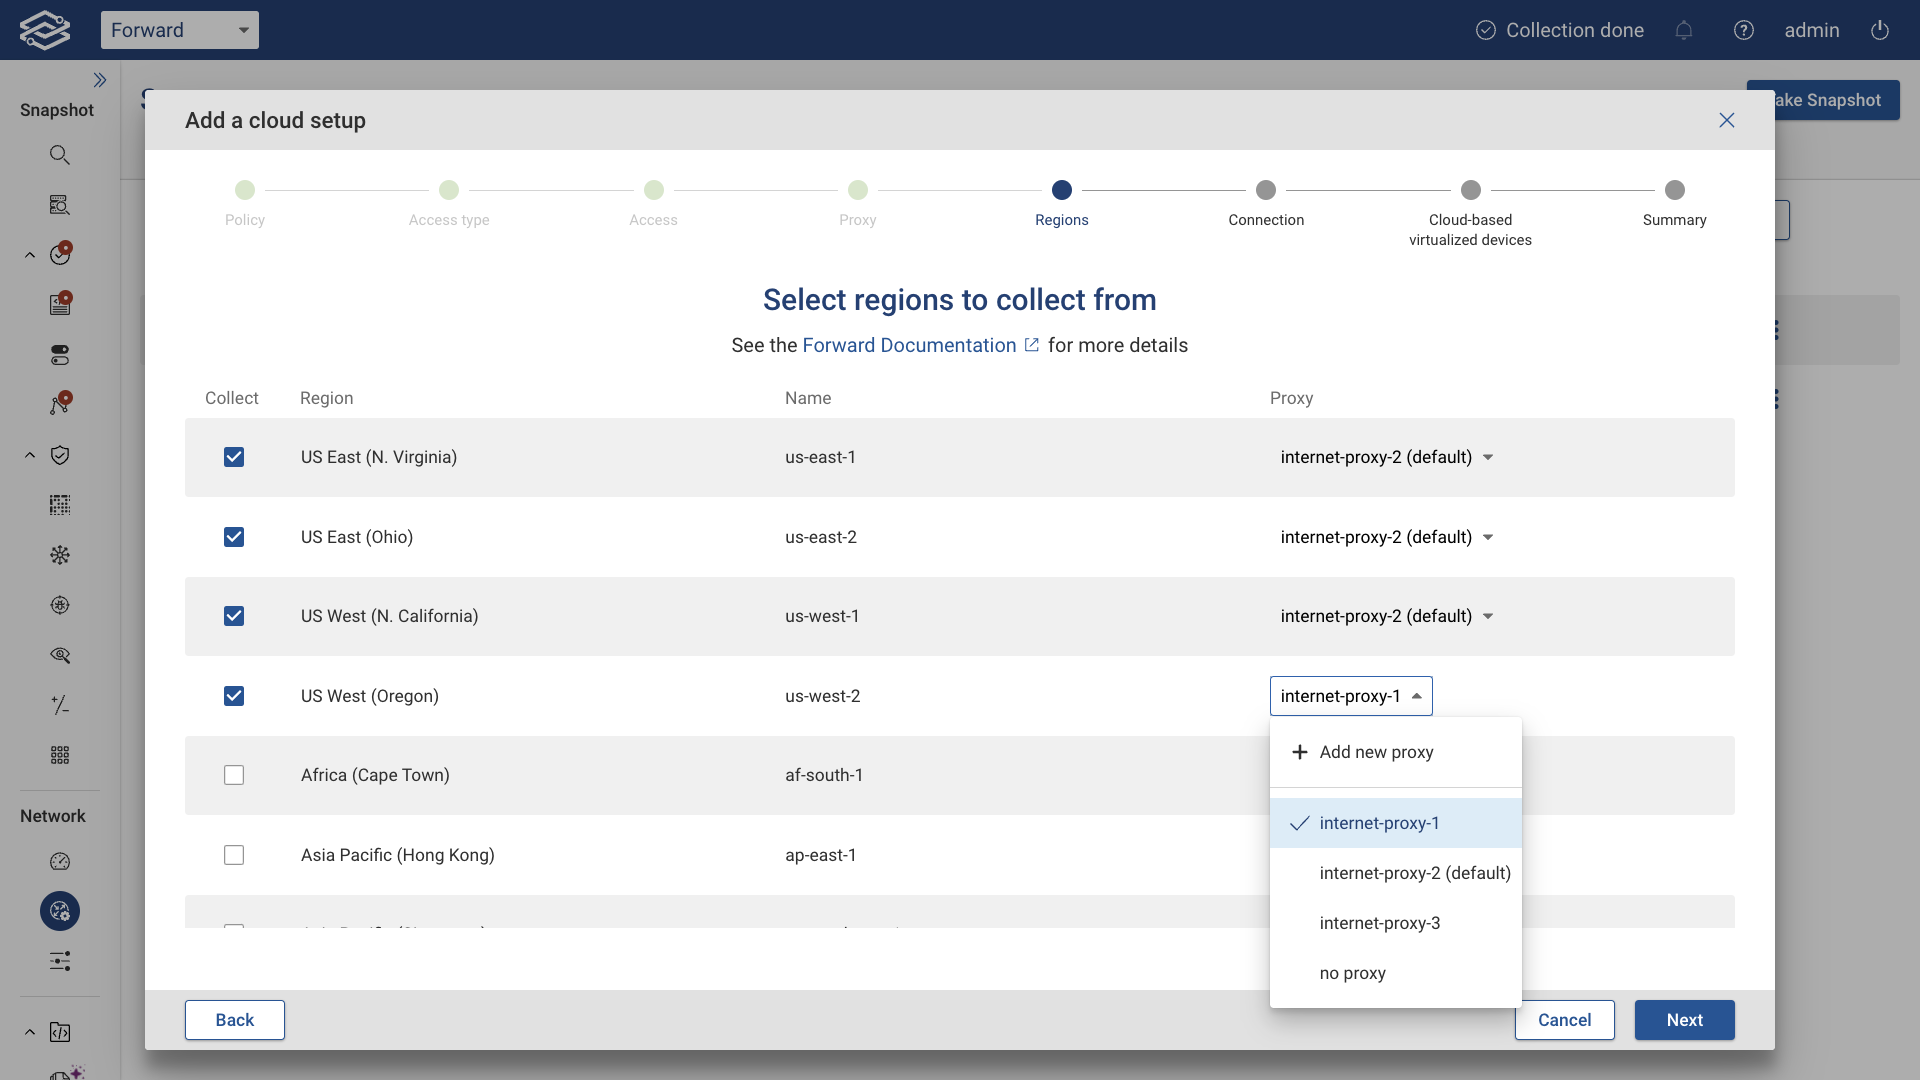
Click the Next proceed.
Connect AWS with Forward Enterprise
Depending on the access method you selected earlier, complete the setup using one of the following approaches.
Option 1: Forward's IAM user (AWS Assume Role)
In the last step you need to provide a unique Account Name, the Role ARN from step 3 and optionally select the proxy server.
Provide the following:
- Account Name (a name to identify the account)
- Role ARN
- (Optional) Proxy Server
Click Test to verify connectivity. A success message will show the number of regions connected.
Click Add to complete the setup.
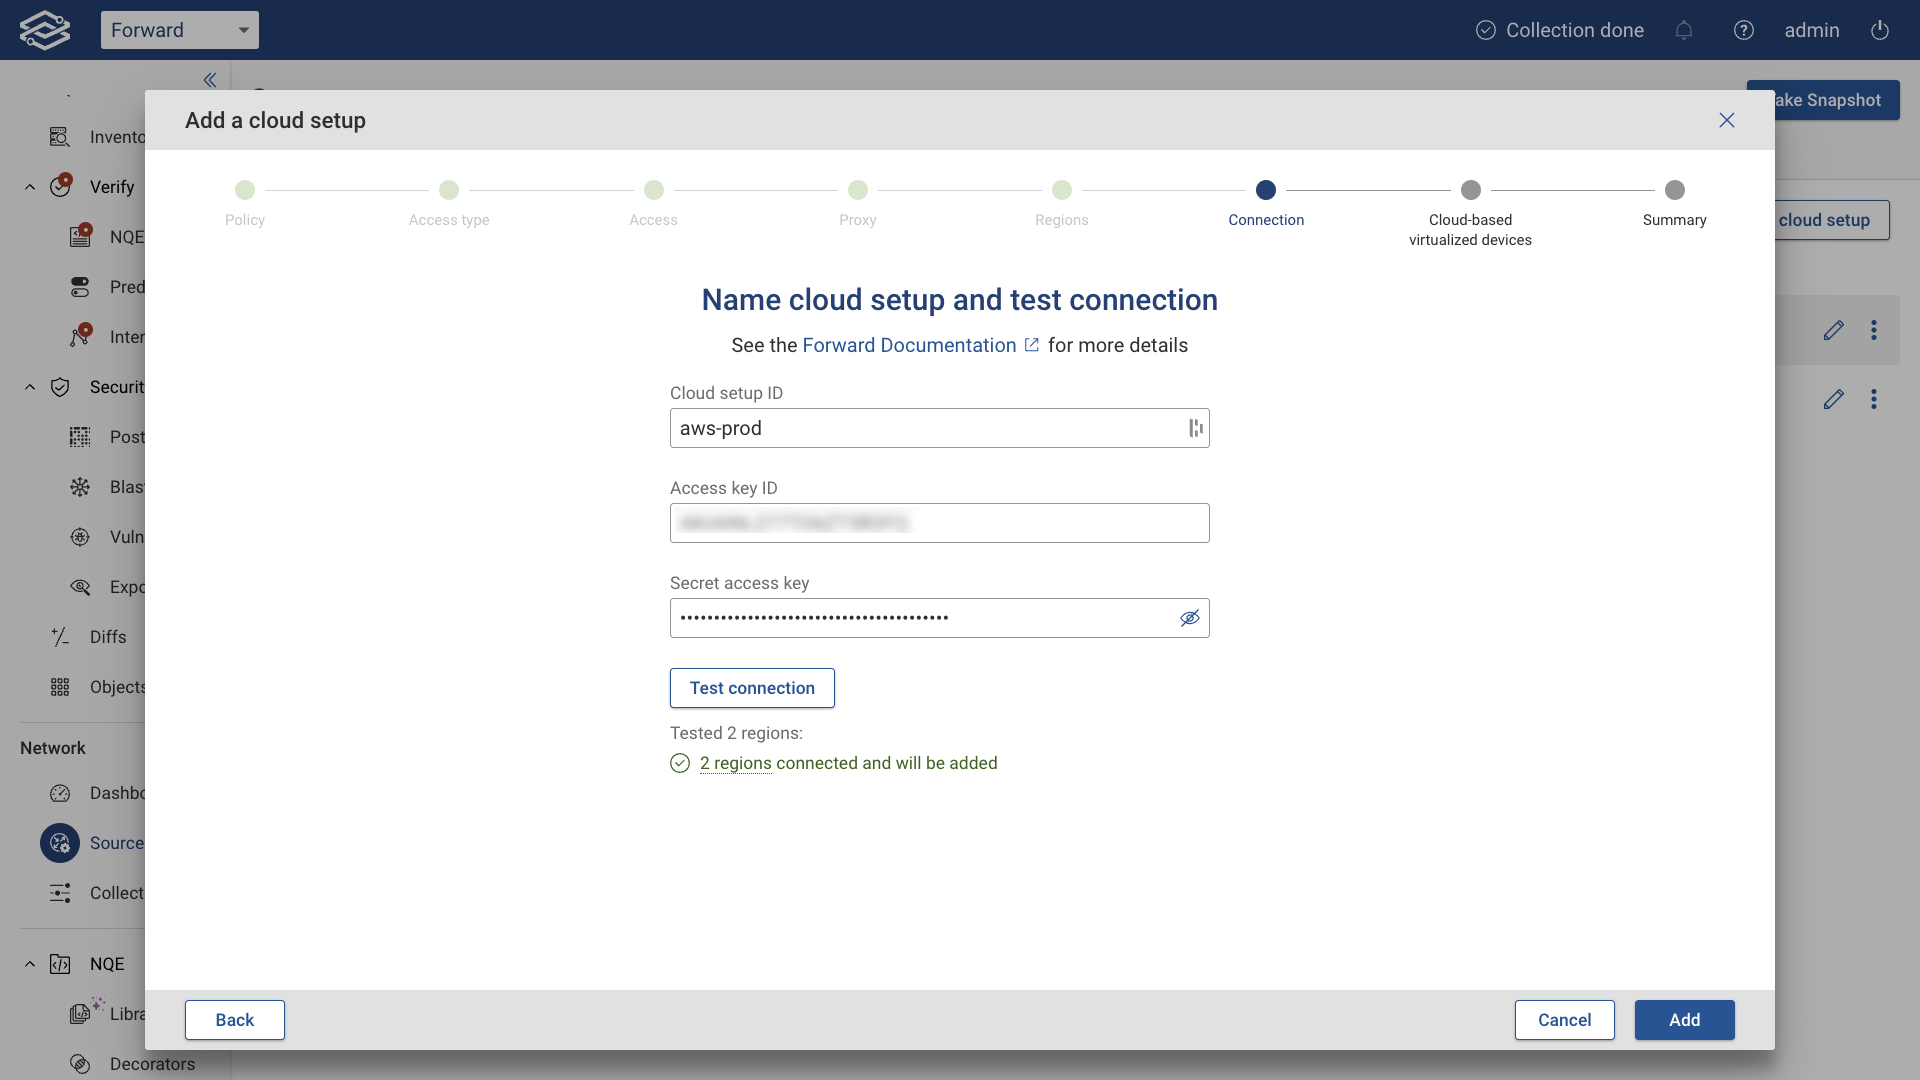
Option 2: Your Organization's IAM user (Direct Access)
Provide the following:
- Account Name
- Access Key ID
- Secret Access Key (from the IAM user created in step 1)
- (Optional) Proxy Server
Click Test to verify connectivity. A success message will show the number of regions connected.
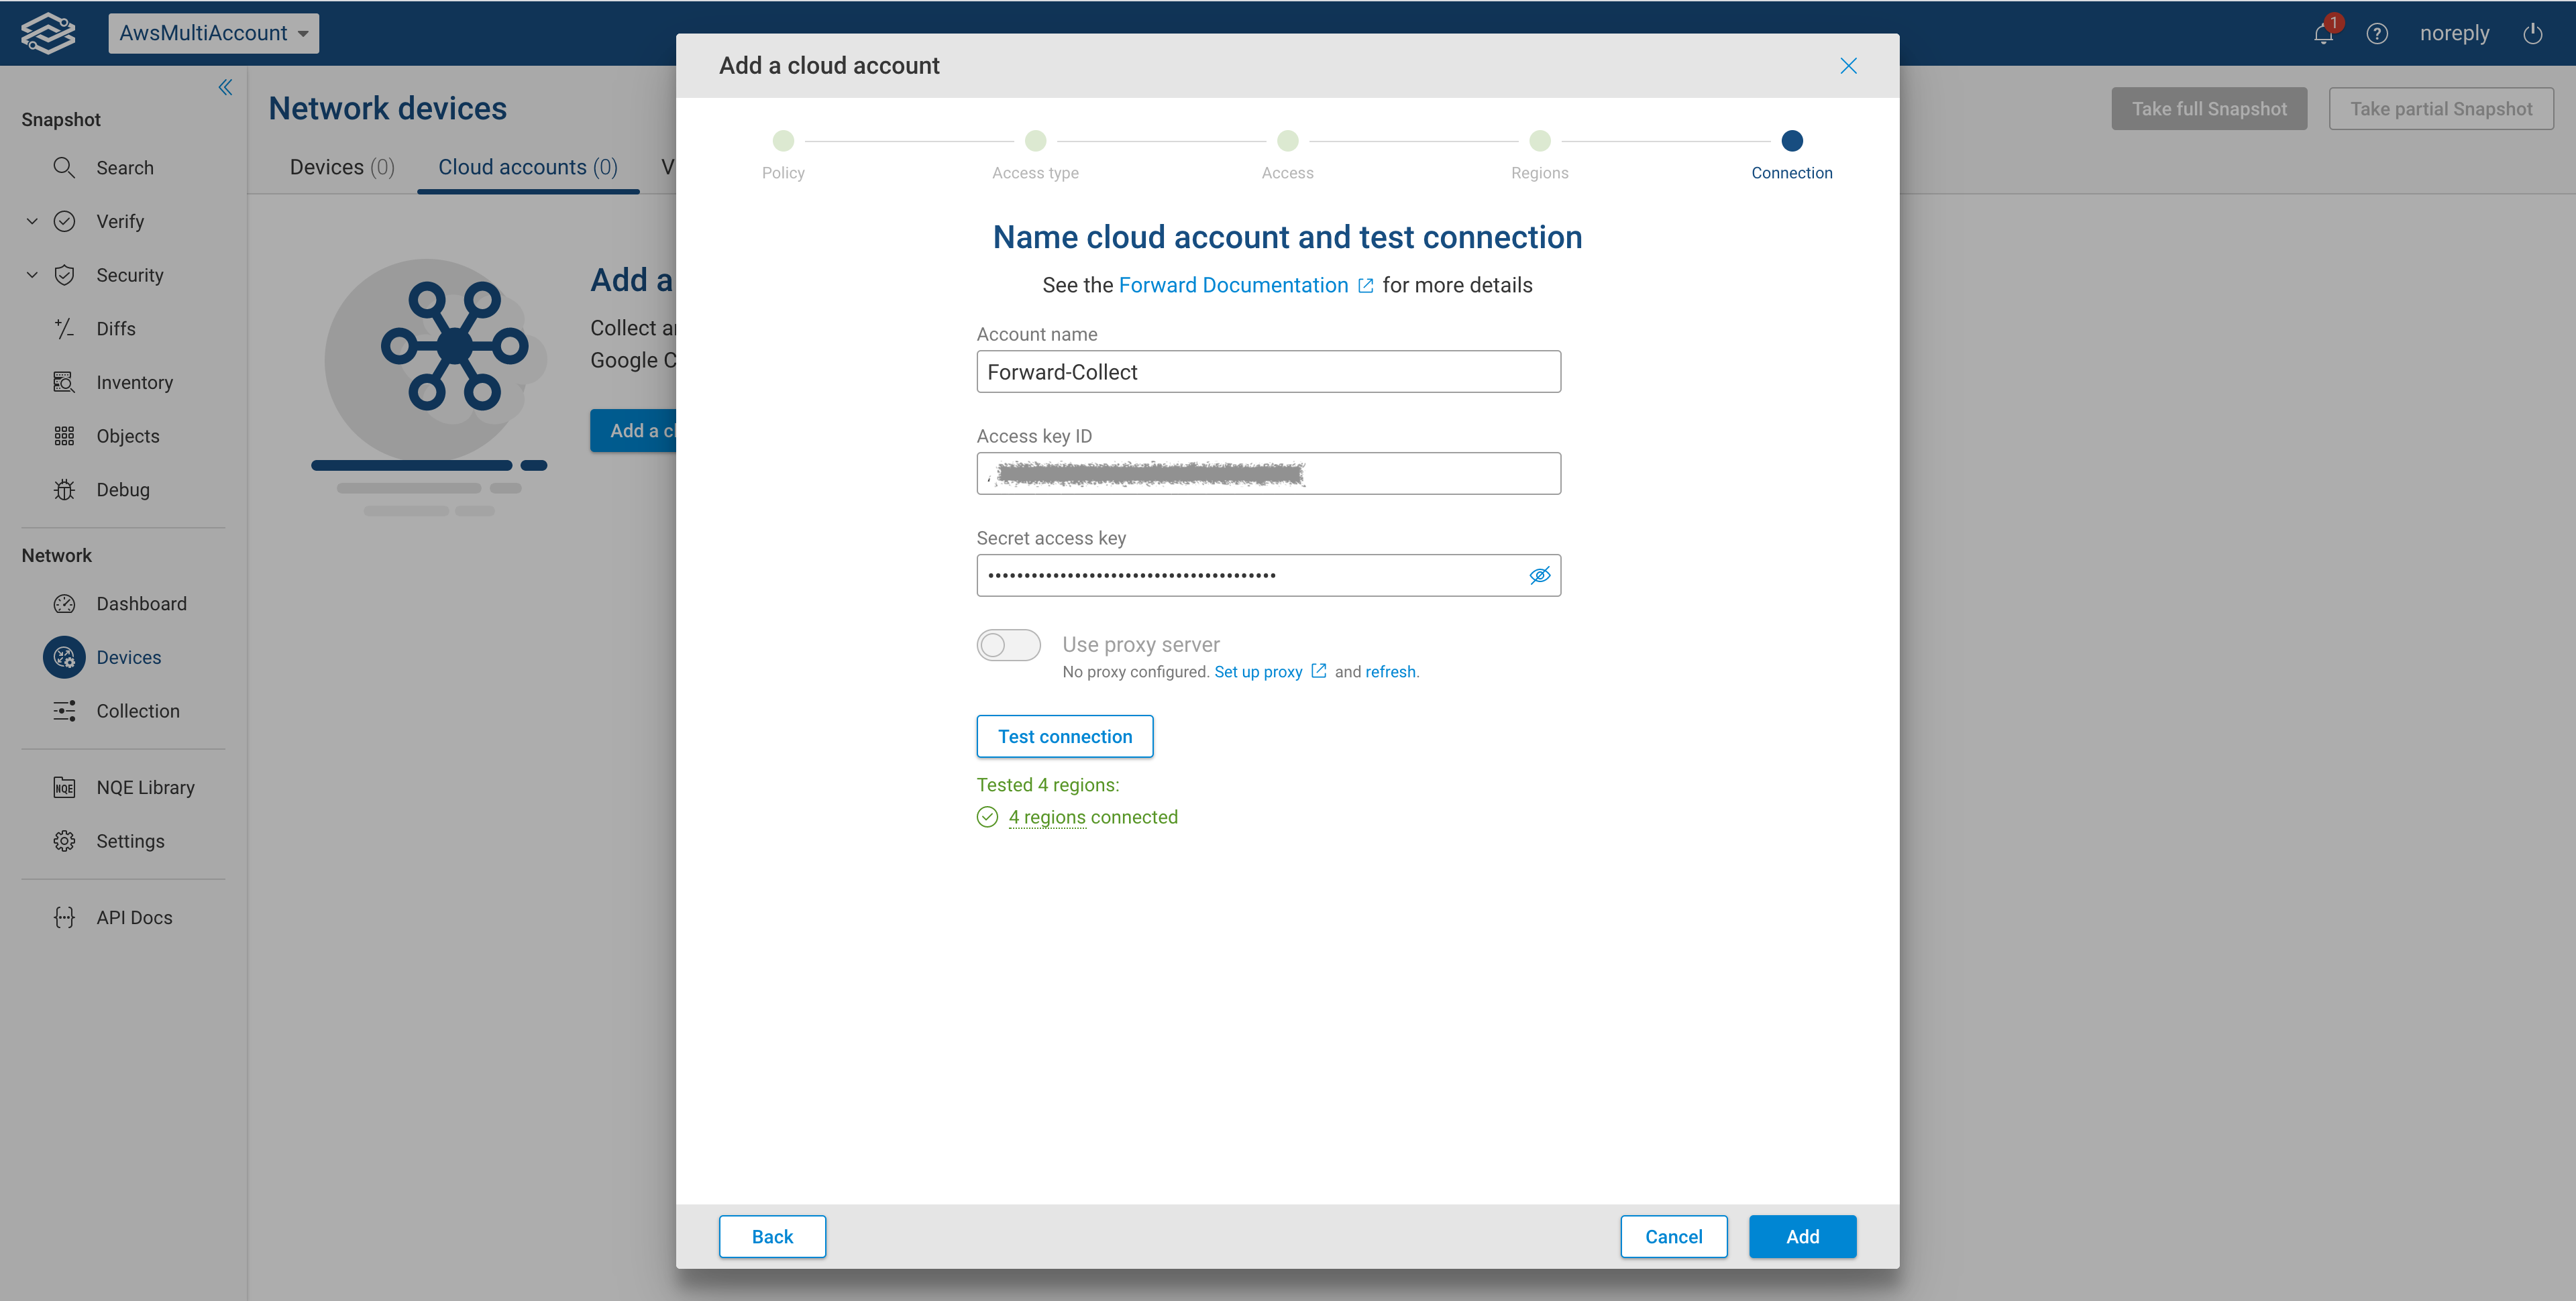
Click Add to complete the setup.
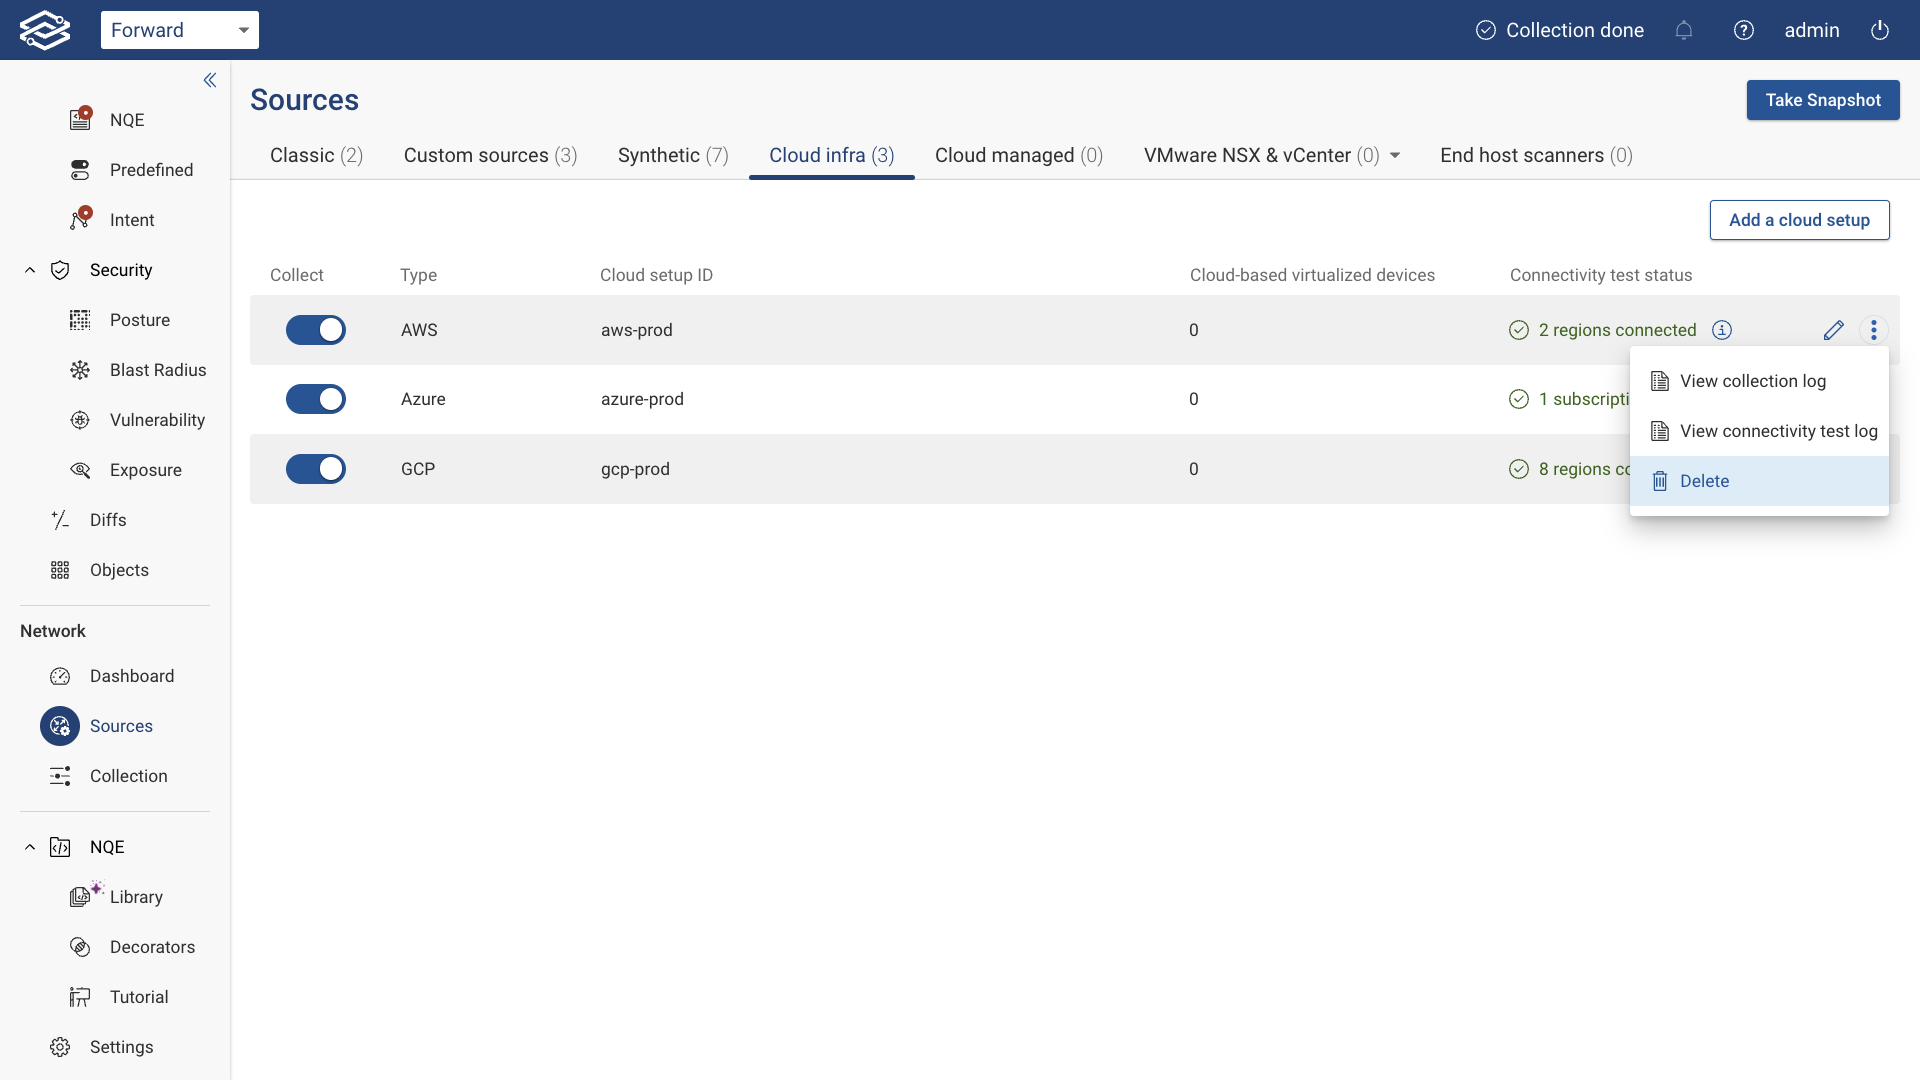
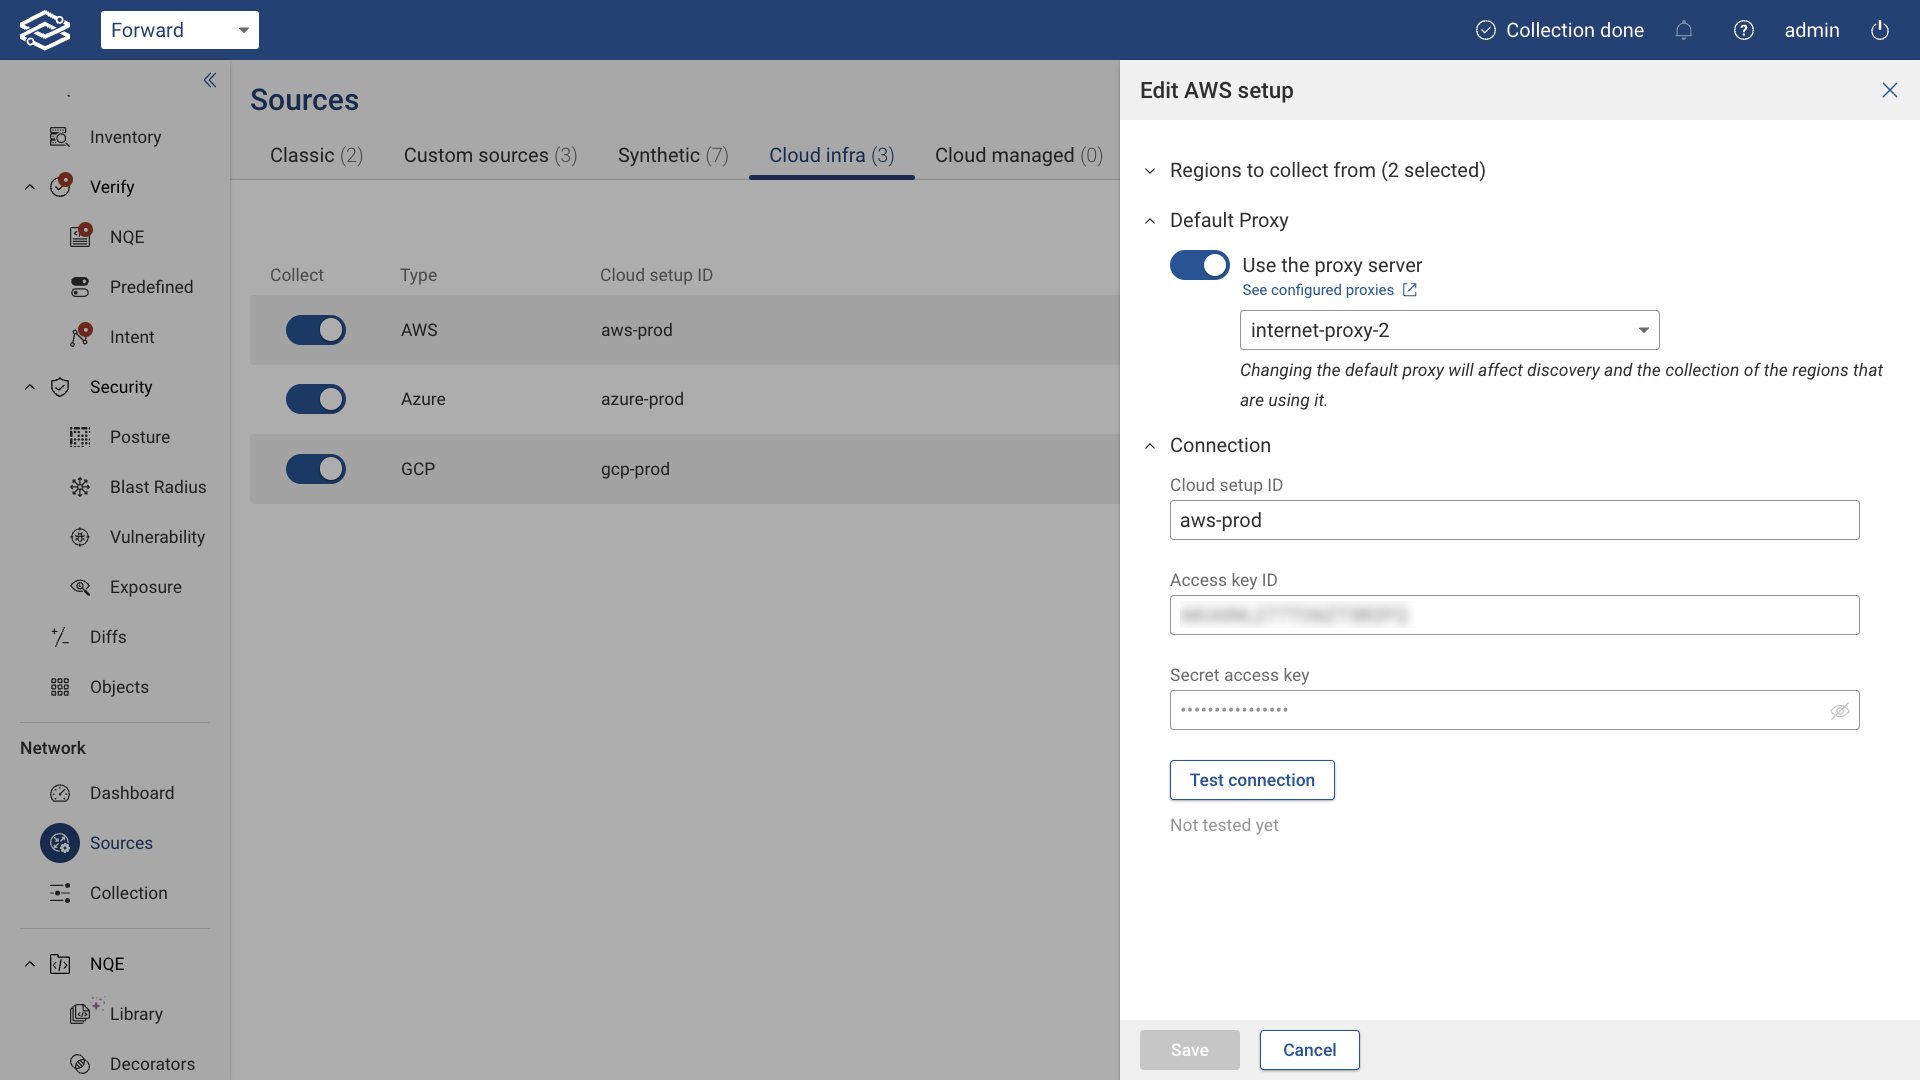
Managing Your AWS Setup
Setup Edit
To update an existing setup:
- Click the Edit icon.
- Expand the Regions section to update region selections.
- Click Test connection to revalidate the setup.
- Click Save to apply changes.
Exclude Setup from Collection
To exclude an AWS setup from active collection, toggle the switch on the left side of the setup.
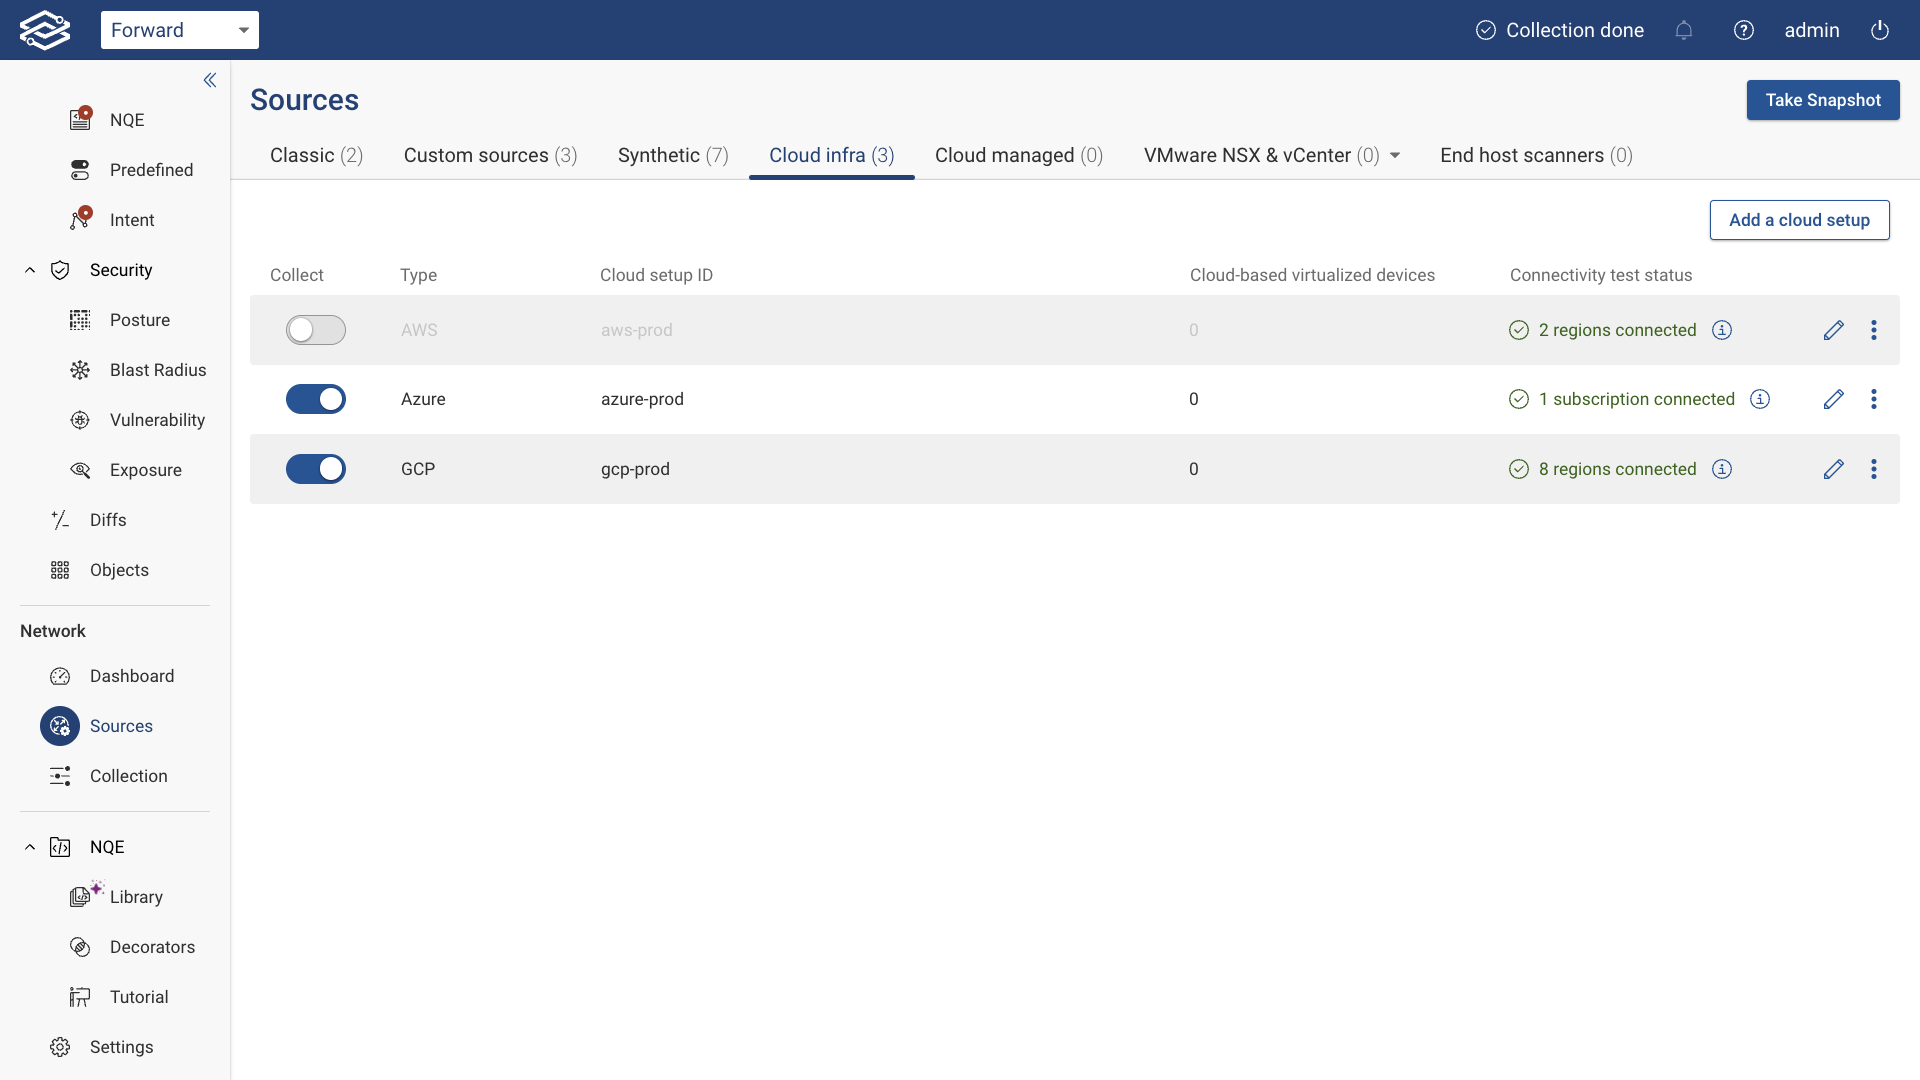
Delete Setup
To permanently delete an AWS setup:
- Click the kebab (three-dot) icon.
- Select Delete.
- Confirm the deletion.