GCP Setup
The Forward Collector can discover and collect Google Cloud Platform (GCP) components like Subnets, Route Tables, Firewalls, NAT rules, VPN Gateways, and VPC Peerings.
The complete list of supported GCP features is published on the Feature Matrix page.
Pre-requisite
A Forward Collector should be installed on-prem.
Setup
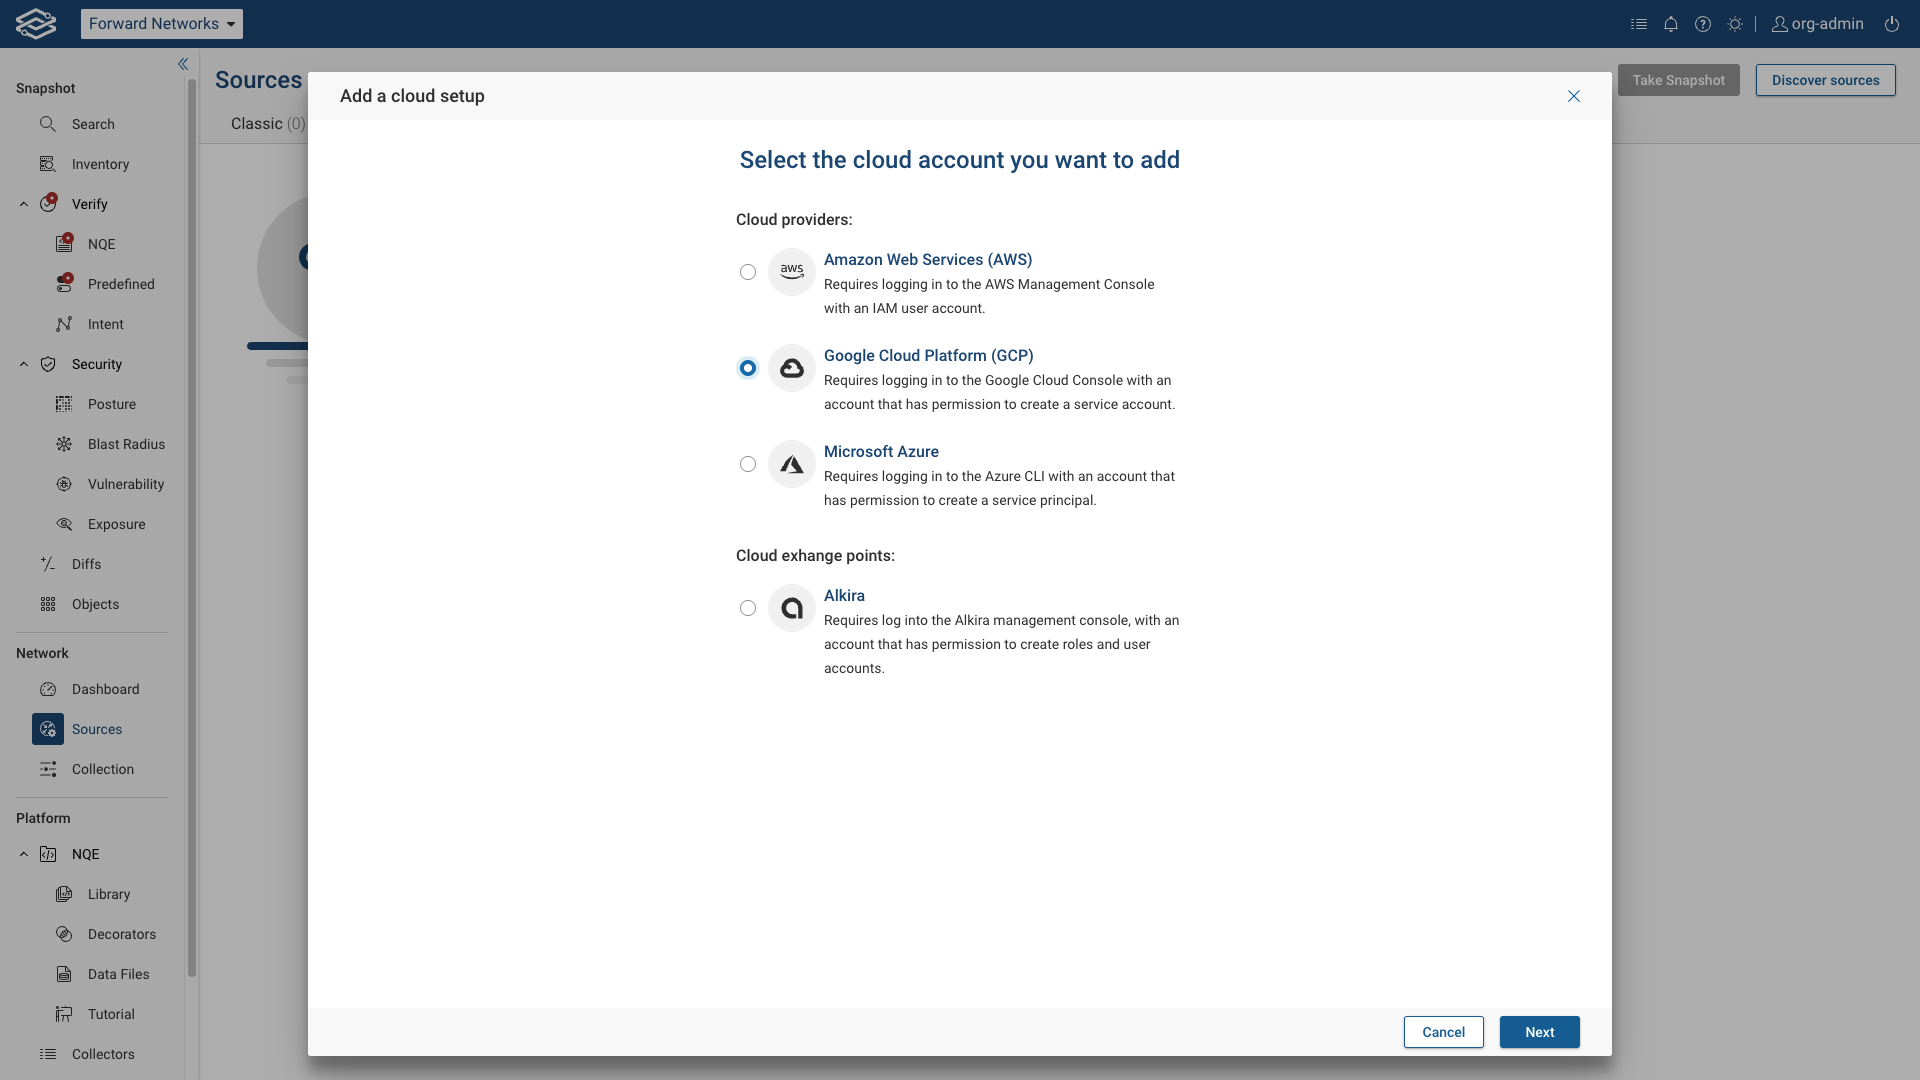
To start the setup process, navigate to Sources > Cloud infra > Add a cloud setup > select Google Cloud Platform (GCP) from the list of cloud setups, then click Next.
The wizard guides the user through the entire process, which consists of the following steps:
- Account: Create a GCP Service Account
- Key: Create a service account key
- Permissions: Add service account to a project or an org folder
- Proxy: Optionally connect to the GCP account via a proxy
- Projects: Select the projects to collect from
- Regions: Select the regions to collect from
- Connection: Connect GCP with Forward Enterprise
- Cloud-based virtualized devices: Discover cloud-based virtualized devices (optional)
- Summary: Cloud Setup Summary
Account: Create a GCP Service Account
Follow these instructions to create a GCP Service Account:
- Go to the GCP Service Accounts page: https://console.cloud.google.com/iam-admin/serviceaccounts
- Select a project from the list of available projects.
- Click the Create Service Account link at the top of the page.
- On the next page, provide a Service account name and an optional description for the service account.
- Skip granting access and click the Done button.
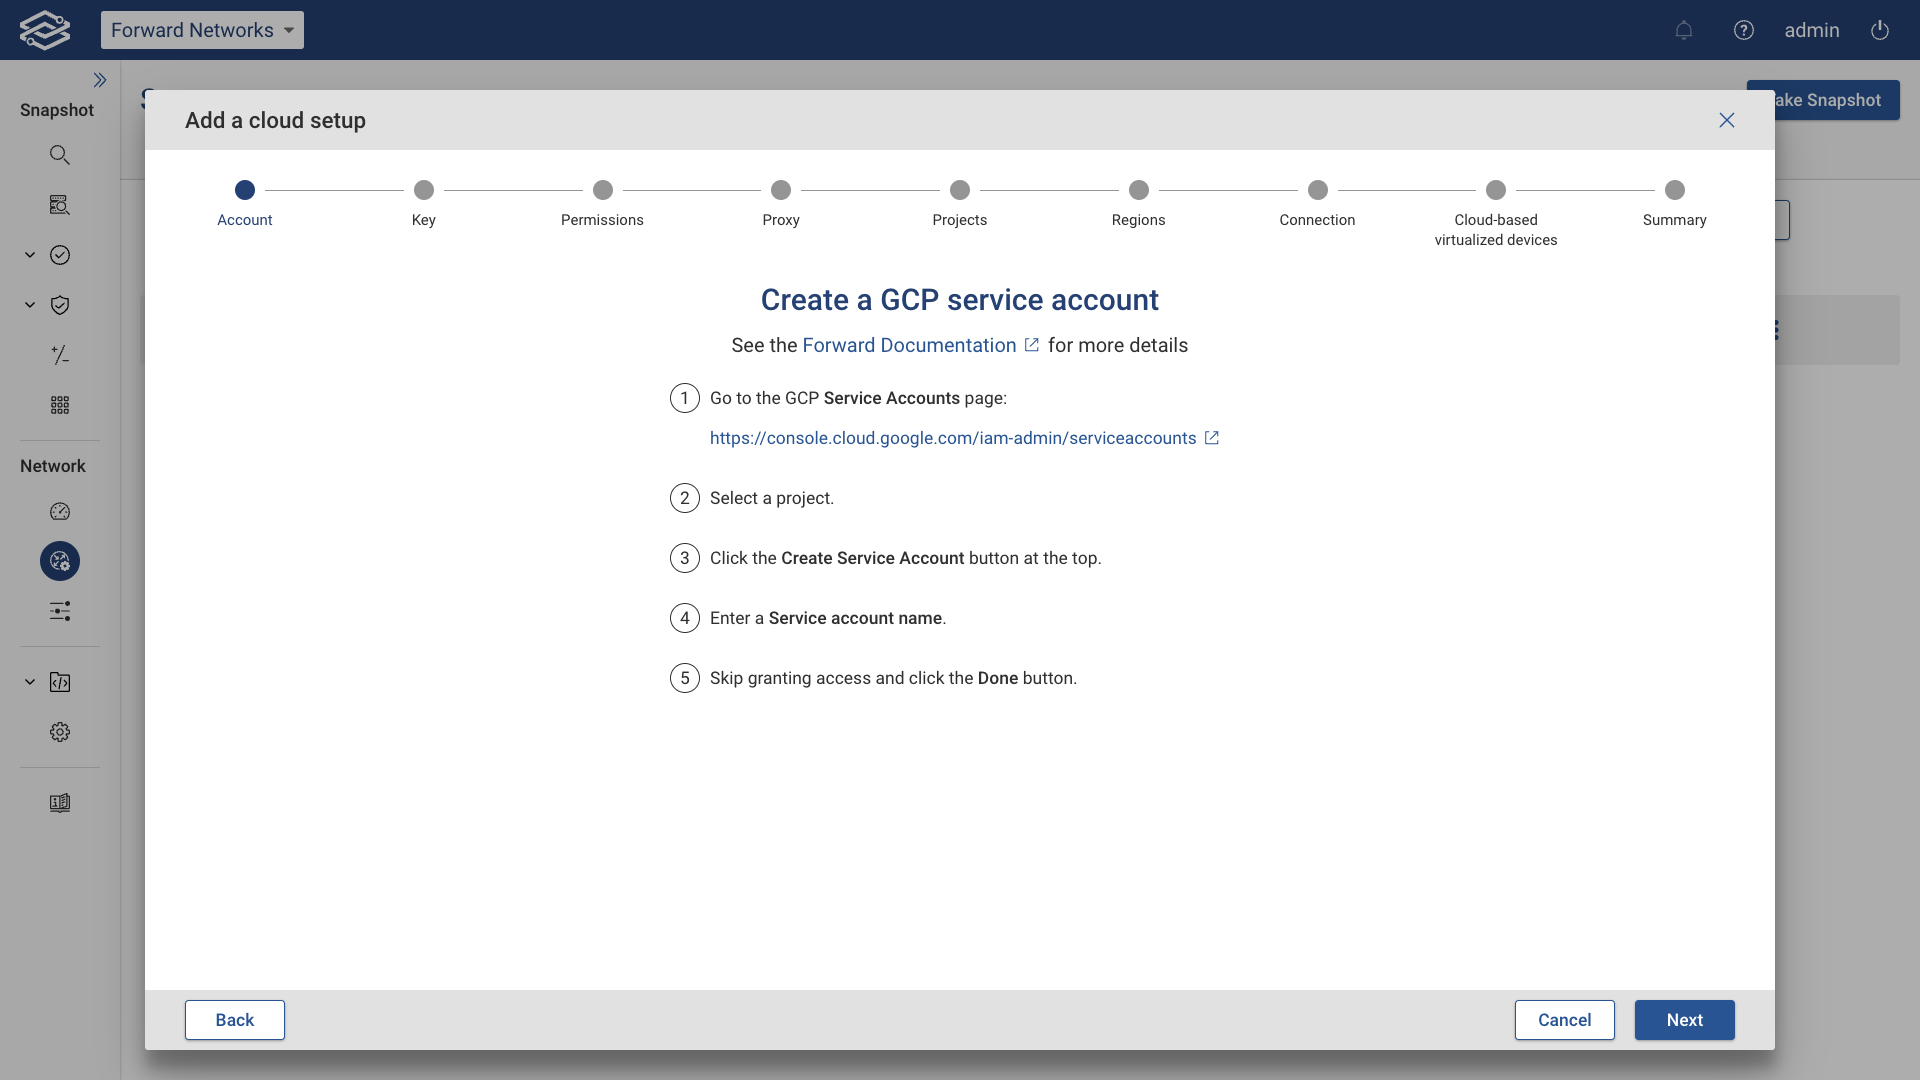 Then click Next.
Key: Create a service account key
Follow these instructions to create a GCP account key file in JSON format and upload it:
- In the service accounts list, find the account you just created, open its Actions menu, and select Manage keys.
- Click the Add Key drop-down menu and select Create new key.
- In the dialog that opens, select the JSON key type and click the Create button to download the private key file.
- Upload the key file:
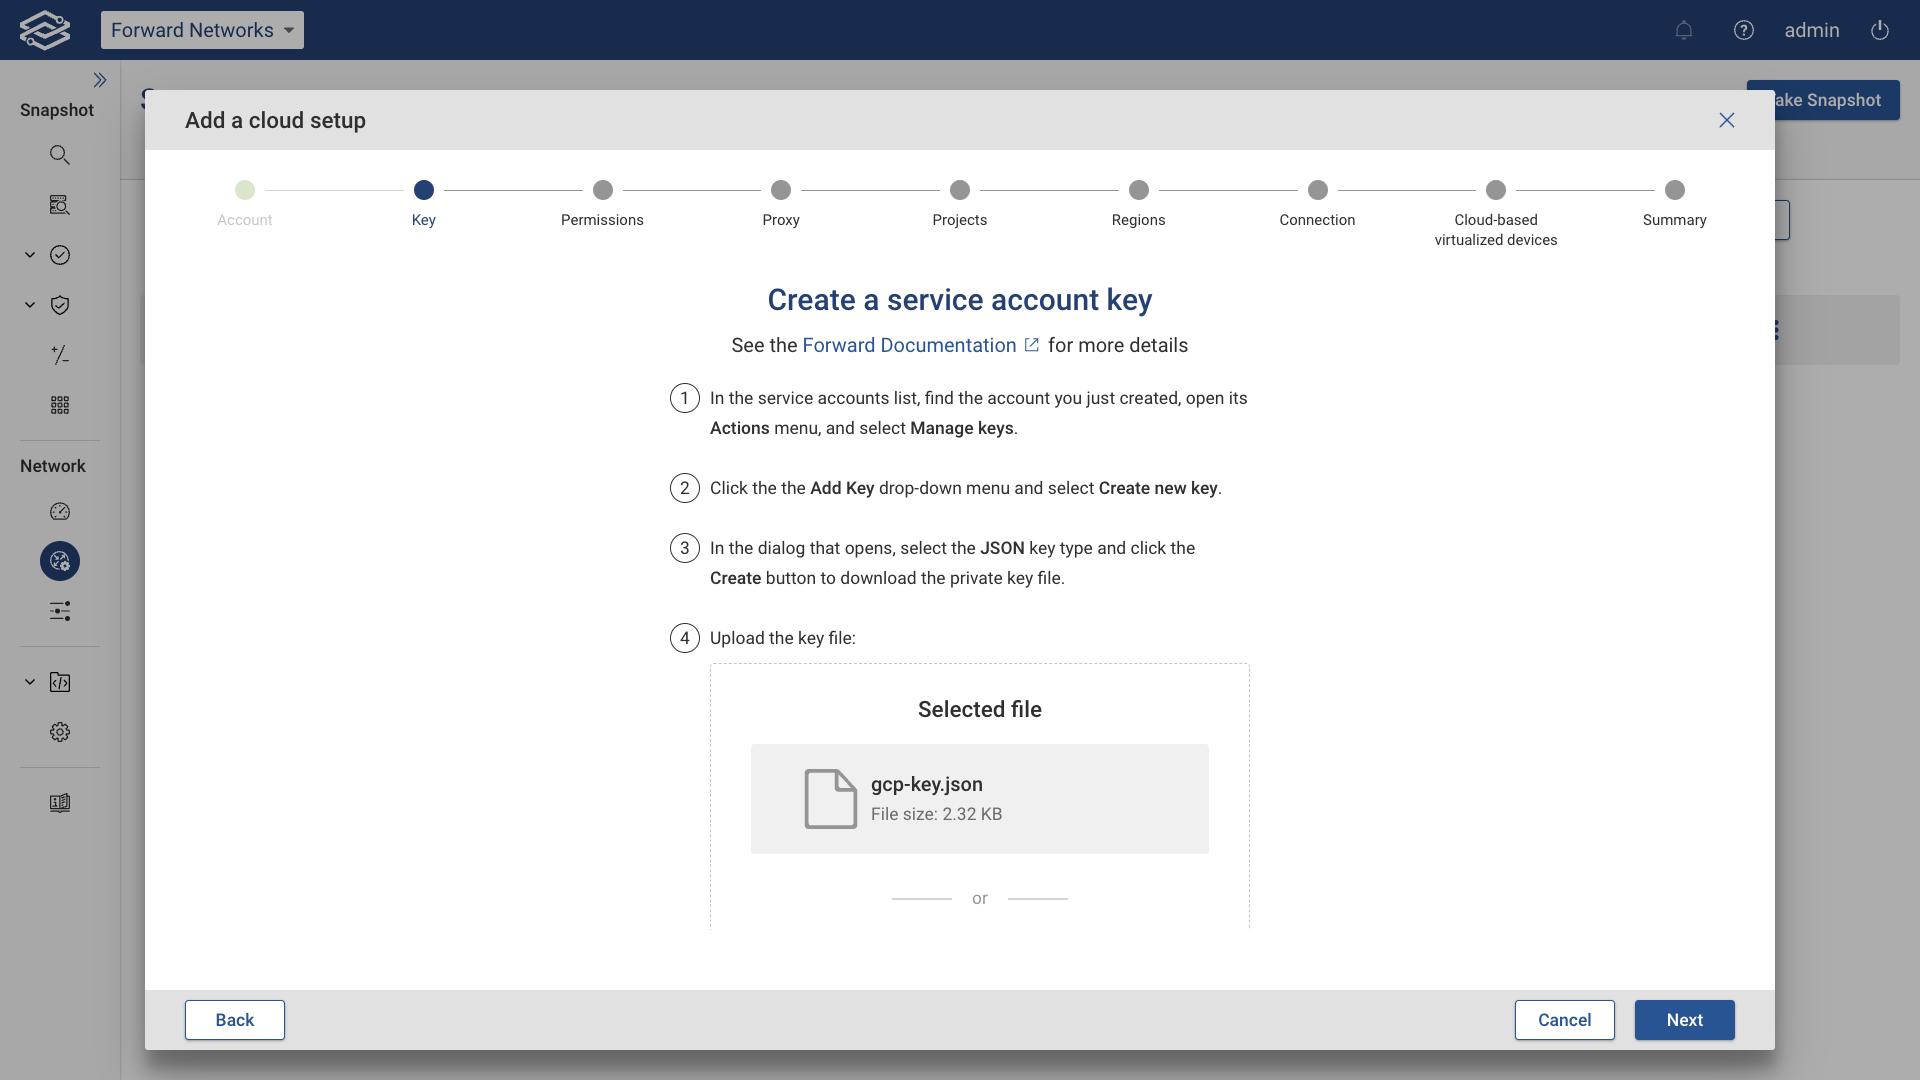
Then, click the Next button.
Permissions: Assign service account to read-only org/project roles
Follow these instructions to add the service account to a project or an org folder:
- From the project selector on the Google console, choose the organization, some folder within the organization hierarchy, or a single project. This choice affects which projects can be collected.
- Go to the Navigation menu in the top left corner, and select IAM & Admin > IAM
- From the top left click Add
- Copy and paste the new service account email in New members.
- Add two roles: Basic > Browser and Basic > Viewer.
- Click Save

Proxy: Use a proxy server (optional)
Optionally, set up a proxy server and enable the Use proxy server toggle button.

Then, click Next.
Projects: Select the projects to collect from
All discovered projects will be listed, including their Project ID, Project name, and Status.
When the Collect all projects toggle button is enabled, the Collector will attempt to collect all projects discovered from this account, including any future projects. Disable this option to customize project selection.
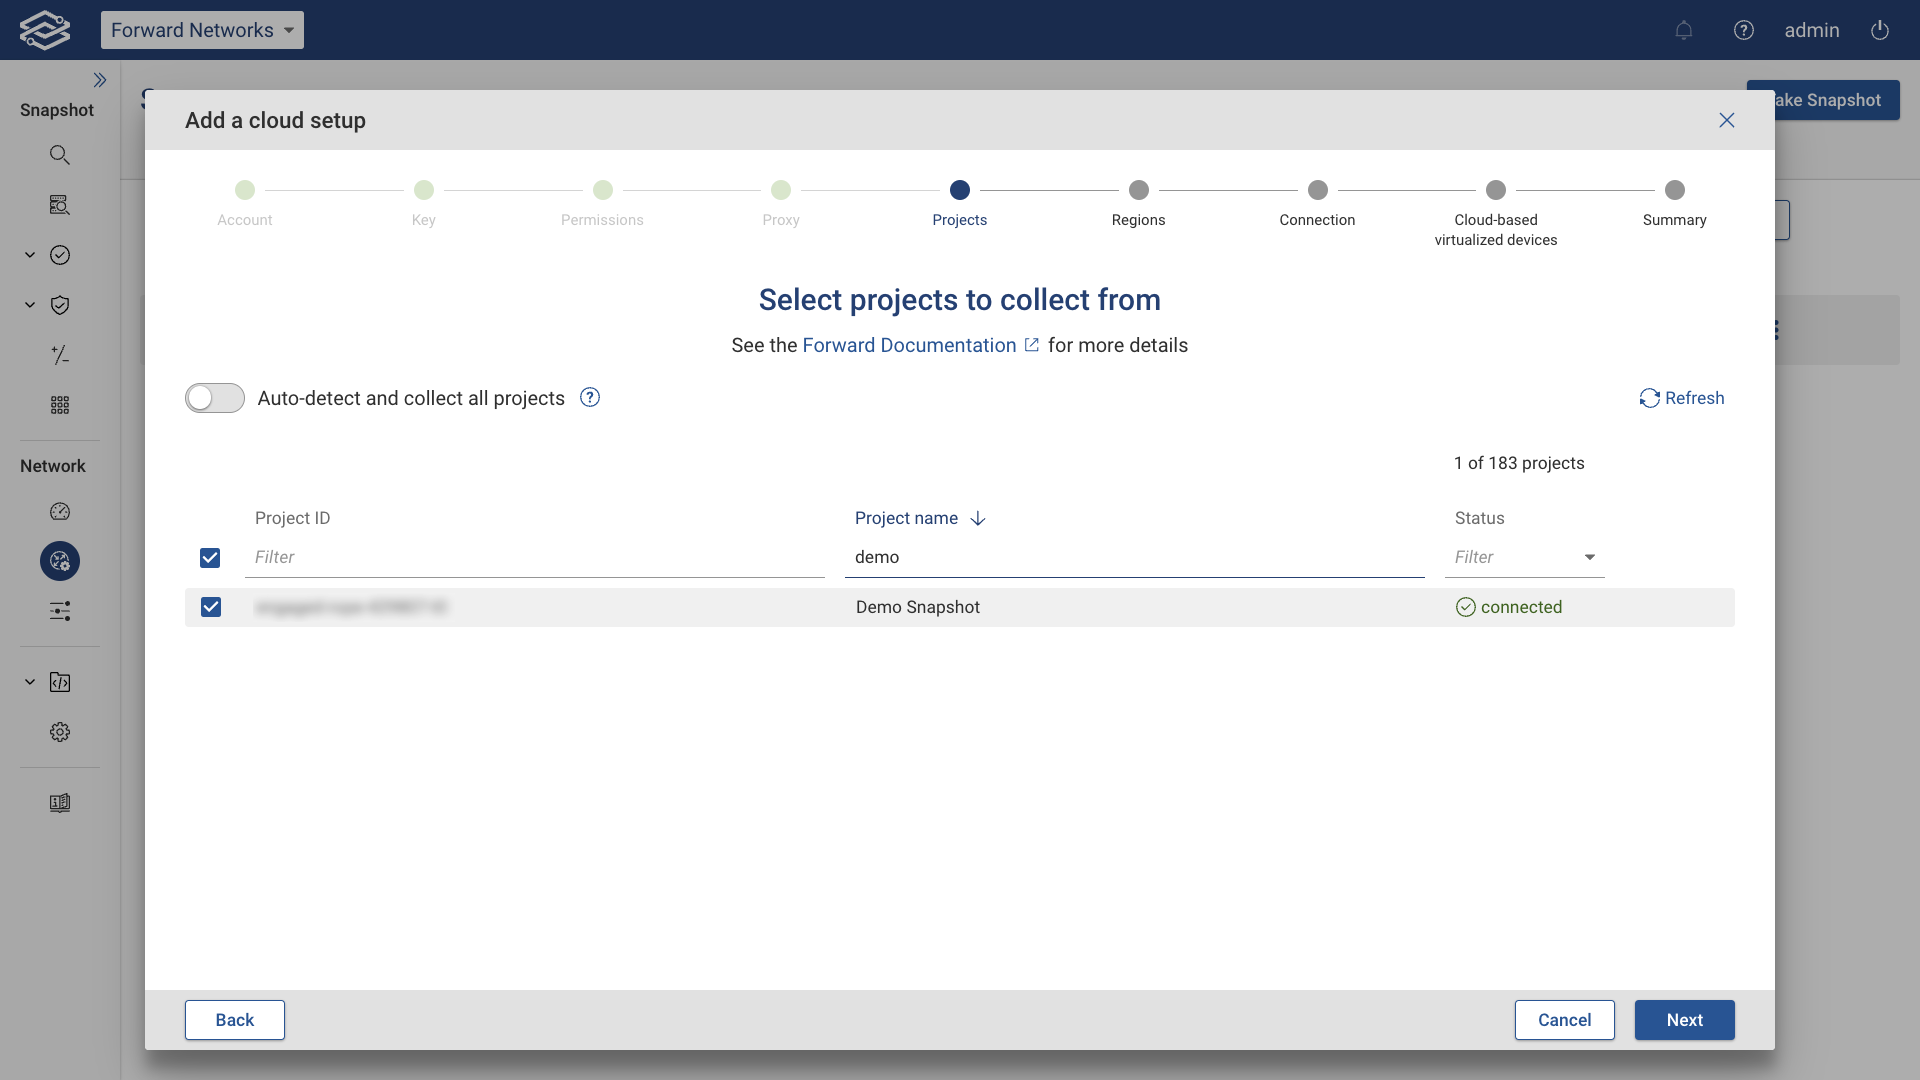
Then click the Next button.
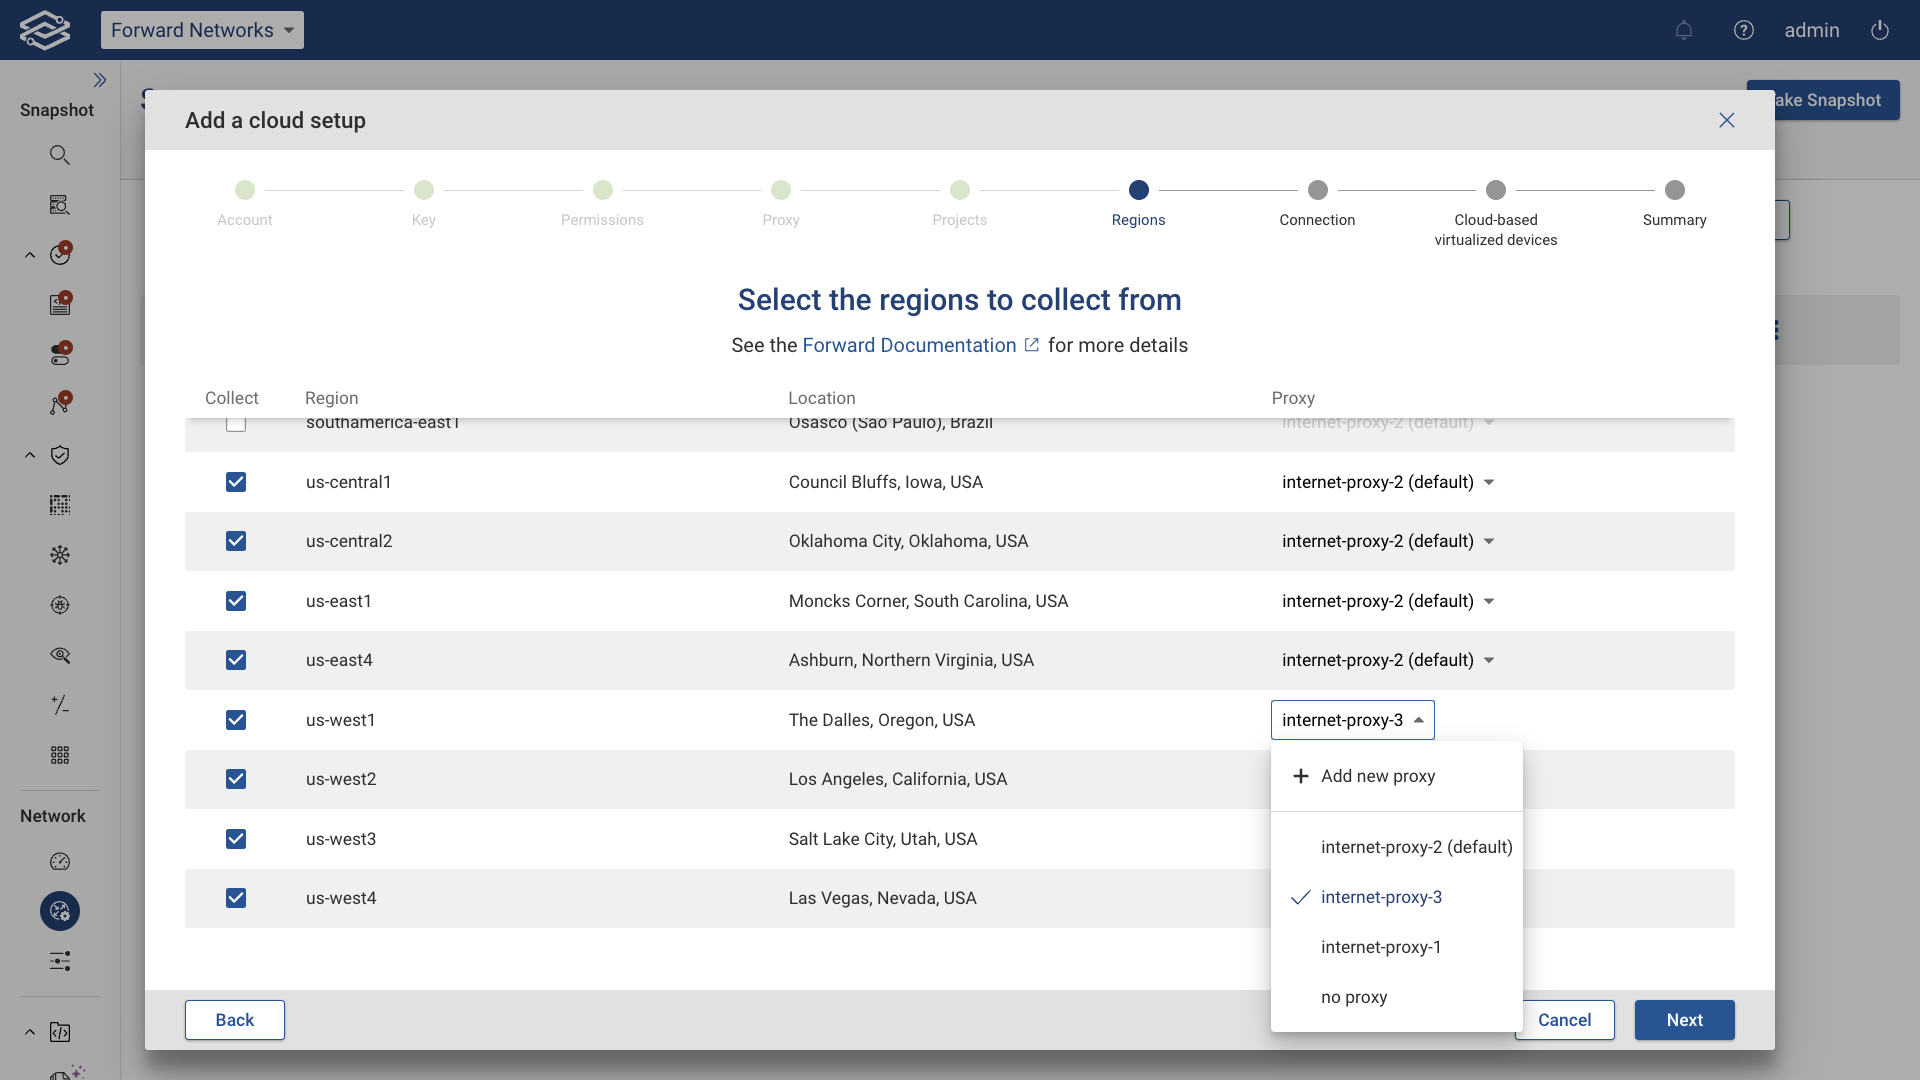
Regions: Select the regions to collect from
Select the regions to collect from. If using a proxy server, the option to assign one internet proxy per region will be available. Then click the Next button:
Connection: Connect GCP with Forward Enterprise
Provide a unique Cloud setup ID for this GCP setup.
Then, click Test connection to verify that the Collector can connect to the GCP setup:
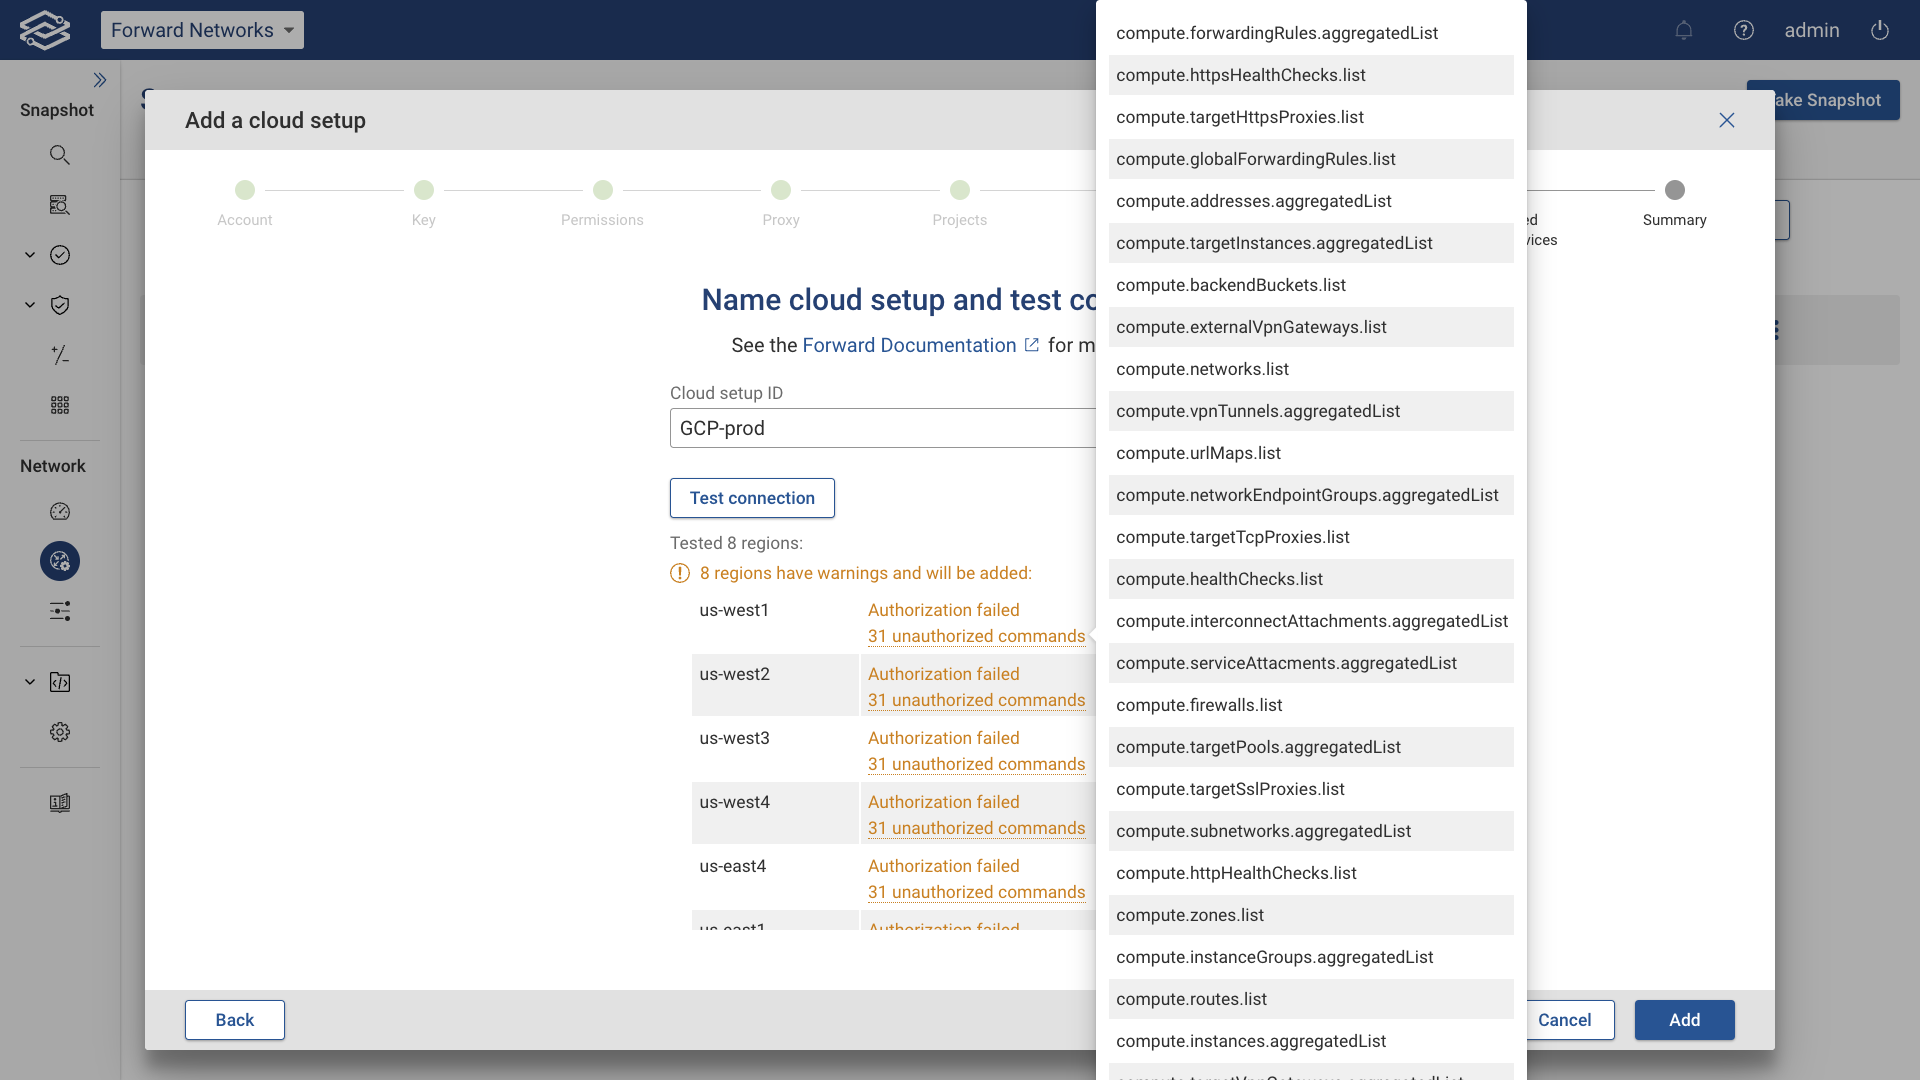
The connection test's results for both regions and projects will be shown, including any Failure errors. In case of any project connection errors, during the next collection, the Collector will attempt to connect to these projects again, but they'll be excluded from the Snapshot if the connection problems aren't resolved.
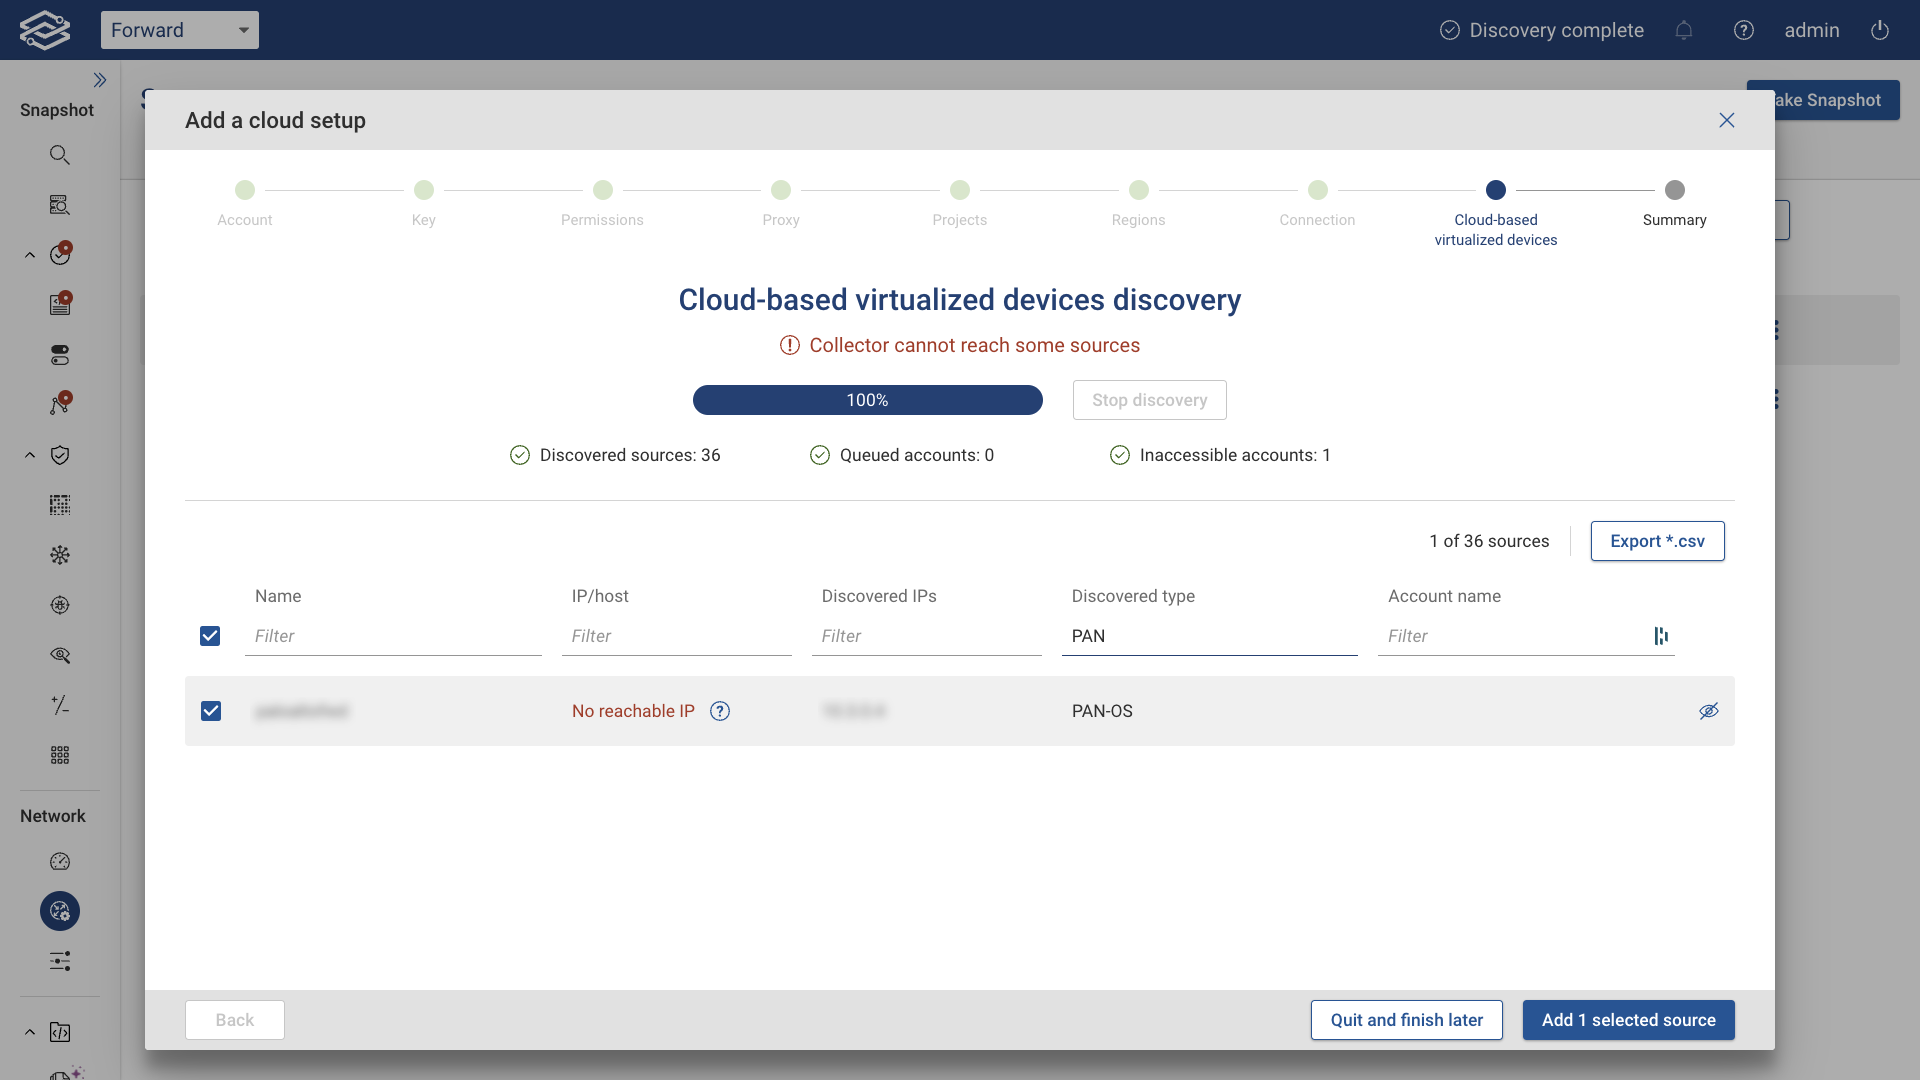
Cloud-based virtualized devices: Discover cloud-based virtualized devices (optional)
In this optional step, you can discover cloud-based virtualized devices by clicking Start discovery.
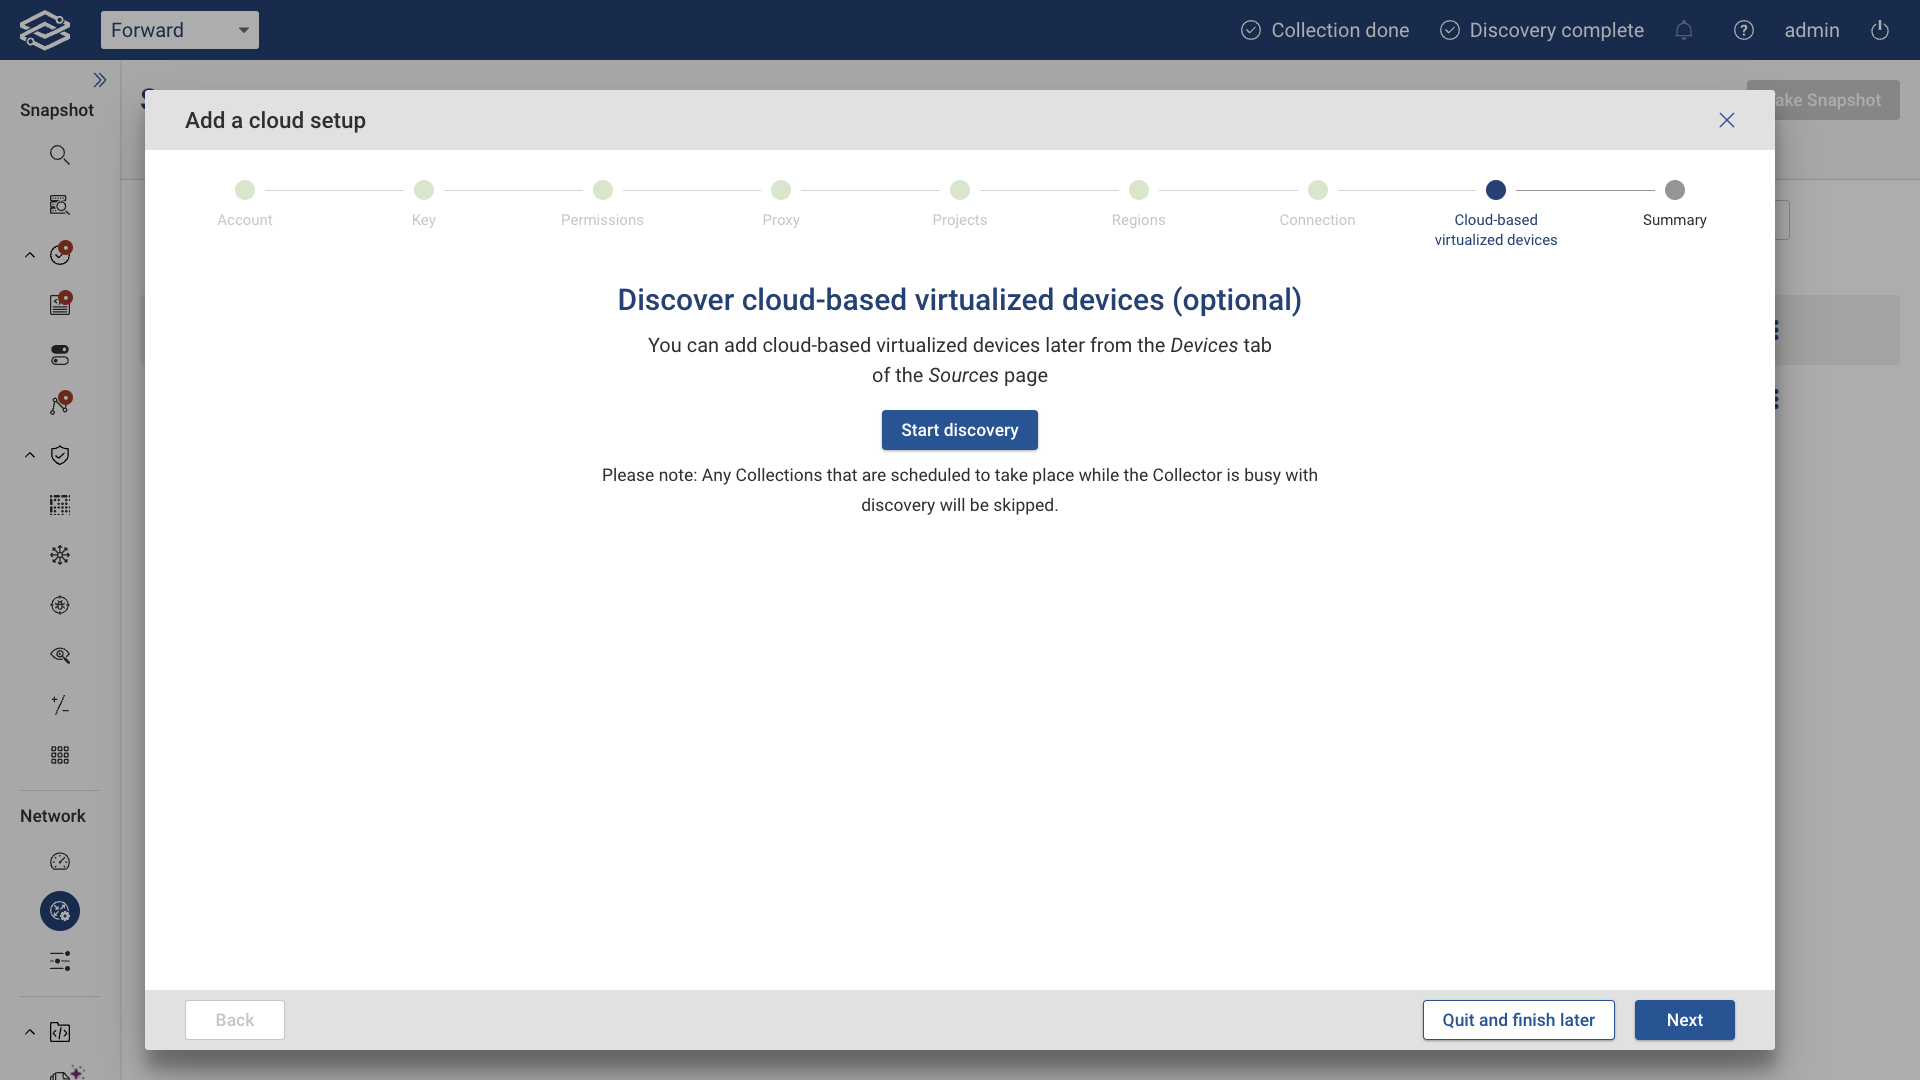
A list of all discovered virtual devices will be shown along with their Name, IP/host, Discovered IPs, and Discovered type. Select the virtual devices to collect from, then click Add x selected devices.
- You can add cloud-based virtualized devices later as well. From the Devices tab of the Sources page, click Add devices, and select Discover cloud-based virtualized devices.
- You need to successfully connect to at least one region to finalize the setup creation process
- Forward Enterprise will automatically connect the GCP network to the Internet Node for external connectivity and path completion to the rest of the network.
Summary
In the final step, a summary report of what has been added will be shown, as well as the following suggestions to ensure a successful collection of the newly added GCP account and any other virtualized devices:
- Credentials: confirm that the Collection > Credentials page lists the credentials required to access the devices.
- Jump Servers: navigate to Sources > Devices and assign any jump servers required to reach the devices (e.g., virtualized devices).
- Connectivity test: navigate to Sources > Devices and run a connectivity test for each device.
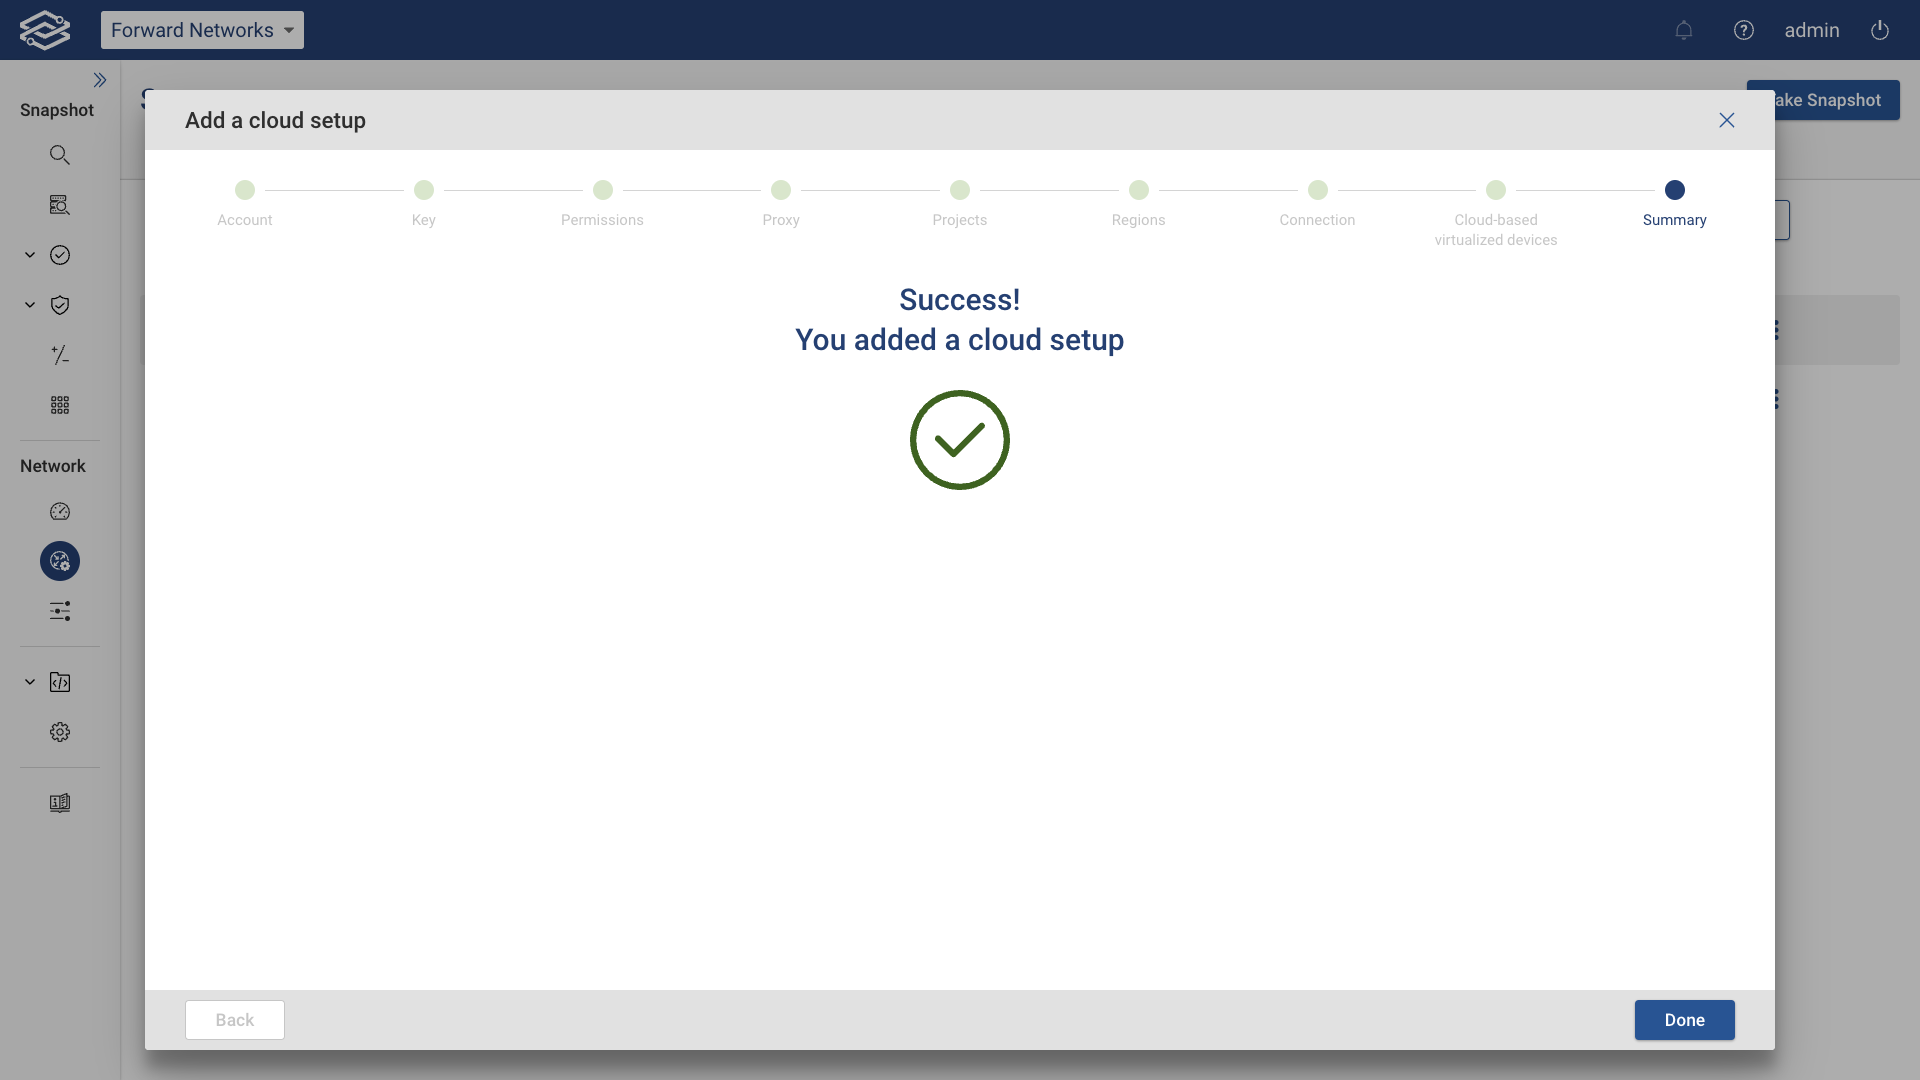
click Done.
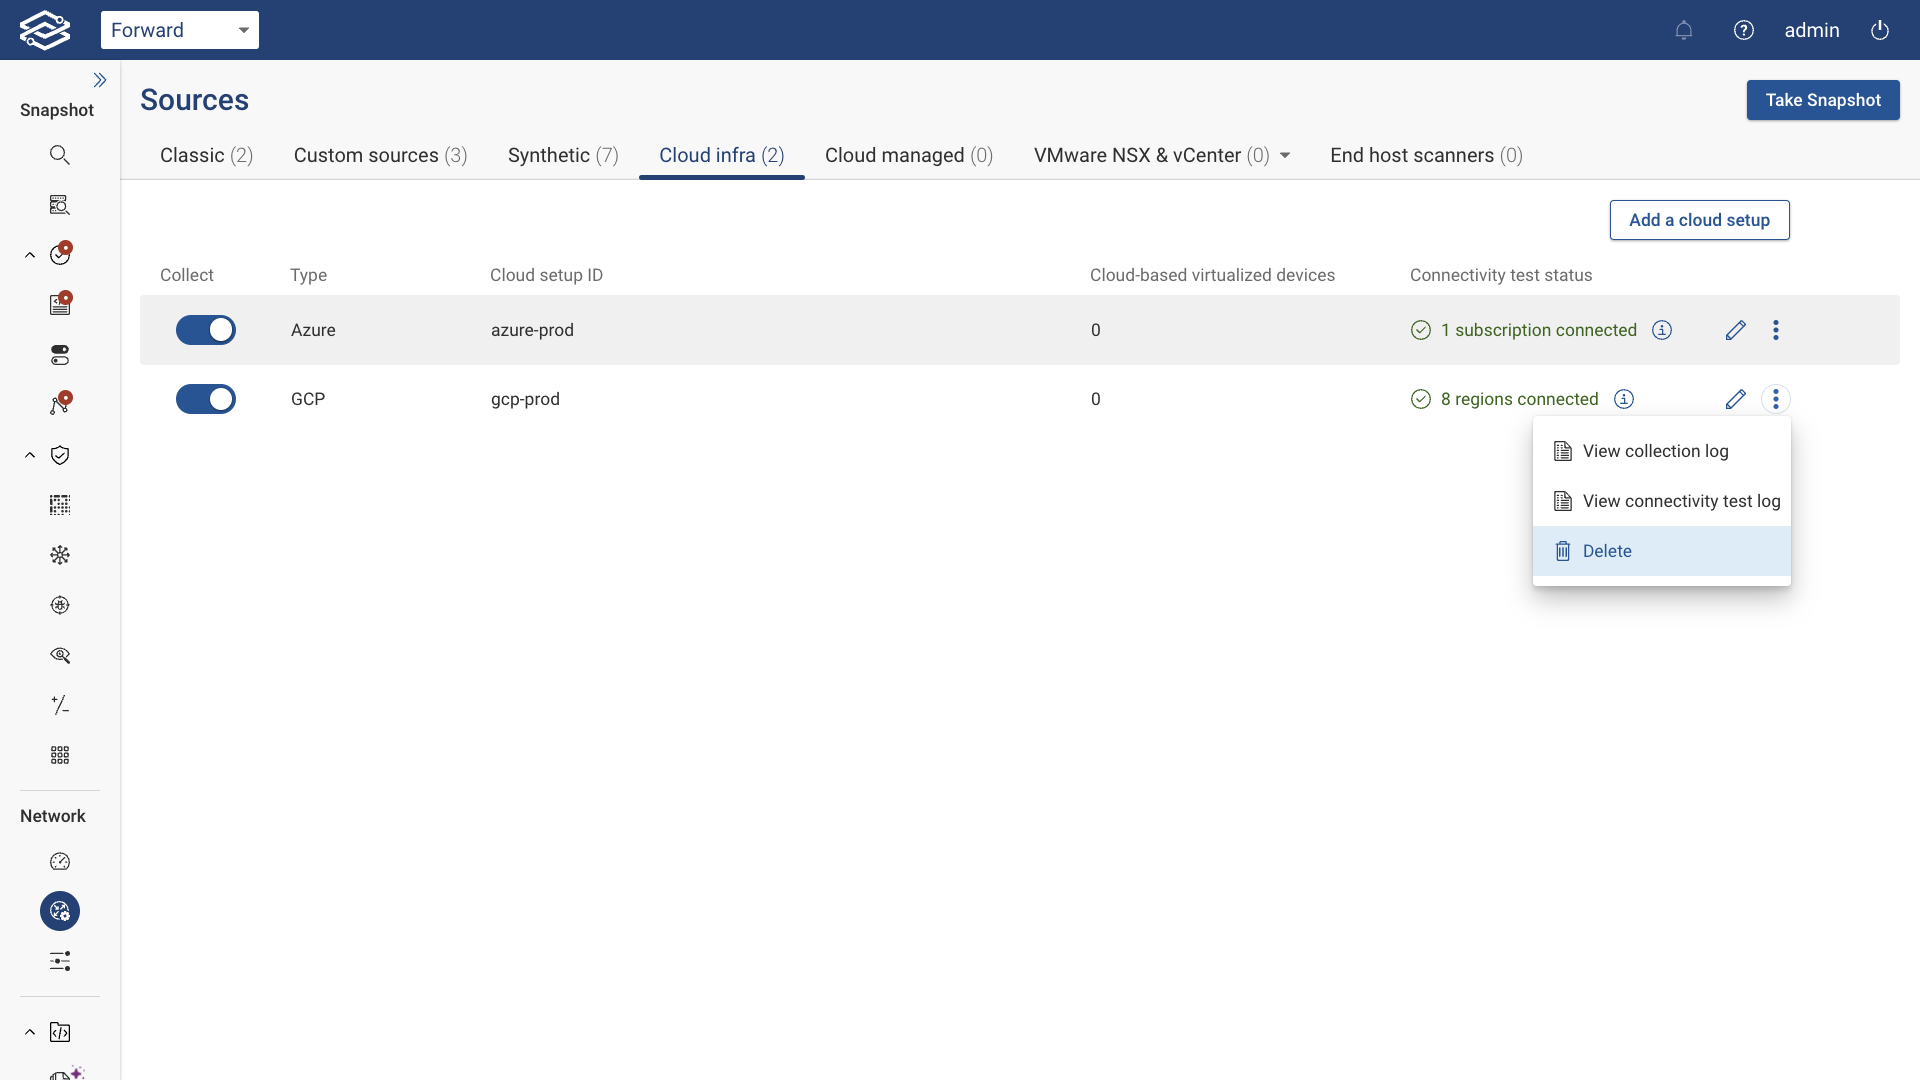
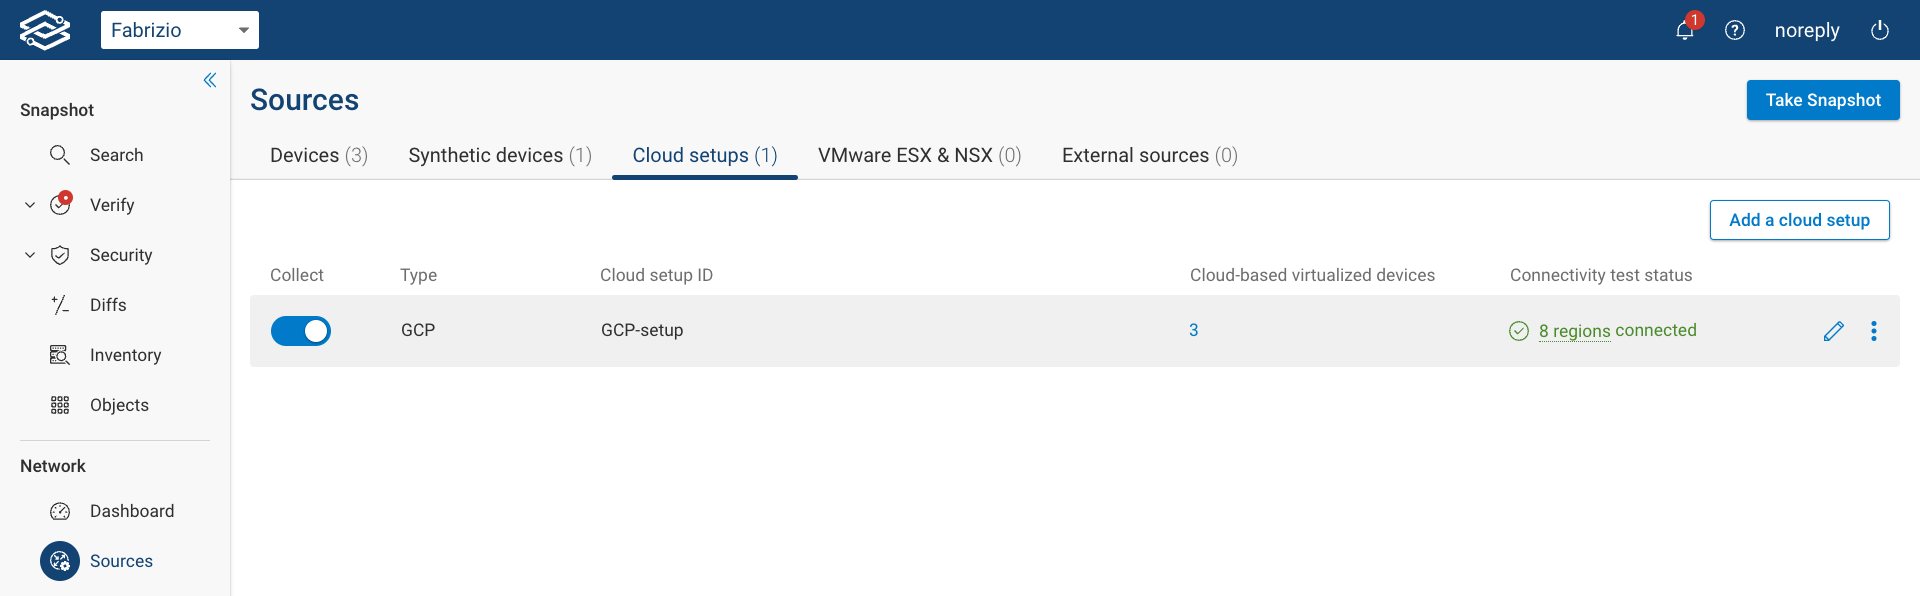
Once the setup creation is completed and access is verified, the setup will show as active within the Cloud infra tab in the Sources page along with the status. At this point, the collection can take place.
Setup changes
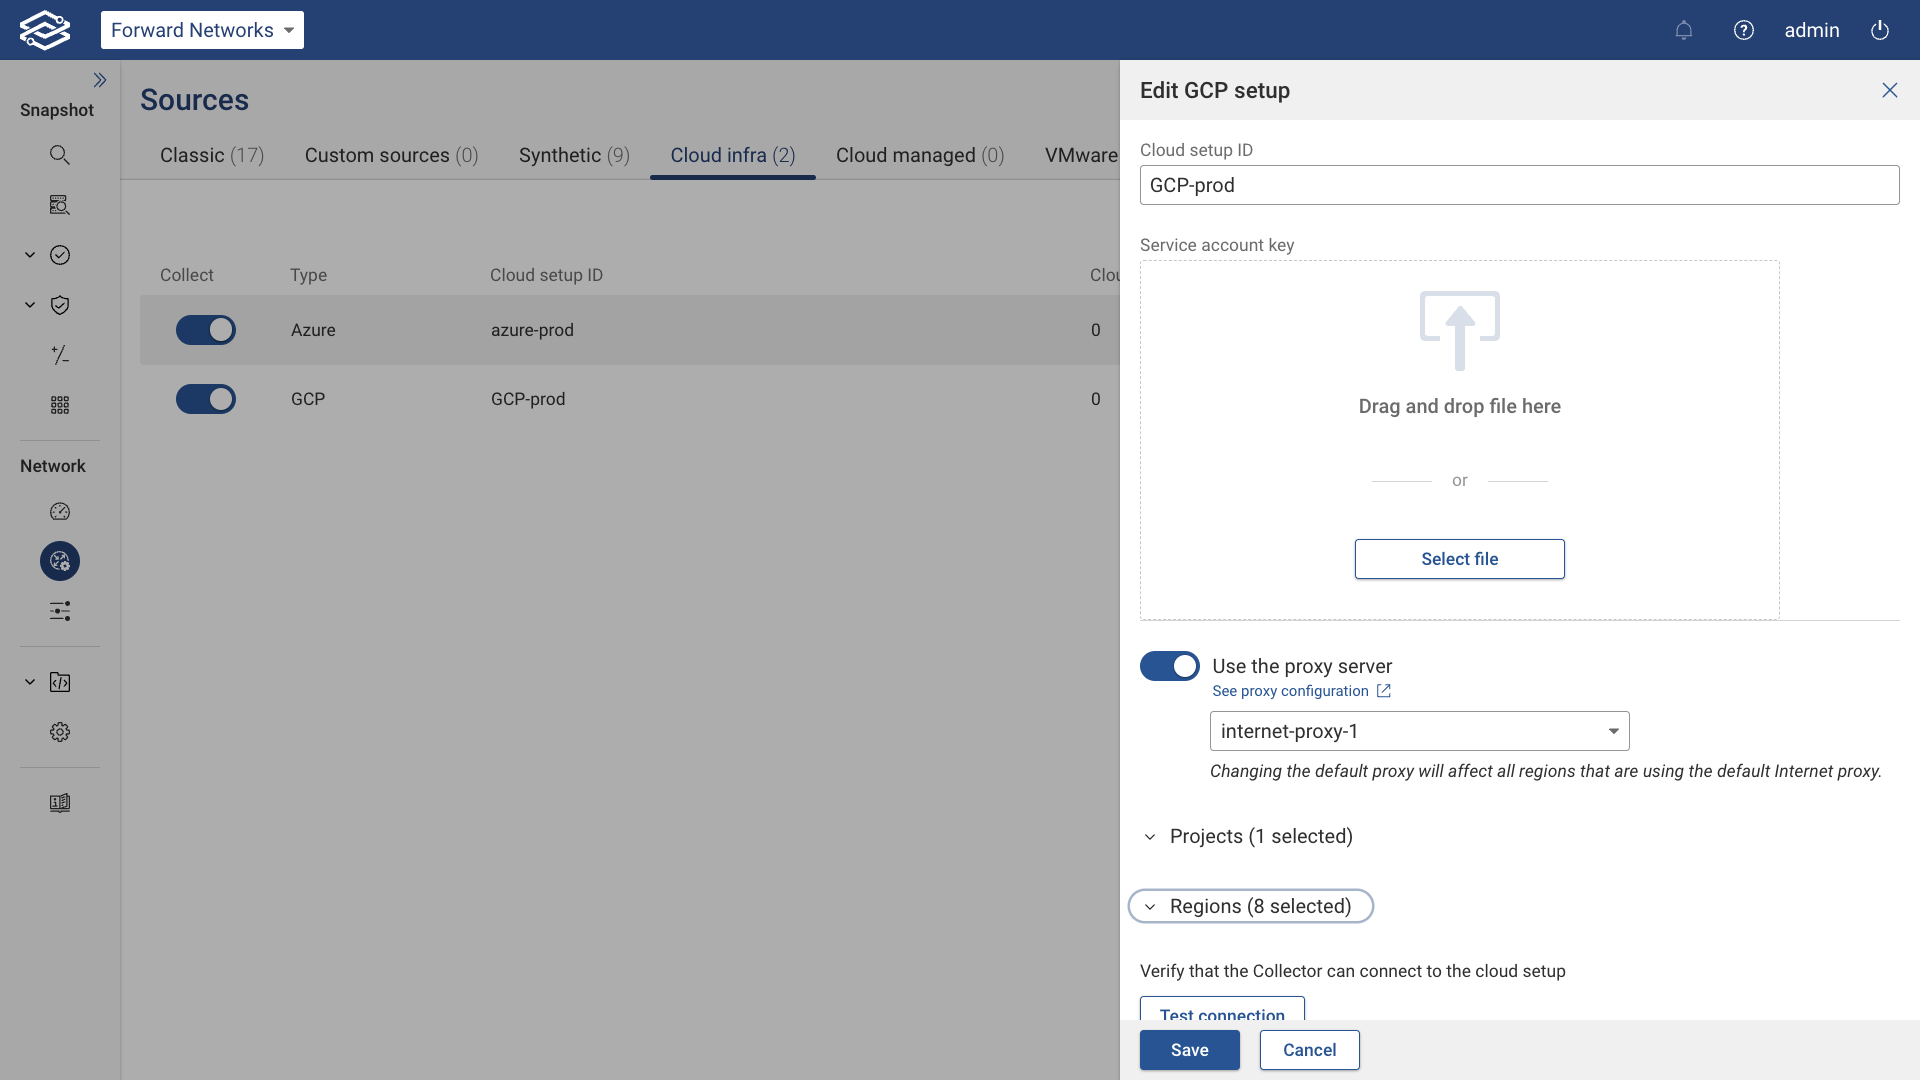
Setup Edit
If you need to make any changes to the setup, click the Edit icon on the right side of the setup. For instance, to change the regions to collect from, expand the Regions section, select a different list of regions, test the regions again by clicking Test connection. Finally, click Save to make the changes permanent.
Exclude setup from Collection
To exclude a GCP setup from collection, click the toggle button on the left side of the setup.
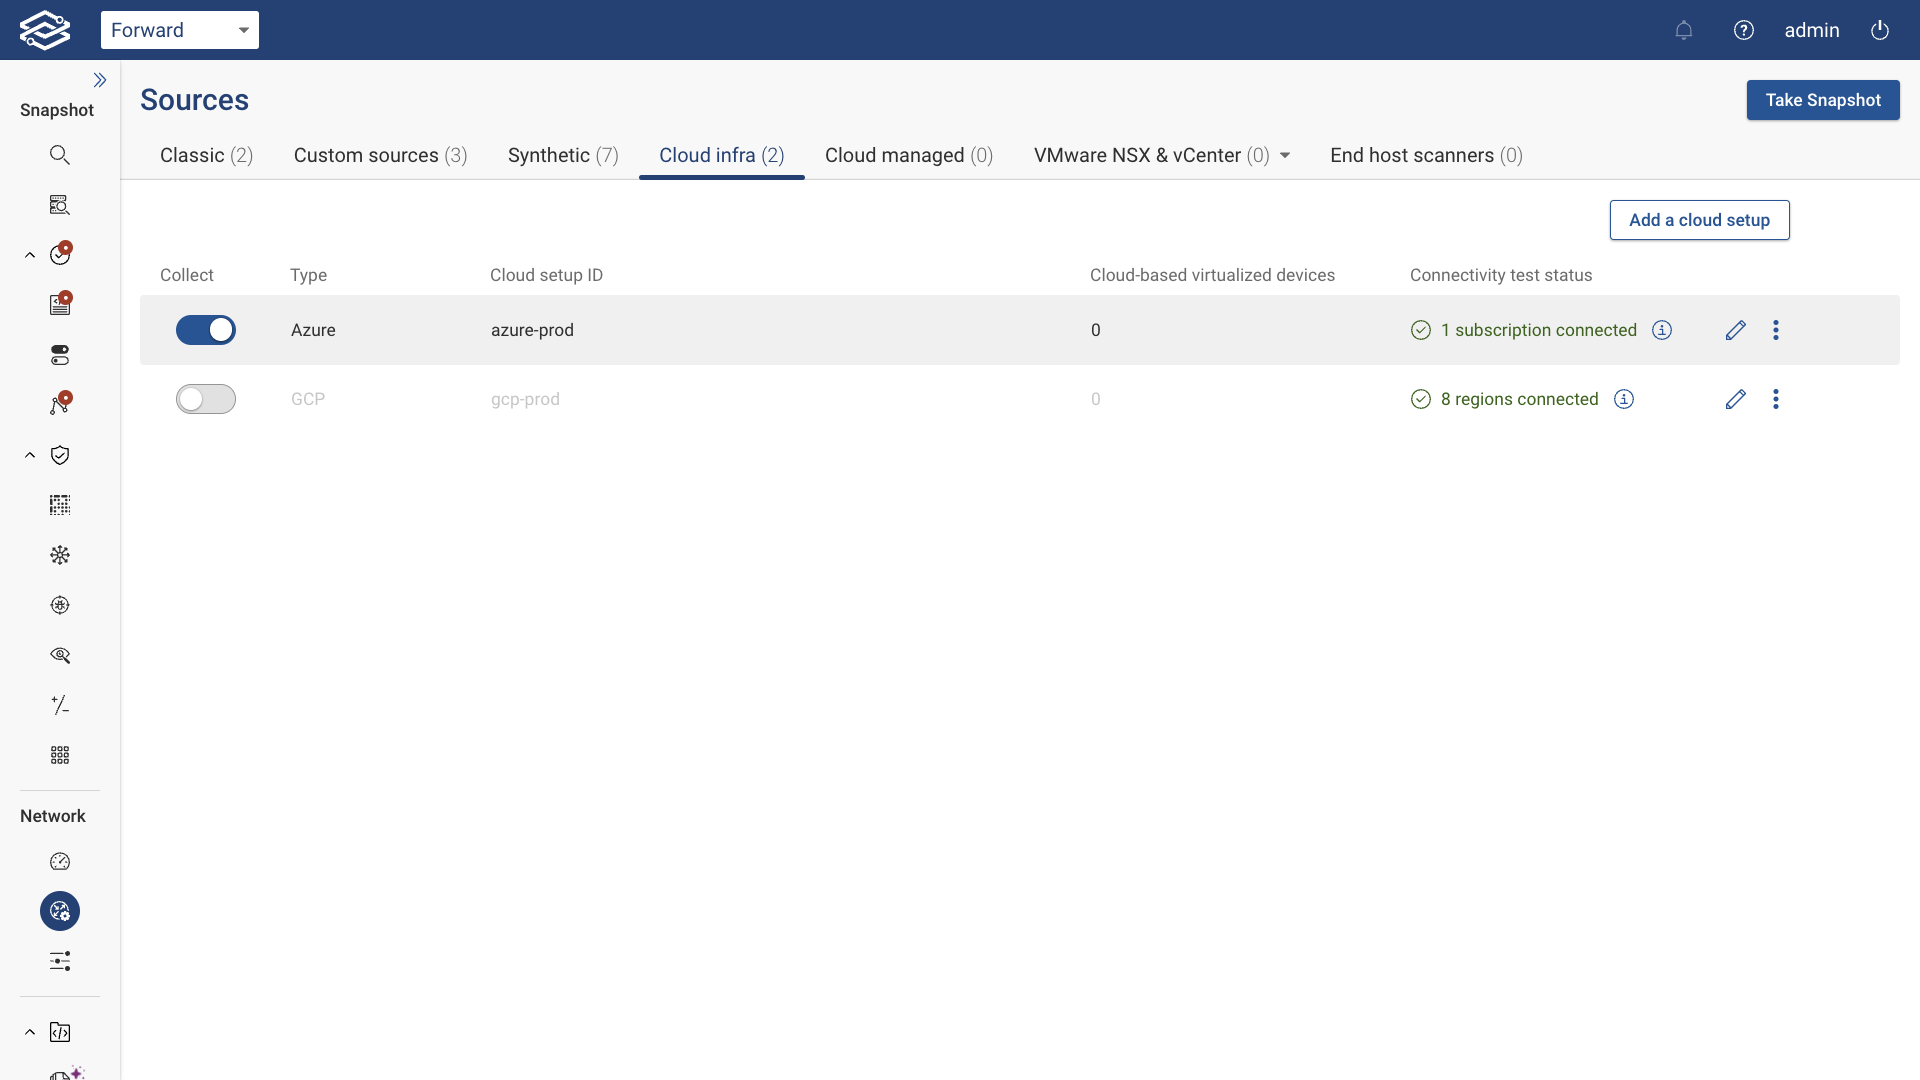
Delete setup
To delete a GCP setup, click the kebab icon on the right side of the setup, click Delete, and confirm the setup deletion: