Jump Servers
Forward Enterprise obtains data for path analysis primarily using industry-standard command-line interface (CLI) access. This is typically done with secure shell (SSH) read-only credentials provided to the platform to retrieve configuration and state.
In certain instances, it is beneficial to limit SSH access to more effectively audit and maintain the security of network devices.
In common parlance, this is known as a bastion or jump server.
Jump Servers Basics
About the Jump Server
A jump server, jump host, or jump box is a computer on a network used to access and manage devices in a separate security zone. The most common example is managing a host in a DMZ from trusted networks or computers.
A jump server is a hardened and monitored device that spans two dissimilar security zones and provides controlled access between them. User access should be tightly controlled and monitored.
OpenSSH is commonly used to configure a jump server - in either a Linux or Windows environment. Many different vendors provide implementations of SSH. For example, an Ubuntu SSH jump server can be configured using the instructions on this page.
A common technique known as SSH port forwarding allows the client to transparently access network devices without directly interfacing with the jump server. If the server does not support port forwarding, the client will first log in to the jump server, then attempt to run the SSH command from the shell and relay the information back through to the first SSH session.
Security risks
A jump server is a potential risk in a network's design. There are several ways of improving the security of the jump server, including:
- Reducing the subnet size (increasing the number of subnets), and securing those VLANs using a firewall or router.
- Using higher security authentication, such as multi-factor authentication or SSH keys.
- Keeping the operating system and software on the jump server up to date.
- Using access lists (ACLs) to restrict access to only the entities that require it.
- Do not allow outbound access to the rest of the internet from the jump server.
- Restrict which programs can be run on the jump server.
- Enable strong logging.
Jump Server in Forward Enterprise
Implementation
In practice, Forward Enterprise uses the following SSH command to collect a network device's configuration and state:
ssh -J <jump host> <network device>
If the jump server's SSH server daemon supports SSH port forwarding we strongly suggest using this option to transparently access network devices without directly interfacing with the jump server. If the server does not support port forwarding, the Forward Collector will first log in to the jump server, then attempt to run the SSH command from the shell and relay the information back through to the first SSH session.
Forward Enterprise supports multiple jump servers with or without port forwarding as well as direct connections which can be used simultaneously for connections to multiple networks. See the diagram below for an example with multiple jump servers and direct connection.

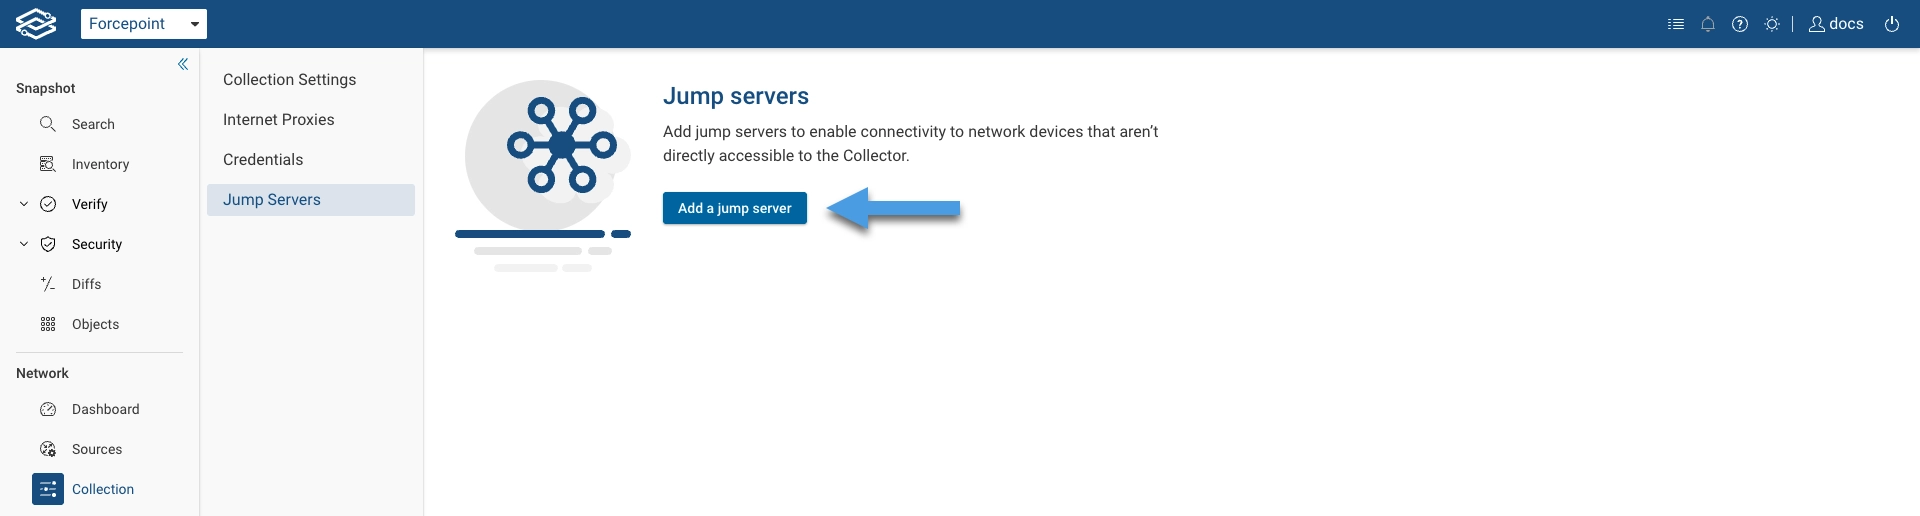
Adding a jump server
To add a jump server, navigate to Collection > Jump Servers and select Add a jump server to get started.
Follow the instructions below based on the authentication method you are using.
Password-based authentication
To add a jump server utilizing credential-based authentication, provide the following information:
- Hostname/IP: Enter the jump server's hostname or IP address.
- Port(optional): Leave this field empty if the server is running on the standard SSH port (22). Otherwise, specify the alternative port number.
- Username: Enter the username used to log in to the jump server.
- Key or certificate authentication: Ensure this option is disabled if using password-based authentication.
- Password: Enter the password used to log in to the jump server.
- Port Forwarding: [TCP port forwarding] (https://help.ubuntu.com/community/SSH/OpenSSH/PortForwarding) provides robust connectivity to devices via a range of connectivity methods. Keep this option enabled unless the SSH daemon on the jump server disallows port forwarding.
- Authentication timeout (optional): Duration to wait for the jump server authentication response.
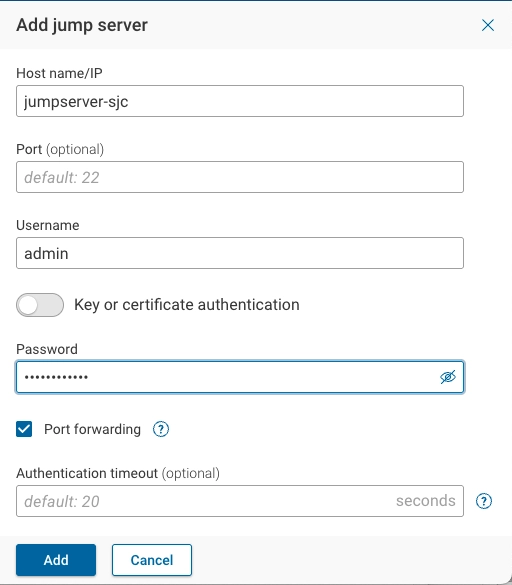
Click on Add to save the jump server configuration.
Key and certificate-based authentication
To add a jump server using SSH key and certificate-based authentication, provide the following information:
- Hostname/IP: Enter the jump server's hostname or IP address.
- Port: Leave this field empty if the server is running on the standard SSH port (22). Otherwise, specify the alternative port number.
- Username: Enter the username used to log in to the jump server.
- SSH key authentication: Enable this option.
- SSH key: With SSH key authentication enabled, paste a copy of the SSH key for the jump server. Ensure the key is in OpenSSL PEM format.
- SSH certificate (optional): Optional extension of SSH Key-based authentication. Paste a copy of the SSH certificate for the jump server. Ensure the certificate is provided in OpenSSH format.
- Port Forwarding: [TCP port forwarding] (https://help.ubuntu.com/community/SSH/OpenSSH/PortForwarding) provides robust connectivity to devices via a range of connectivity methods. It must be enabled for SSH key-based and certificate-based authentication.
- Authentication timeout (optional): Duration to wait for the jump server authentication response.
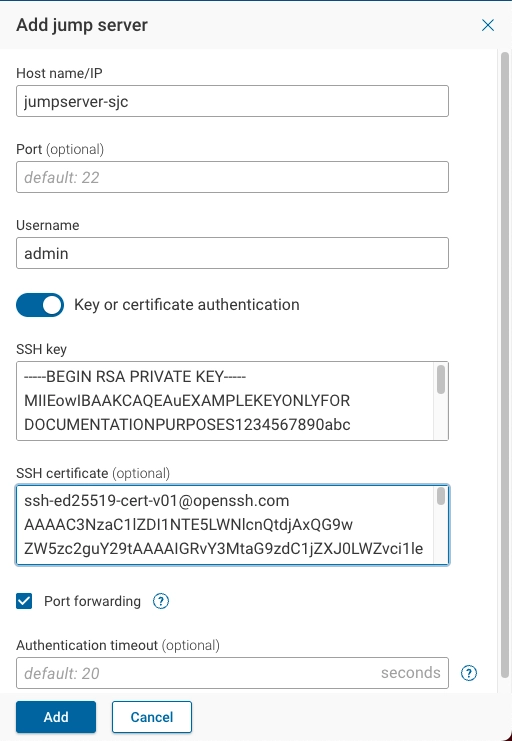
Click on the Add button to save the jump server configuration.
The jump server will now be displayed on the Jump Servers page.

You have the ability to decouple collection concurrency for devices that go through jump servers from those that do not go through jump servers by setting the concurrency parameters independently. Check the Collection Concurrency page for more information.
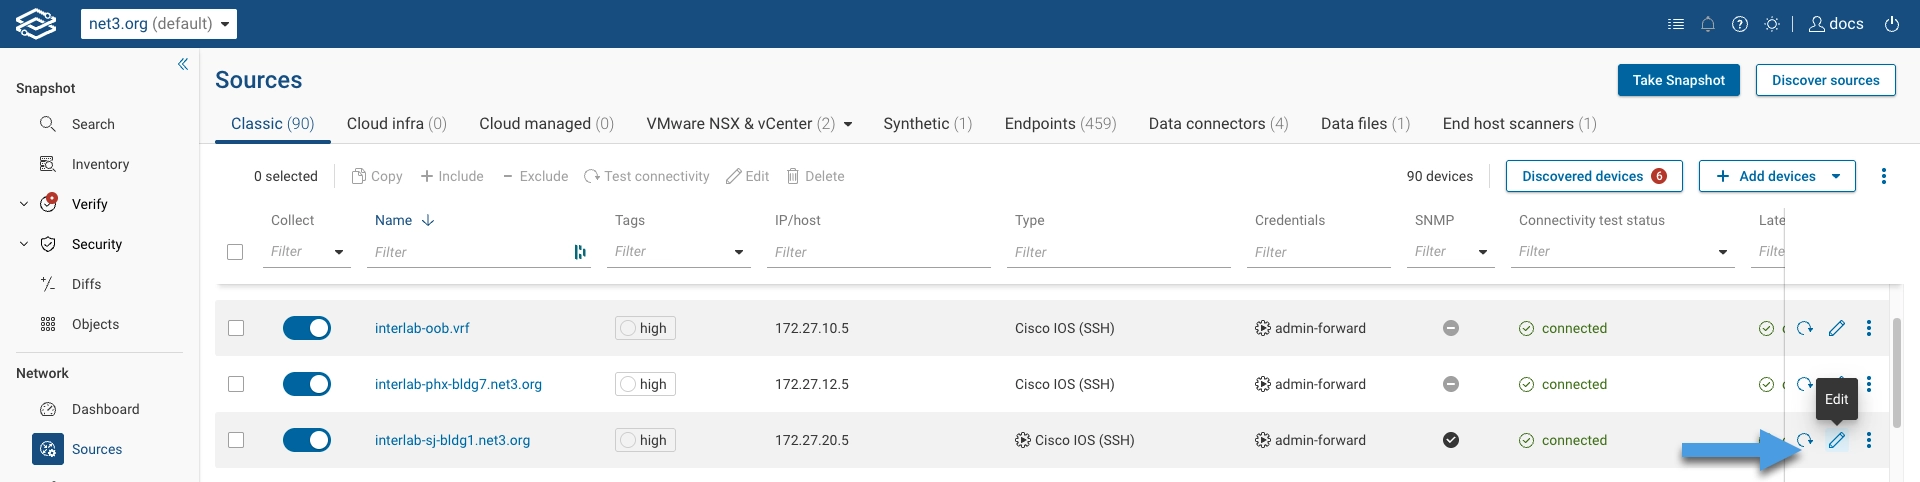
Configure Device Collection through Jump Server
Next, configure one or more network devices to be collected through the jump server.
Navigate to Sources > Classic, then click on the Edit icon beside the device you would like to collect via
the jump server.
You can use the bulk-edit functionality if you want to configure the same jump server for multiple devices at once.
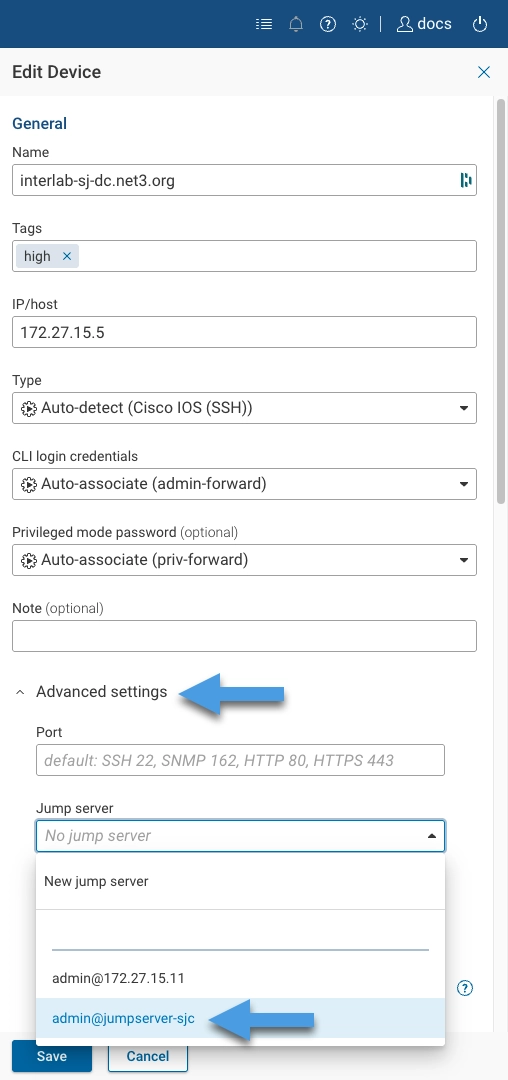
Click Advanced Settings in the Edit Device page.
Then click on the Jump server pulldown menu, select the appropriate jump server for this network device to be collected through, then click Save.
At this point, the Forward Collector will attempt to test login capability to the network device through the jump
server.
If the Connectivity test status column in the Devices page shows connected, then the jump server was
configured correctly. 
From here, you can proceed to the Connectivity Test section to conclude the Forward Collector basic configuration.