Snapshots
At this point, you may take your first network collection, referred to as a Snapshot.
A Snapshot is a collection of the network device's running configuration and state table files at a specific point in time.
The Forward Collector will log in to the network devices, gather configuration and network state information, create a network topology, and run algorithms to calculate every possible traffic path in the network. This process can take some time, depending on the size and complexity of your network.
If the connectivity test has not been run for a given device yet, the platform automatically runs the test prior to collecting from the device.
A Snaphot also includes additional information such as DNS data, aliases, verification checks, NQE queries, link overrides, edge nodes, locations, scorecards, KPIs, decorators, topologies, endpoints, data files, and synthetic nodes. The CVE database used to identify vulnerabilities in the snapshot’s devices is stored within the application instead.
When the Snapshot processing is complete, you're presented with the network overview page, which will show:
- An auto-generated topology of the network under analysis.
- The number of devices that have been successfully collected.
- The status of the links between those devices.
Snapshots can be triggered in three different ways:
Check the Monitor Collection progress section to see how you can monitor the entire process.
Scheduled Collection
To set up a schedule-based automated collection, follow these steps:
- Navigate to the Collection application > Collection Settings, then select the Schedule tab.
- Click on the Add collection schedule button to show the two options available.
- Set time: Run collection at each of one or more times (in some time zone) on each of one or more days.
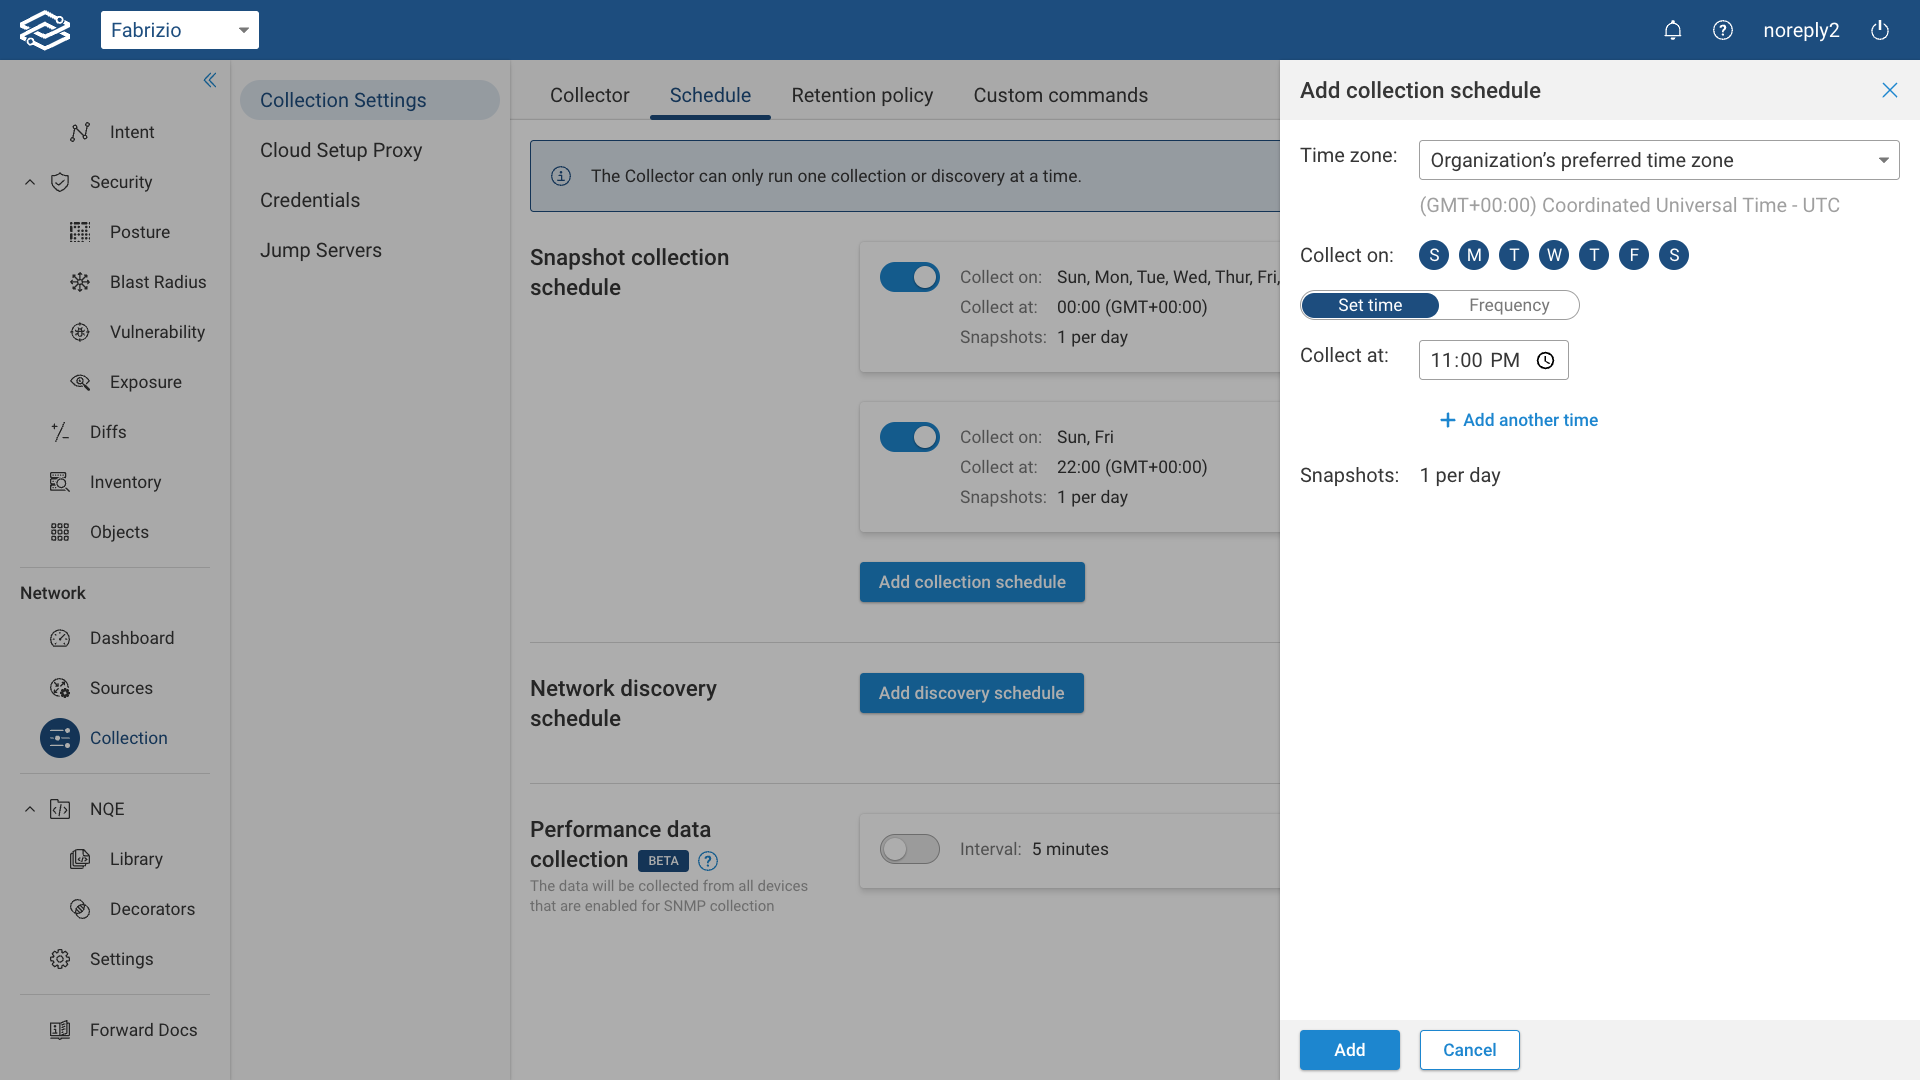
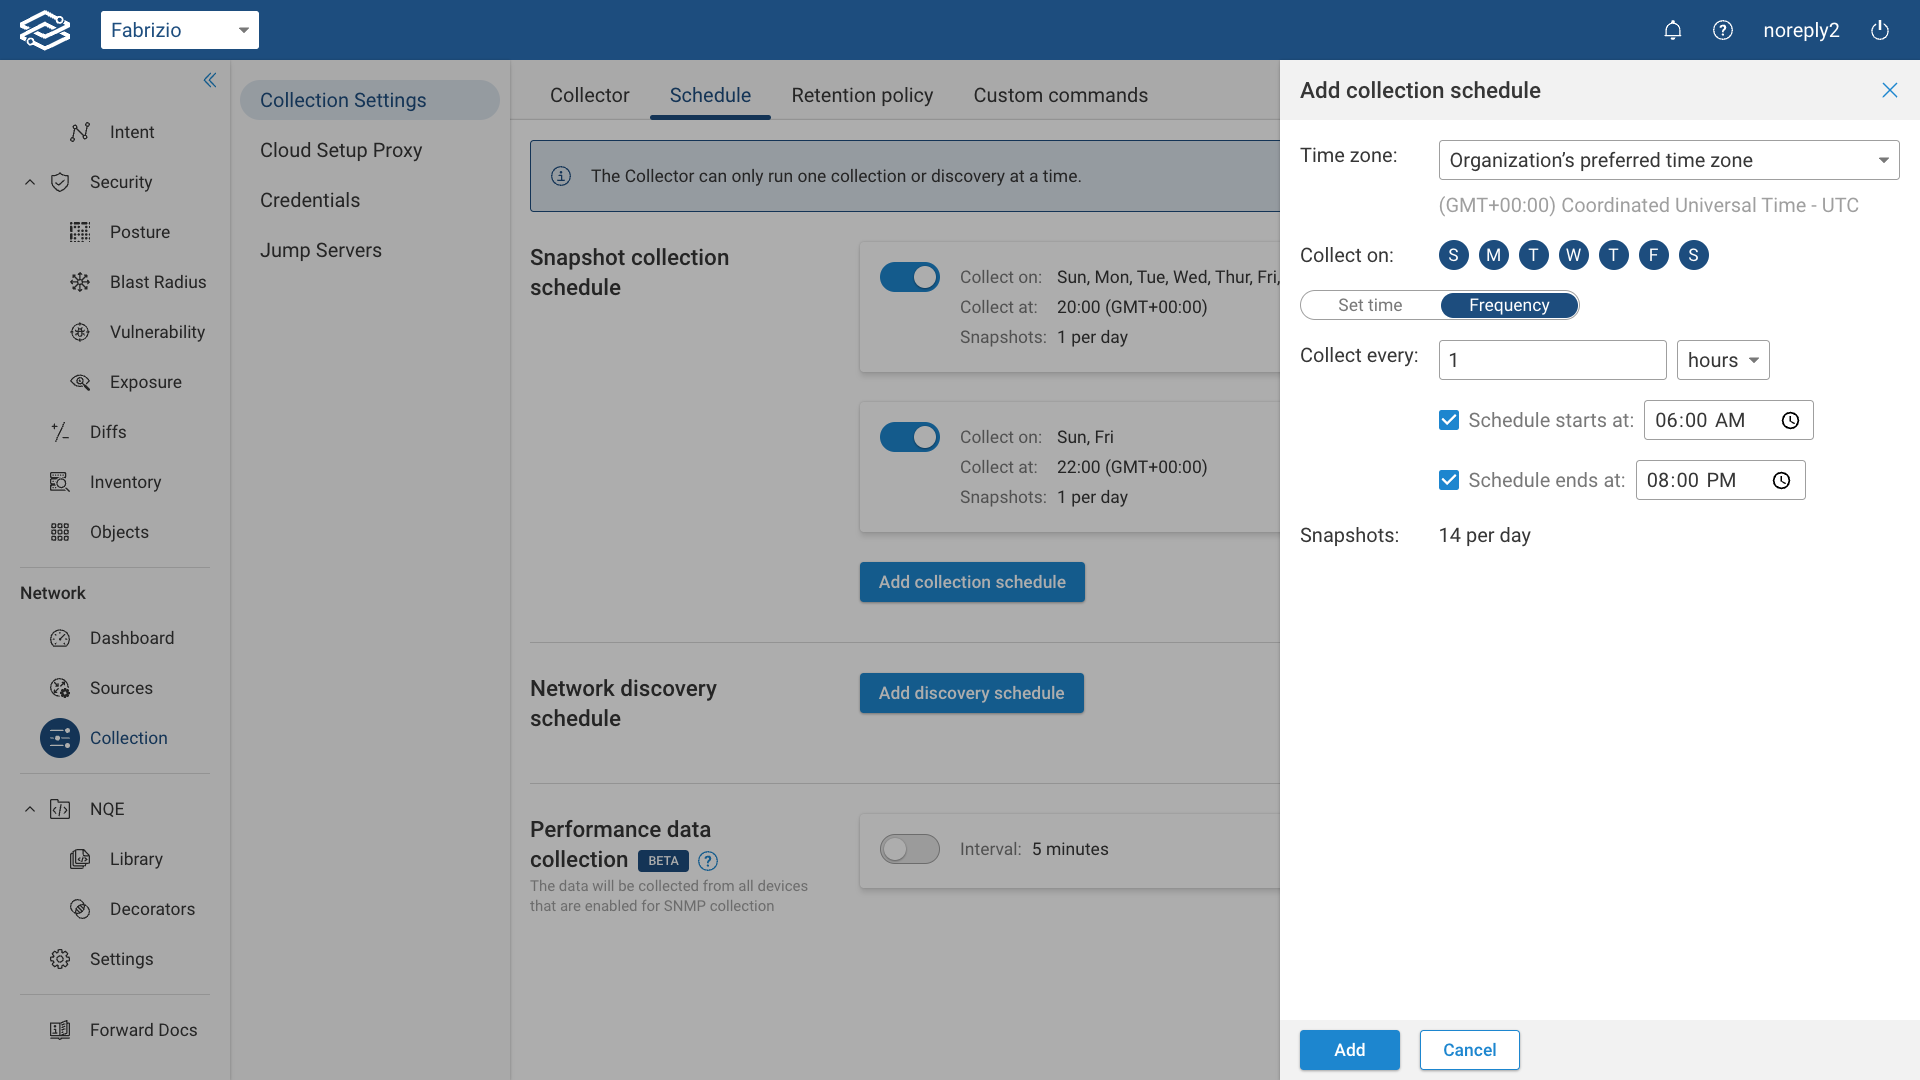
- Frequency: Run collection at a fixed period between 1 minute and 24 hours, resetting daily.
- Set time: Run collection at each of one or more times (in some time zone) on each of one or more days.
By default, the Organization time zone is used for the collections. To set a different time zone, select a new one from the Time Zone drop-down menu.
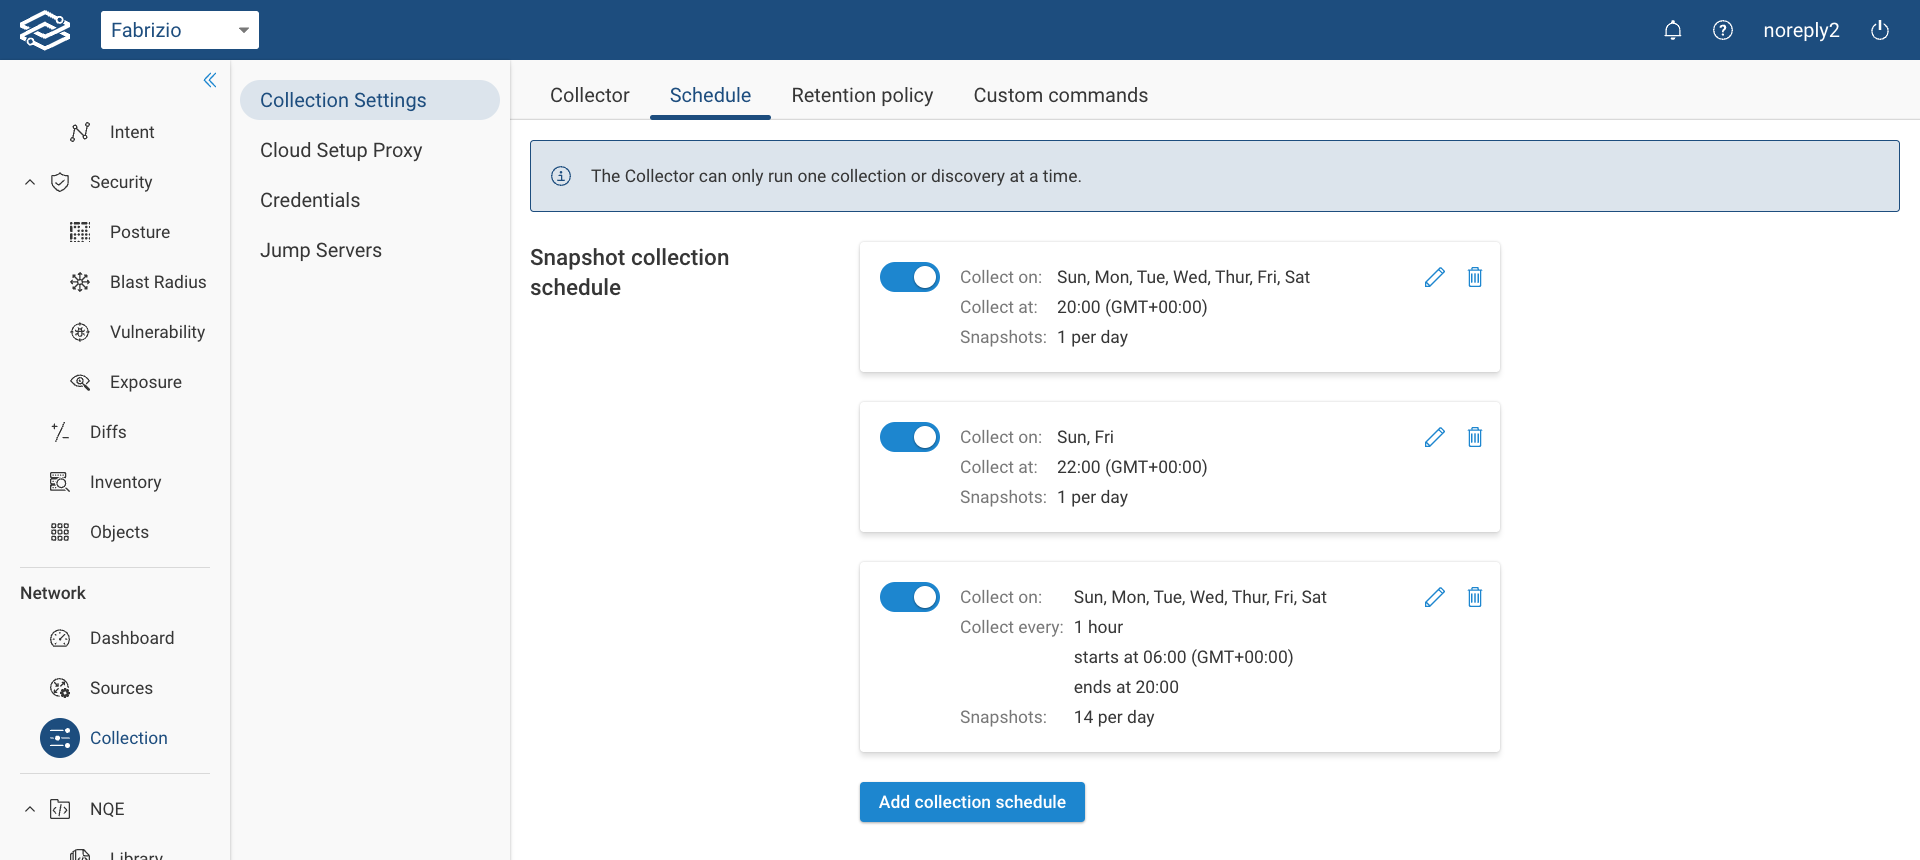
The summary provides a breakdown of scheduled collections.
Manually Triggered Collection
To manually trigger a collection, you have two options:
Option 1: from the Snapshot pulldown menu:

Option 2: From the Sources page:
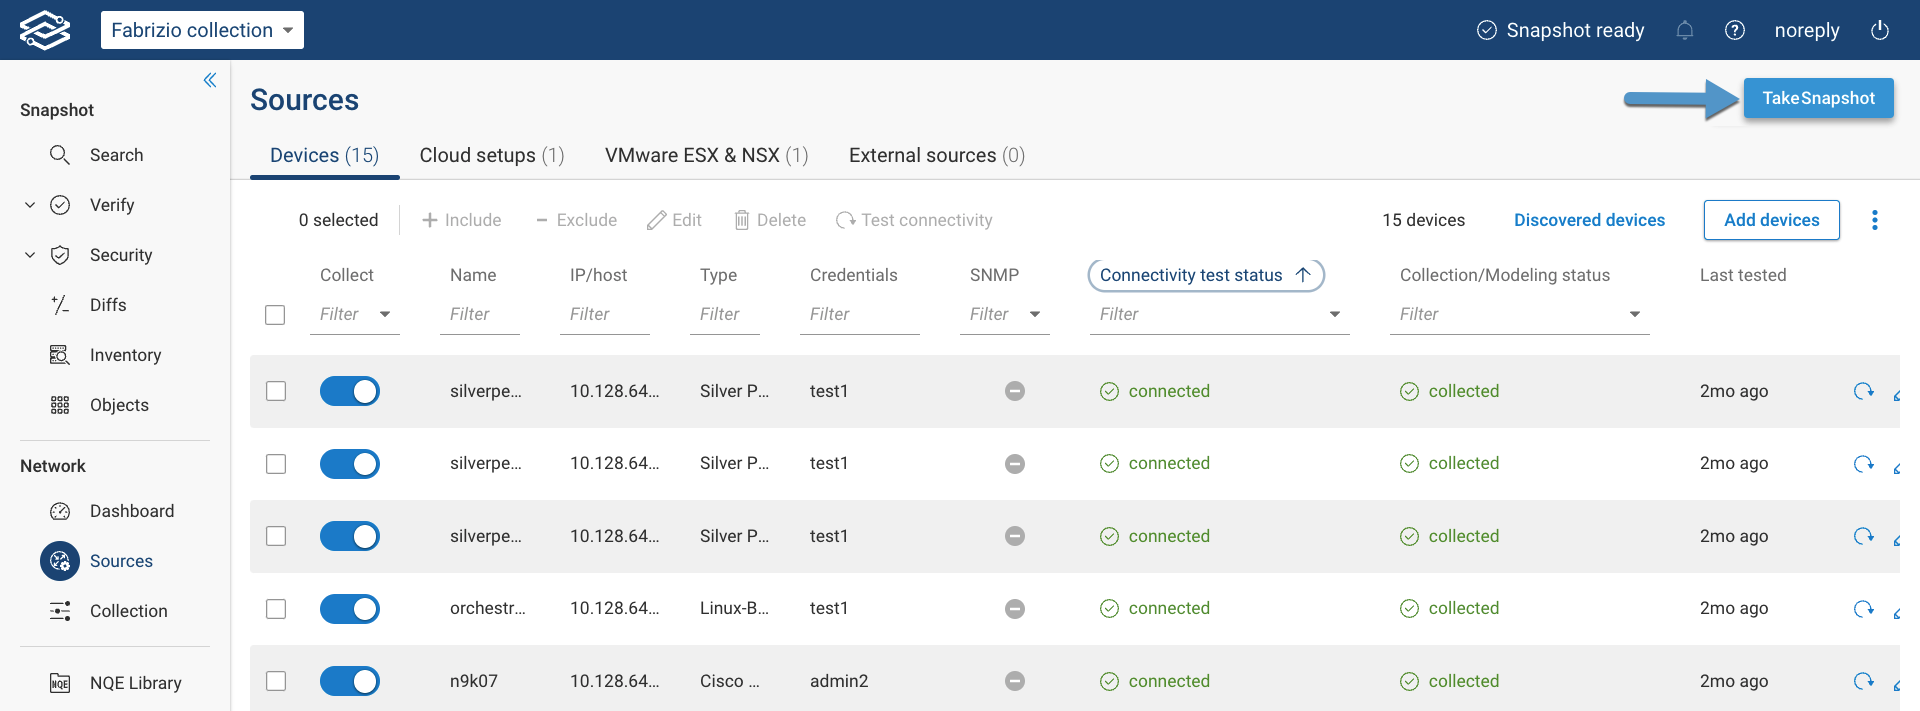
Click on Take full Snapshot, and the Forward platform will take care of the rest.
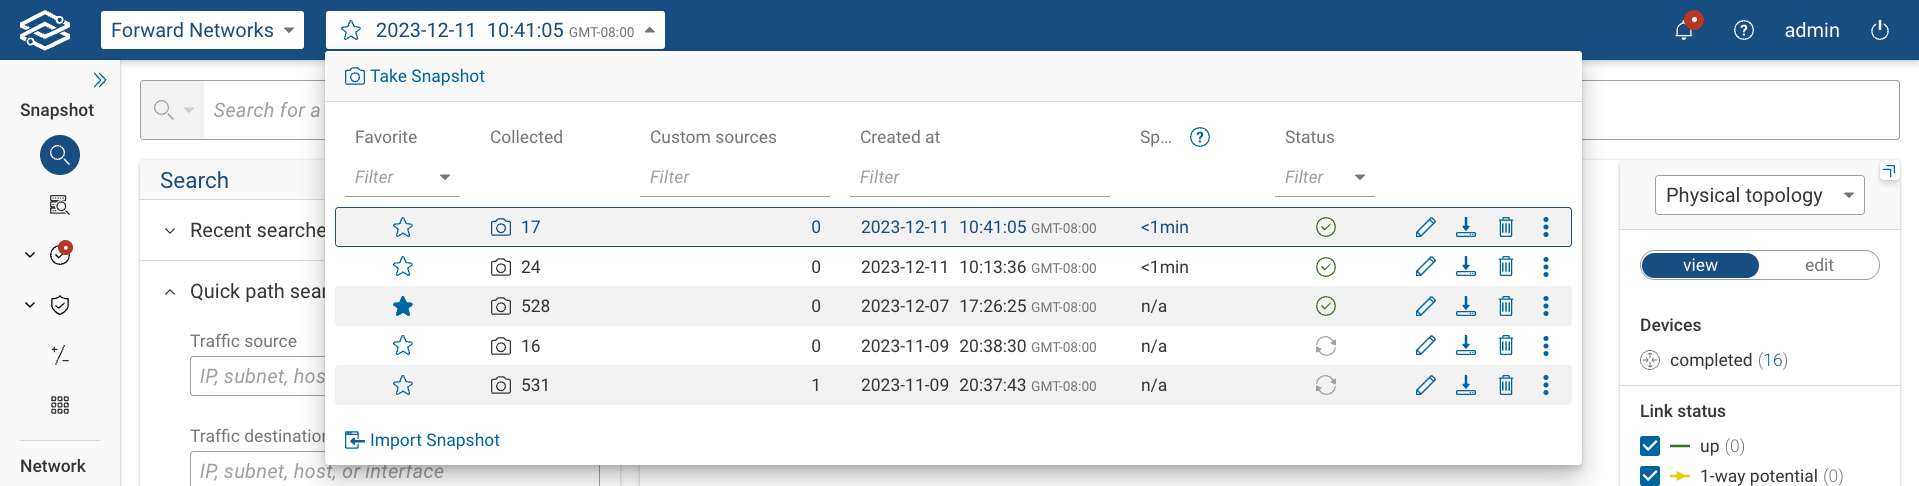
After the collection ends, click again on the Snapshot pull-down menu.

You should see the new Snapshot at the top of the list.
Other information provided in the Snapshot menu is the collection Span. It's the period of time between the oldest and latest device collection times in the Snapshot.
Your setup is now complete! You may want to modify the topology layout, to do so you can go over the topology section of this documentation.
Collection via REST APIs
The Forward Platform REST APIs can trigger a network collection, get the status of a network’s collector, or cancel an in-progress network collection. Please refer to the Network Collection API Documentation for a complete list of available APIs.
Collection Progress
You can monitor the network collection progress by checking the status on the upper right of the Forward UI close to the platform notifications icon:
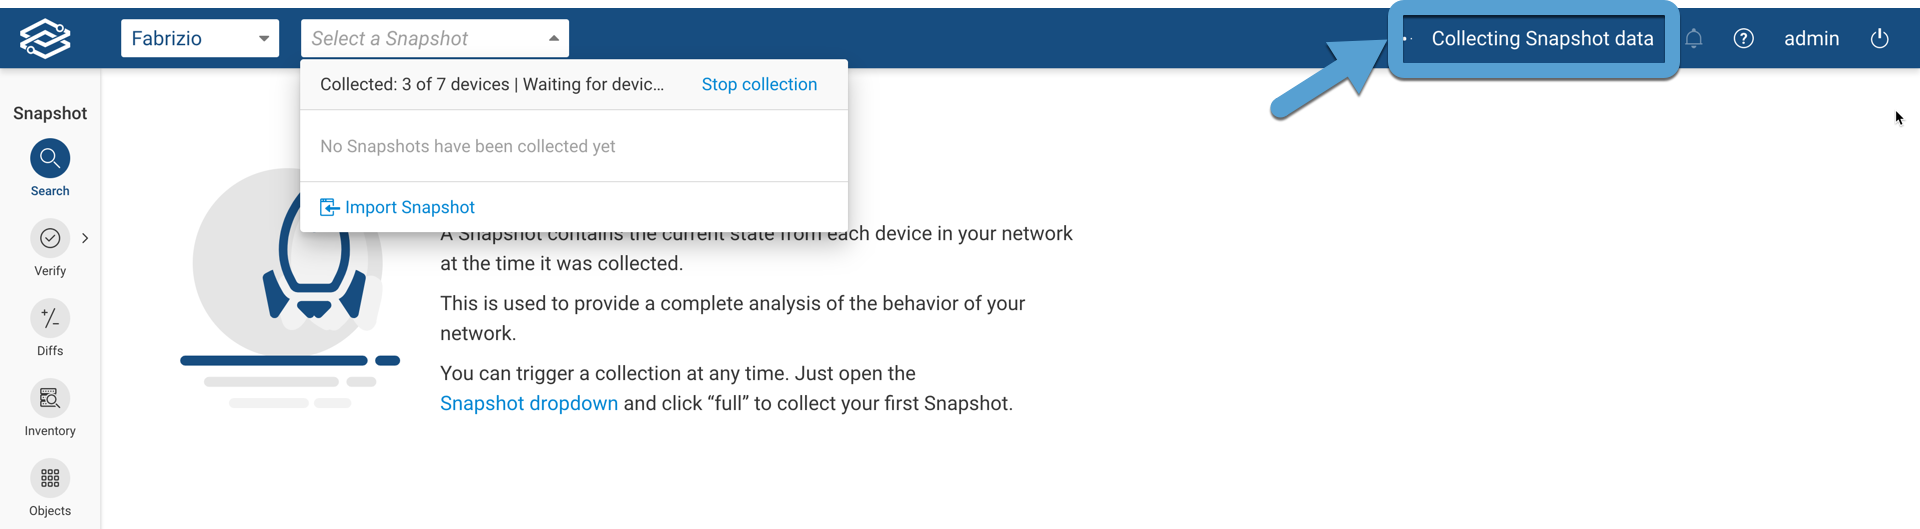
You can monitor the progress by clicking on the progress status.
Below, you can see some screenshots taken during the main collection phases:
Connectivity Test
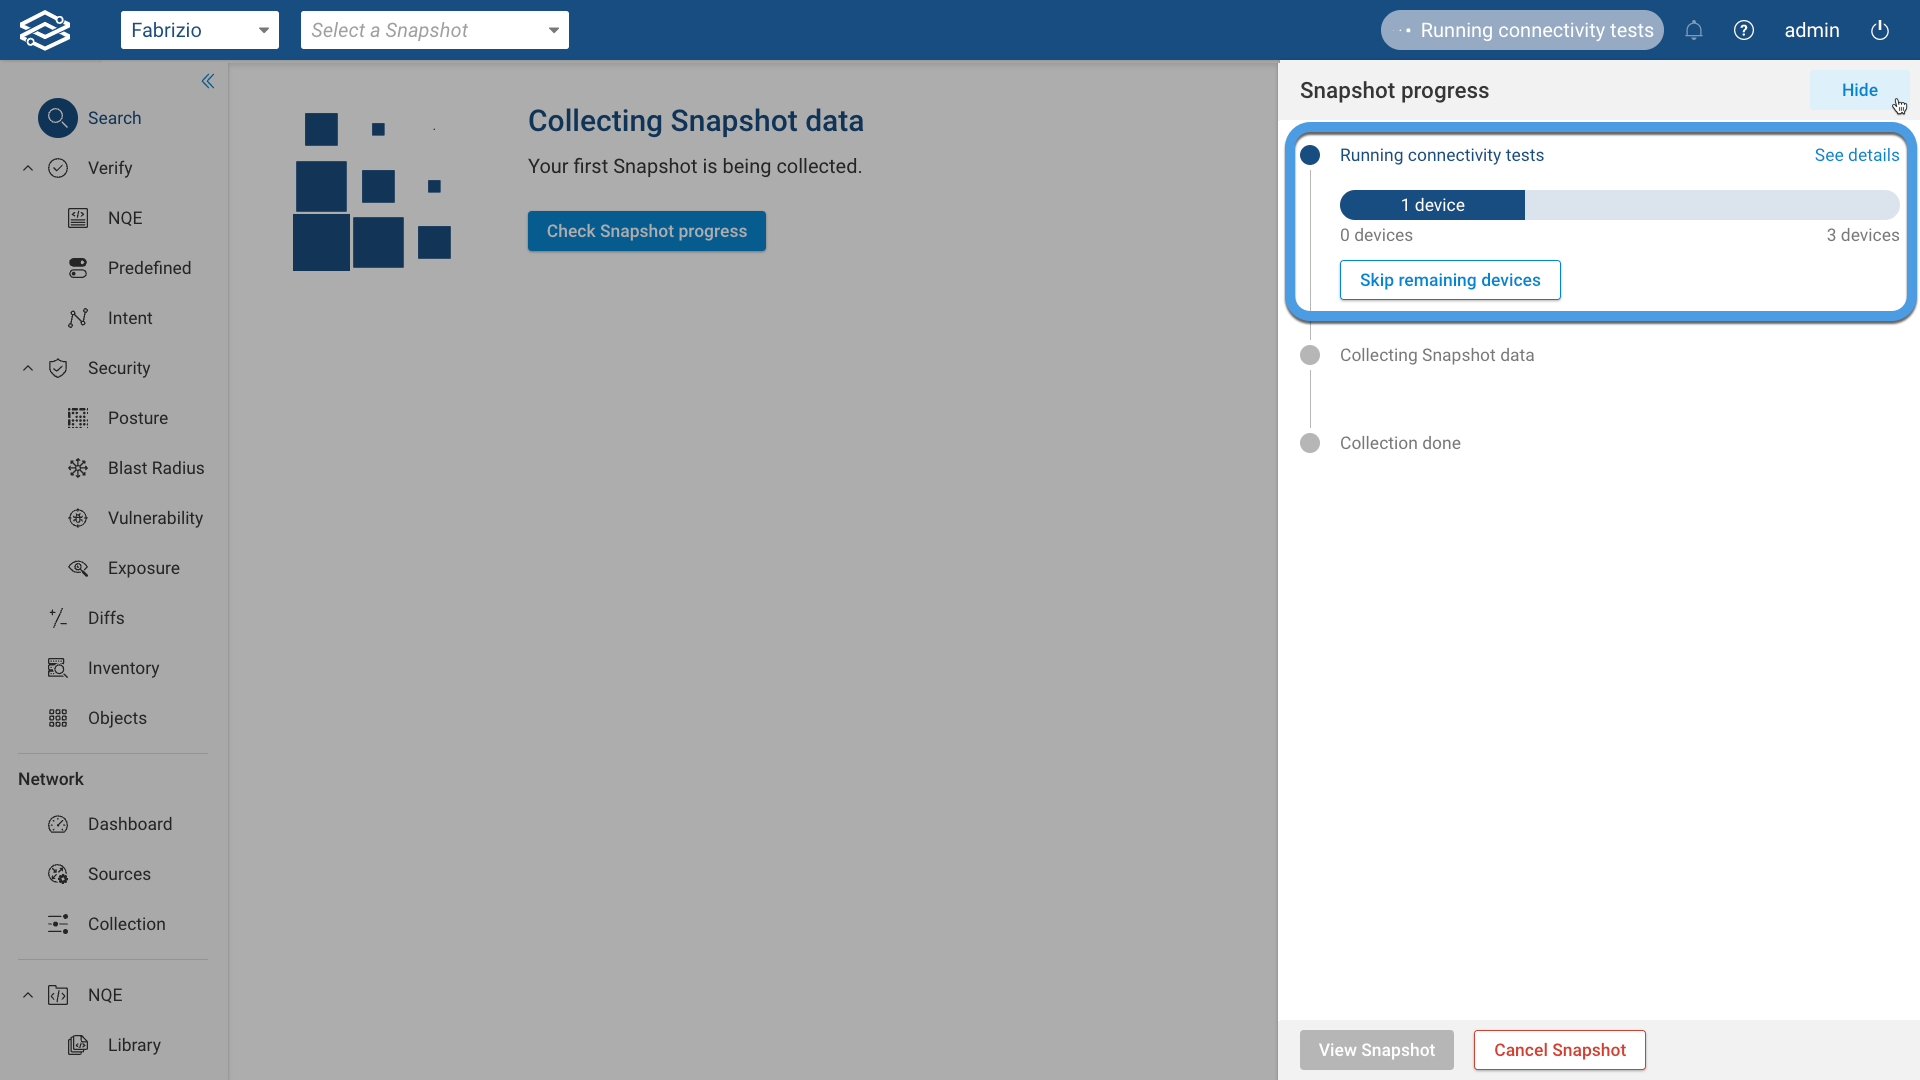
For more details, check the Connectivity testing page.
Device Collection
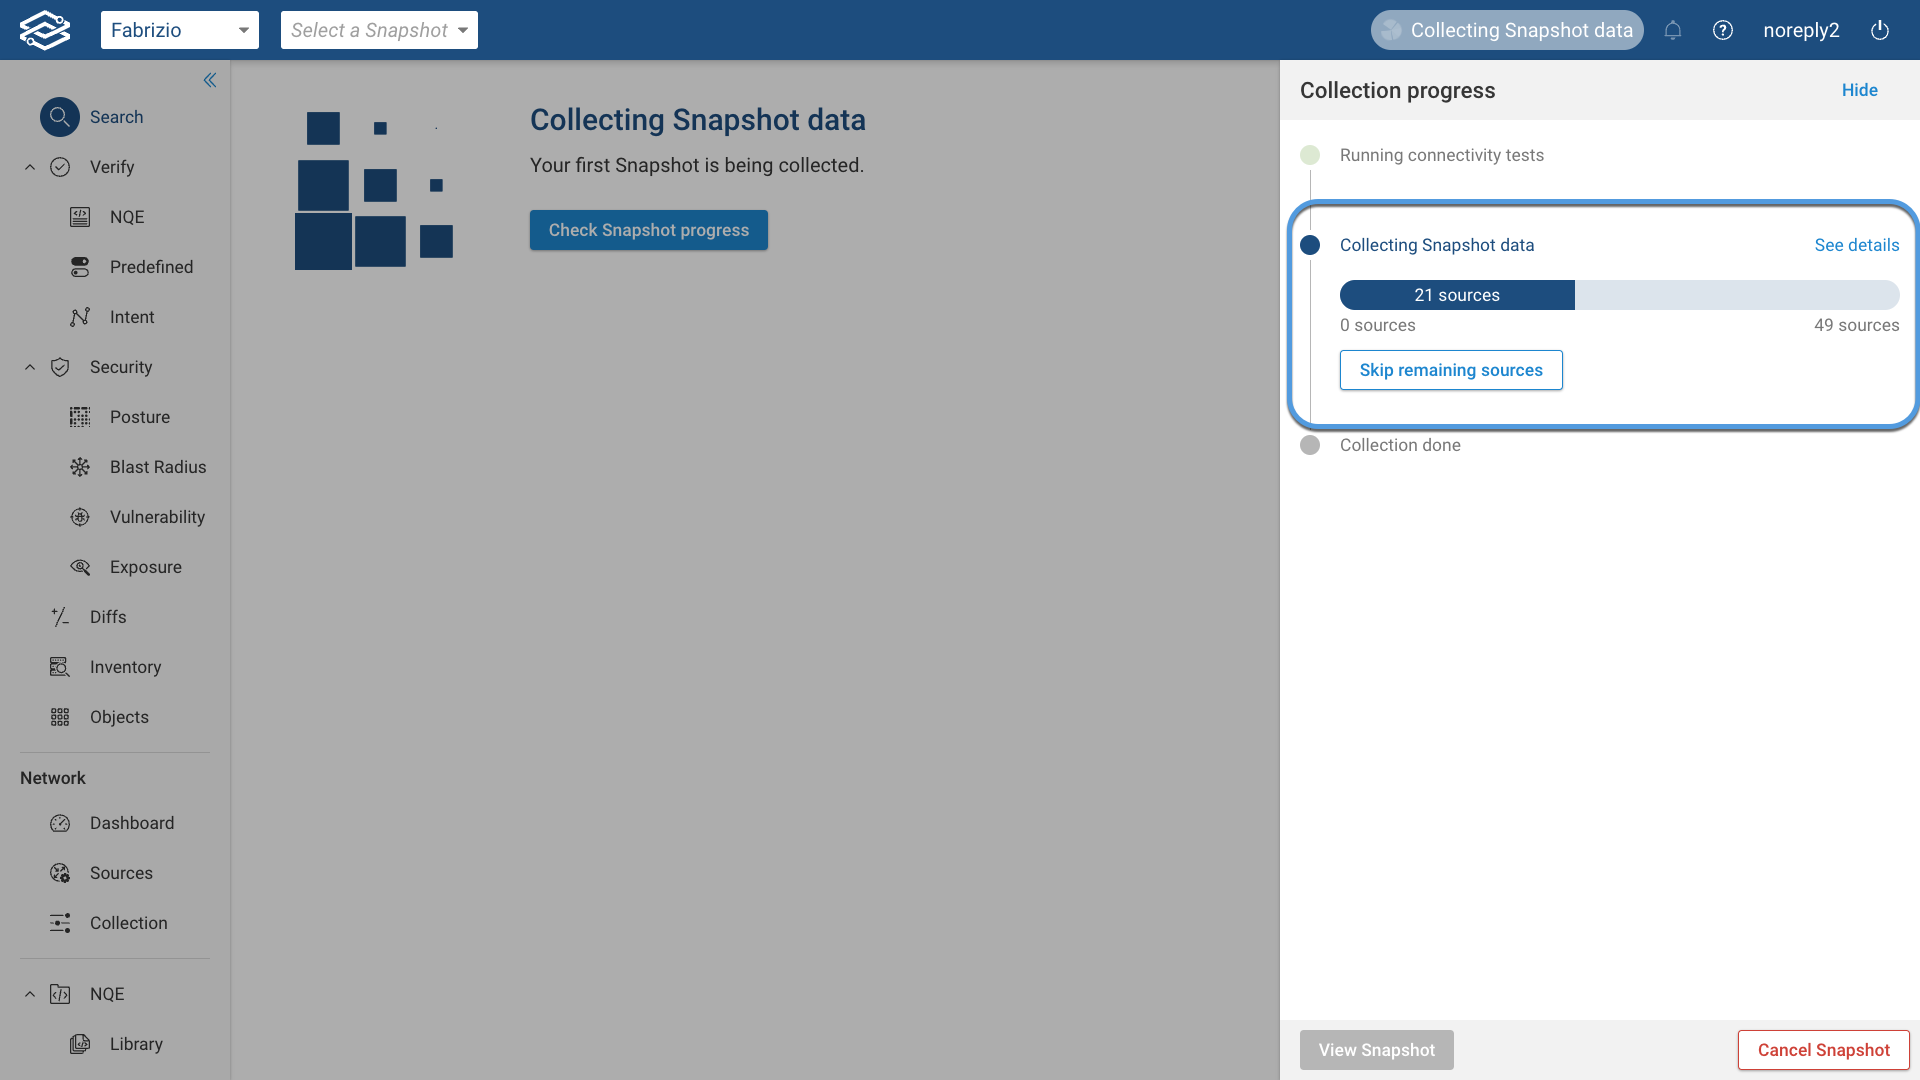
Click on See Details to get a detailed view of the devices being collected:
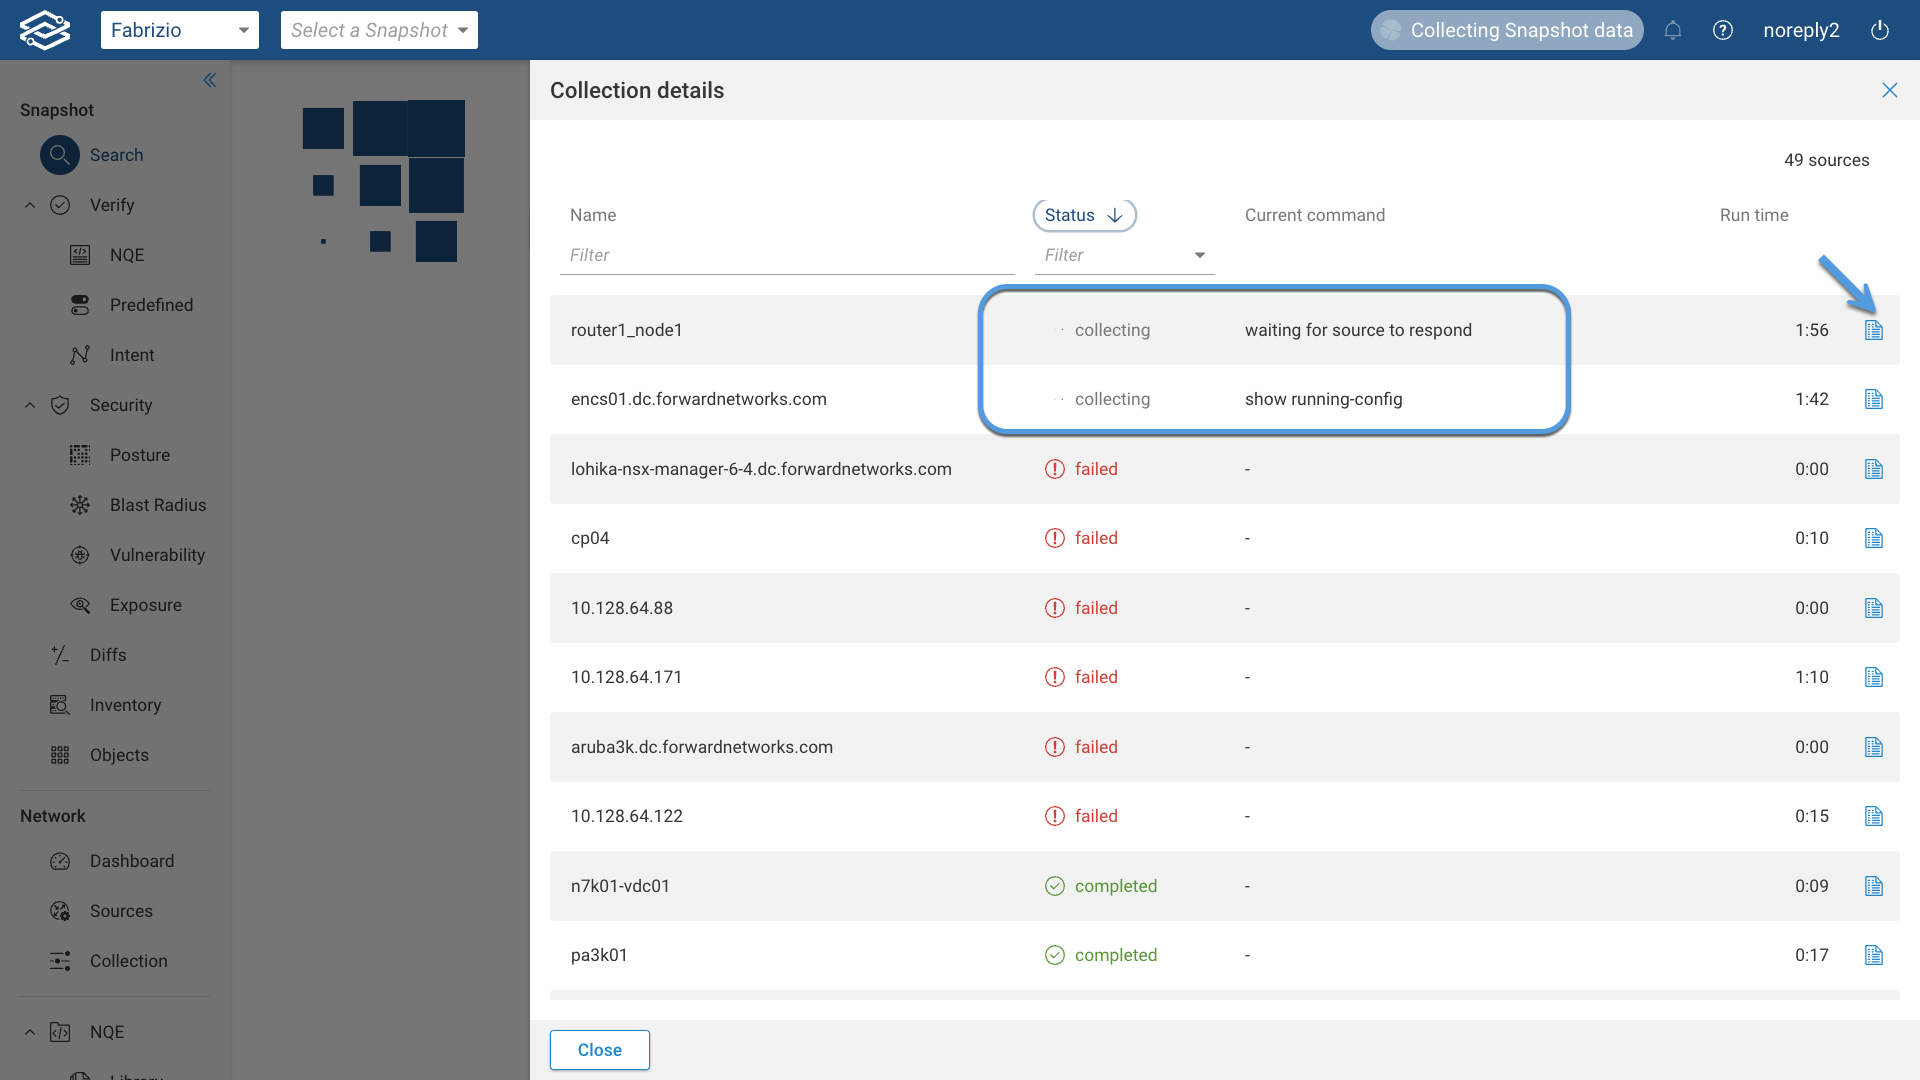
You can see the device collection logs by clicking on View Logs icon.
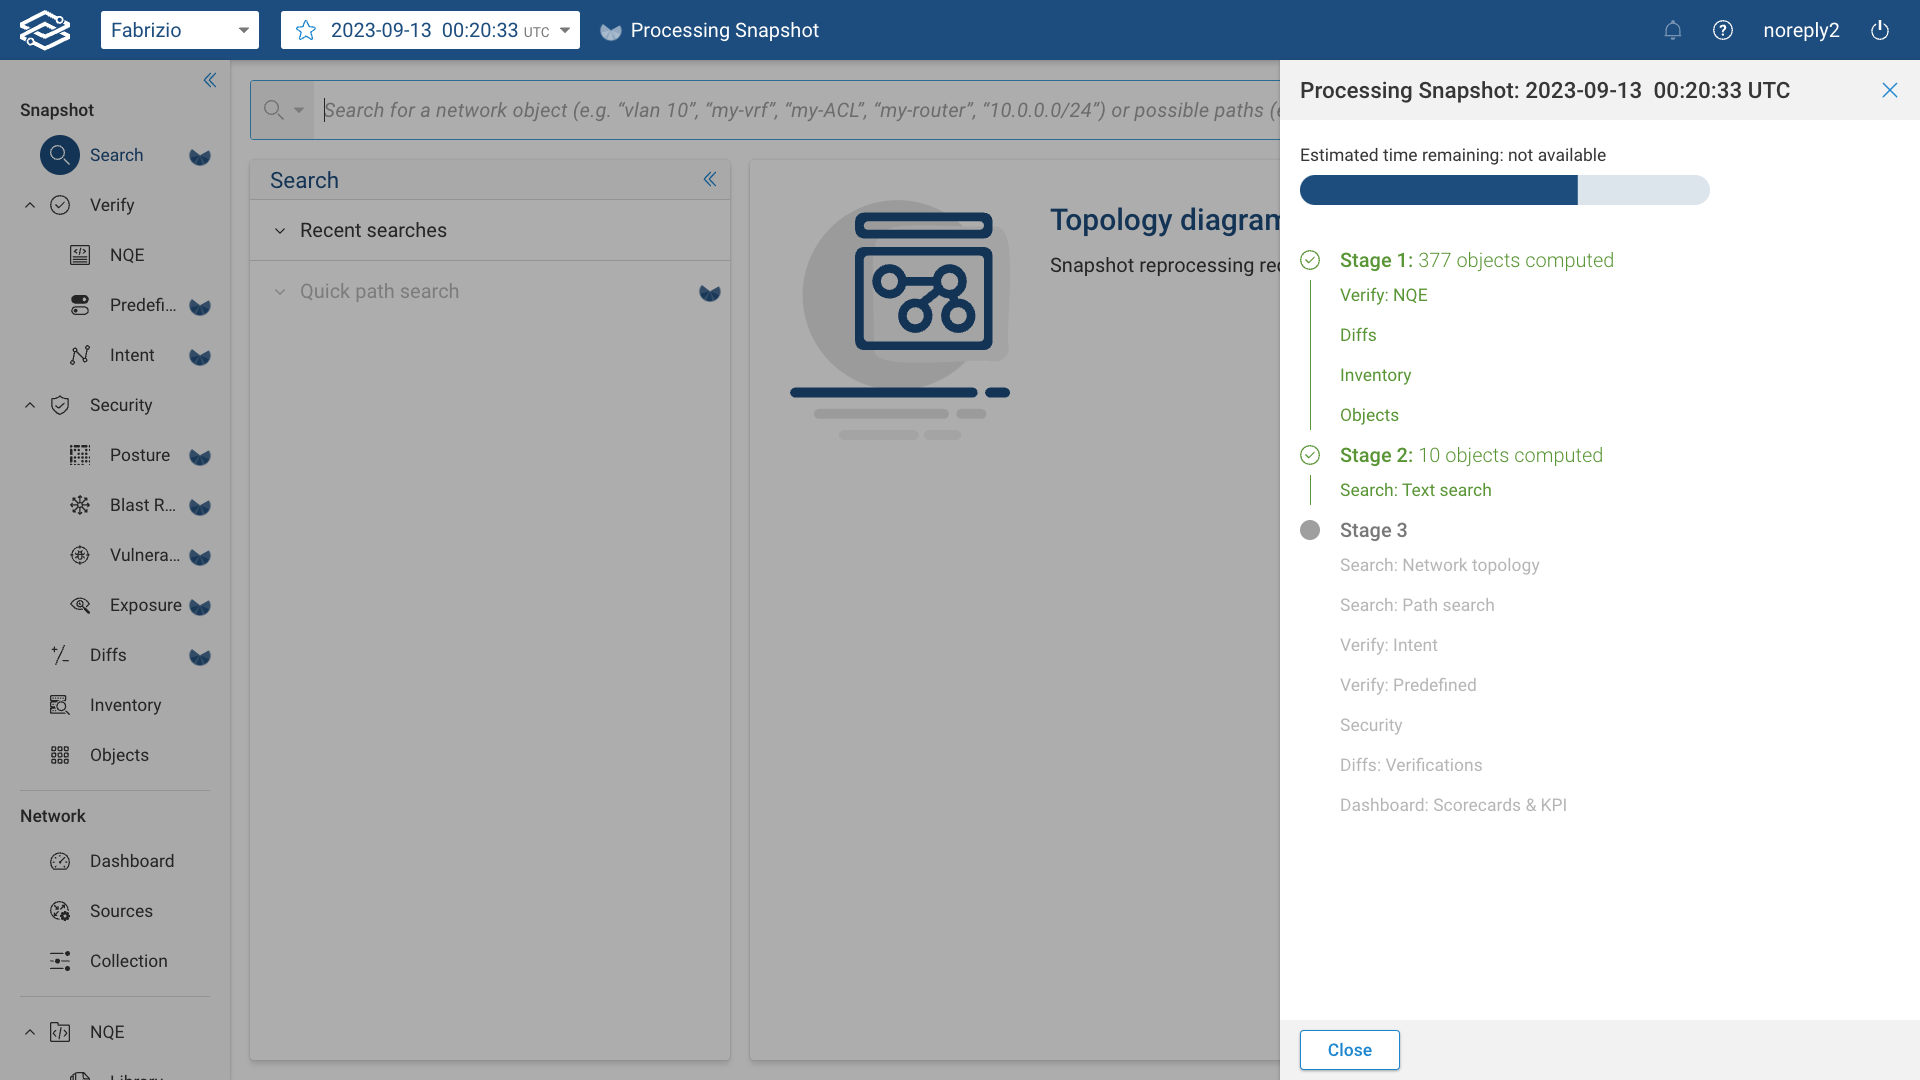
Snapshot Processing
Forward Enterprise employs a Snapshot progressive processing methodology, comprising of various stages.
At the conclusion of each stage, a set of Forward Enterprise applications becomes instantly accessible, eliminating the need for the Snapshot to be fully processed.
While processing, the estimated time remaining is displayed (when available), and progress is indicated at the top of the page. Additionally, it provides information on available applications in both the Processing Snapshot drawer and the navigation menu after each stage.
Snapshot Ready
Once the processing is over, a final report with the number of devices successfully collected and the number of devices that failed to collect is shown:

Click on View failed sources to troubleshoot any devices with collection errors:
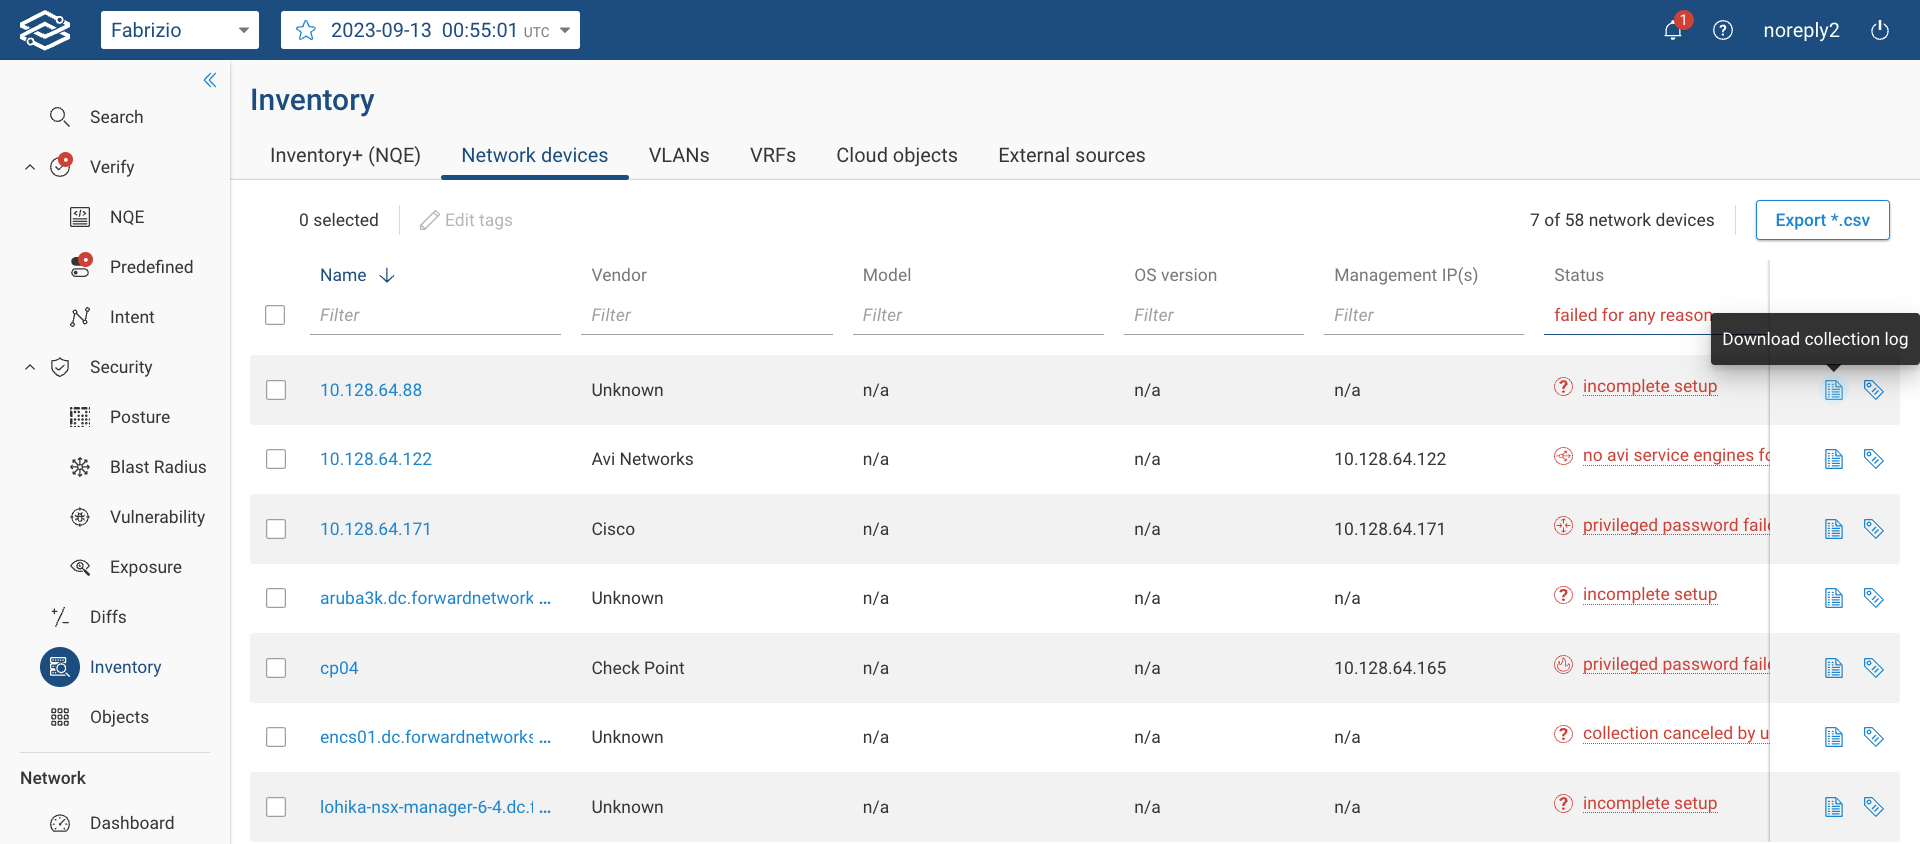
The collection log for each failed source can be downloaded using the Download collection log icon on the right.
Now that the snapshot is ready, you can start using the Forward applications.
Snapshot Management
Export
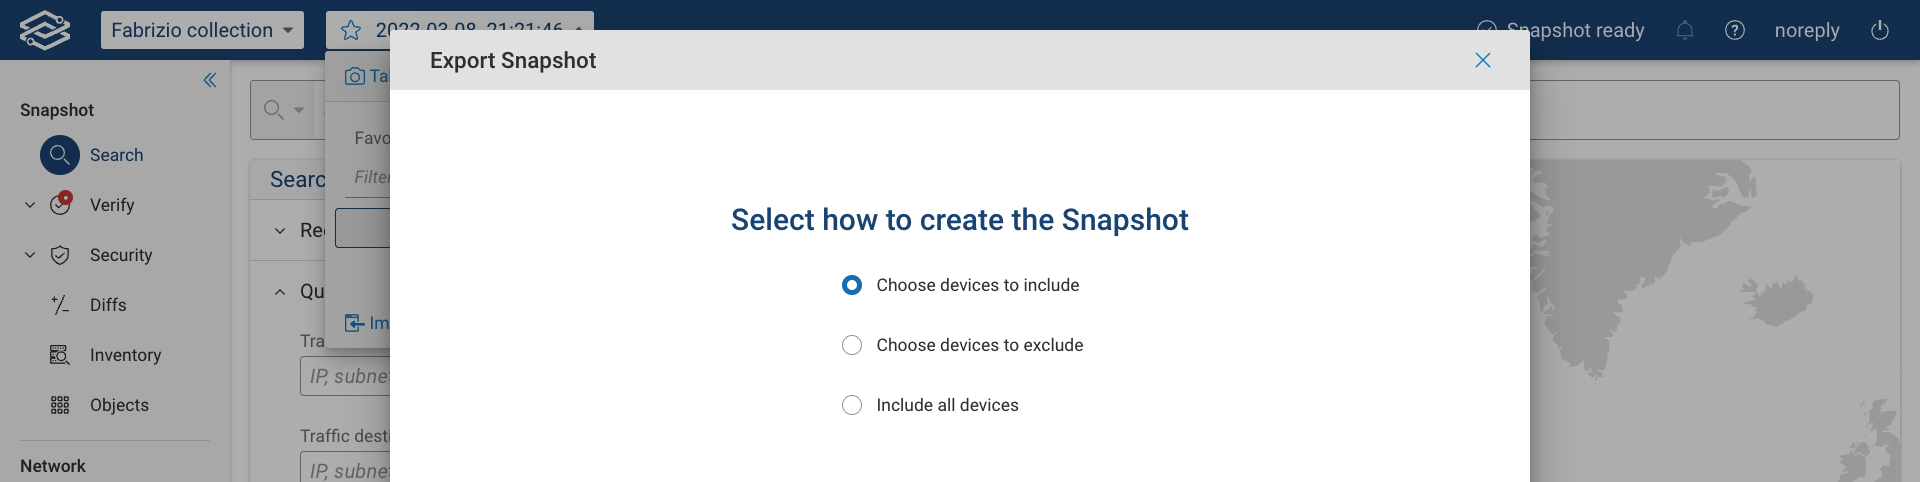
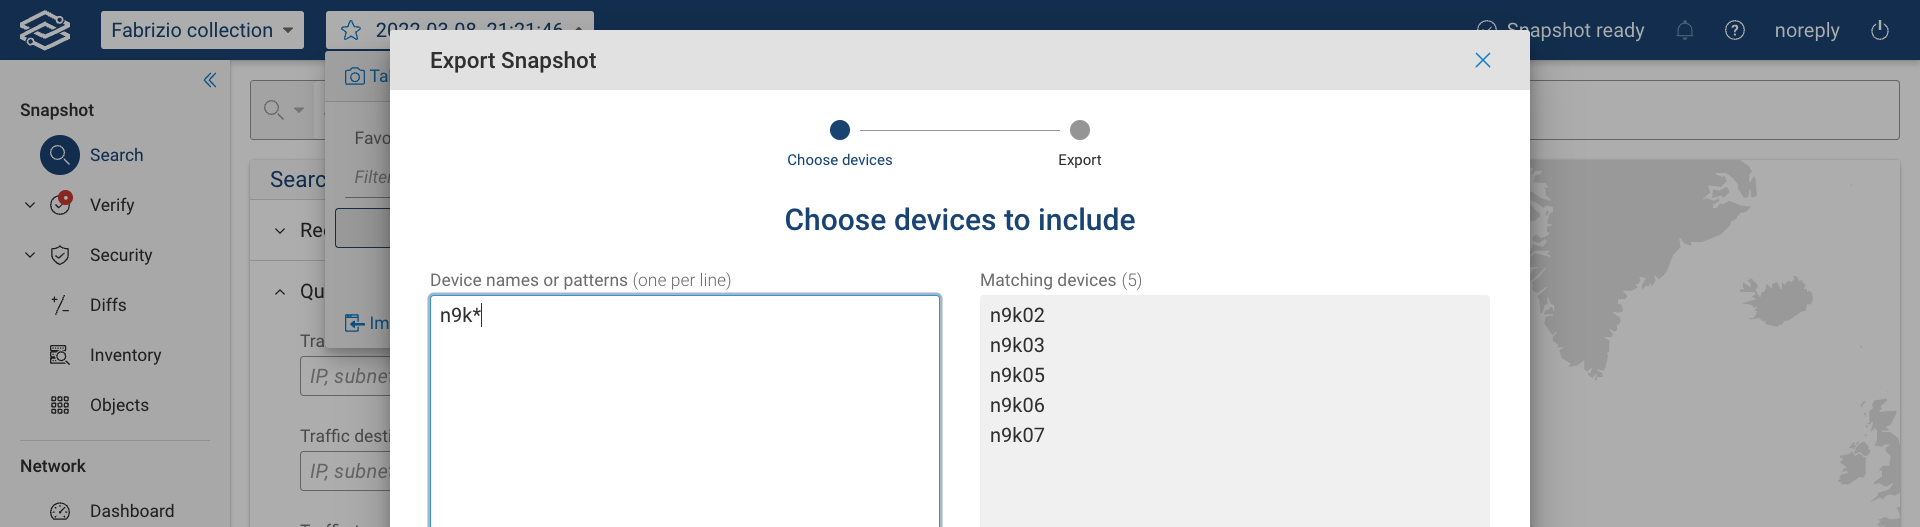
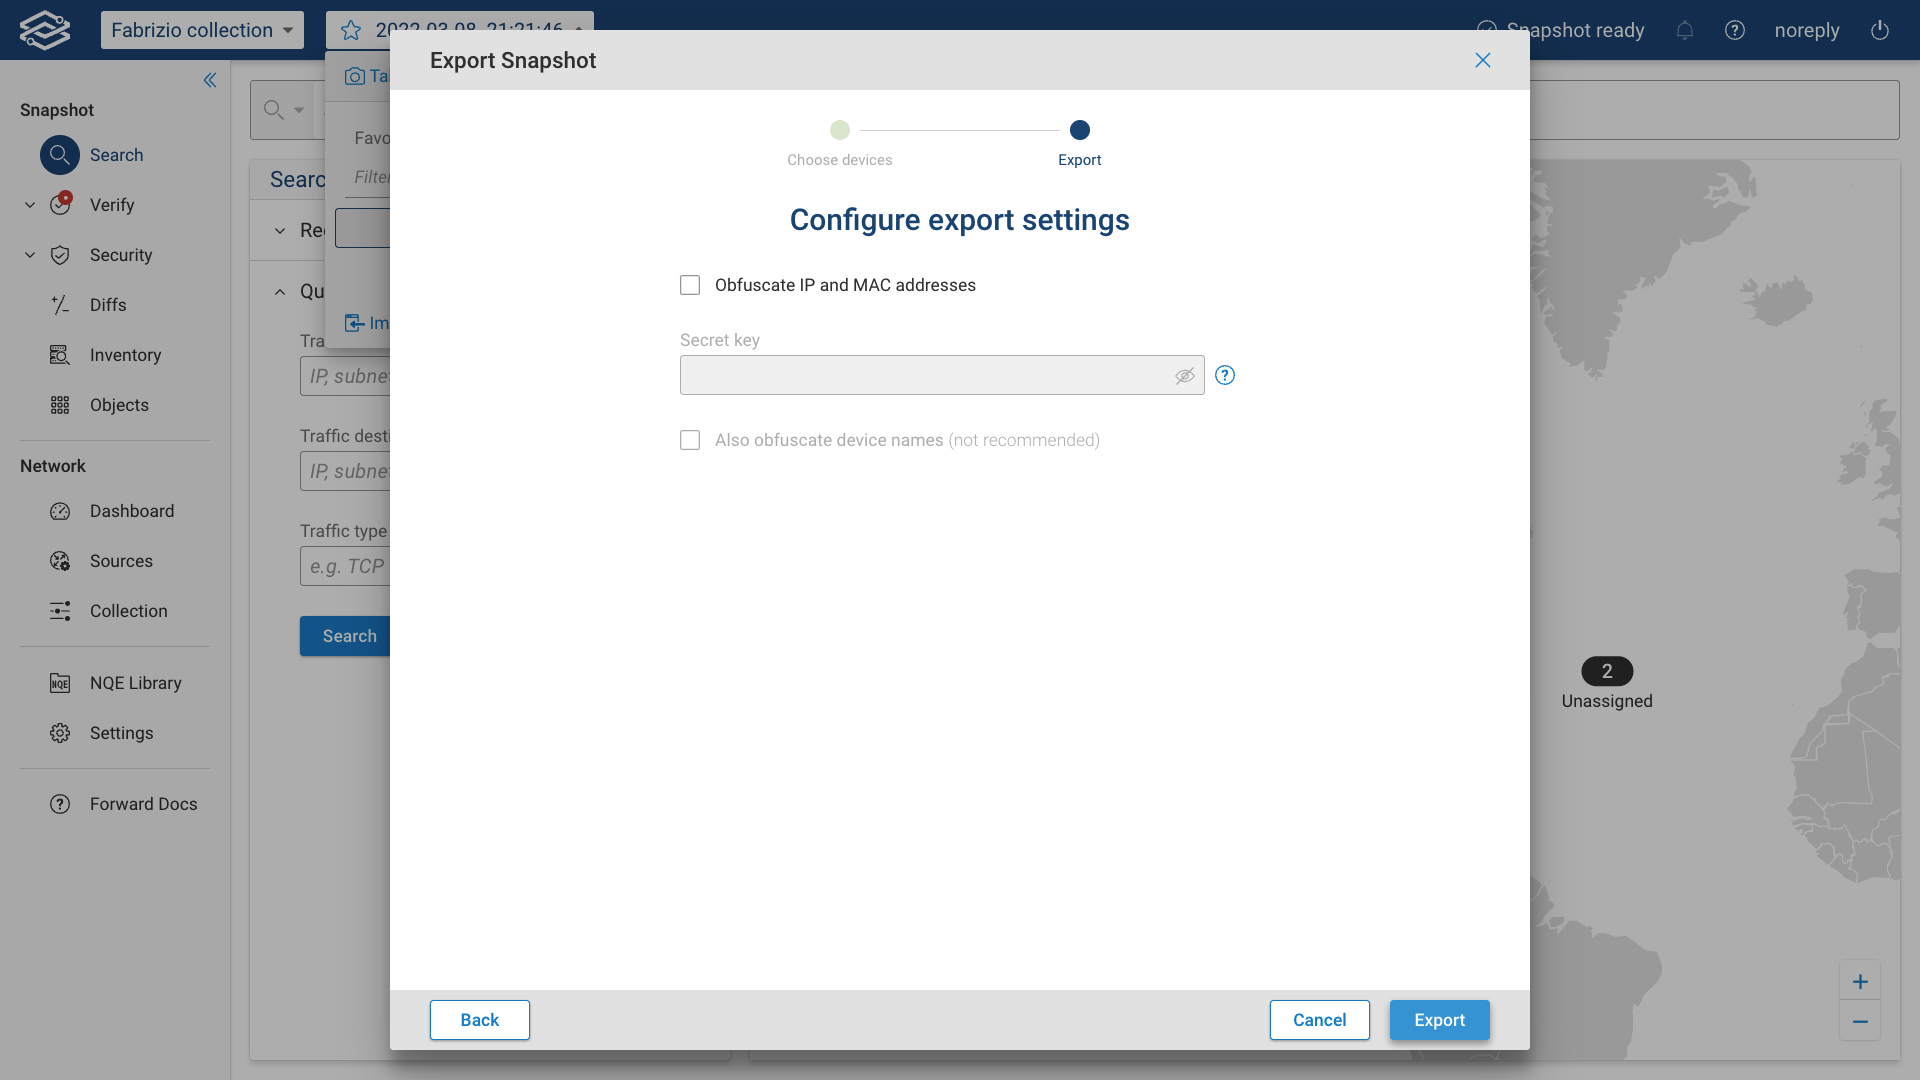
Snapshots can be exported in a zip file format from the Snapshot selector. The Export icon provides a full export while the Advanced export option in the kebab menu provides the ability to filter the devices to be included or excluded in the export as well as options to obfuscate IP, MAC addresses, and device names.

The following screenshots show you an Advanced Export wizard workflow example:
Import
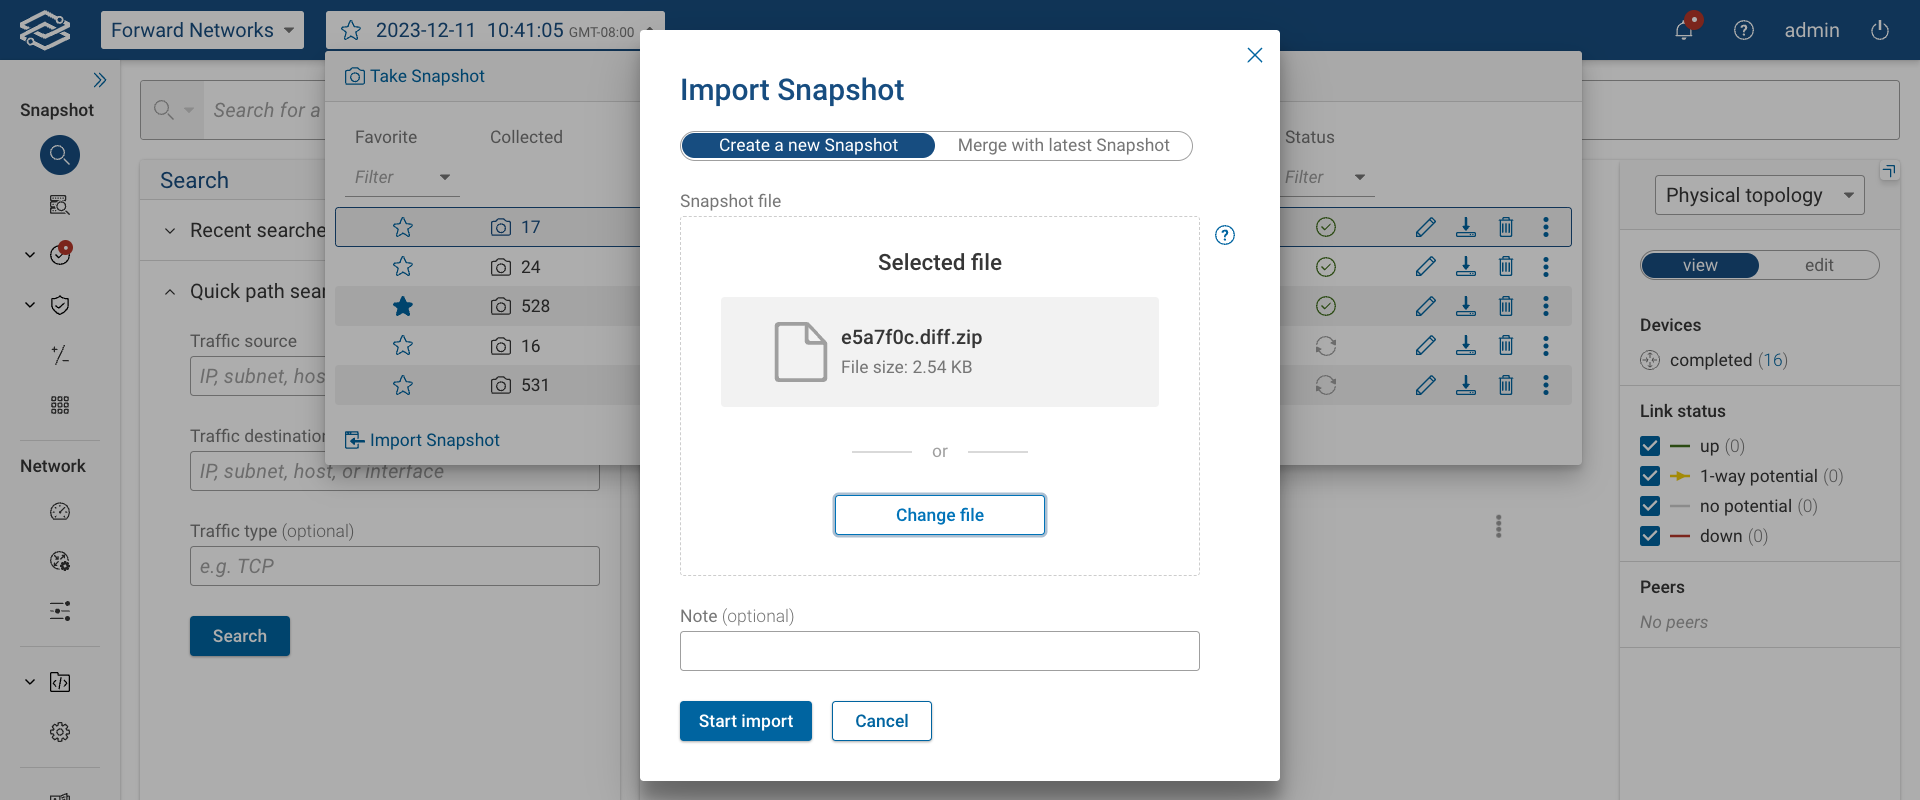
To import a previously exported Snapshot, navigate to the Snapshot Selection drop-down and click on Import Snapshot at the bottom.
In the Create a new Snapshot tab, upload your Snapshot .zip file by either dragging and dropping it into the designated area or by selecting the file manually. You also have the option to add a Note.
For detailed steps on merging multiple snapshots, refer to the Merge section below.
Merge
When importing a Snapshot, Forward allows importing multiple Snapshot files at the same time.
This allows merging Snapshots collected from independent networks (enclaves) to provide a complete global view of the enclave networks.

- Overlapping domains. The assumption is that enclaves don't have overlapping domains and if there are duplicate devices they will be simply ignored.
- Merged data. While merging Snapshots, Forward merges the following data: Devices, locations, located devices, device clusters, synthetic devices, link overrides, link inference settings, edge node listing, security matrix filters, aliases, scorecards and KPI categories.
- Locations. If locations with the same name exist in two Snapshots:
- If they are the same, only the first location is retained.
- If they are different, the second location is renamed by appending a suffix like "-1" and assigned a new location id.
- Device clusters. Different scenarios while merging are as follows:
- If no cluster with the same name exists, the cluster is added and its devices removed from other clusters.
- If a cluster with the same name exists and is equal, no action is taken.
- If a cluster with the same name exists and belongs to the same location, the clusters are merged and its devices removed from other clusters.
- If a cluster with the same name exists but belongs to a different location, a unique name for the imported cluster is created, added, and its devices are removed from other clusters. Note that we also update the location ids of the imported clusters.
- Synthetic devices. Synthetic devices from multiple Snapshots are combined. Only Internet nodes are merged into a single device, since a Snapshot can only contain one Internet node.
- Link overrides. All link overrides are merged.
- Link inference settings. All link inference settings are merged.
- Edge node listing. If there are edge nodes with the same name in two Snapshots, the one from the later Snapshot takes precedence.
- Security matrix filters. If there are two filters with the same name, their resource pools are merged. Note that all other metadata is not retained for a filter (if at all present).
- Aliases. If there are two aliases with the same name but are not defined the same, they are merged.
- Scorecards and KPI categories. Category ids are reassigned to avoid conflicts. If there are any scorecards or categories with conflicting names, the scorecard or category from the last imported Snapshot is used.
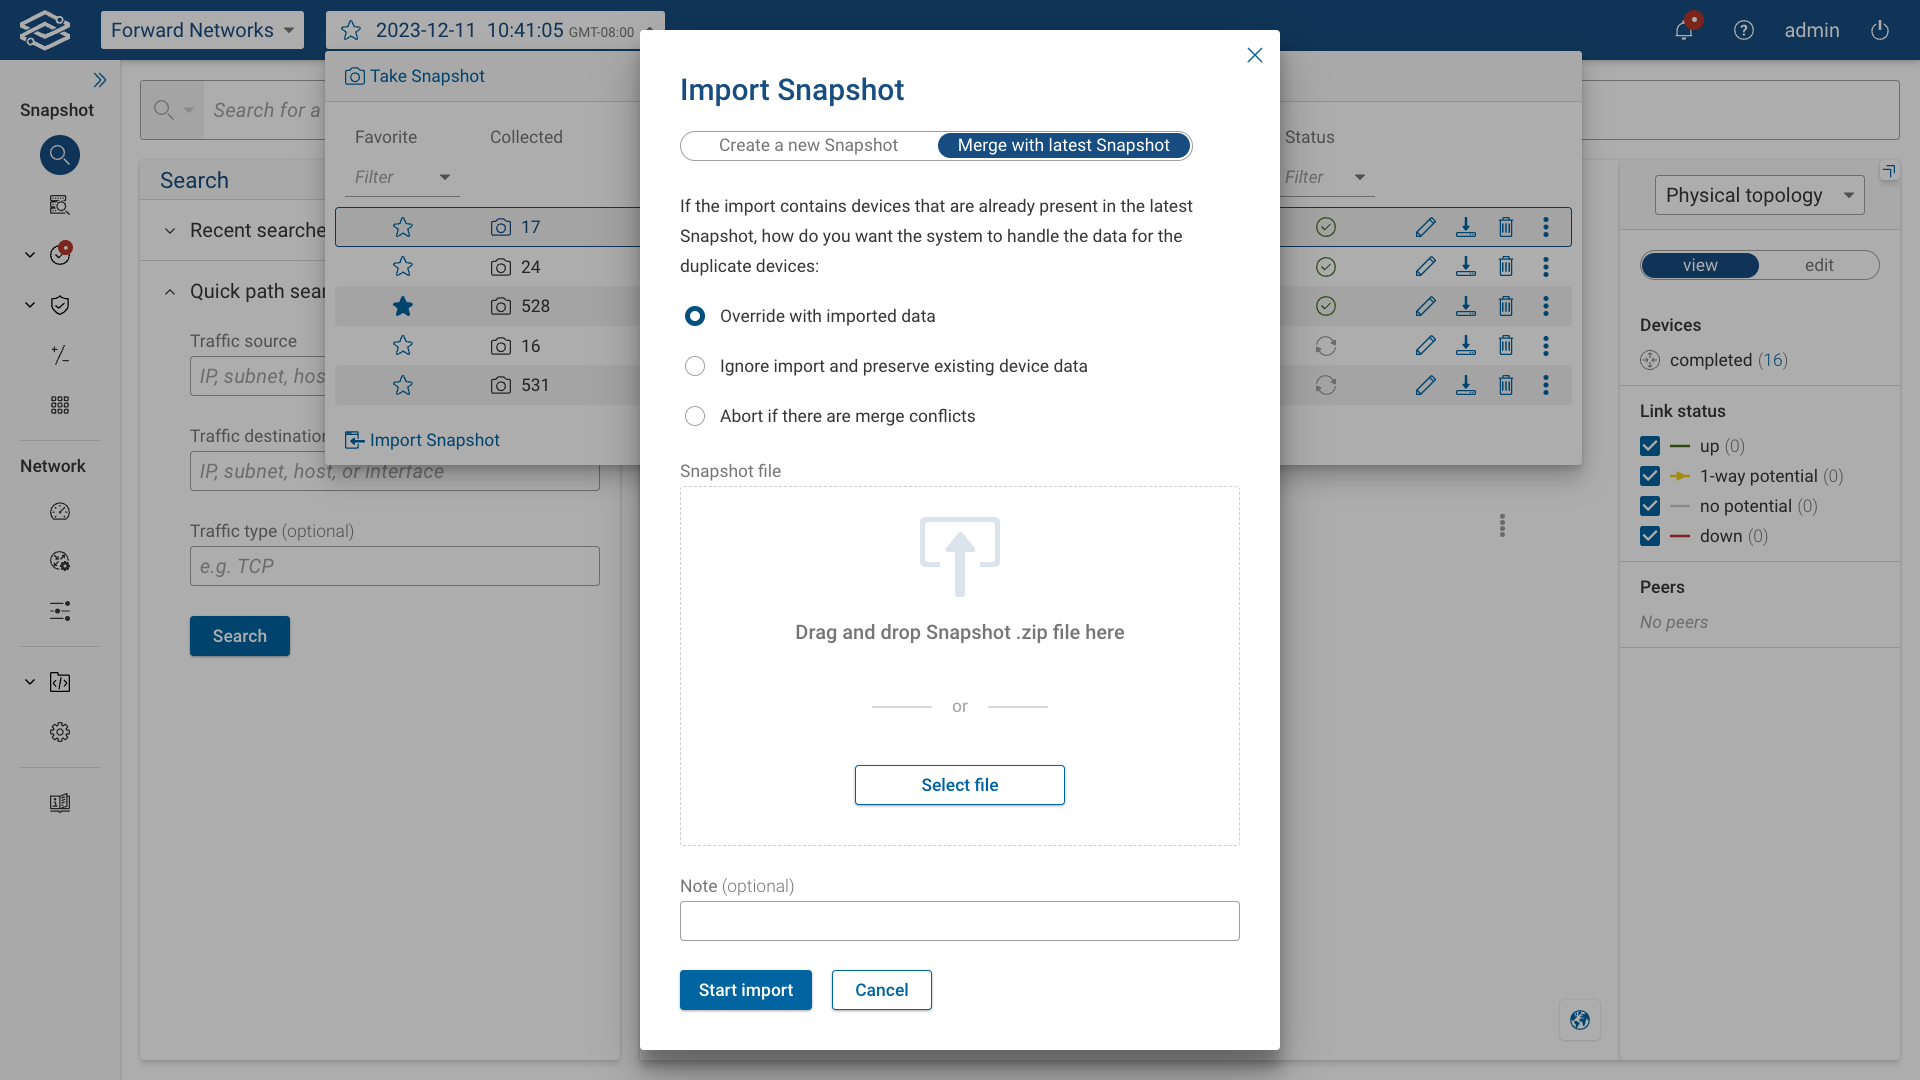
To merge a previously exported Snapshot with the latest Snapshot, navigate to the Snapshot Selection drop-down, click on Import Snapshot at the bottom, and select the Merge with Latest Snapshot tab.
You will be presented with the following options for handling duplicate device data:
- Override with imported data: Existing duplicate device data will be replaced with the data from the imported Snapshot.
- Ignore import and preserve existing device data: The system will retain the existing device data, ignoring duplicates from the imported Snapshot.
- Abort if there are merge conflicts: If duplicate data is detected, the import process will be aborted and shows the list of device names that exist in both the latest snapshot and the imported snapshot.
Upload your Snapshot .zip file by dragging and dropping it or manually selecting the file. You have the option to add a Note as well.
Data such as locations, clusters, synthetic devices, and others are merged with the latest Snapshot following the merging logic outlined earlier in this section.
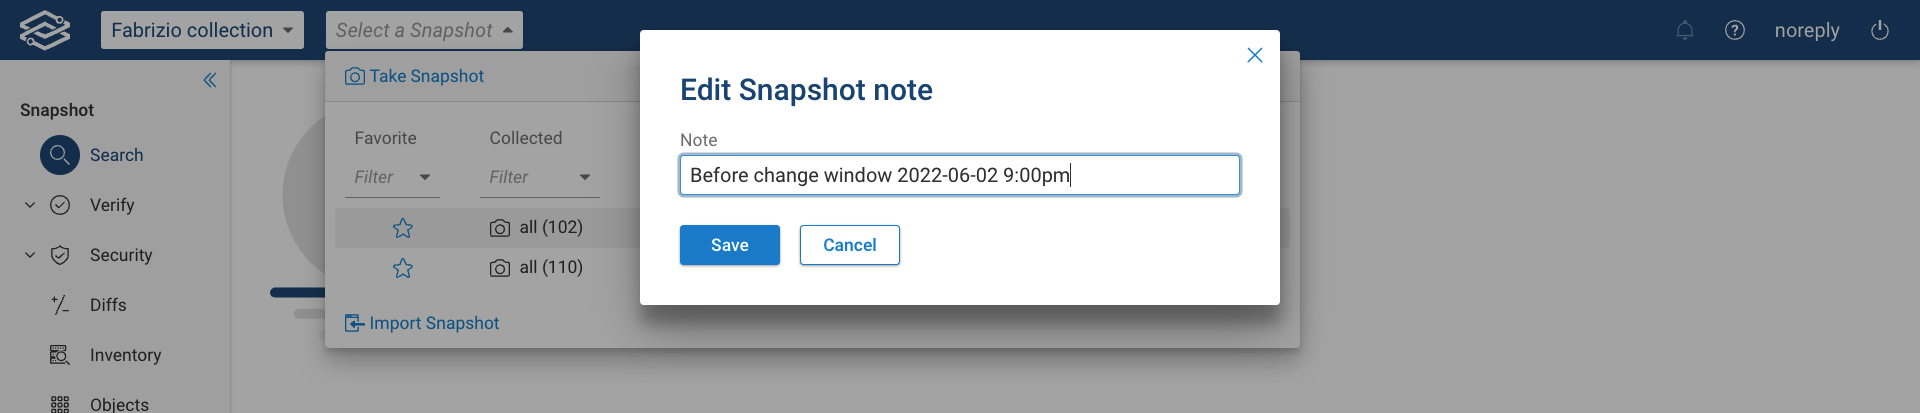
Edit
The Edit option on the right side of the Snapshot selector allows you to add or edit a Snapshot note.
Delete
To permanently delete a Snapshot from the Forward platform, click on the delete icon on the right side of the Snapshot selector and confirm its deletion.
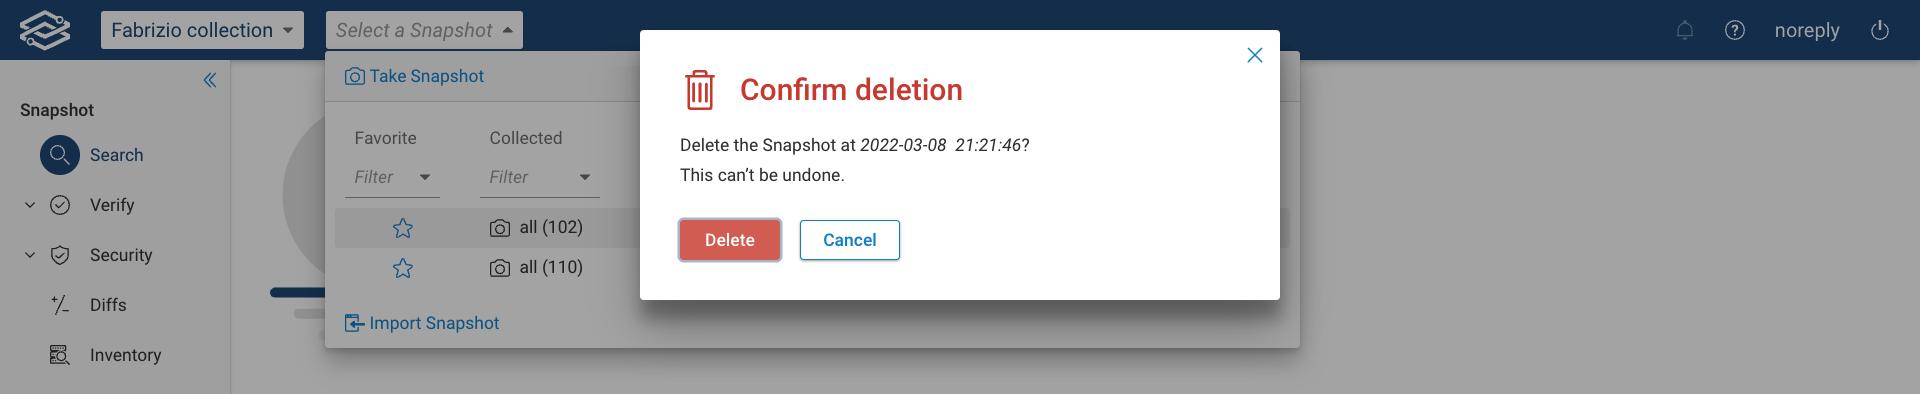
A Snapshot deletion cannot be undone!