Inventory+ (NQE)
Inventory+ provides seamless access to network data across various technological domains, including detailed insights into device hardware and Layer 2 (L2) and Layer 3 (L3) configurations and states.
Inventory+ utilizes Forward's Network Query Engine (NQE), presenting data views built from NQE queries available in the NQE Library.
The queries in Inventory+ are processed each time a new Snapshot is taken, ensuring that the latest data is always accessible. Results are displayed in a tabular format, which can be sorted and filtered as needed.
Add Queries to Inventory+
Inventory+ allows users to add queries in two ways:
Using the Add NQE Queries Button
- Click the Add NQE queries button located above the query list.
- A dialog box will appear with the complete list of available NQE queries from the NQE Library. Queries already added
to Inventory+ will appear greyed out.
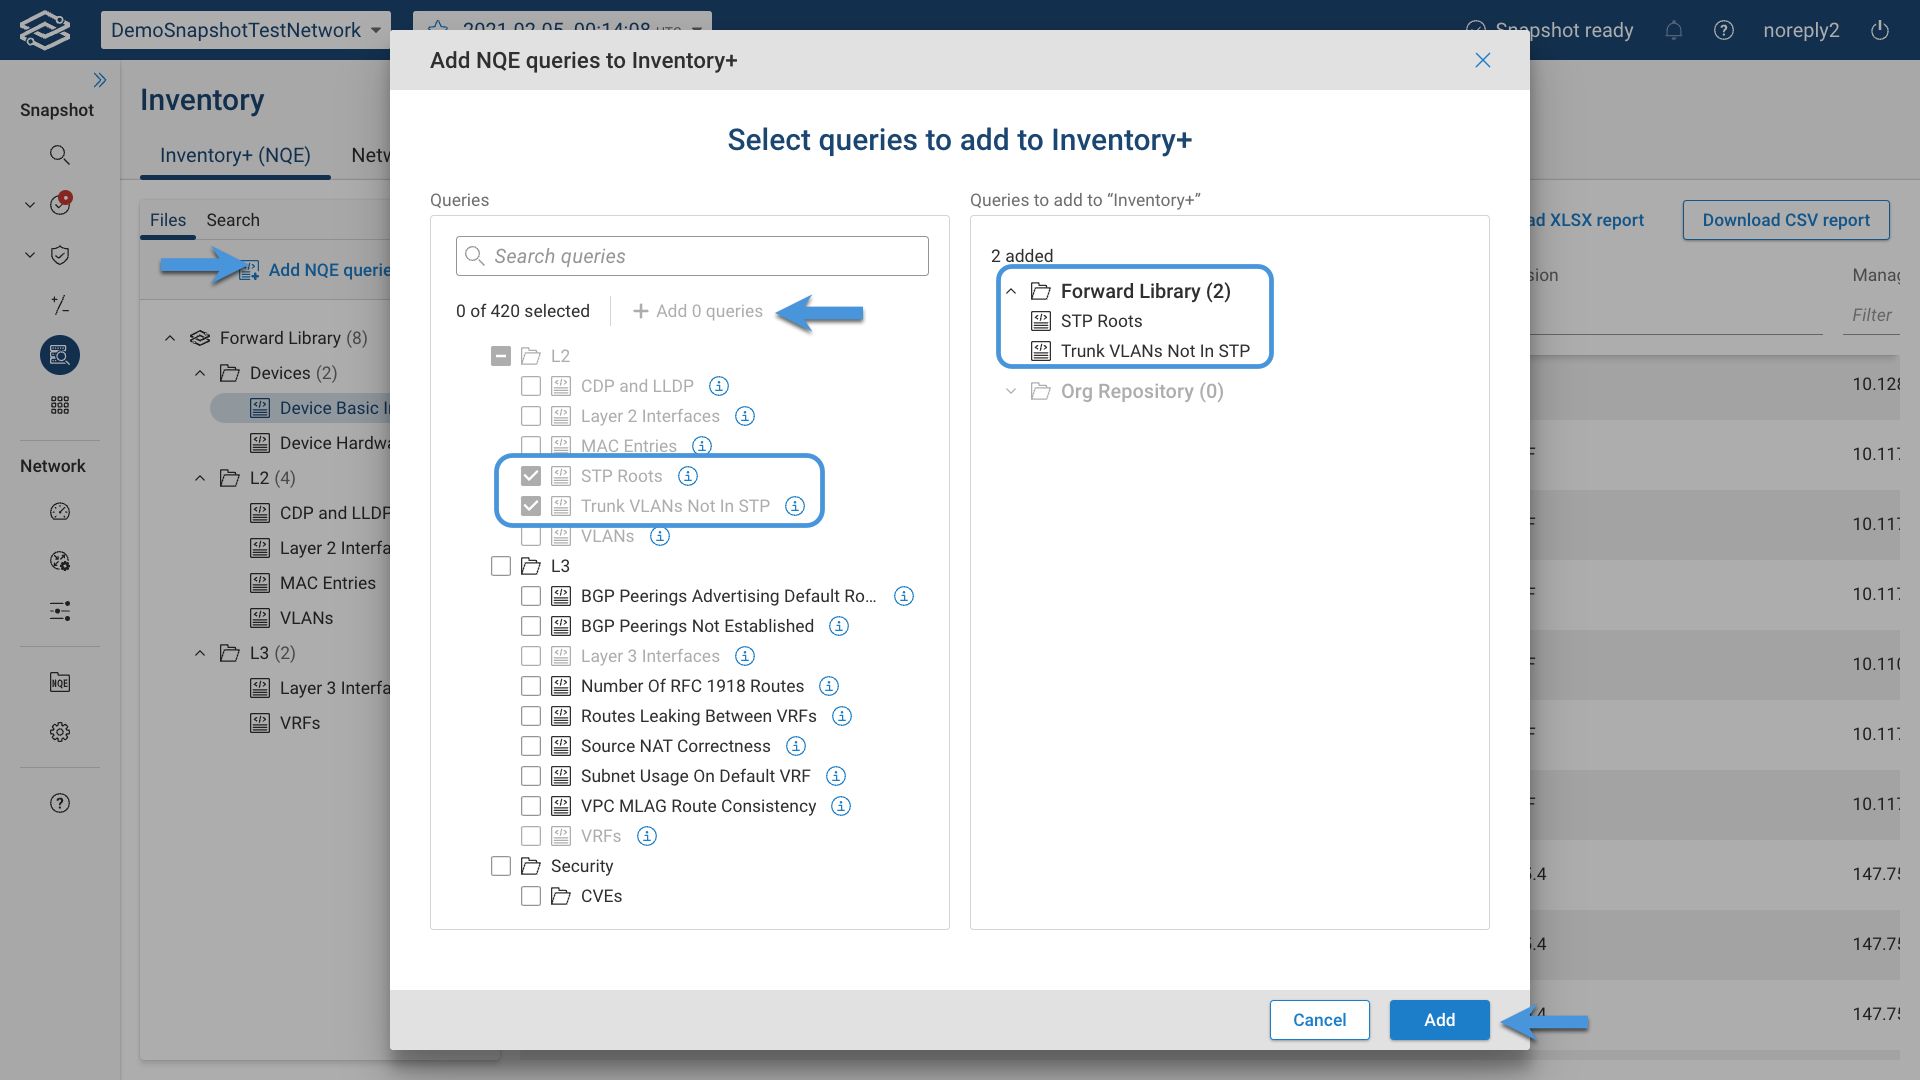
- Select queries to add, either individually or using the bulk selection option.
- Click Add x queries and confirm by clicking Add.
From a Folder
- Open the folder's menu by clicking the kebab icon (three vertical dots) next to the folder name.
- A dialog box will appear, showing the list of queries within the selected folder. Queries already present in
Inventory+ will appear greyed out.
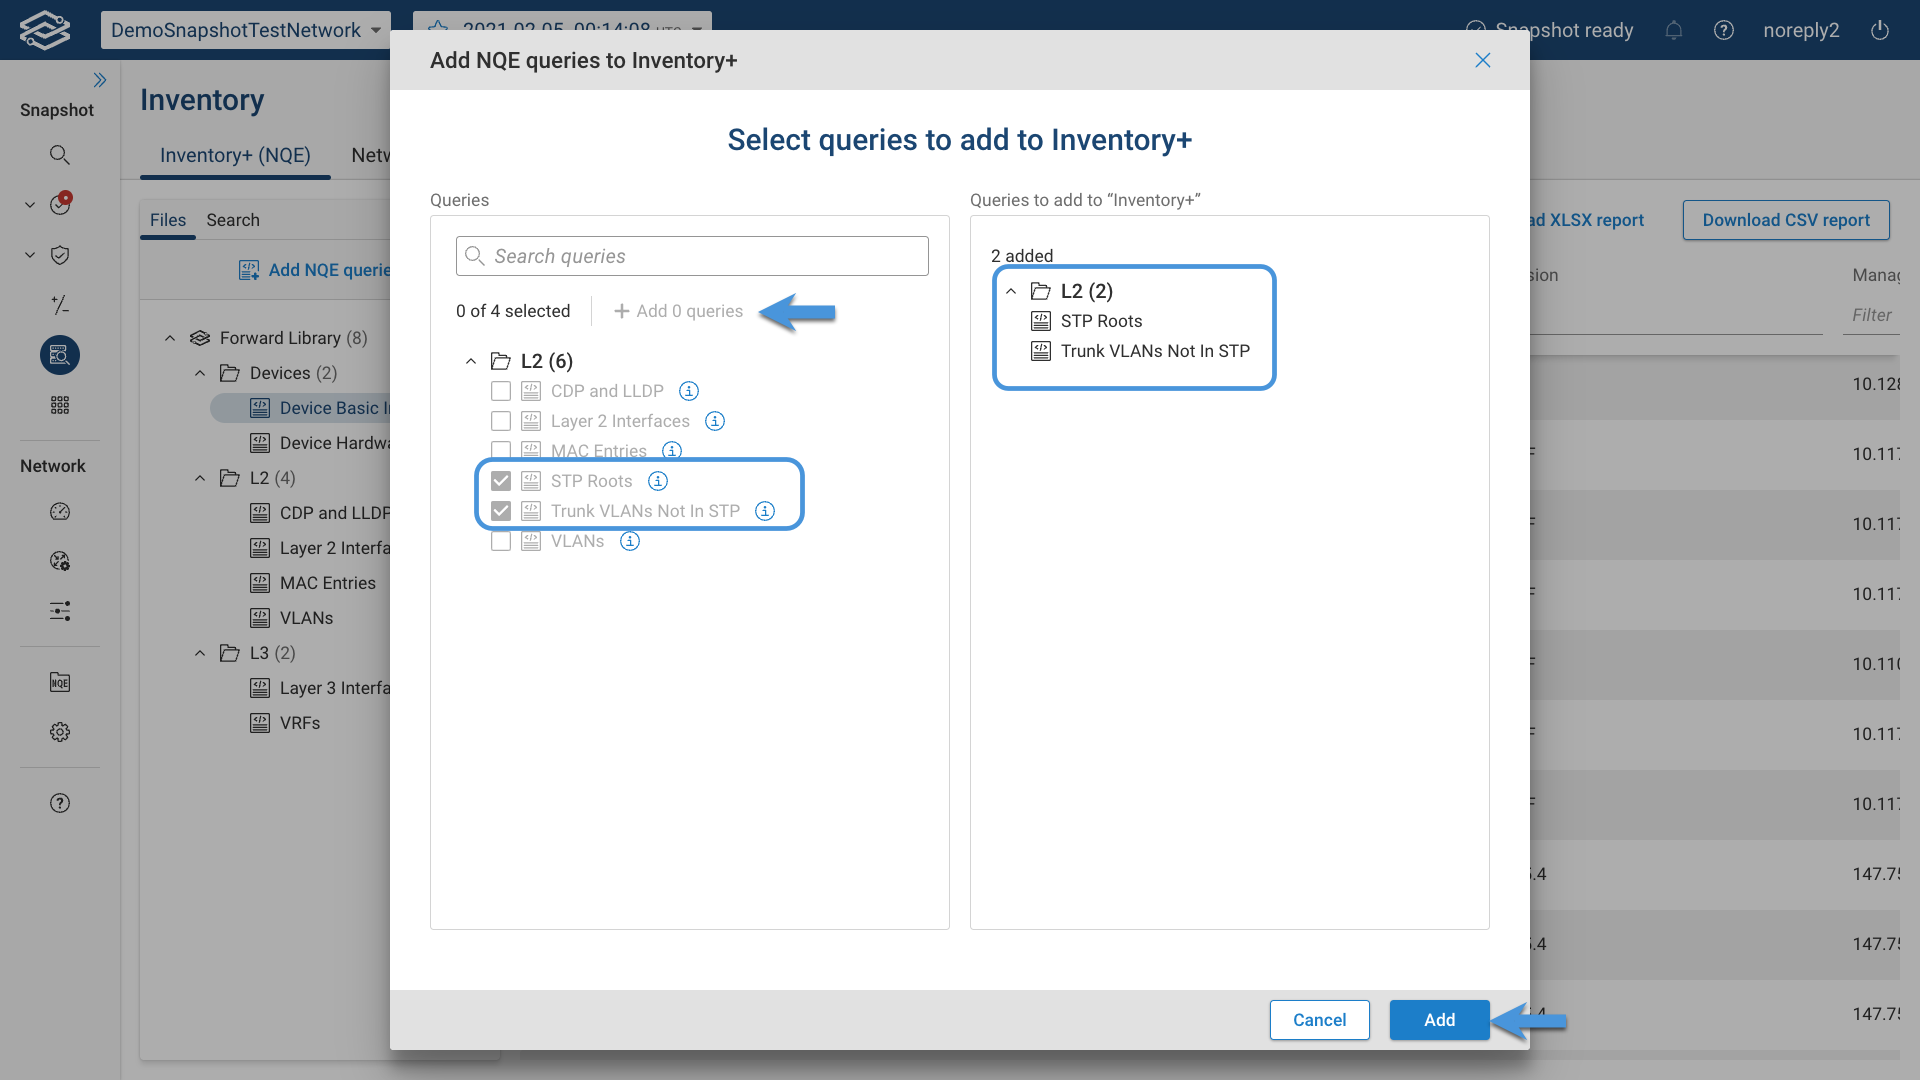
- Select the desired queries, click Add x queries, and confirm by clicking Add.
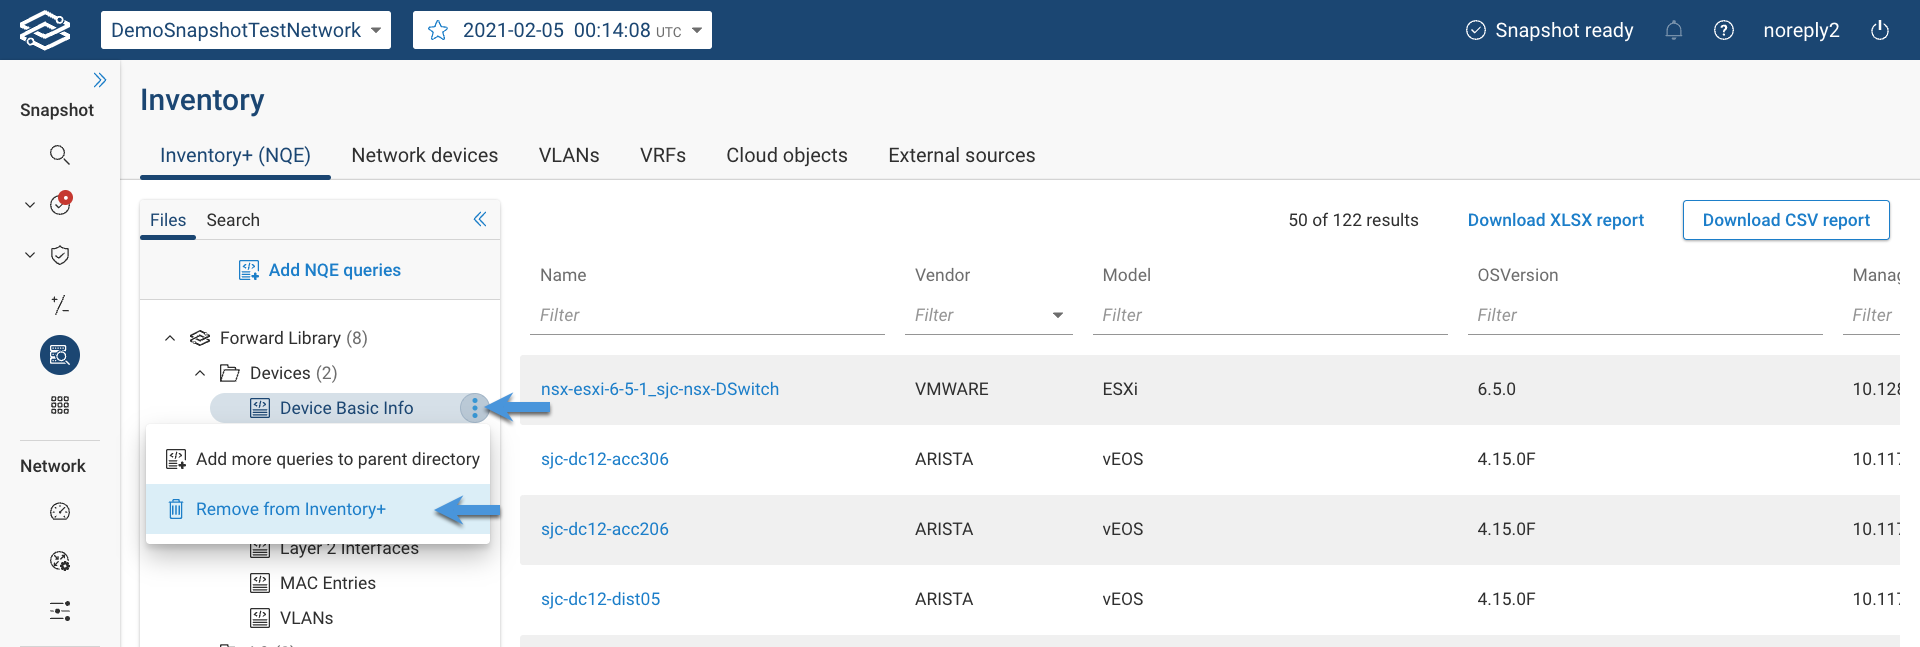
Remove Queries from Inventory+
Removing Individual Queries
- Locate the query in the list.
- Click the kebab icon (three vertical dots) next to it and select Remove from Inventory+.
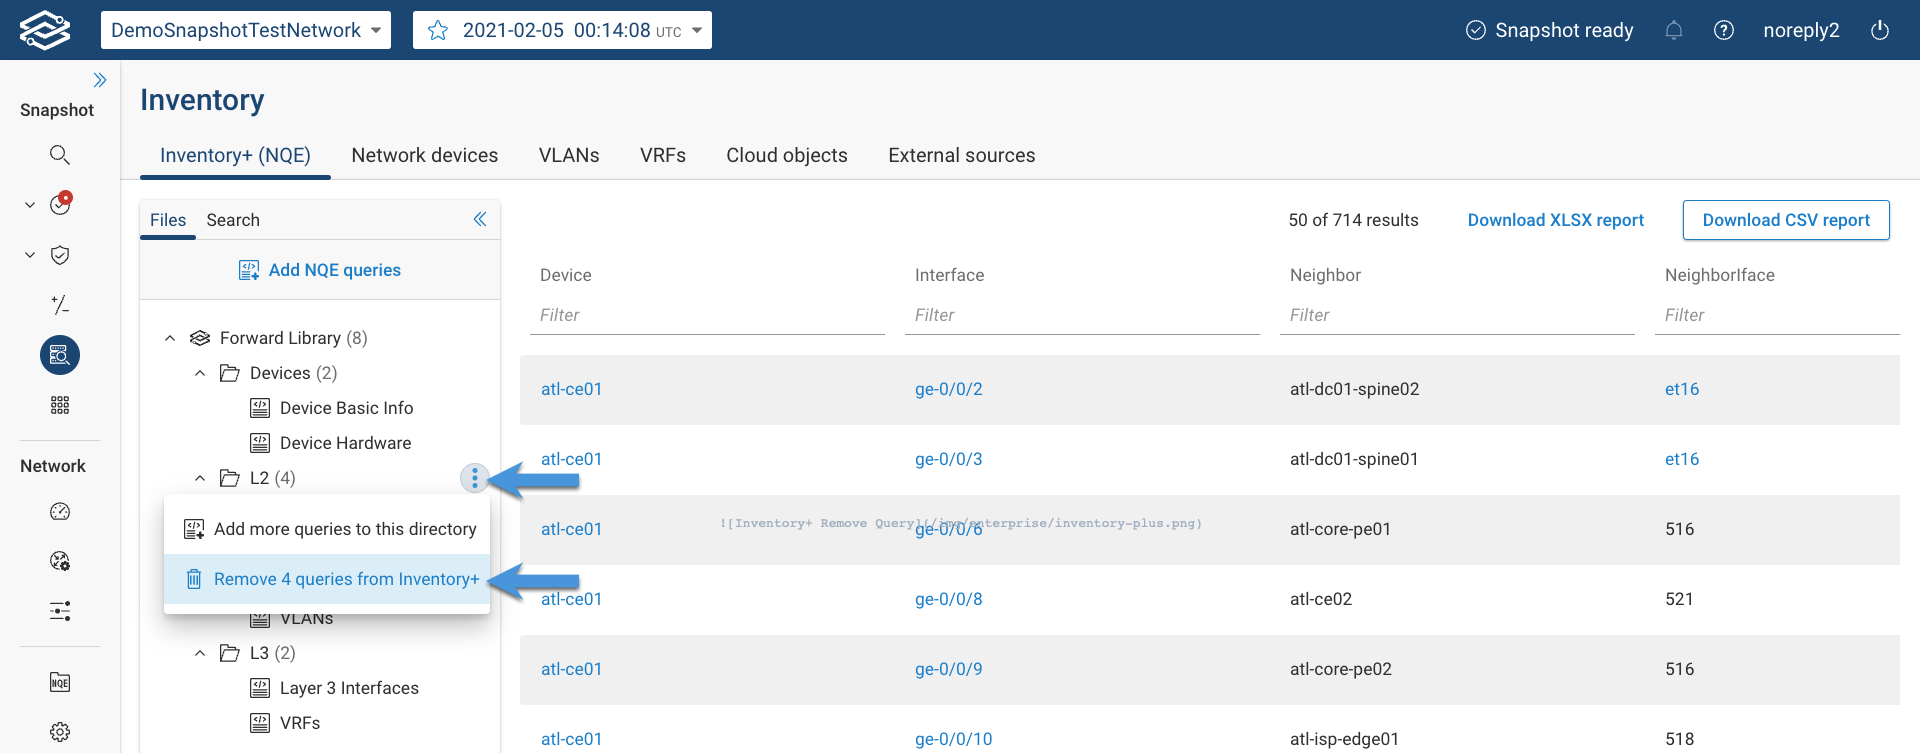
Removing Folders
- Locate the folder in the list.
- Click the kebab icon (three vertical dots) next to it and select Remove x queries from Inventory+ to remove the folder and all its queries.
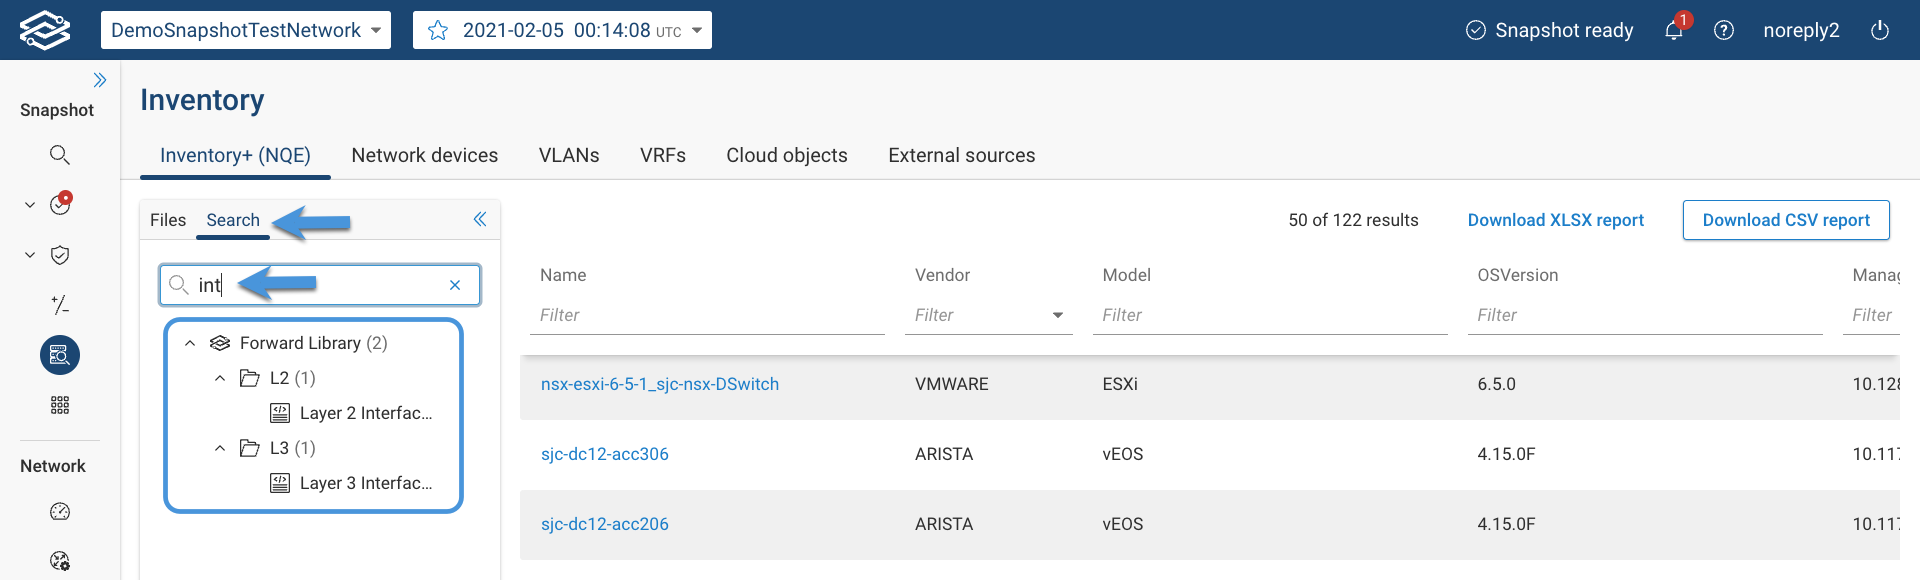
Searching Queries
The Search tab enables users to find queries by matching their summaries to the search text.
NQE History
NQE History enables users to view how network data changes across multiple snapshots and identify when selected data, such as a device, an interface, or an IP address, changed without manually inspecting each snapshot. It provides historical visibility for selected NQE queries in Inventory+, recording when selected key attributes changed across processed snapshots and displaying that information alongside the most recent snapshot results.
NQE History records and retains data from snapshots that have been processed since history tracking was enabled for an NQE query. Historical results remain available until they expire based on the configured retention period (more on this below).
Key features of NQE History:
- Any snapshot processed since history tracking was enabled will contribute data to the historical view.
- Results from each snapshot are retained until they expire.
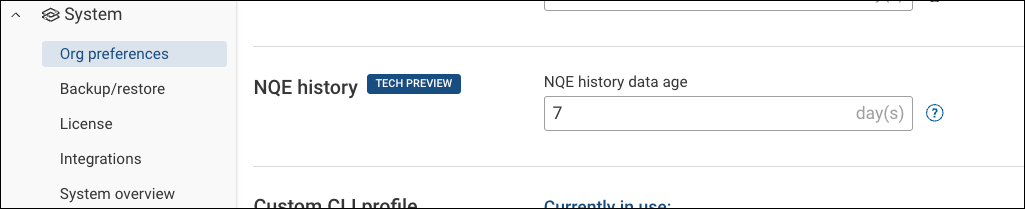
- The retention period is configured in Settings > System > Org Preferences > NQE History (default: 7 days with a maximum value of 30 days).
Enabling NQE History
To enable historical tracking, an NQE query must define one or more primary keys that identify unique records within the results.
For example, if you need to track how the IP addresses changes in your network you would create an NQE query where you would “primary key” the IP address, its subnet and its source so that the NQE query will generate an entry for each unique triplet and track each of them for the configured retention period.
-
In the NQE Library, create or open a query.
-
Add a primary key annotation to specify which attributes uniquely identify each record.
@primaryKey(Device, "Interface Name")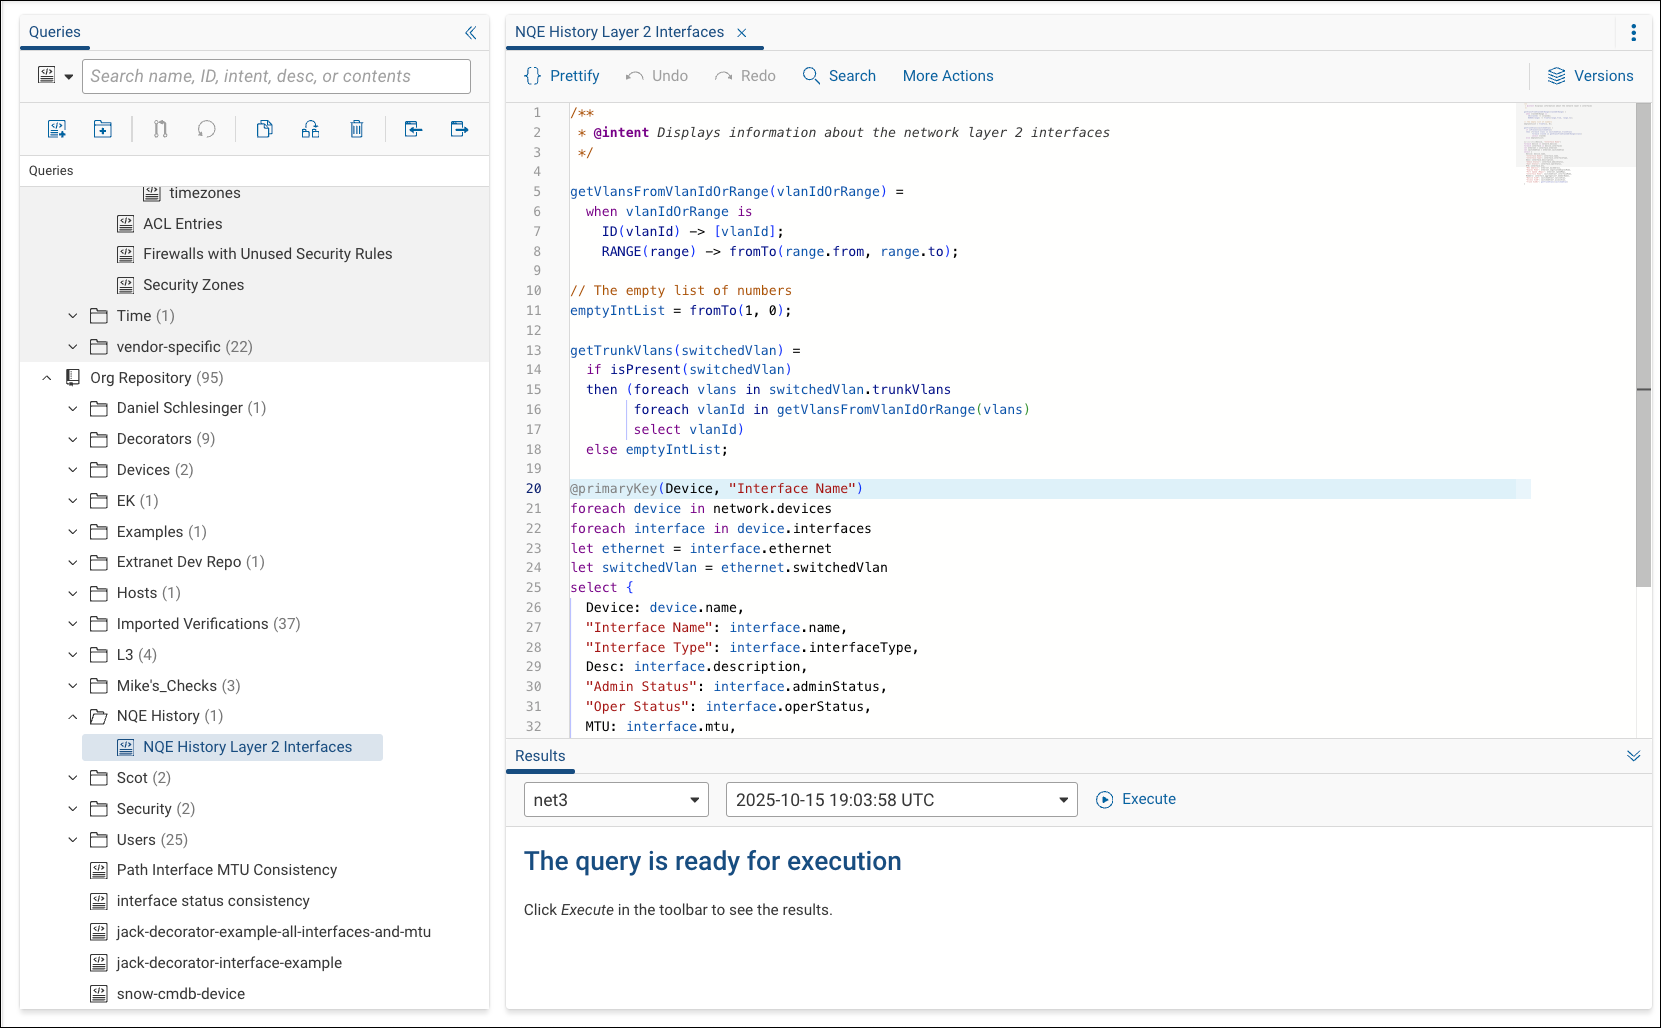
-
Commit the query changes.
-
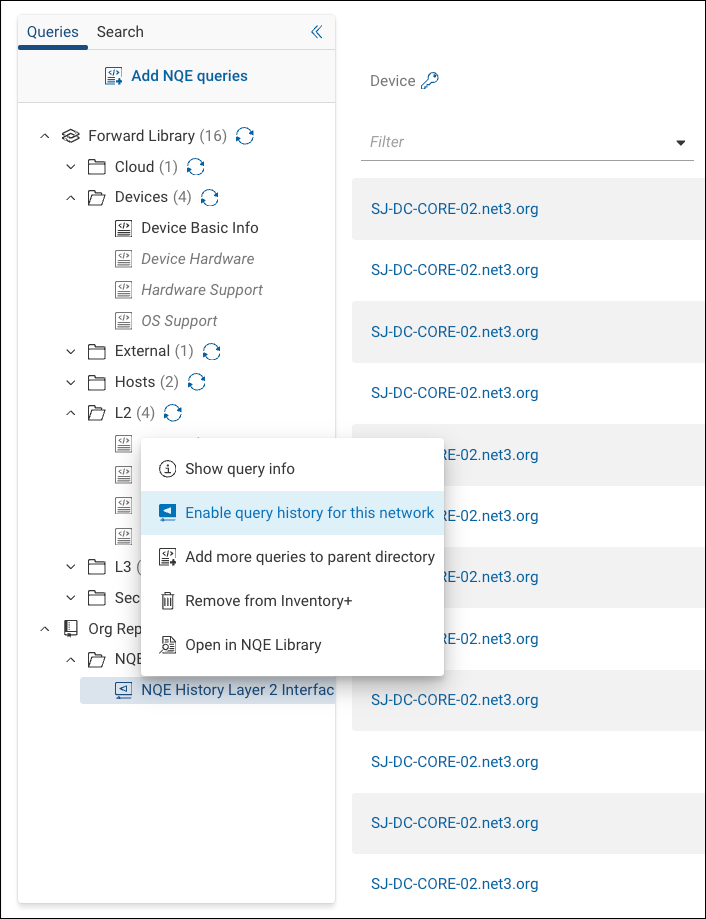
In Inventory+, add the NQE query. Once added, right-click the query and select Enable query history for this network.
- Queries that support history are marked with a historical icon next to the query name.
-
After enabling the NQE query, the system collects historical data from all processed snapshots within the configured retention period.
Editing or removing a query with history enabled
- Editing a query clears the stored history and repopulates it using currently processed snapshots.
- Removing a query clears all stored history and does not repopulate it.
- If a query is edited in a way that makes it ineligible for history, NQE History is disabled for that query across all networks and its historical data is deleted. A query becomes ineligible if it is made invalid, if the primary key is removed, or if columns named Last Seen or Historical Status are added.
Per-network configuration
History tracking is configured per network. Enabling NQE History for a query in one network does not automatically enable it for the same query in other networks.
Disabling NQE History
To disable NQE History for a query, right-click the query in Inventory+ and select Disable query history for this network.
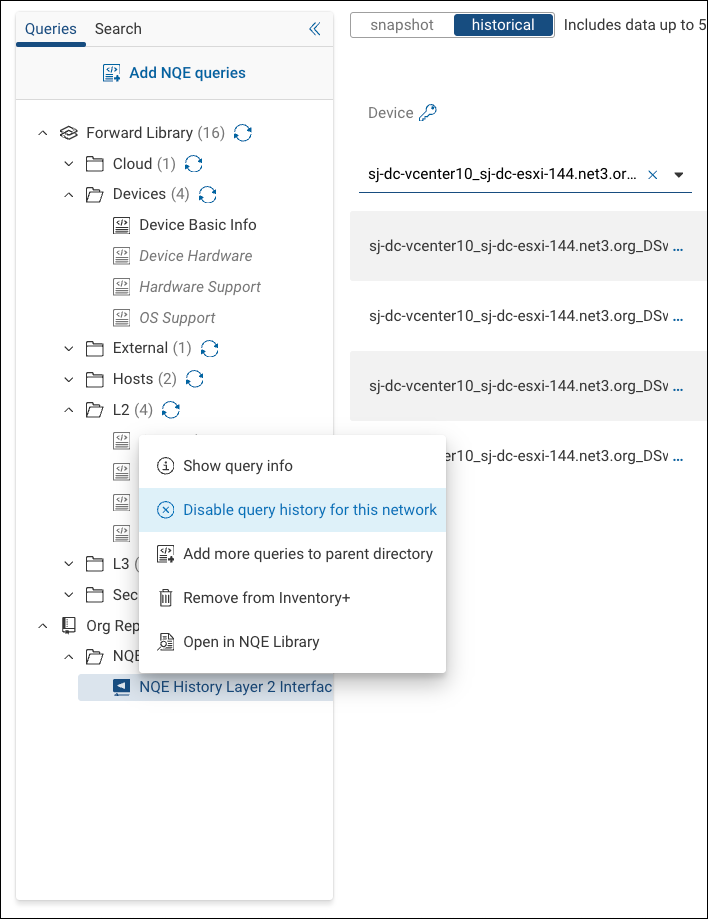
Disabling history removes all stored historical data for the query.
Viewing Historical Data
When a query has NQE History enabled, Inventory+ displays two tabs:
- Snapshot: Shows the data for the most recent snapshot.
- Historical: Displays data from all processed snapshots within the retention period.
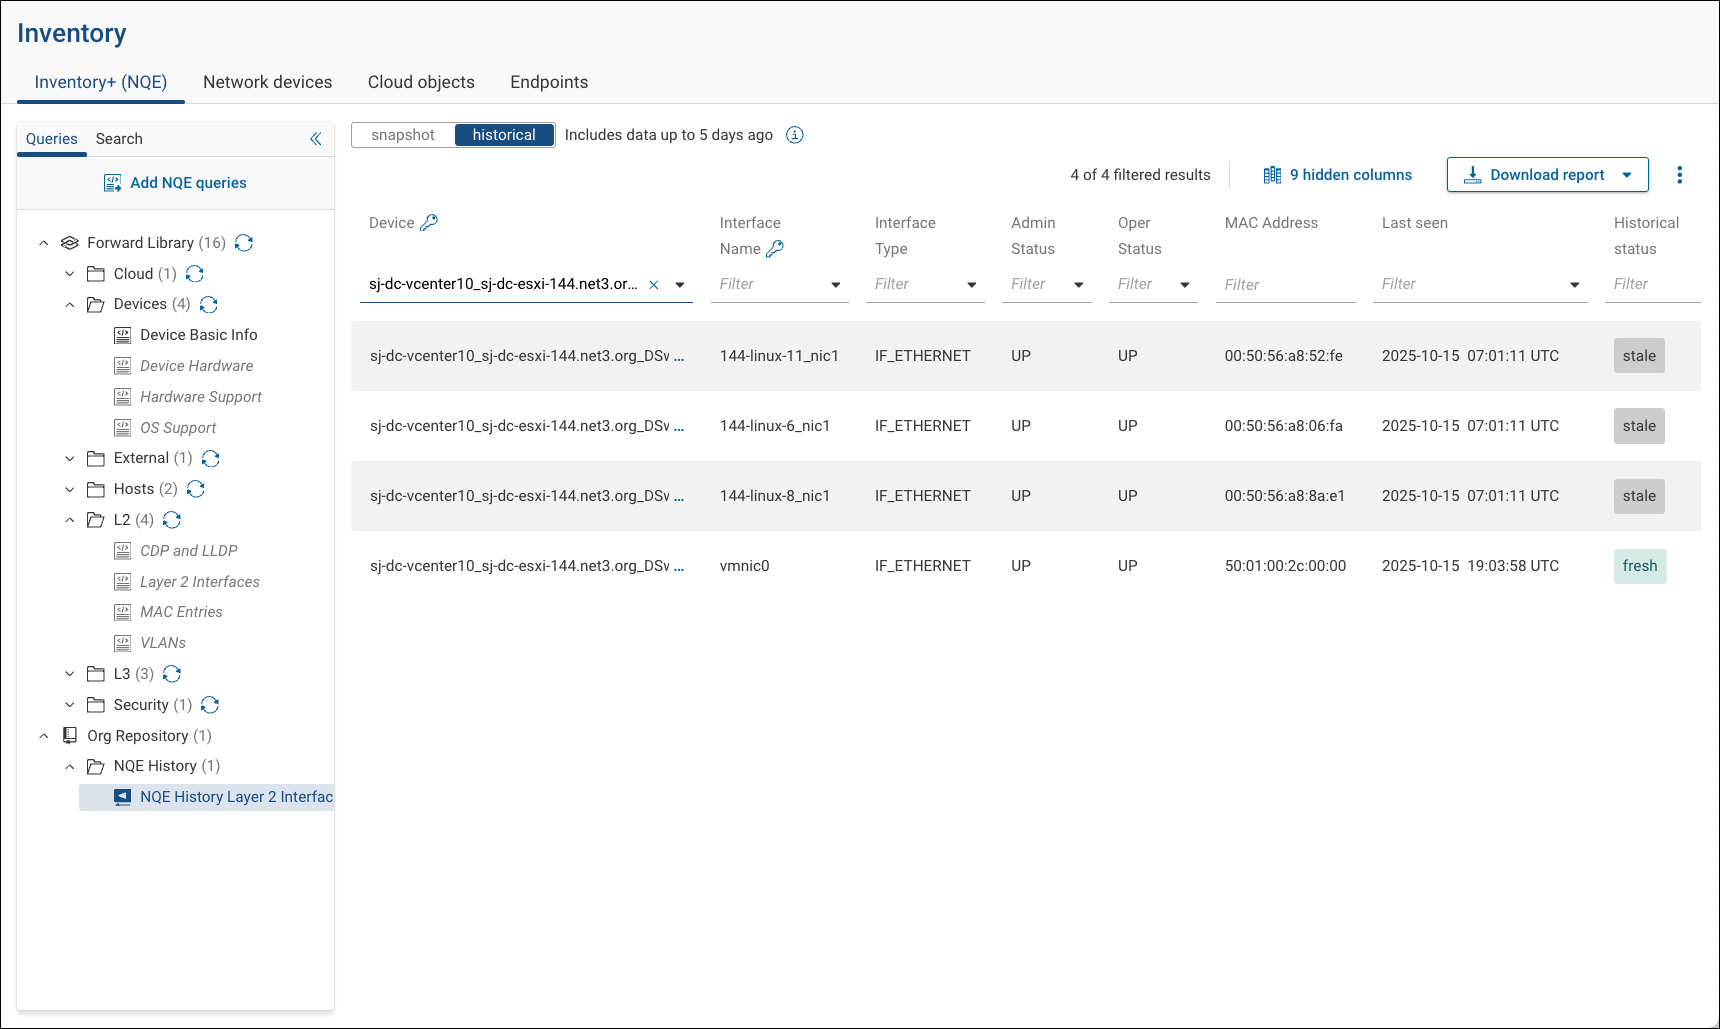
The historical view includes additional columns:
- Last Seen: The most recent snapshot in which the record appeared.
- Historical Status: Indicates whether the record is Fresh (currently present) or Stale (no longer present in the current snapshot).
Columns representing the query’s primary key are marked with a key icon.
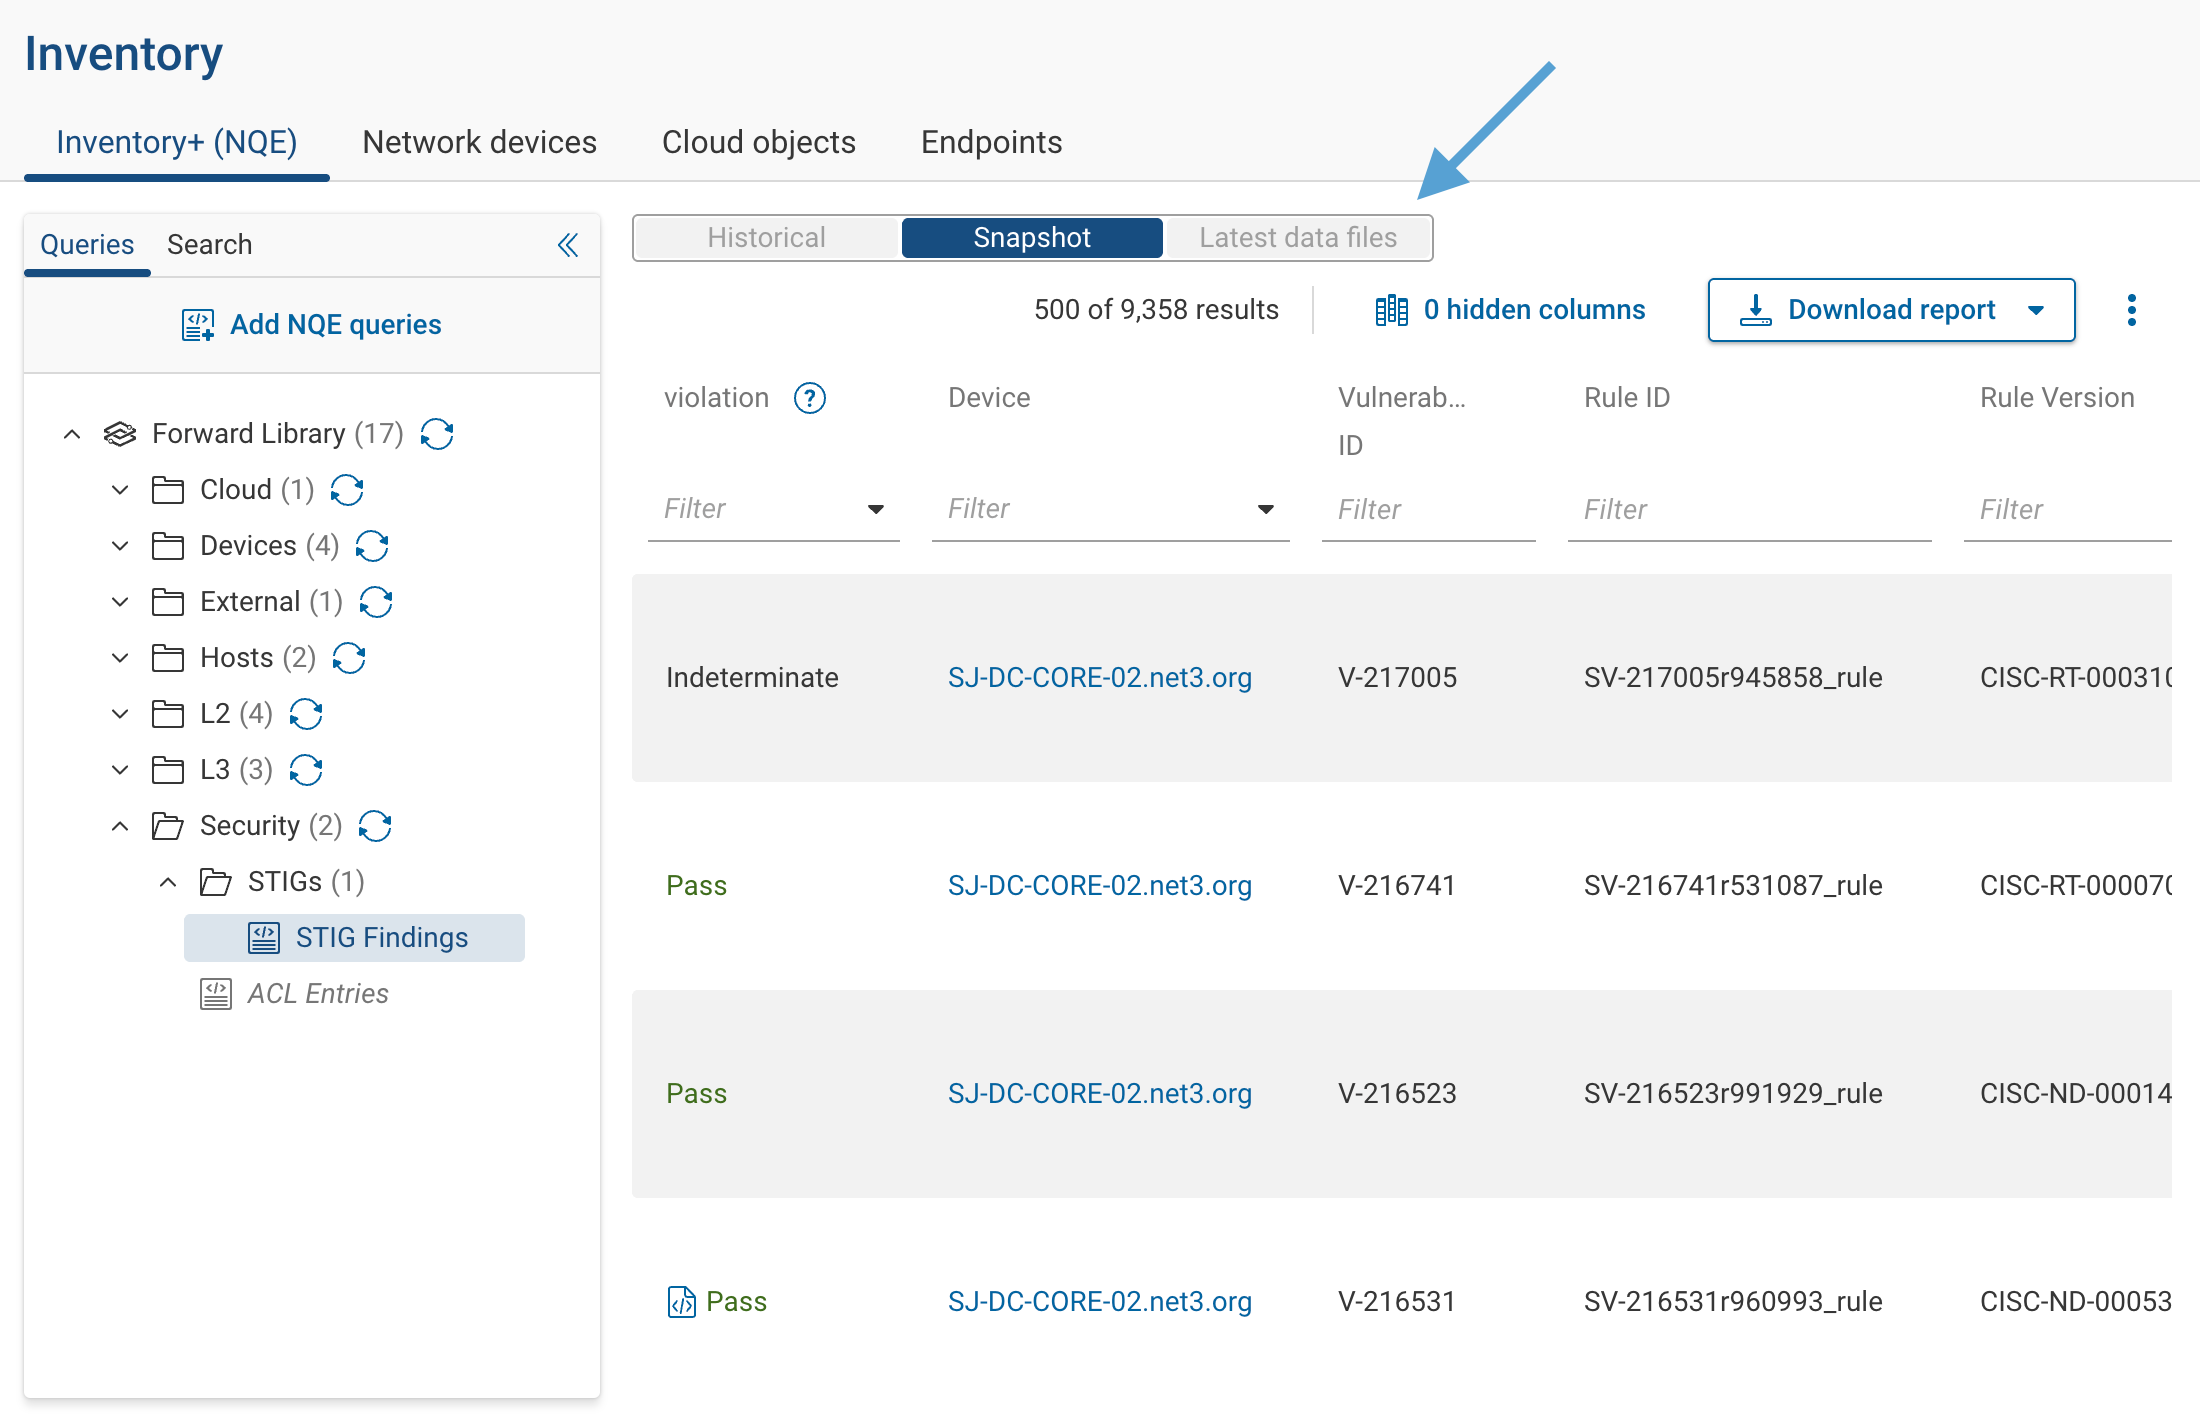
Using Latest Data Files in Inventory+
Inventory+ queries that rely on data files include a selector allowing you to choose whether to view:
- snapshot-based results, or
- snapshot with the latest data files
This selector appears only when the underlying query uses a data file and a new version of that file has been uploaded.
See NQE → Data Files for more details on working with data files..
End-of-Life/End-of-Support Data
Inventory+ includes prebuilt queries (“OS Support” and “Hardware Support”) that directly consume the lifecycle data from NQE data model.
See NQE → HW/SW Lifecycle for more details.
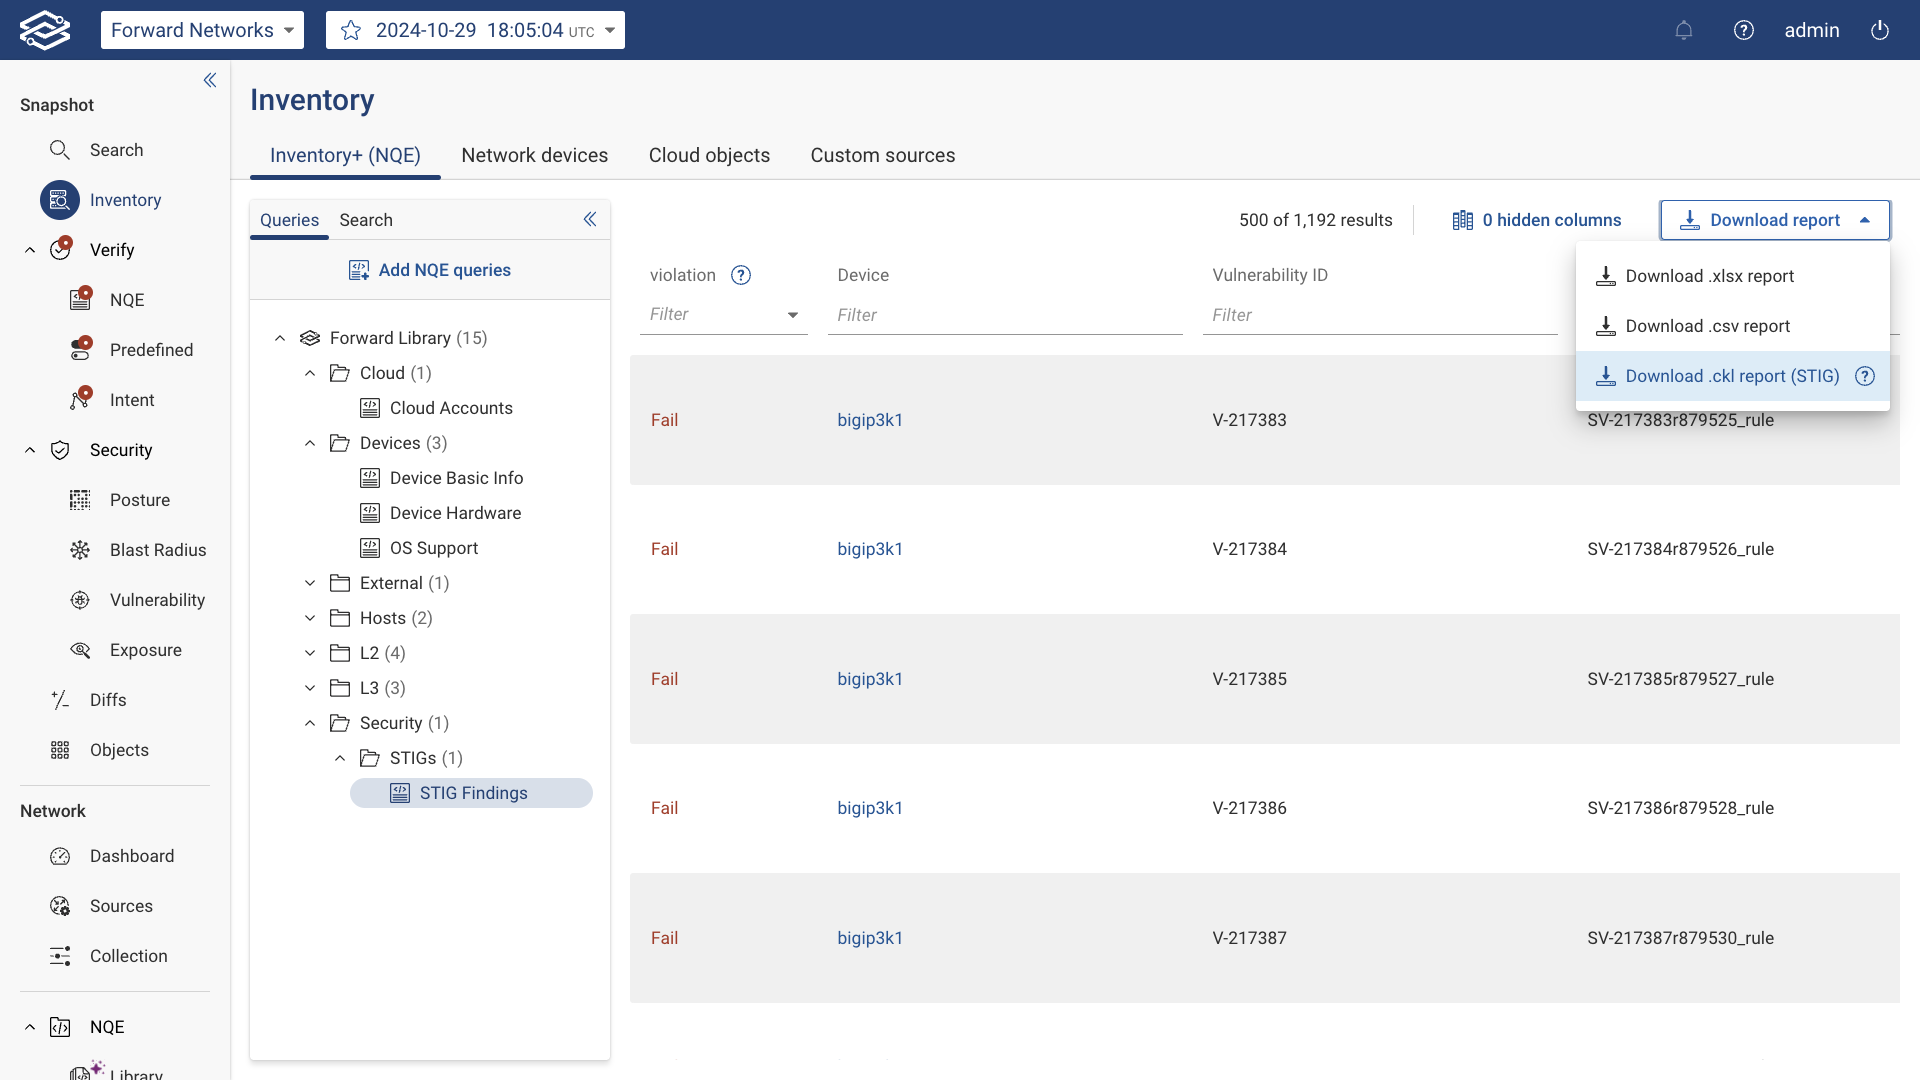
Downloading a Report
Inventory+ allows users to export query results in various formats for analysis or compliance purposes. Available export formats include CSV, XLSX, and CKLB.
Downloading a CSV and XLSX Report
- Open Inventory+ and select your desired query.
- In the results pane, click on Download report at the top-right corner.
- Select one of the following options from the dropdown:
- Download .csv report
- Download .xlsx report
- The selected report will download to your system. Any active sorting or filters are preserved in the exported file.
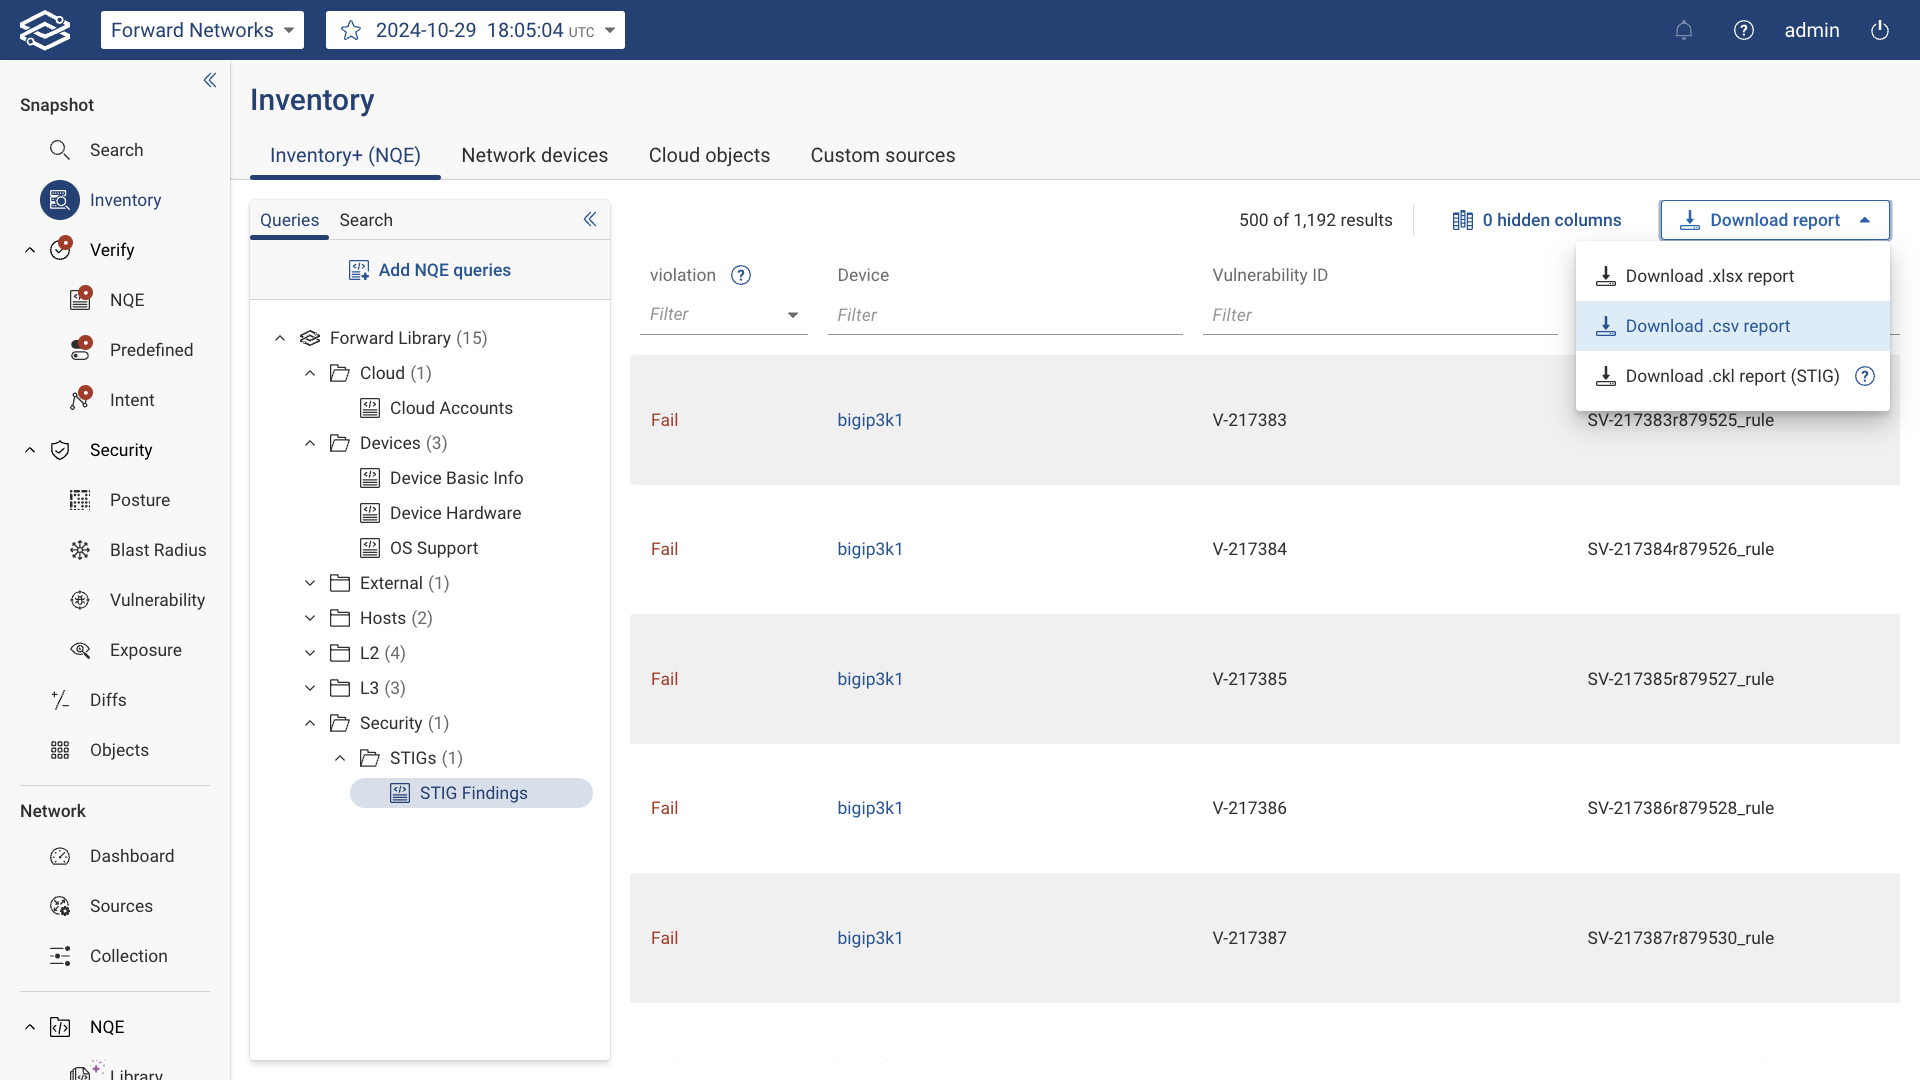
CKLB Export
CKLB Export generates STIG compliance reports in a DoD-compliant CKLB format. This export option is available only for queries that include all the required columns found in any of the STIG Findings queries (e.g., STIG Findings - Cat I, STIG Findings - Cat II, or STIG Findings - Cat III). While additional columns can be added to the query, none of the required columns can be removed.
Steps to download a CKLB report:
- Execute any of the STIG Findings queries within Inventory+.
- In the results pane, click on Download report at the top-right corner.
- Select Download .ckl report (STIG) from the dropdown menu.
- The selected report will download to your system in .ckl format for use with DoD compliance tools like STIG Viewer.