Access
The Access page is a comprehensive hub for managing role-based access controls. This page centralizes all the settings and tools needed to efficiently control user permissions, ensuring secure and organized access to network resources.
The Access page can be accessed by navigating to Settings > Accounts > Access.
The page is divided into three main tabs:
- User Accounts: Manage individual user accounts and their respective roles and permissions.
- Access Control Groups: Define and manage groups for automatic role assignment based on LDAP or SSO authentication.
- Device Access Labels: Control access to specific devices through customizable labels based on organizational access preferences.
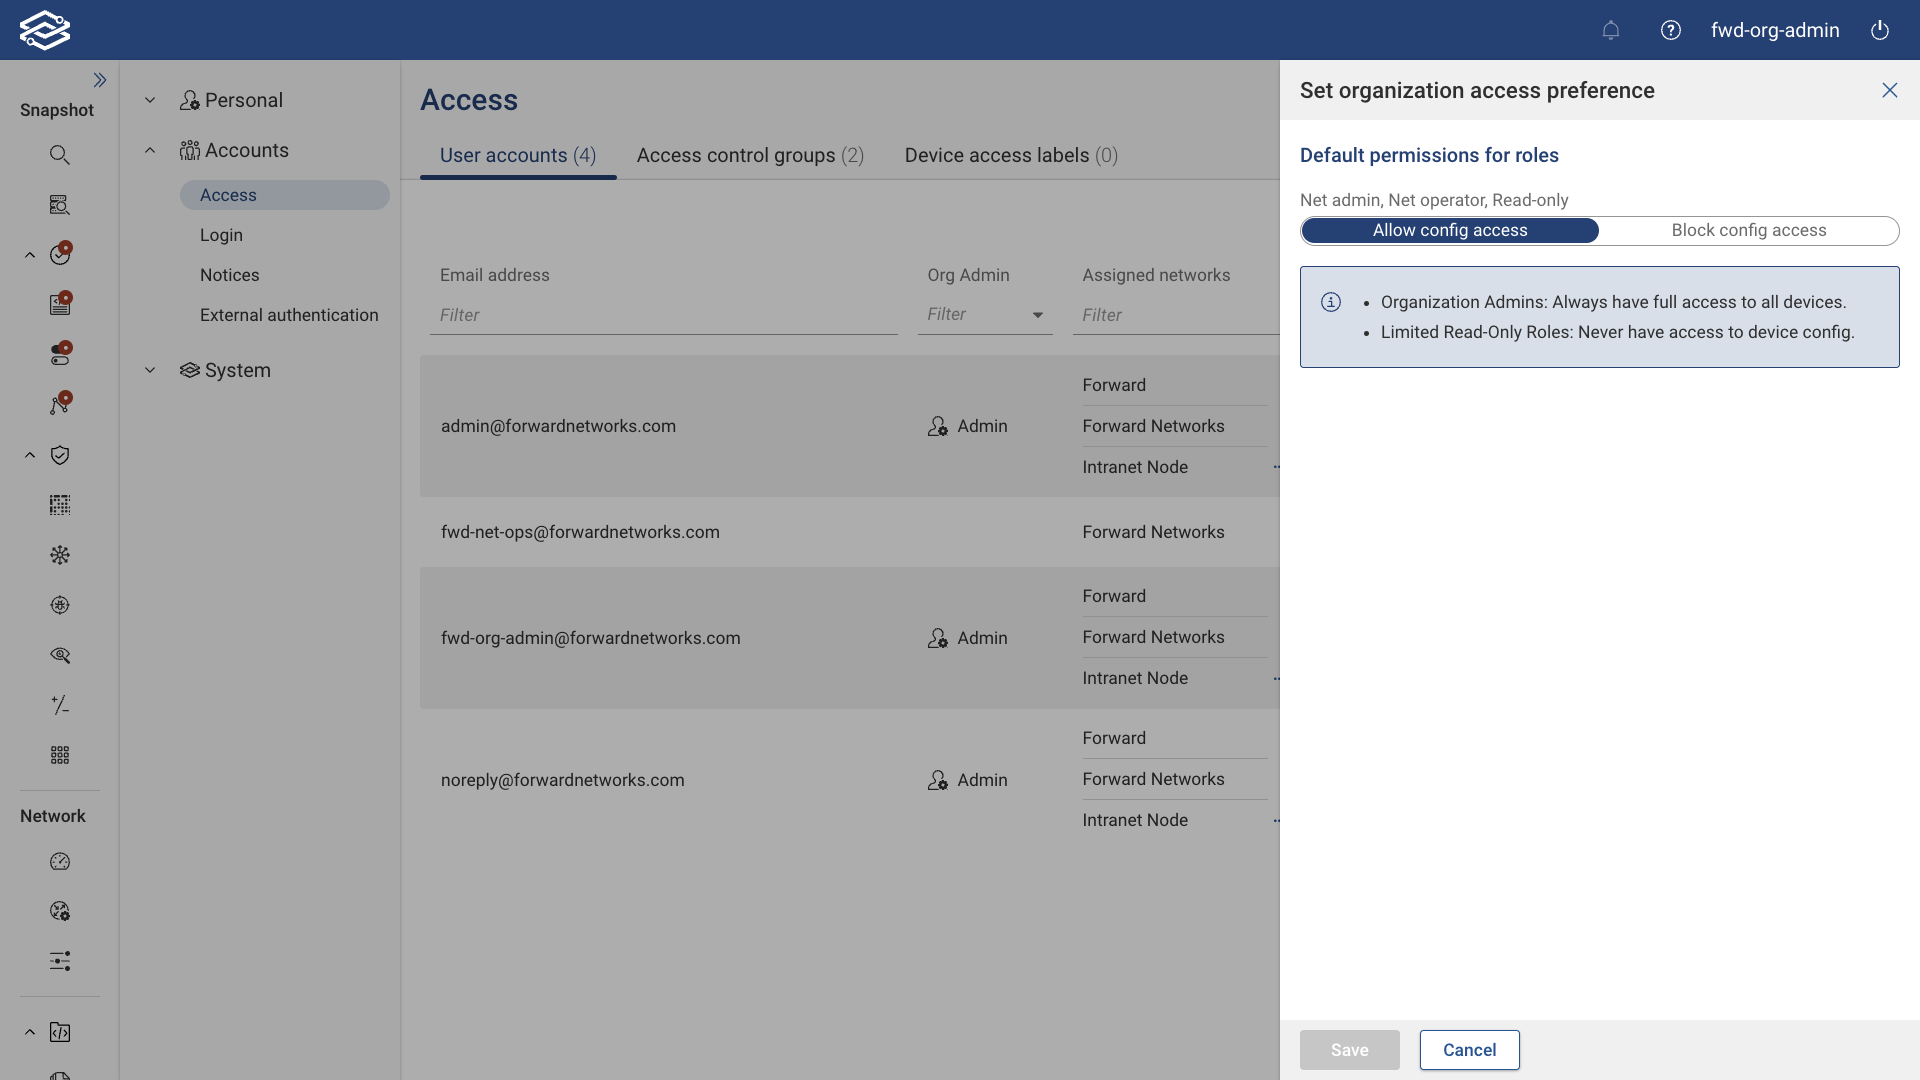
Setting Organization Access Preference
Click Set Organization Access Preference at the top of the page to configure the default permissions for roles within the organization.
- The option is only available to Org Admins.
- Org Admins always have full access to all devices.
- Limited read-only roles never have access to device configurations.
Select from one of the two options provided:
- Allow Config Access: Configures access to all users by default. Device access must be configured to deny access based on the assigned user group.
- Block Config Access: Configures access to be blocked to all users by default. Device access must be configured to allow access based on the assigned user group.
Changing the default permissions for roles within the organization access preference settings will reset device configuration access and is irreversible. This action will DELETE ALL previously configured device access labels and REVERT ALL user device configuration access to the new default settings.
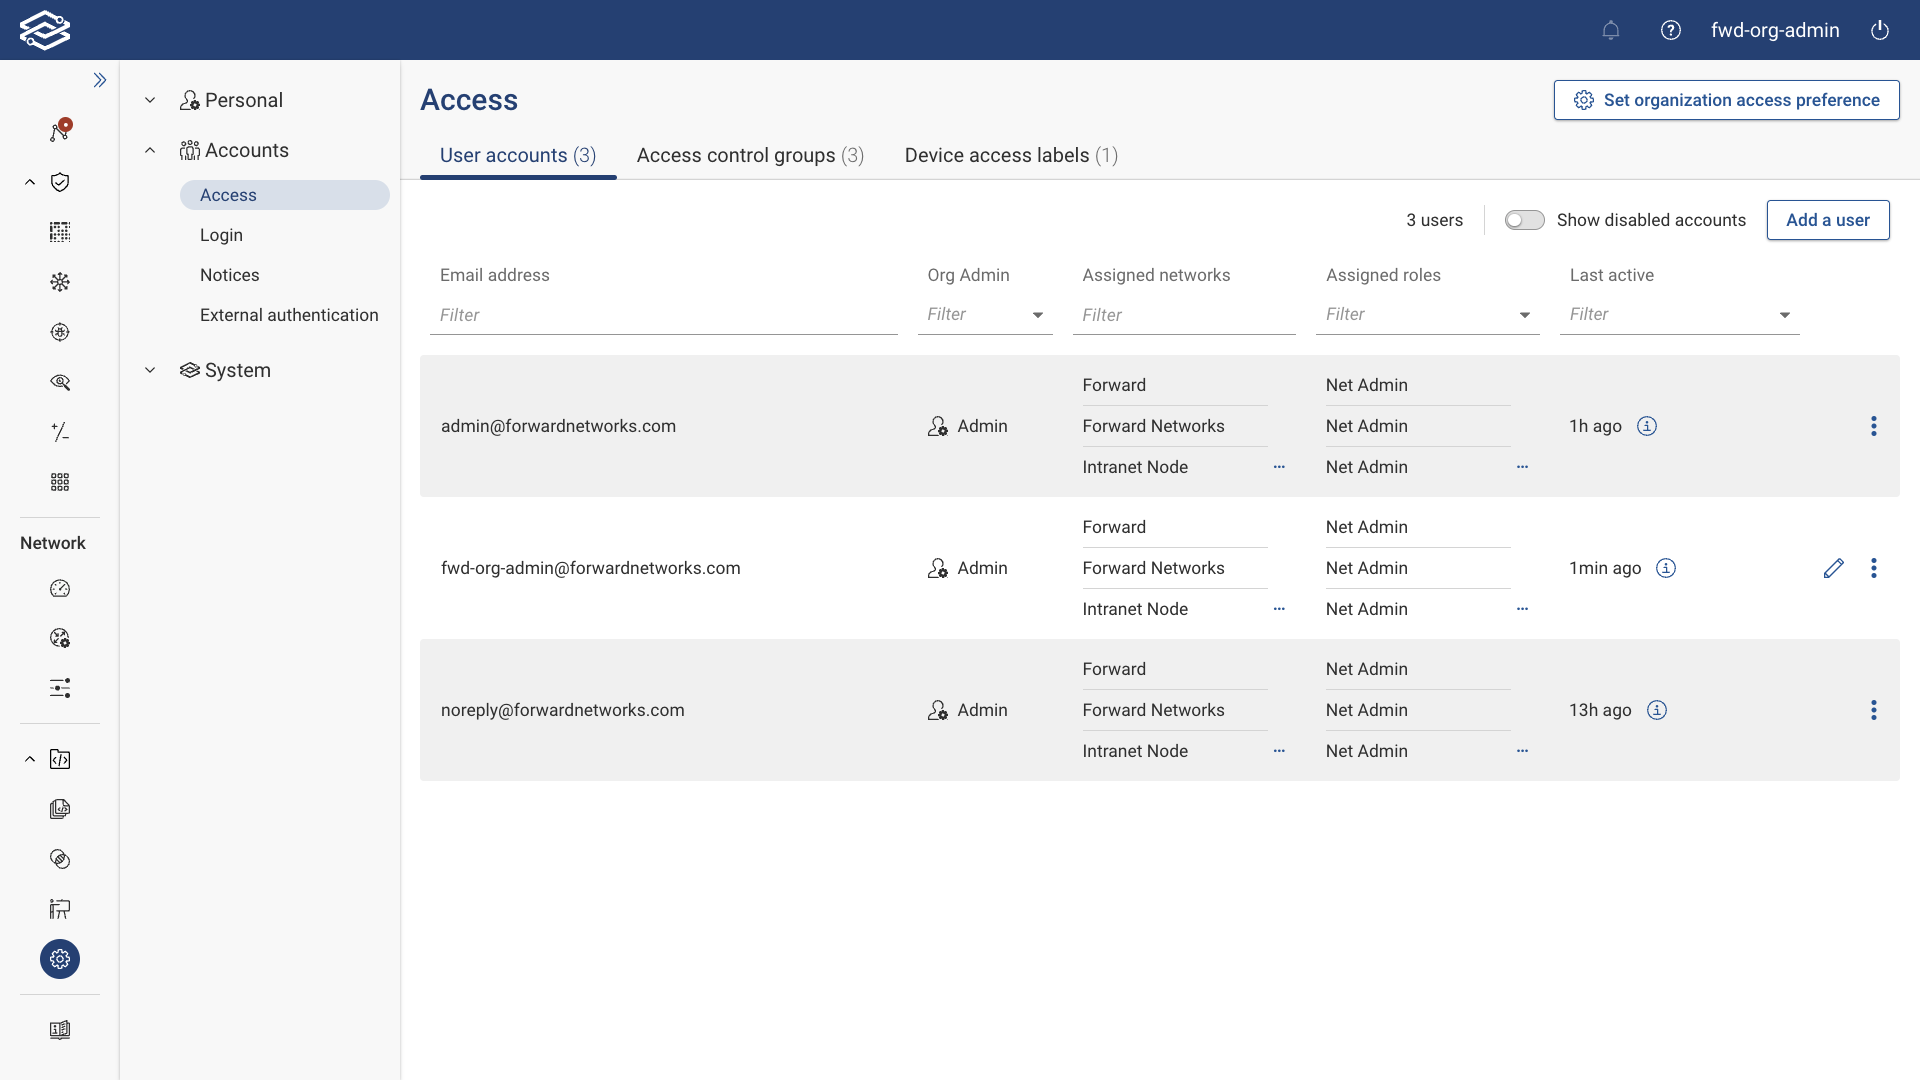
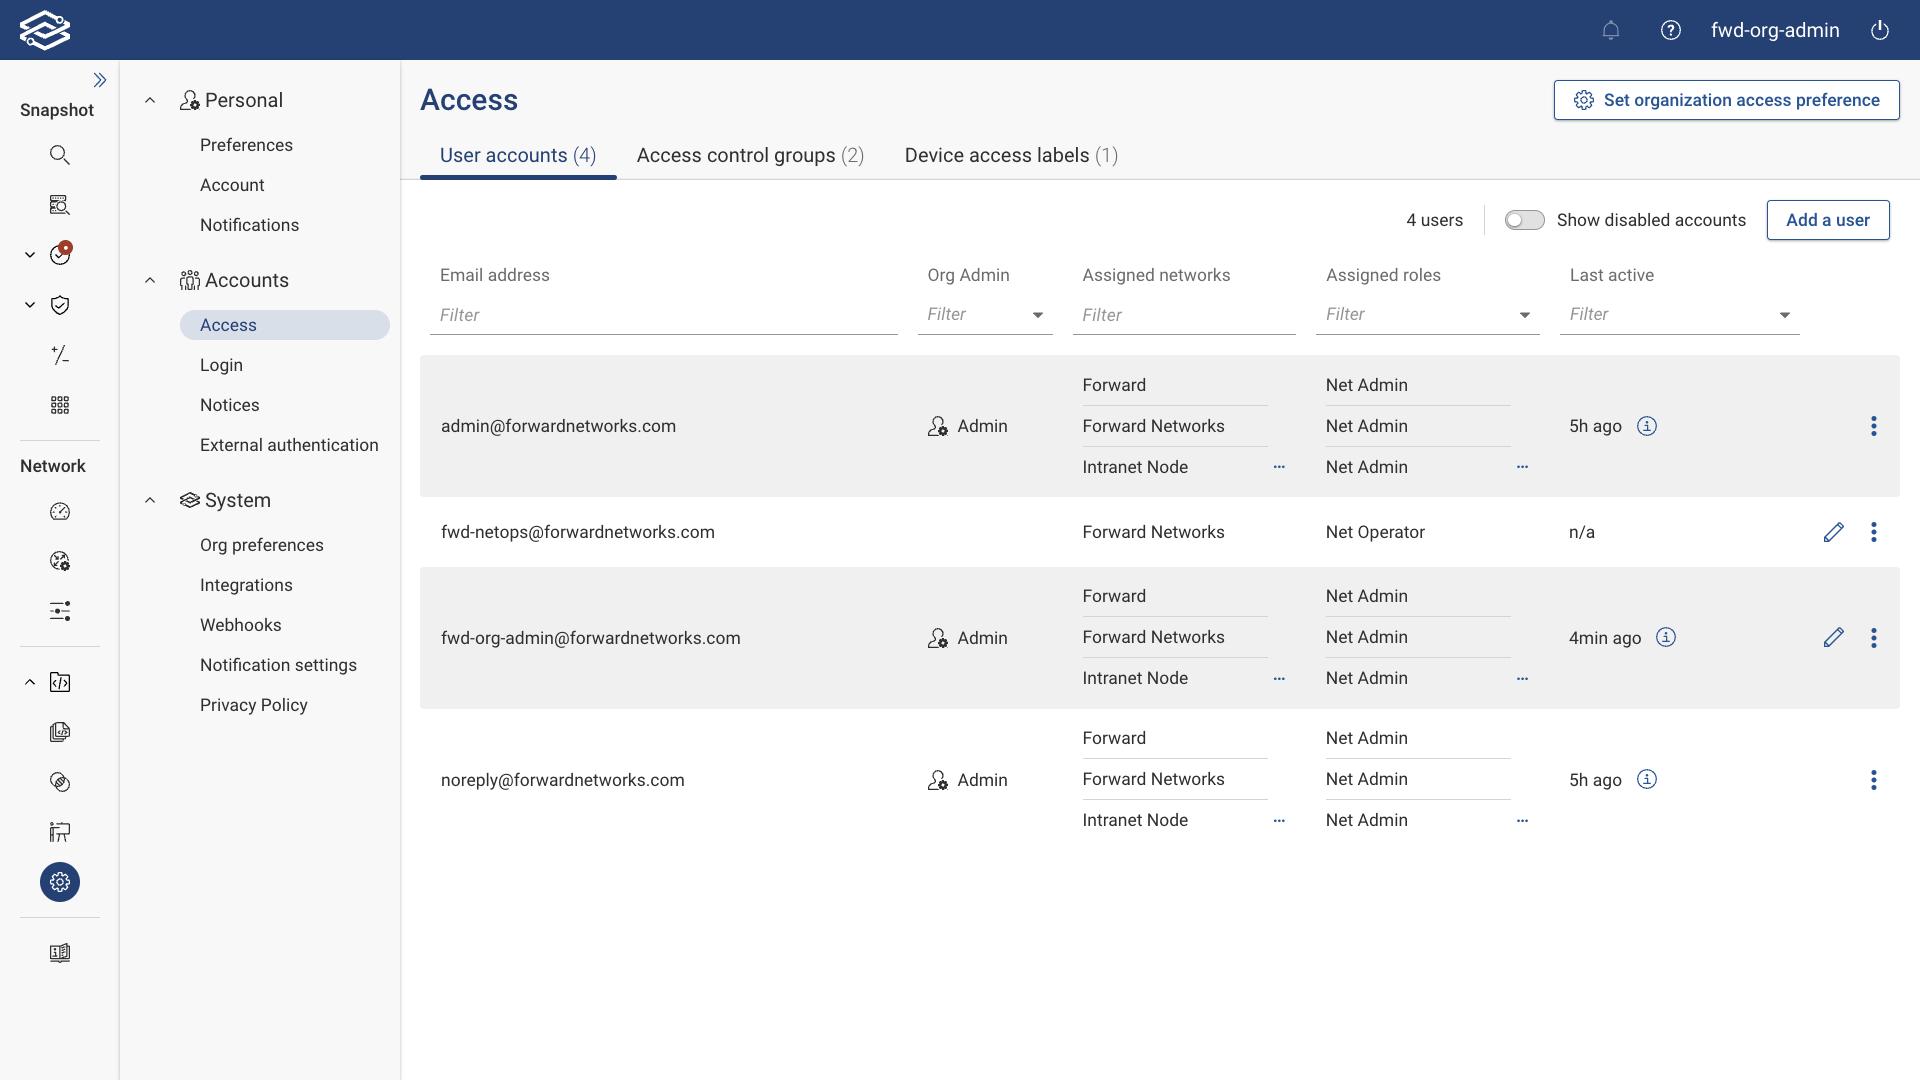
User Accounts
The User Accounts tab displays all currently enabled accounts, with the option to show all disabled accounts if needed. This tab displays the following information for each user account:
- Source: Indicates the authentication method for the user account (LDAP or SAML).
- Email Address: Displays the email address assigned to the user account.
- Username: Displays the username of a user account authenticated via LDAP or SAML.
- Access Control Groups: Lists the access control groups assigned to a user account authenticated via LDAP or SAML.
- Org Admin: Displays if the user account is assigned as an Org Admin.
- Assigned Networks: Displays the networks to which the user account has access.
- Assigned Roles: Displays the roles of the account for each assigned network.
- Device Access Labels: Lists the device access labels assigned to a user account authenticated via LDAP or SAML.
- Last Active: Displays the time since the account was last active.
Adding a User Account
Step 1: Adding a User
To add a user account, navigate to Settings > Access > User Accounts, and select Add a User.
Step 2: Configuring a new user account
From the Add a New User panel, enter the following information to create the user account:
- Email: Provide the email address to be associated with the user account.
- Password: Set a temporary password for the user account.
- Enabled: Set the user account to be in a disabled or enabled state once provisioned.
- Used by Forward Support: Enable this option if this account will be used by Forward Networks Support.
- Org Admin: Set the user account as an organization admin if enabled.
- Network Roles: Select one or more networks to provide access to and select the role the user account will be assigned for each selected network. User accounts set as Org Admins will have access to all networks by default.
Click Save to finish provisioning the user account.

Managing User Accounts
User accounts are displayed and can be managed from the User Accounts tab; the following options are available at the end of a user account displayed:
- Edit: Selecting the edit icon opens the “Edit User” pane for editing a user account’s settings.
- Additional Options:
- Disable: To disable a user account, click the additional options icon and select Disable.
- Delete: To delete a user account, click the additional options icon and select Delete.
Disabling Inactive Accounts
This feature allows Org Admins to set a limit on the number of days an account can remain inactive before being automatically disabled. This setting applies to all roles except Org Admins. Disabled accounts can be manually re-enabled by an Org Admin or by using Forward's APIs.
To enable this feature, navigate to Settings > System > Org Preferences, and within the Account Management field, enter the maximum number of inactive days for an account before it is disabled.
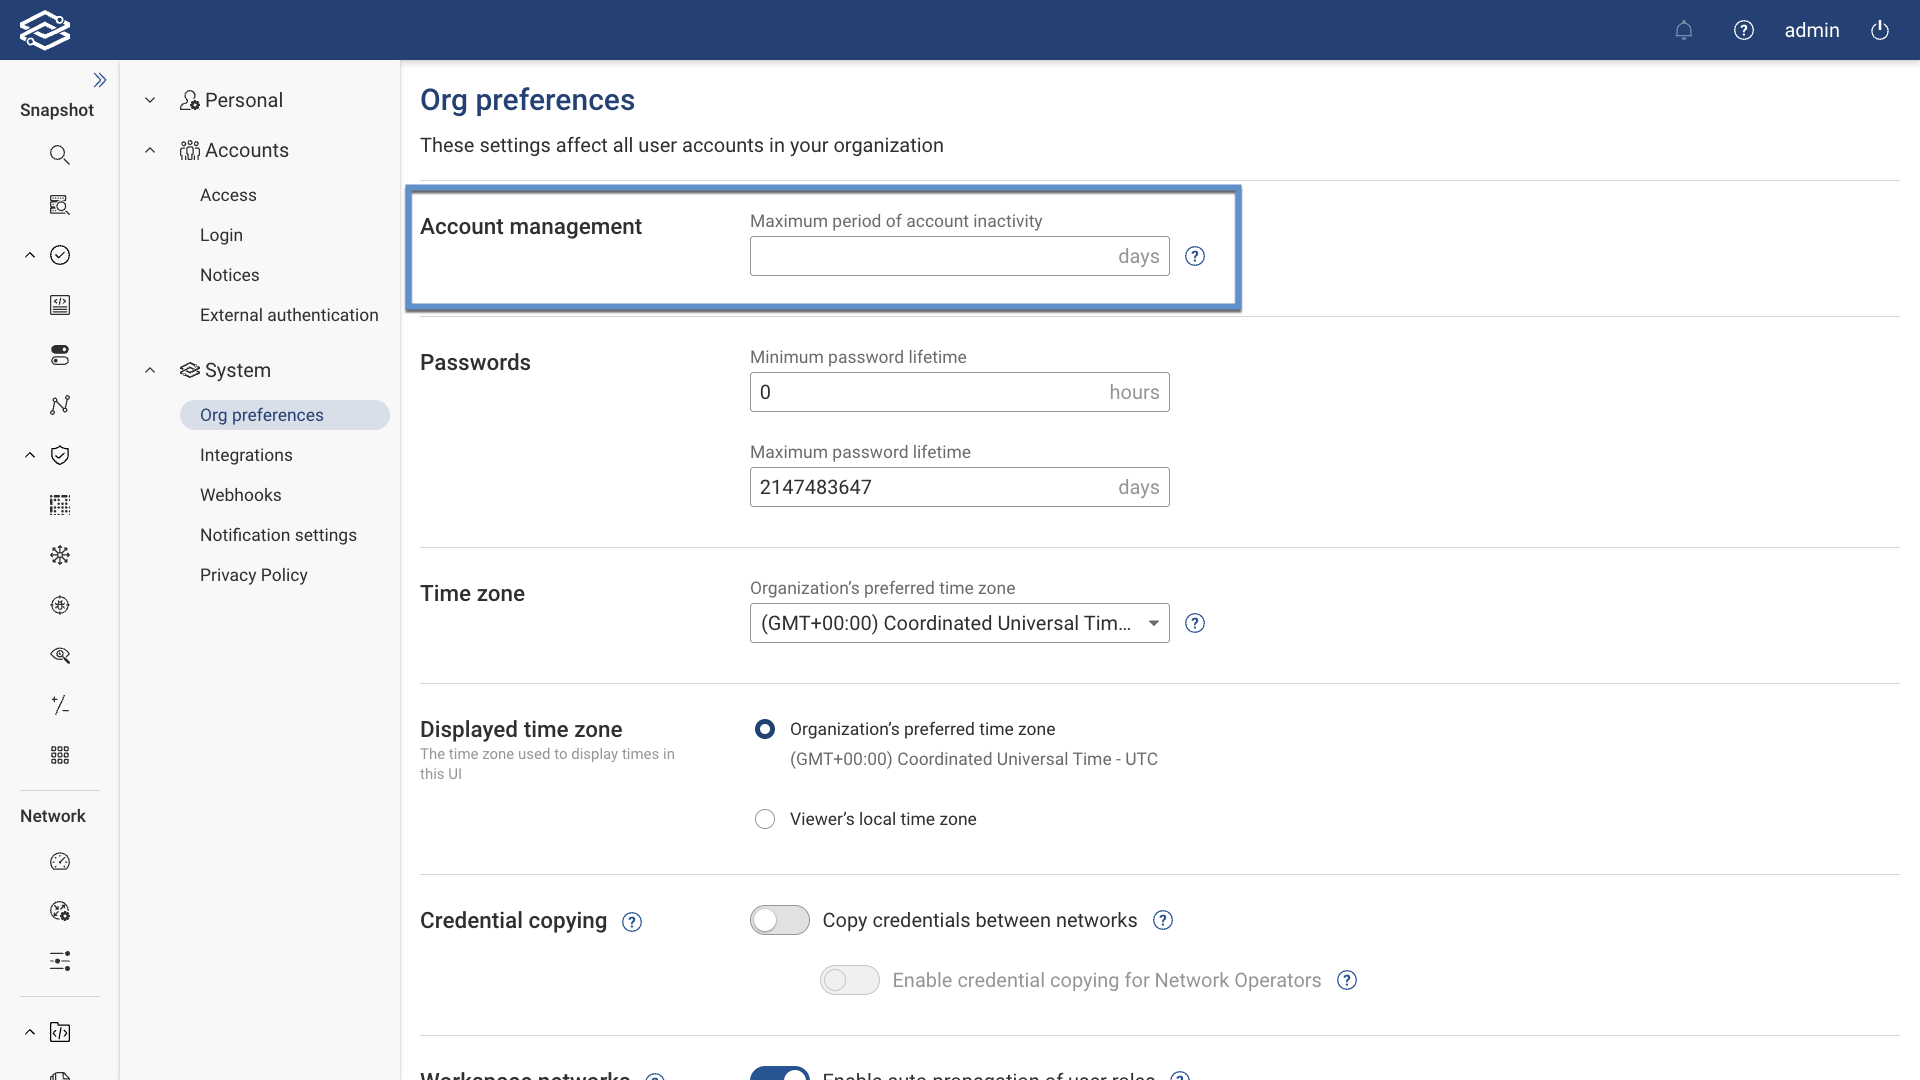
Any account that interacts with the system, whether through the UI or API requests, is considered active. This includes service accounts that exclusively perform API operations.
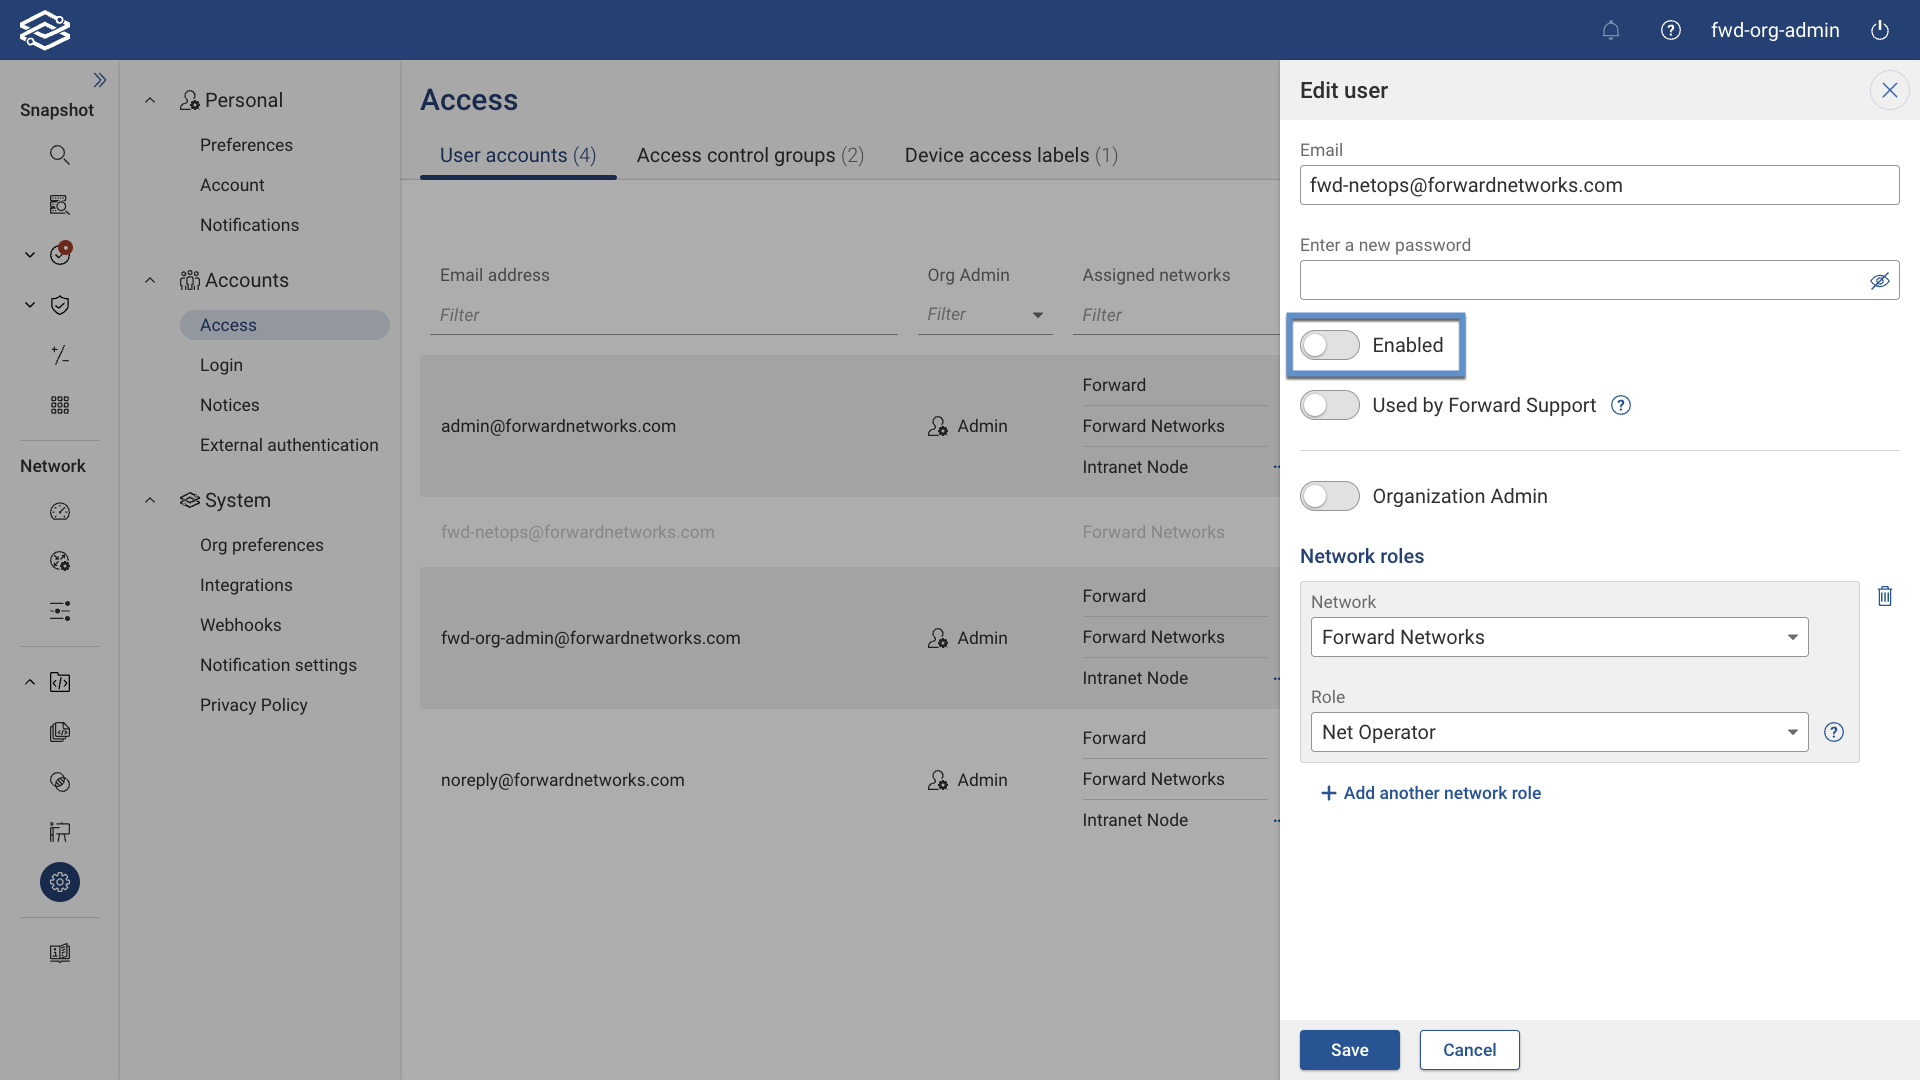
Manually Enabling Disabled Accounts
To manually enable an account, navigate to Settings > Access > User Accounts, toggle the Show Disabled Accounts option to display all disabled accounts, and enable a disabled account by selecting the kebab icon to display the additional option to enable the account.
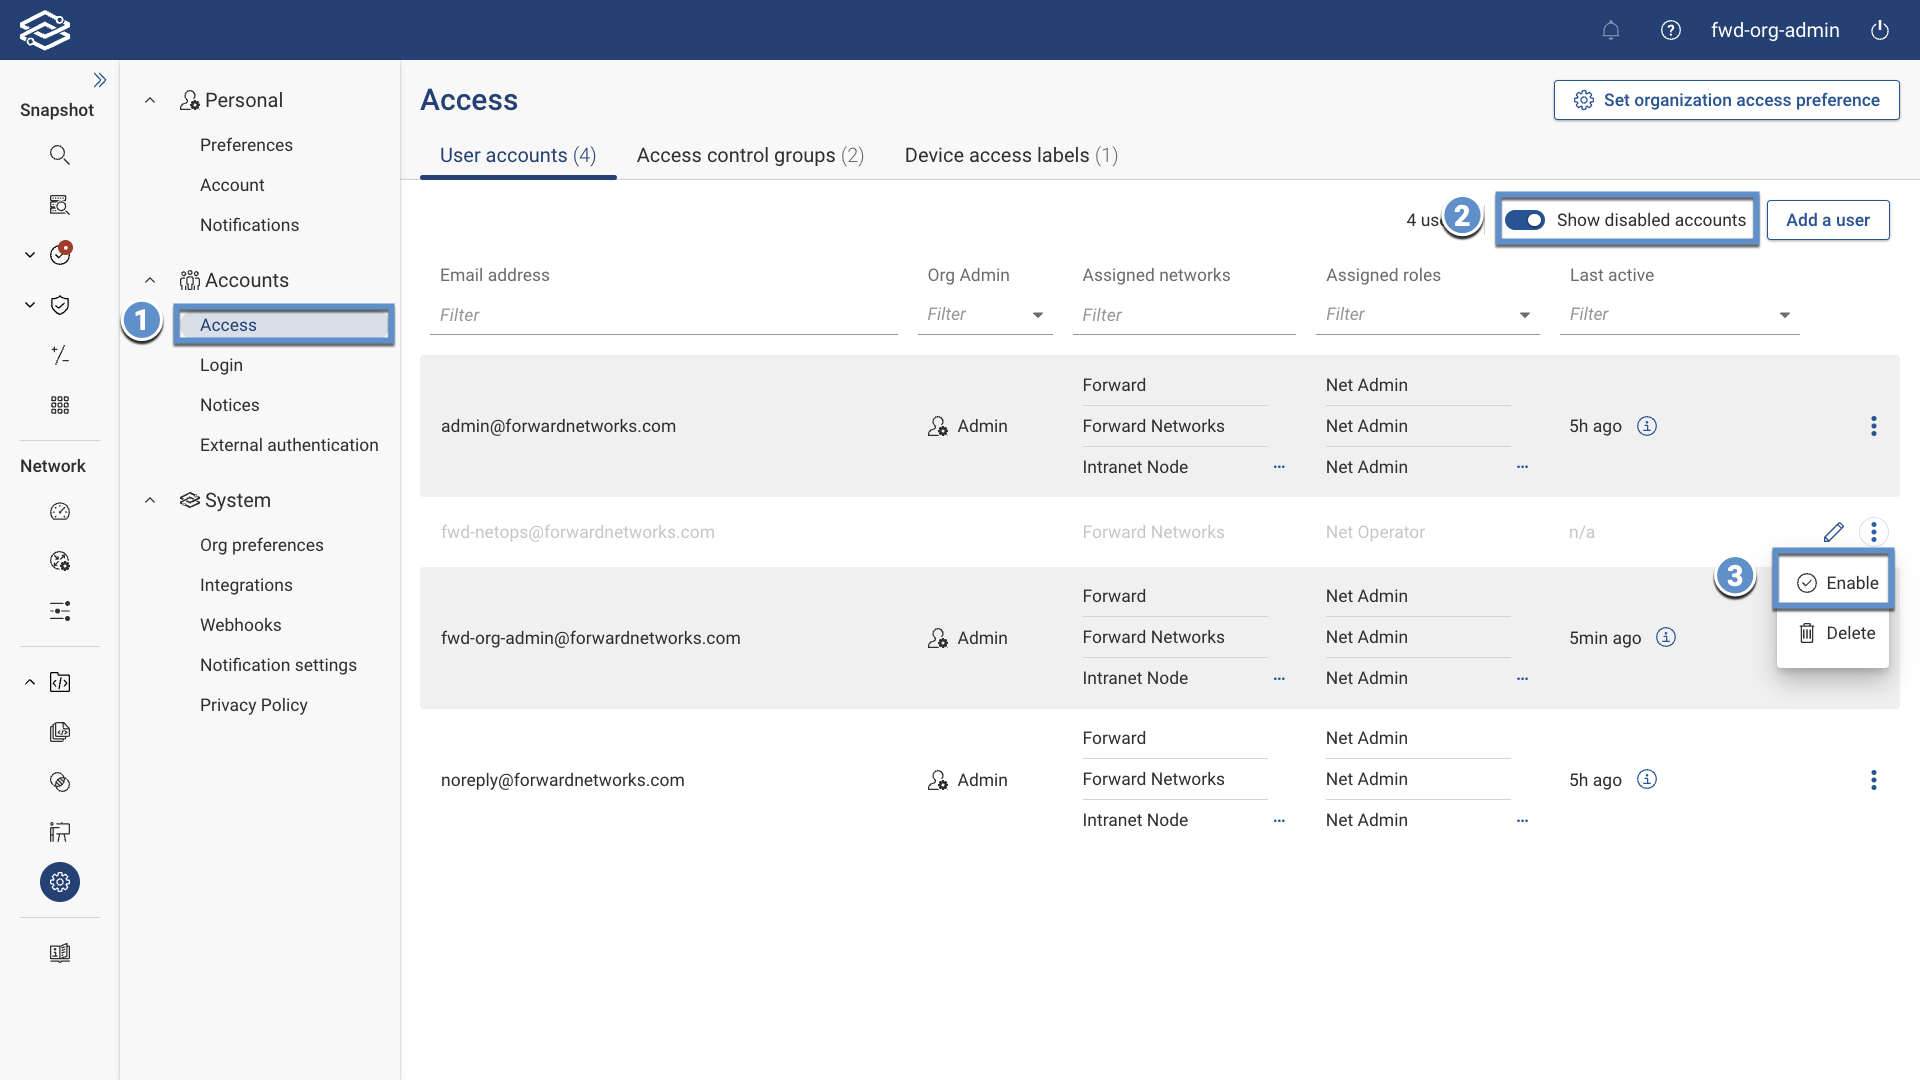
Alternatively, selecting the edit icon next to the account and toggling the enabled setting from the Edit User window will also enable the account.
API Token Management
Org Admins can view and manage all user-created API tokens from the User Accounts tab in Accounts > Access. This view includes the columns API Token First Created and API Token Last Used, providing insight into token activity across the organization.
To view or delete individual tokens, click the Edit icon next to a user to open the Edit User drawer. The API Tokens section lists all tokens created by that user and includes:
- Access Key
- Creation Date
- Expiration Date (only shown if an expiration policy has been set)
- Last Used
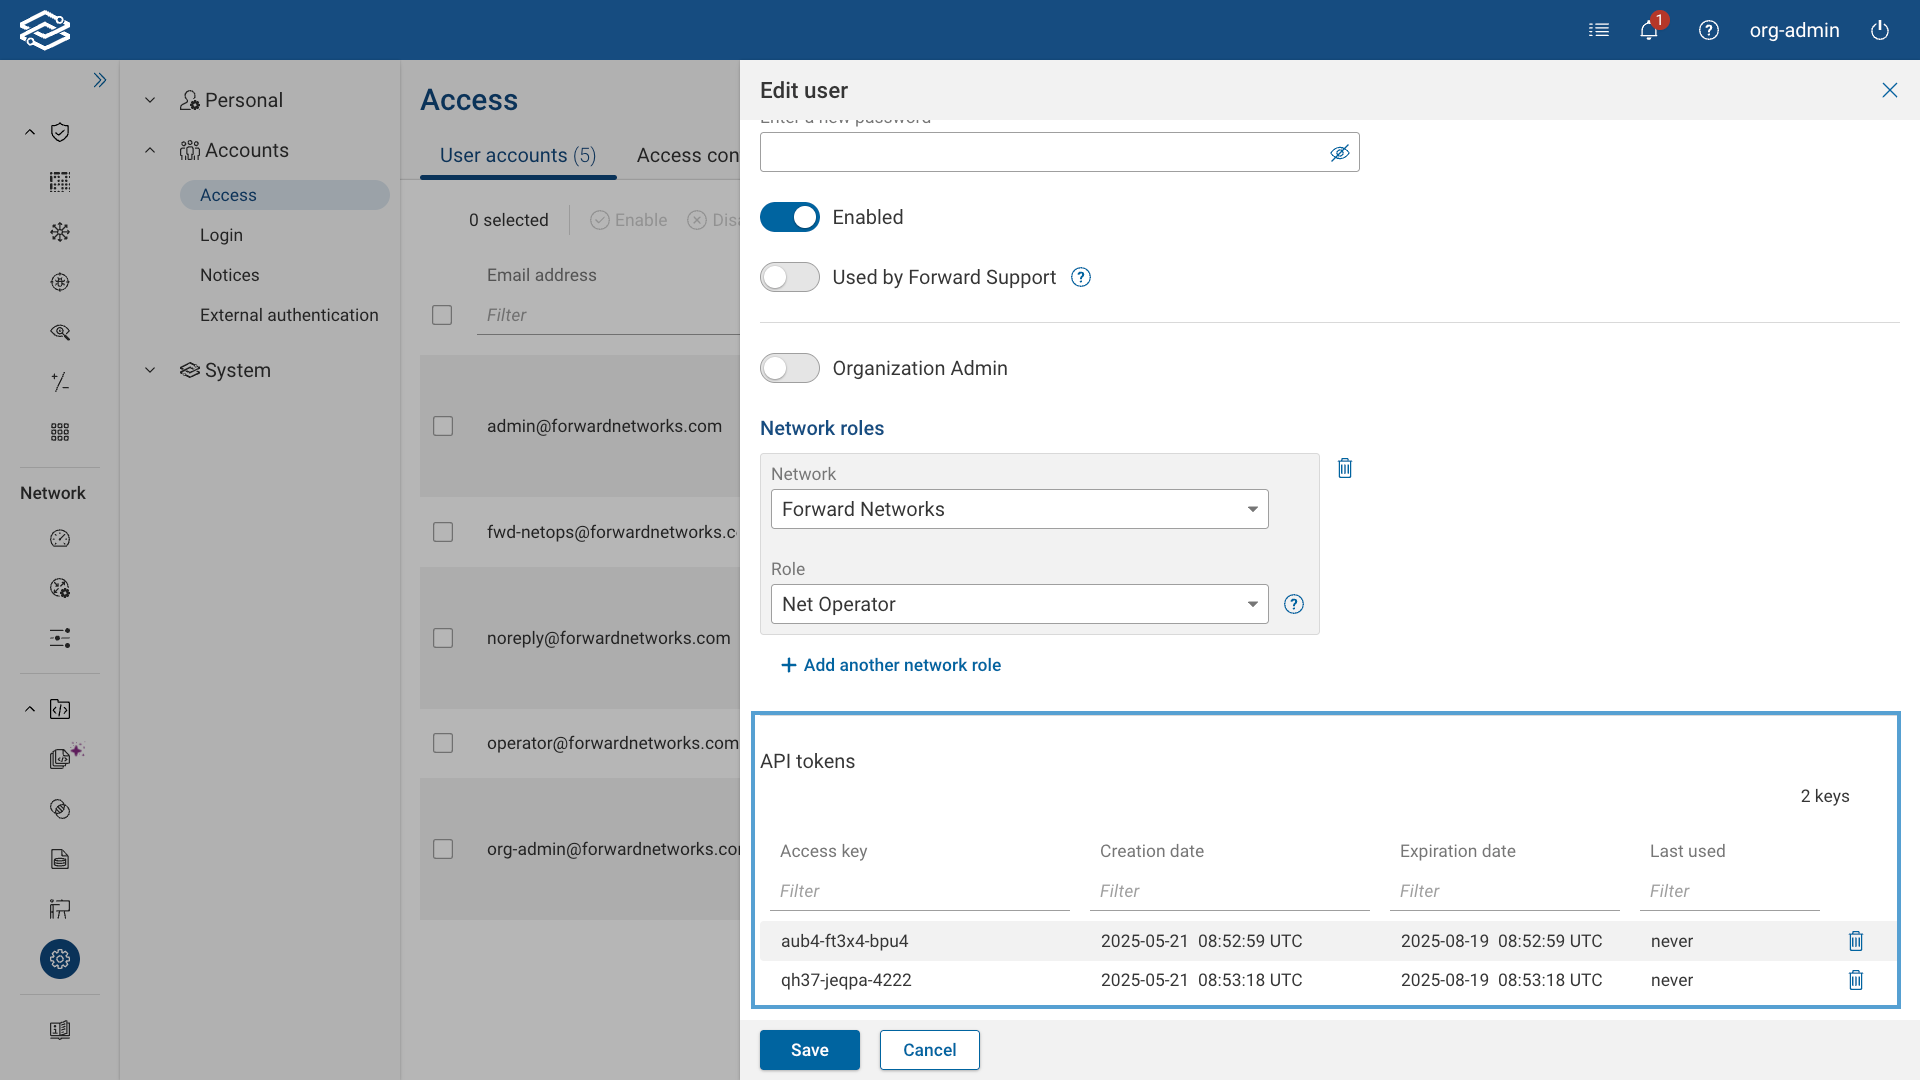
Org Admins can delete any token listed but cannot create tokens on behalf of other users.
Token expiration is controlled by the API token maximum lifetime setting in Org Preferences. If configured, tokens expire automatically after the specified number of days. If the field is left blank, tokens do not expire. Expired tokens cannot be reactivated, and any updates to the lifetime setting only affect tokens that have not yet expired.
Users can view and delete their own API tokens from the Personal > Account page. This view includes the same details: Access Key, Creation Date, Expiration Date, and Last Used.
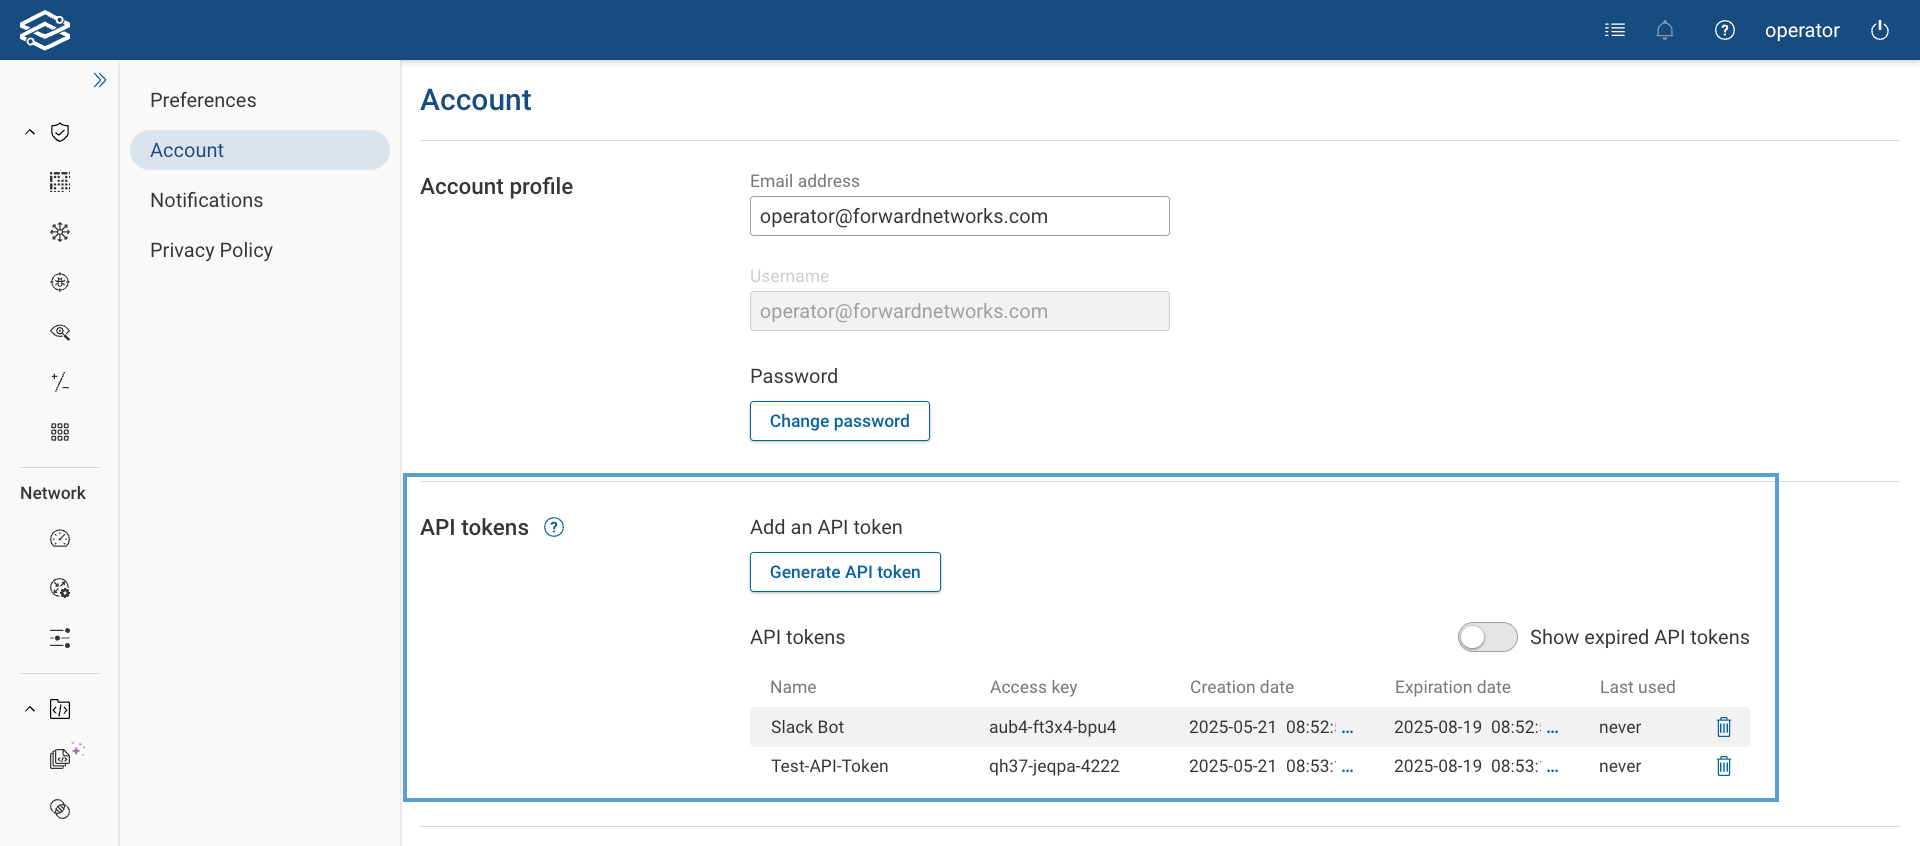
Expiration dates are only displayed if the API token maximum lifetime has been configured with a non-zero value.
Access Control Groups
Access control groups allow Org Admins to automatically associate externally authenticated LDAP or SSO users with org or network roles in the Forward Enterprise application.
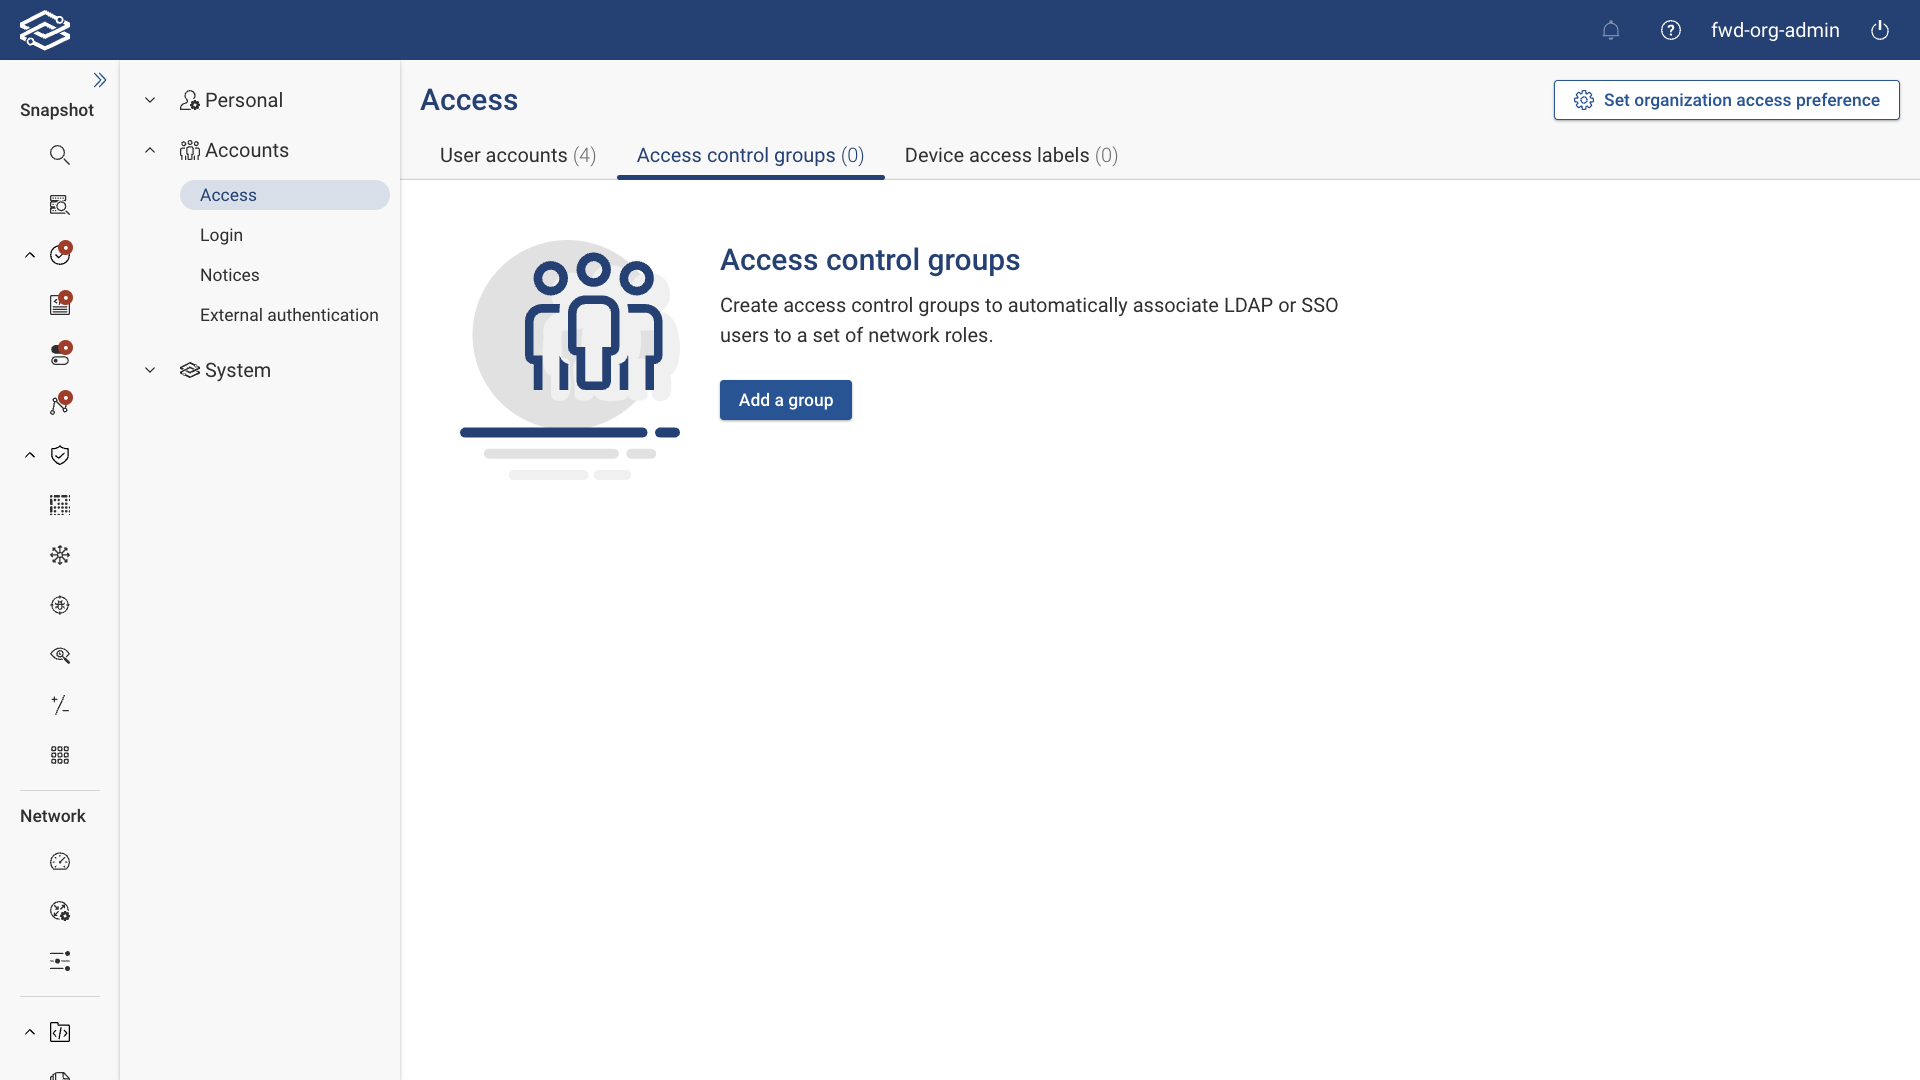
Adding an Access Control Group
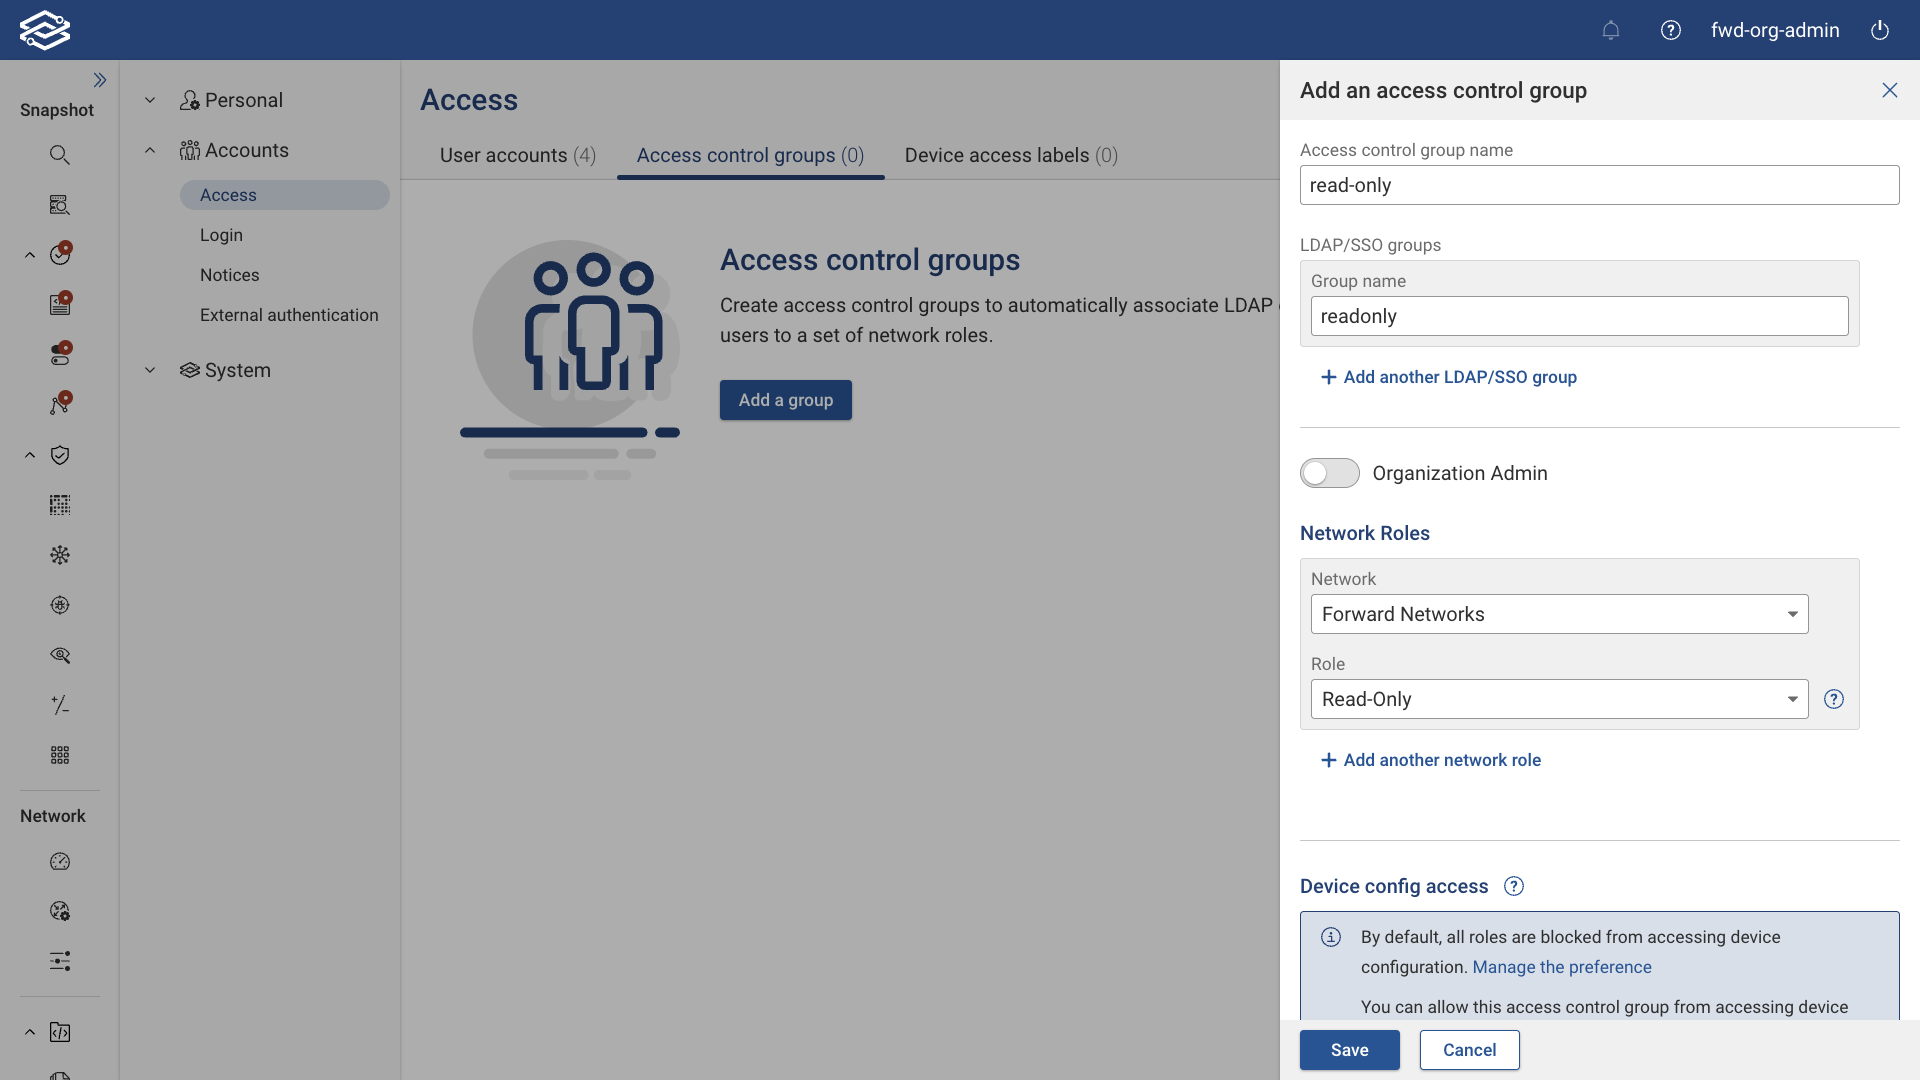
To add an access control group, navigate to Settings > Access > Access Control Groups, and select Add a Group. Provide the following information:
- Access Control Group Name: A unique name for the access control group.
- LDAP/SSO Groups: One or more LDAP/SSO groups. Enter a group name, then click Add Another LDAP/SSO Group if you need to add more. Note that group matching is case-insensitive.
- Org Admin: Toggle to set the access control group as an Org Admin.
Network Roles:
- Network: One or more networks to assign the user to with the role selected above. Select a network from the menu, then click Add Another Network if you need to add more.
- Role: The Forward Enterprise role to associate with the LDAP/SSO users that belong to any of the LDAP/SSO groups listed above. The available roles include Net Admin, Net Operator, Read-Only and Limited Read-Only.
Device Config Access:
- Block Config Access on Labeled Devices (optional): This option will be available if the Allow Config Access setting was set as the default permission for roles from Set Organization Access Preference. Select the device access label(s) from the list to assign it to the access control group.
- Allow Config Access on Labeled Devices (optional): This option will be available if the Block Config Access setting is set as the default permission for roles from Set Organization Access Preference. Select the device access label(s) from the list to assign it to the access control group.
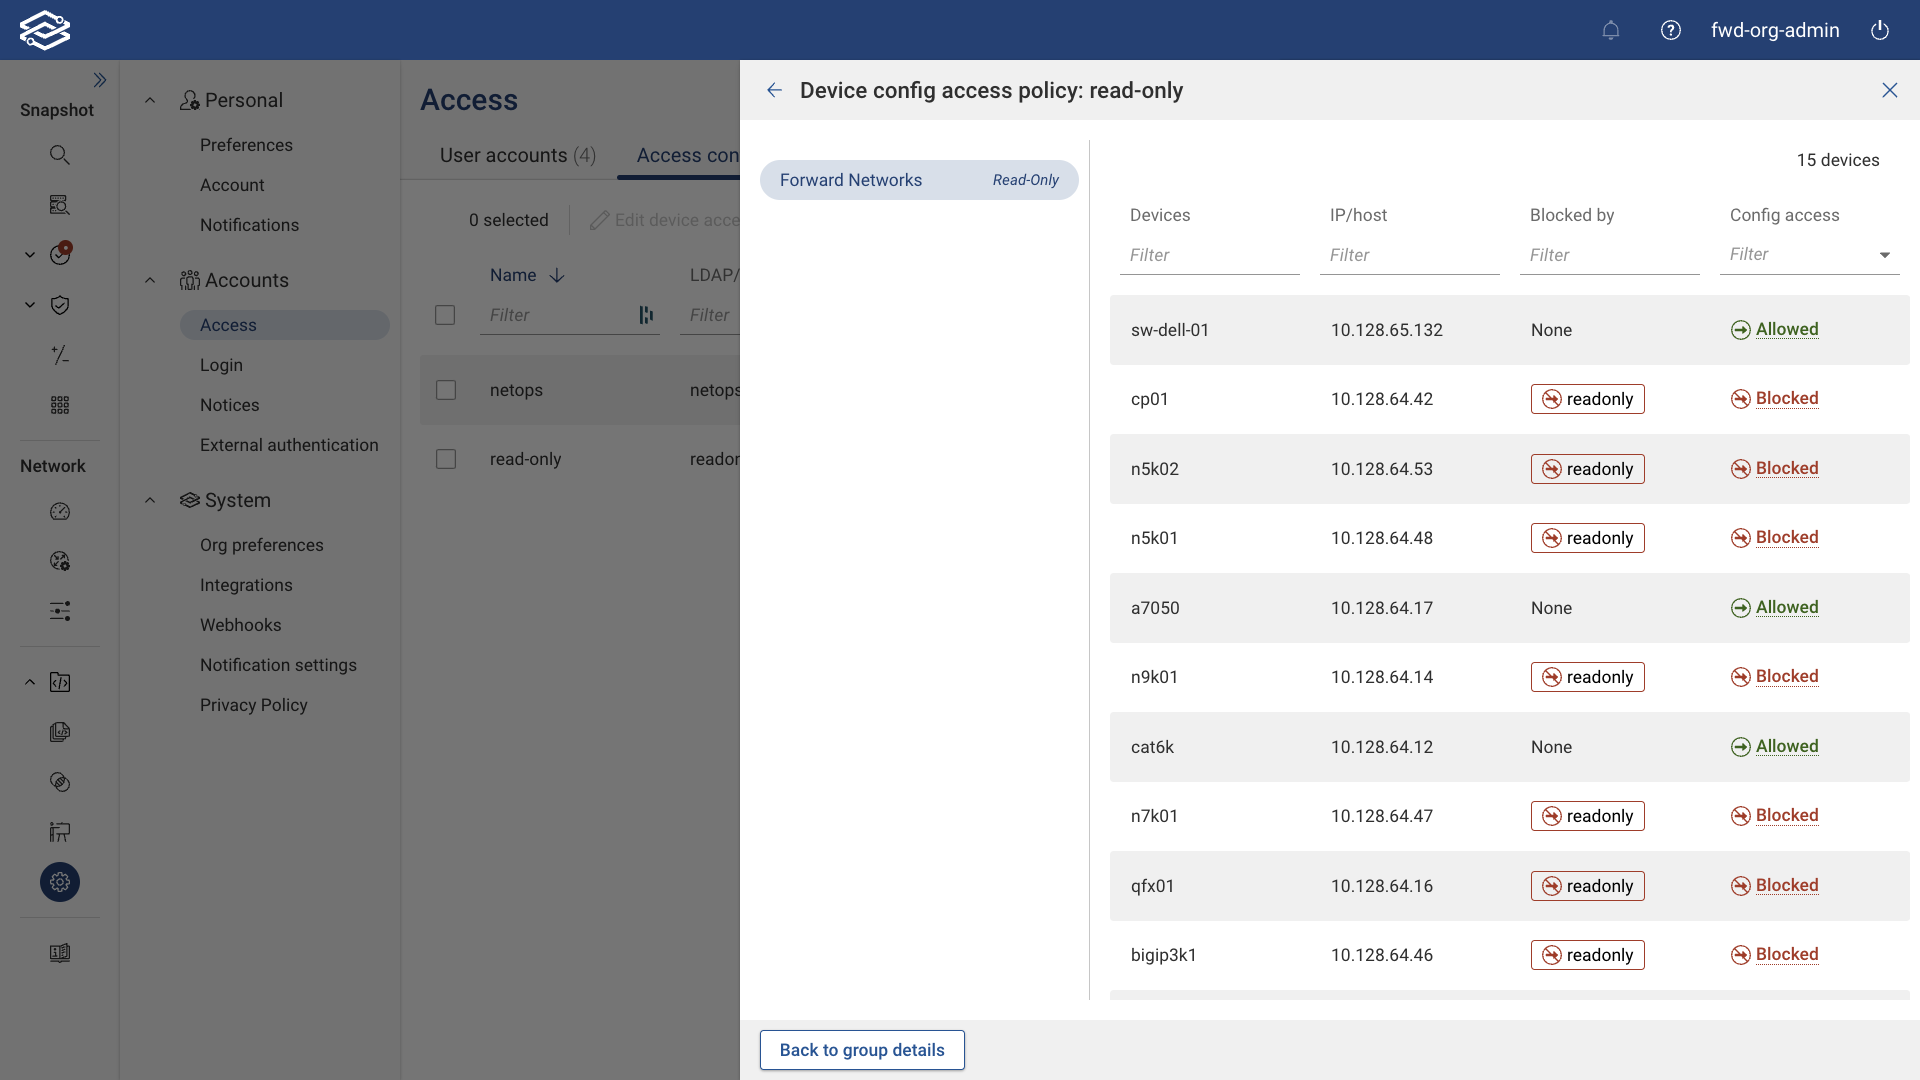
- Preview Device Config Access Policy: Clicking this displays all devices and their config access in association with the selected Access Control Group for each of the assigned networks.
Select Save when ready to finish adding the group.
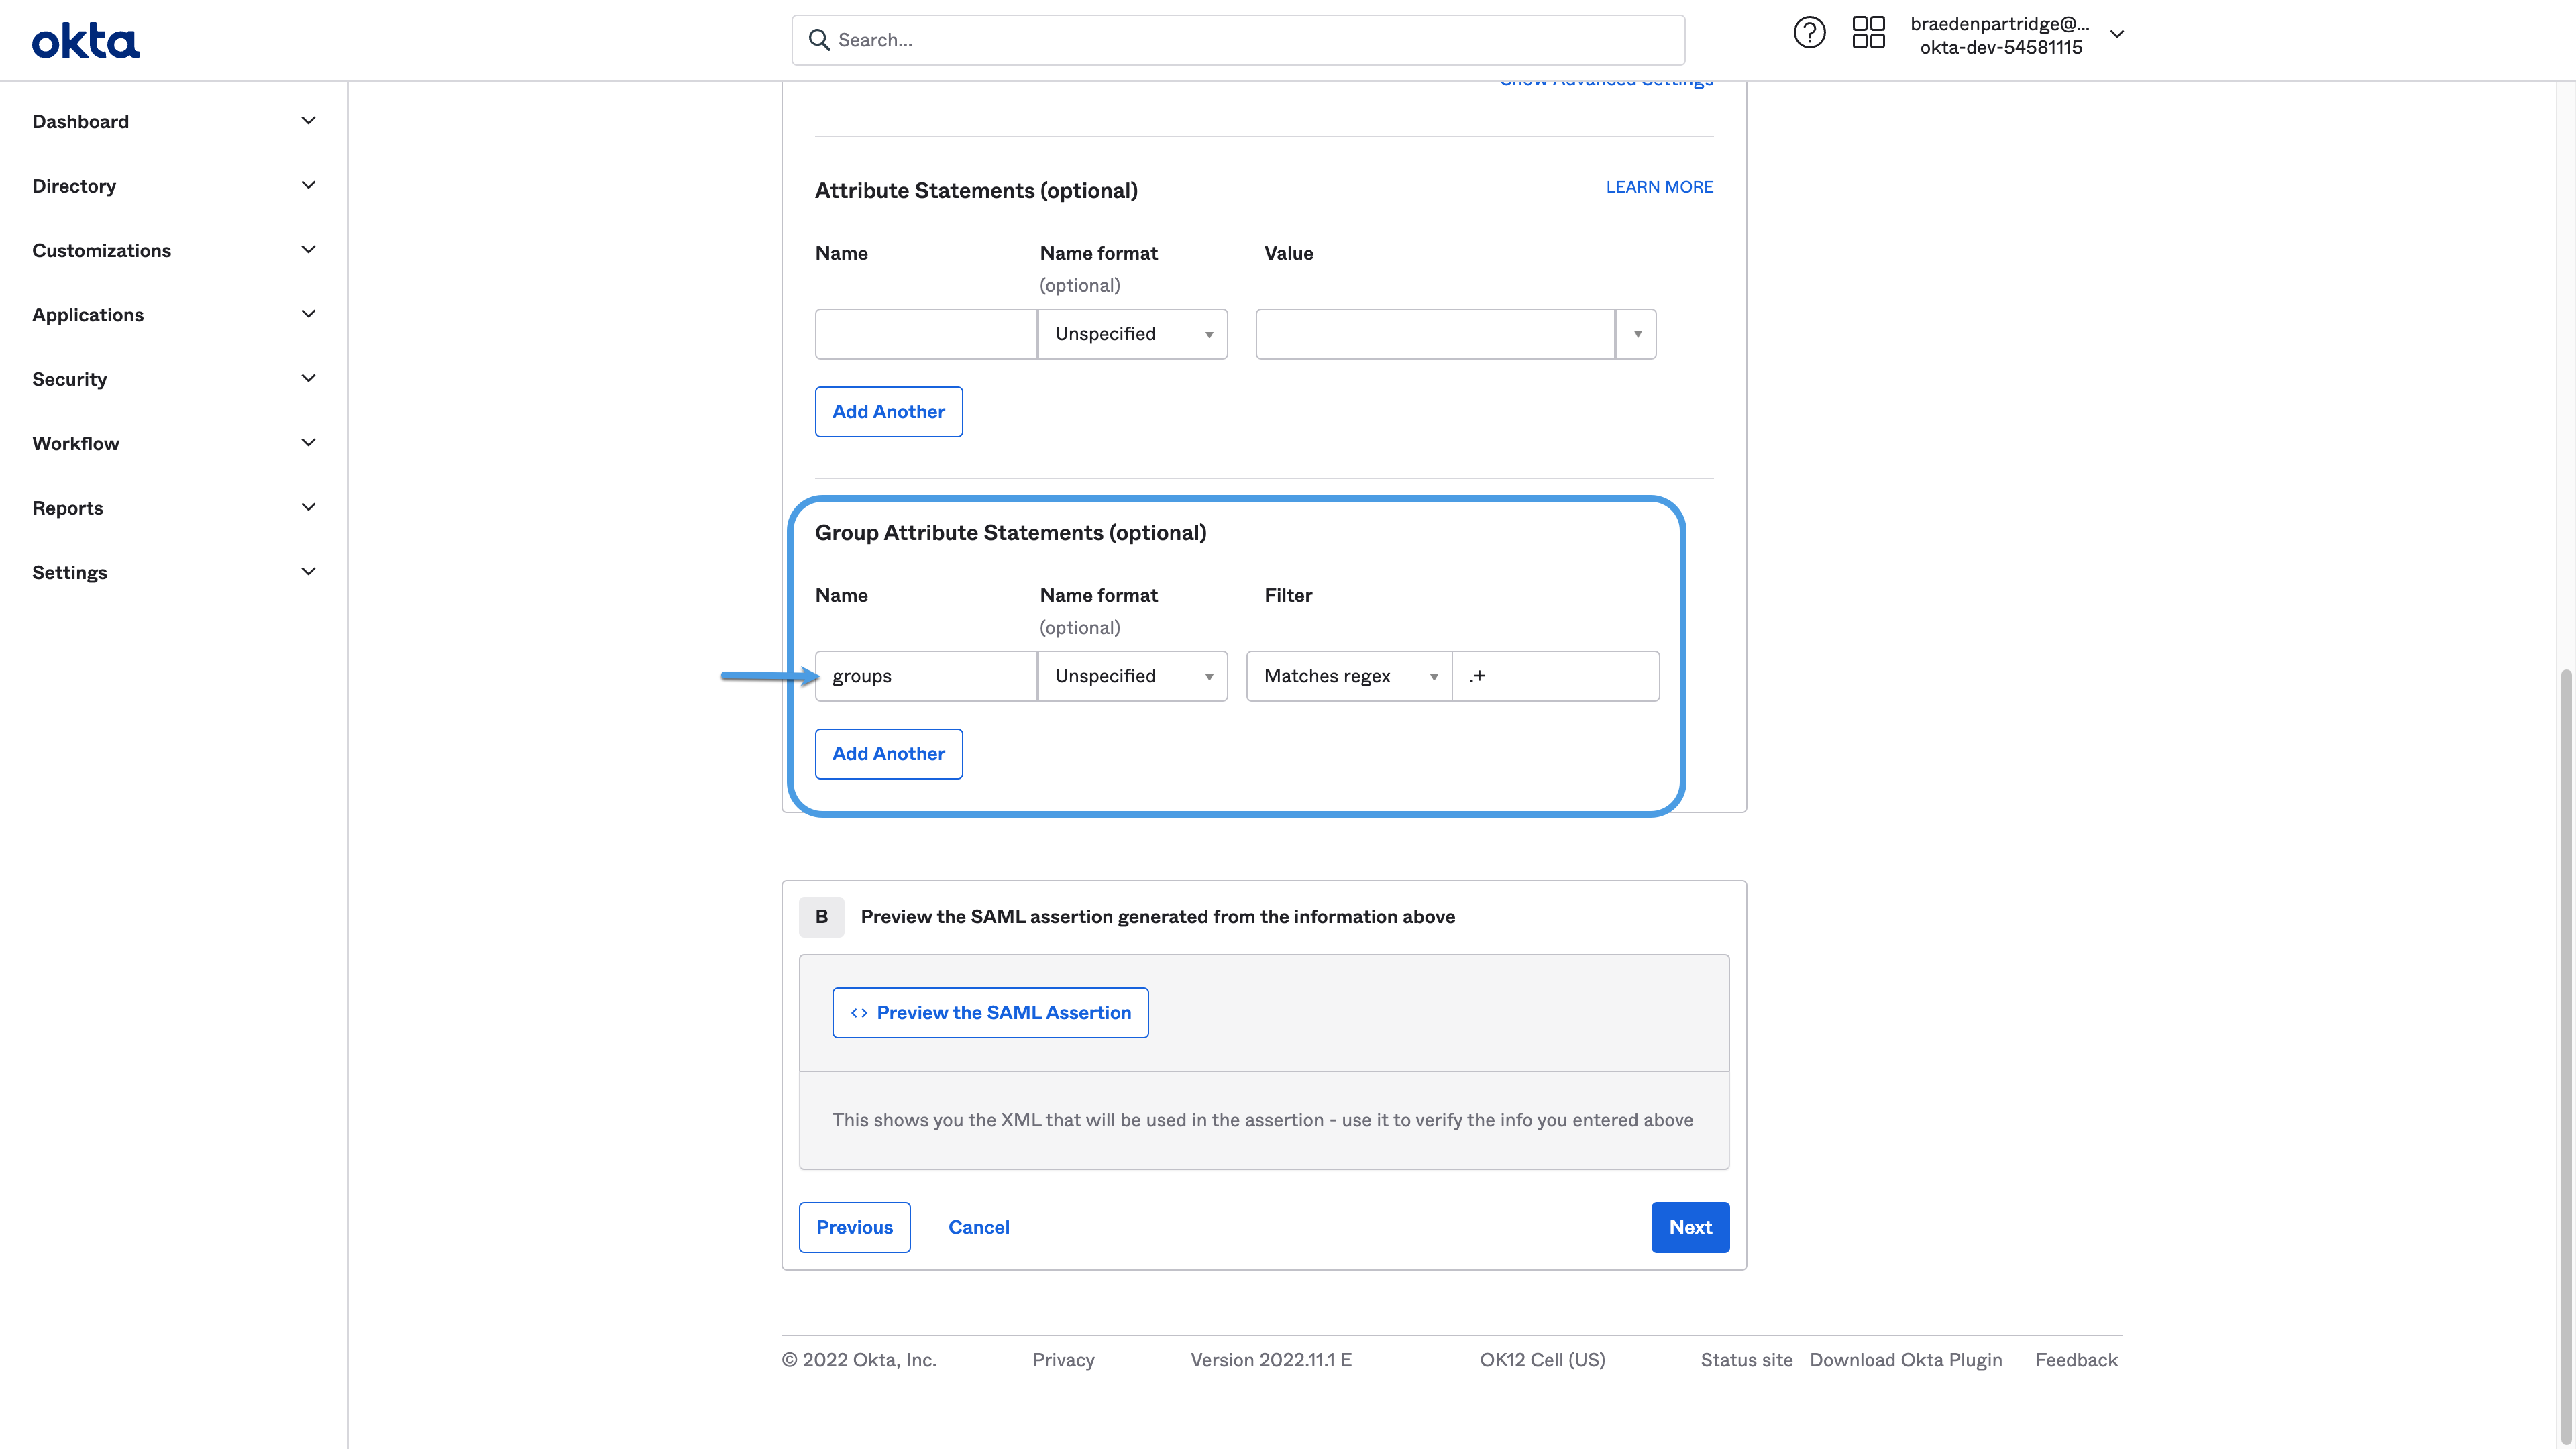
For SSO Groups: The SAML assertion must include a group attribute statement with an attribute name that includes the
group (e.g., group, groups, my-groups), as in the example from Okta below:
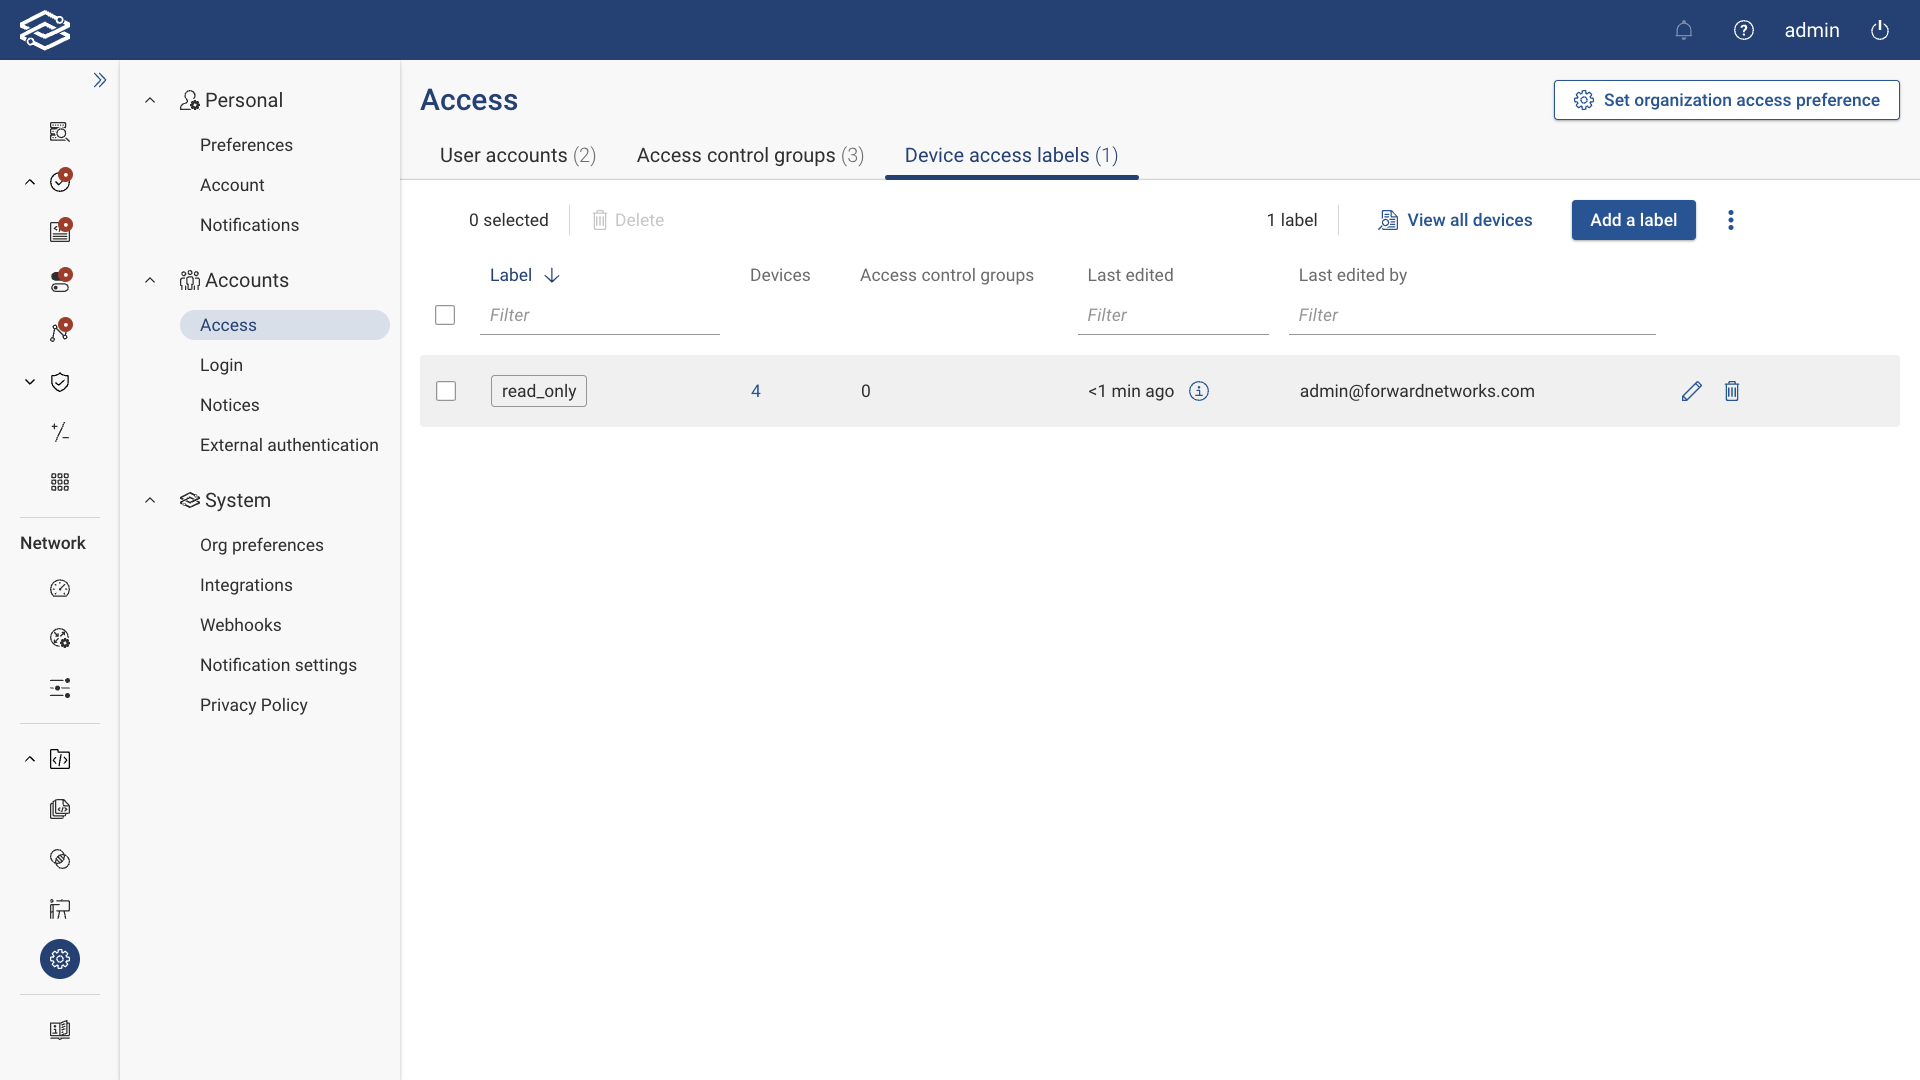
Device Access Labels
Device Access labels determine which devices are allowed or blocked based on the organization's access preference setting.
Adding a Label
To add a Device Access Label, navigate to Settings > Access > Device Access Labels, and select Add a Label to open the wizard.

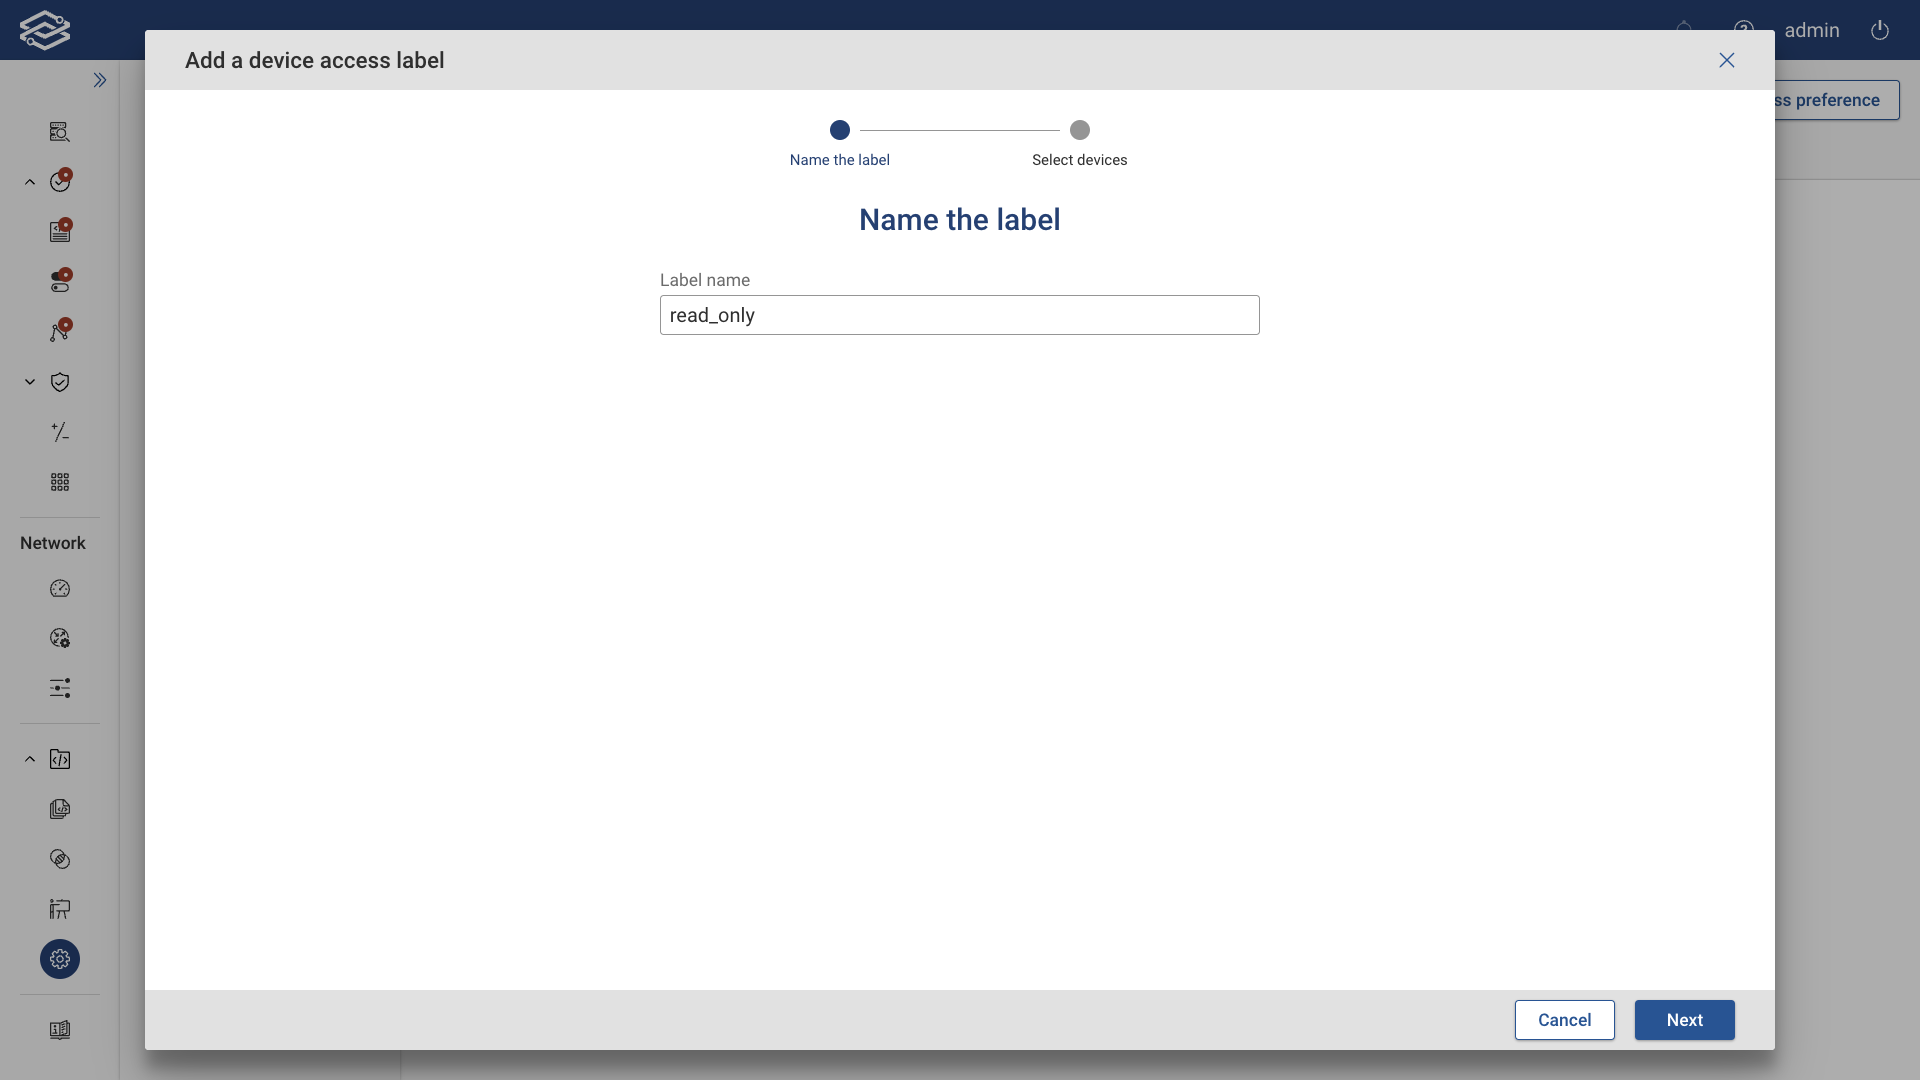
Step 1: Name the Label
Provide a unique name for the label. Click Next.
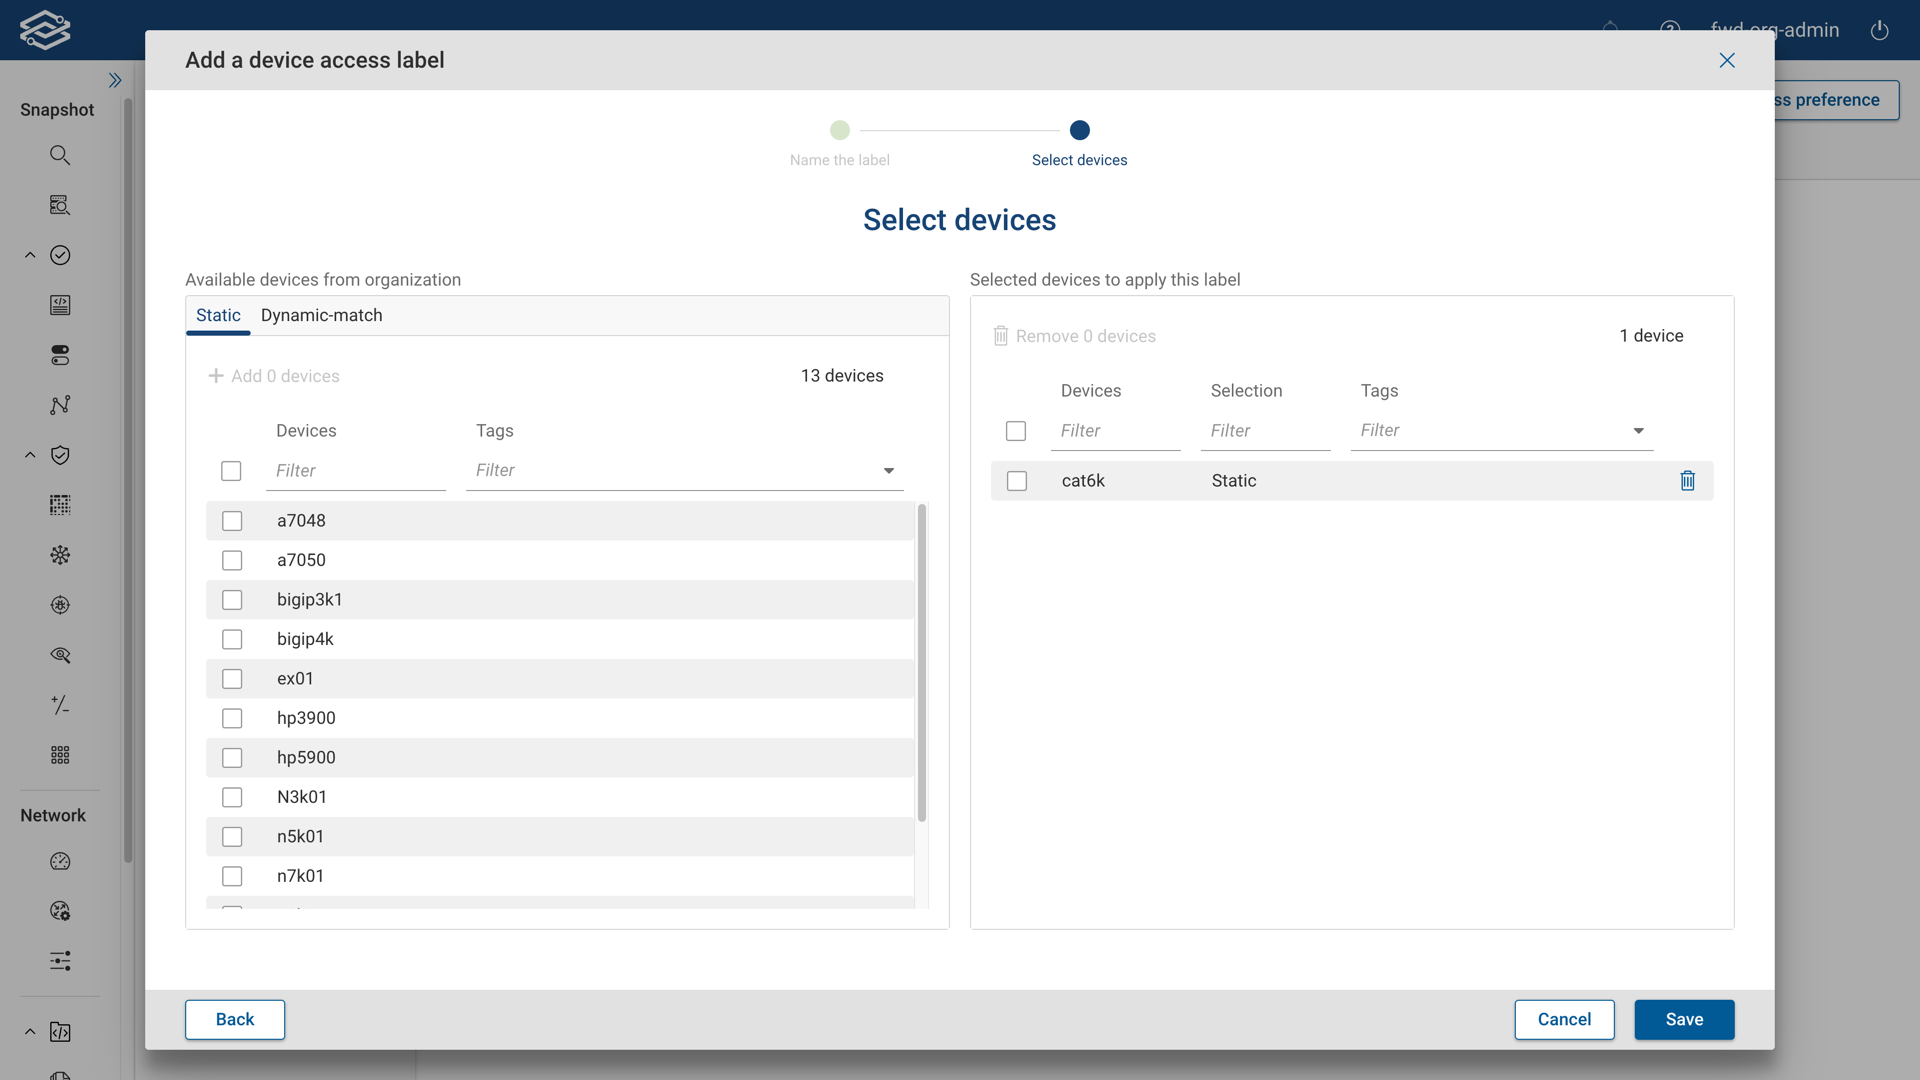
Step 2: Select Devices
Select devices to assign to the label.
- Static: Select individual devices by searching by device name or tag within the static tab.
Selected devices can be removed by selecting the delete icon next to them.
- Dynamic-match: Use device name patterns with wildcards to dynamically select devices within the dynamic-match tab. Multiple patterns can be added, one pattern per line. Future devices matching the pattern will be automatically added to the label.
Static selection of devices takes preference over dynamic-match selection of devices.
Devices added through dynamic matching cannot be individually deleted. To delete a dynamically matched device, the associated device name pattern must be removed.
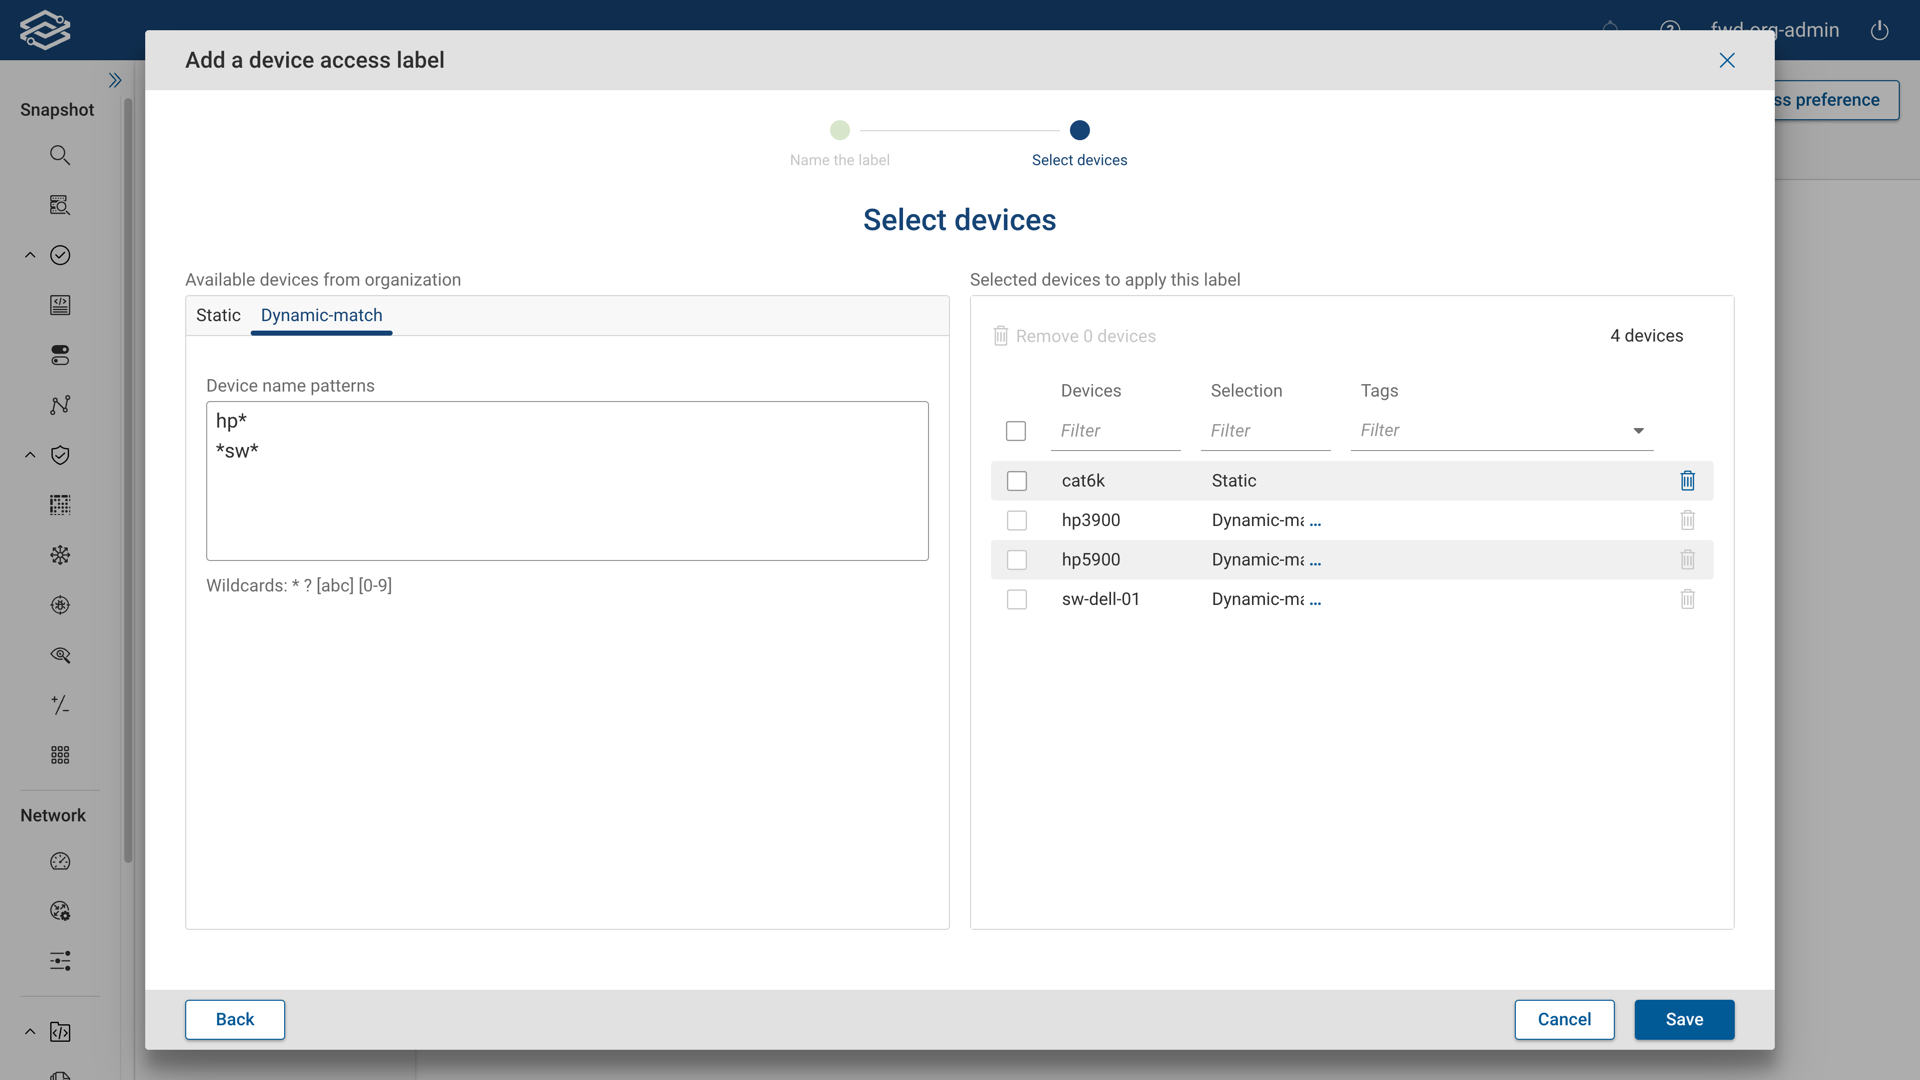
Click Save to finish adding the device access label.
Managing Device Access Labels
Device Access Labels are listed within the Device Access Labels tab. Each device access label row provides the following information:
- Label: Lists the name of the label.
- Devices: Displays the number of devices assigned to the label. Clicking the device number opens the Edit Label Devices tab, displaying a list of the devices and affiliated tags. Selecting Edit Devices opens the Edit Devices on This Label panel to edit the devices assigned to the label.
- Access Control Groups: Displays the number of access control groups to which the label is assigned. Click on the displayed access control group number to view and edit the label-blocked or label-allowed access control groups tab, depending on the org access preference settings being used. You can view the names of the access control groups assigned, assign additional groups, or remove existing groups if needed.
- Last Edited: Displays when the label was last edited.
- Last Edited By: Displays the name of the last user who edited the label.
At the end of each device access label row are additional options for editing and deleting:
- Edit: Select the Edit icon to open the Edit Label panel to edit the device access label.
- Delete: Select the Delete icon to delete the selected label.