Webhooks
Forward Enterprise allows the configuration webhooks to notify external applications that a new Snapshot is available on the Forward platform.
Only Forward Org admins can view, create, edit, test, and delete webhooks.
Creating a webhook
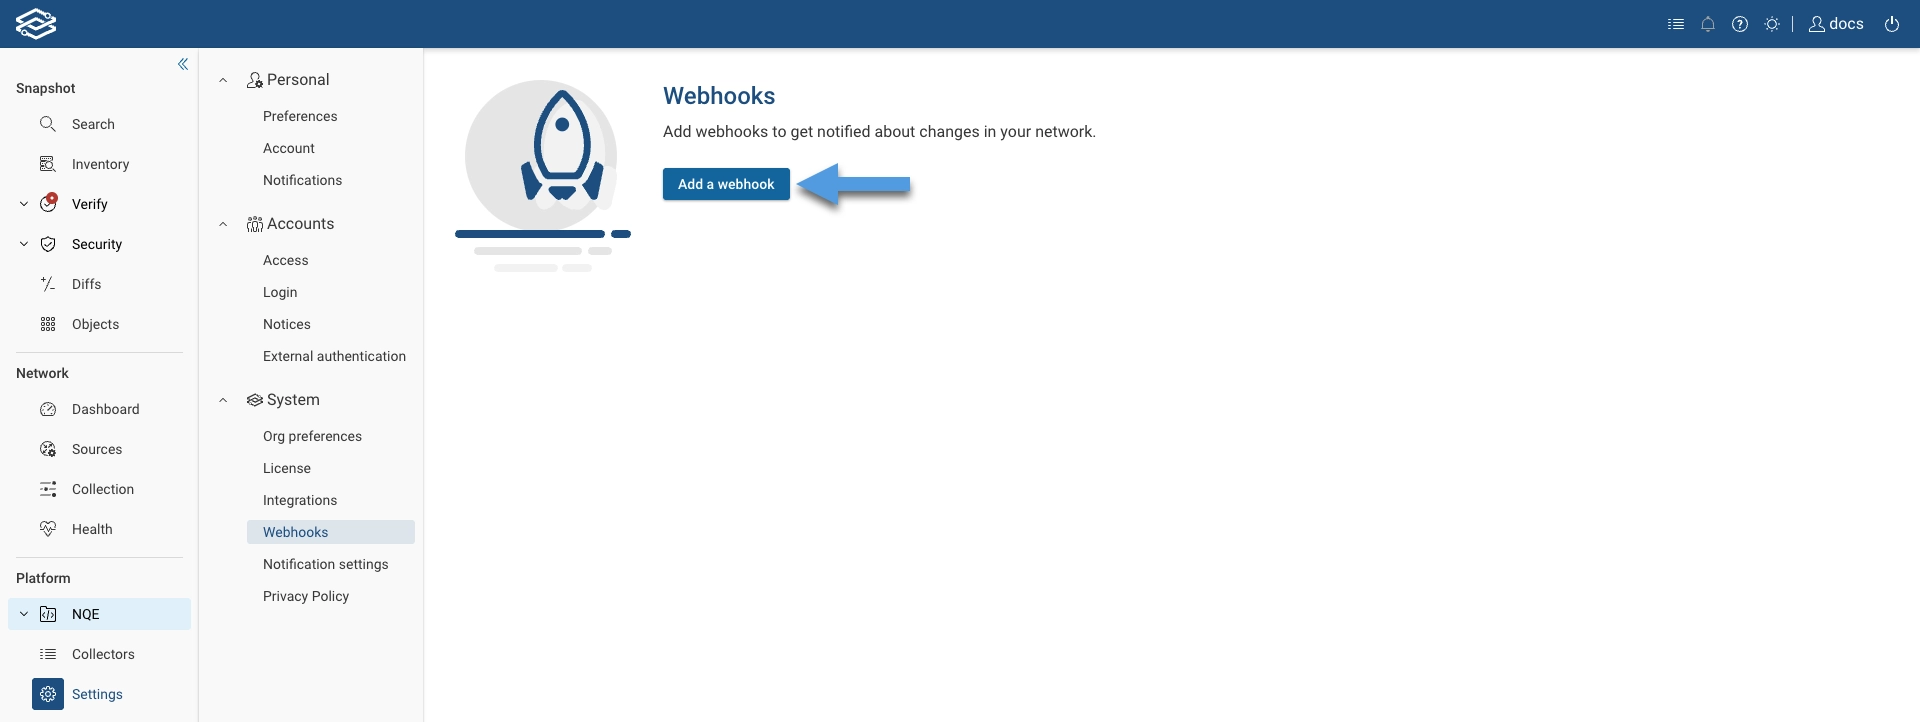
To create a webhook, navigate to Settings > System > Webhooks, and click Add a webhook.
To configure the webhook, provide the following information in the Create webhook drawer.
General
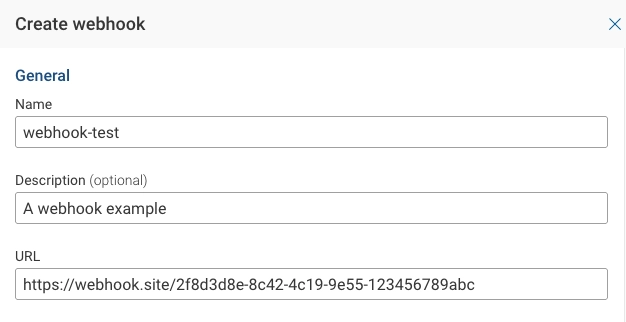
- Name: Provide a unique webhook name.
- Description (optional): Provide an optional description.
- URL: Add the external application URL.
- Disable SSL validation: Optionally disable SSL validation on on-prem deployments. Not recommended! This options appears after you start typing the URL.
Webhook subscription event

- Event: Select an option from the drop-down menu:
- New Snapshot ready: Send a notification when a new Snapshot is ready.
- Intent Verification failure: Send a notification if any Verification changes from pass to fail.
- NQE Verification failure: Send a notification if any Verification changes from pass to fail.
- Networks (optional): Select a subset of Networks from the Networks drop-down menu. If left empty, events from all networks are sent.
Authentication
To add webhook authentication, enable Use Basic Authentication and provide a Username and Password.

Notification format
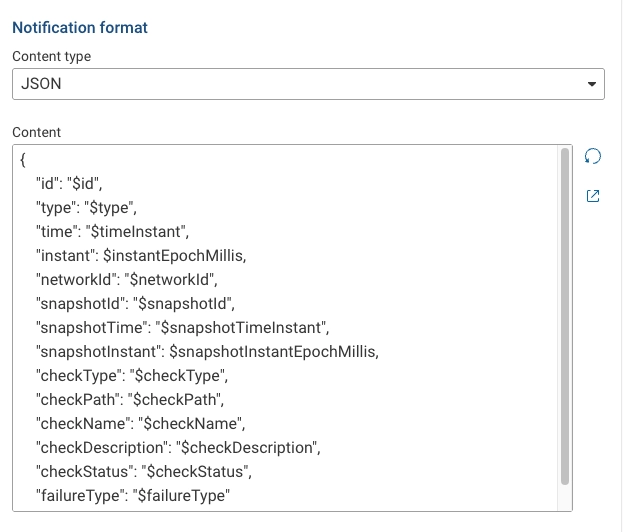
- Content-type: Select JSON or Plain Text as the content type of the expected payload.
- Content: Displays an editable list of keys to match against the expected payload. Use the Reset to default option to restore the content textbox to its default set of keys. A list of all supported variables is also provided below.
List of supported variables
$id
$type
$timeInstant
$instantEpochMillis
$networkId
$snapshotId
$snapshotTimeInstant
$snapshotInstantEpochMillis
$numSuccessfulDevices
$numDevicesWithCollectionFailures
$numDevicesWithProcessingFailures
$collectionFailedDeviceCount
$processingFailedDeviceCount
Connection
Test the connection with the external application by clicking Test. A Test connection window will appear, showing the webhook Payload details and the IP address from which the request will be sent.
Click Send request to start the test.
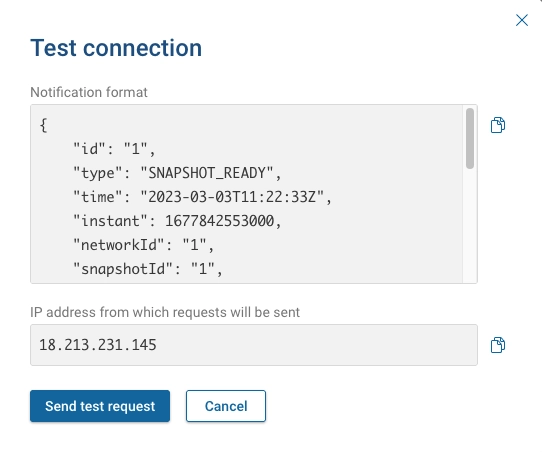
If the test succeeds without errors, click Save to store the webhook.
Customers may need to adjust firewall rules to allow Webhook requests from Forward to reach external applications. The
Webhook requests are sourced from the Forward application, https://fwd.app/ for SaaS deployment, or
https://<Forward-instance-IP>/ for on-prem deployments. The Webhooks source IPs are listed at the bottom of the Test
connection dialog.
Managing webhooks
Once a webhook has been added, it will be displayed within the Webhooks page.

Every webhook has the following options:
- Active: Enable or disable a webhook by toggling it.
- Test: Click on the test icon to open the test connection window again.
- Edit: Click on the edit icon to open the edit pane for the selected webhook.
- Delete: Click on the delete icon to delete the selected webhook.