On-Prem Infra
Overview
With Forward, users gain Google-like search capability for the network, with instant, interactive access to all device configuration and state information. Every search result shows not just where the information is but presents the information in a context-aware fashion, highlighting network building blocks such as VLANs, VRFs, and interfaces.
Forward Enterprise automatically builds a fully interactive, accurate, and up-to-date Topology Map whenever it collects from the network.
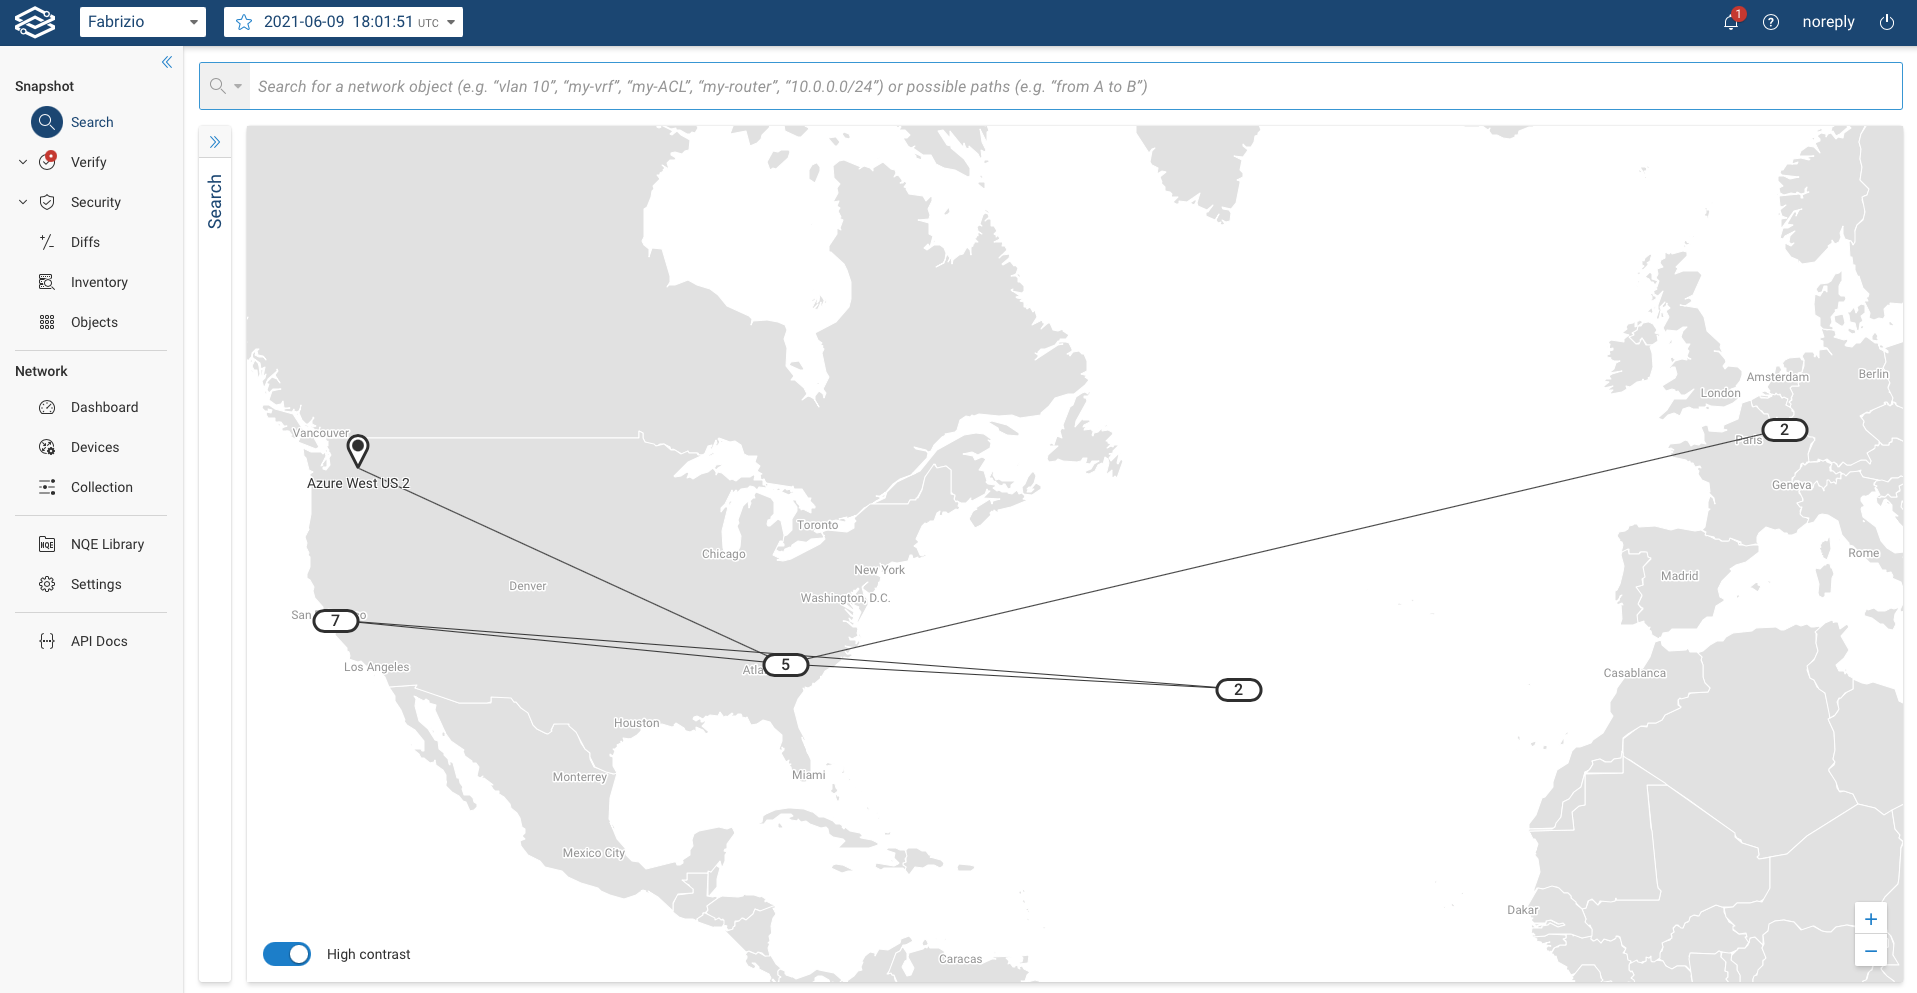
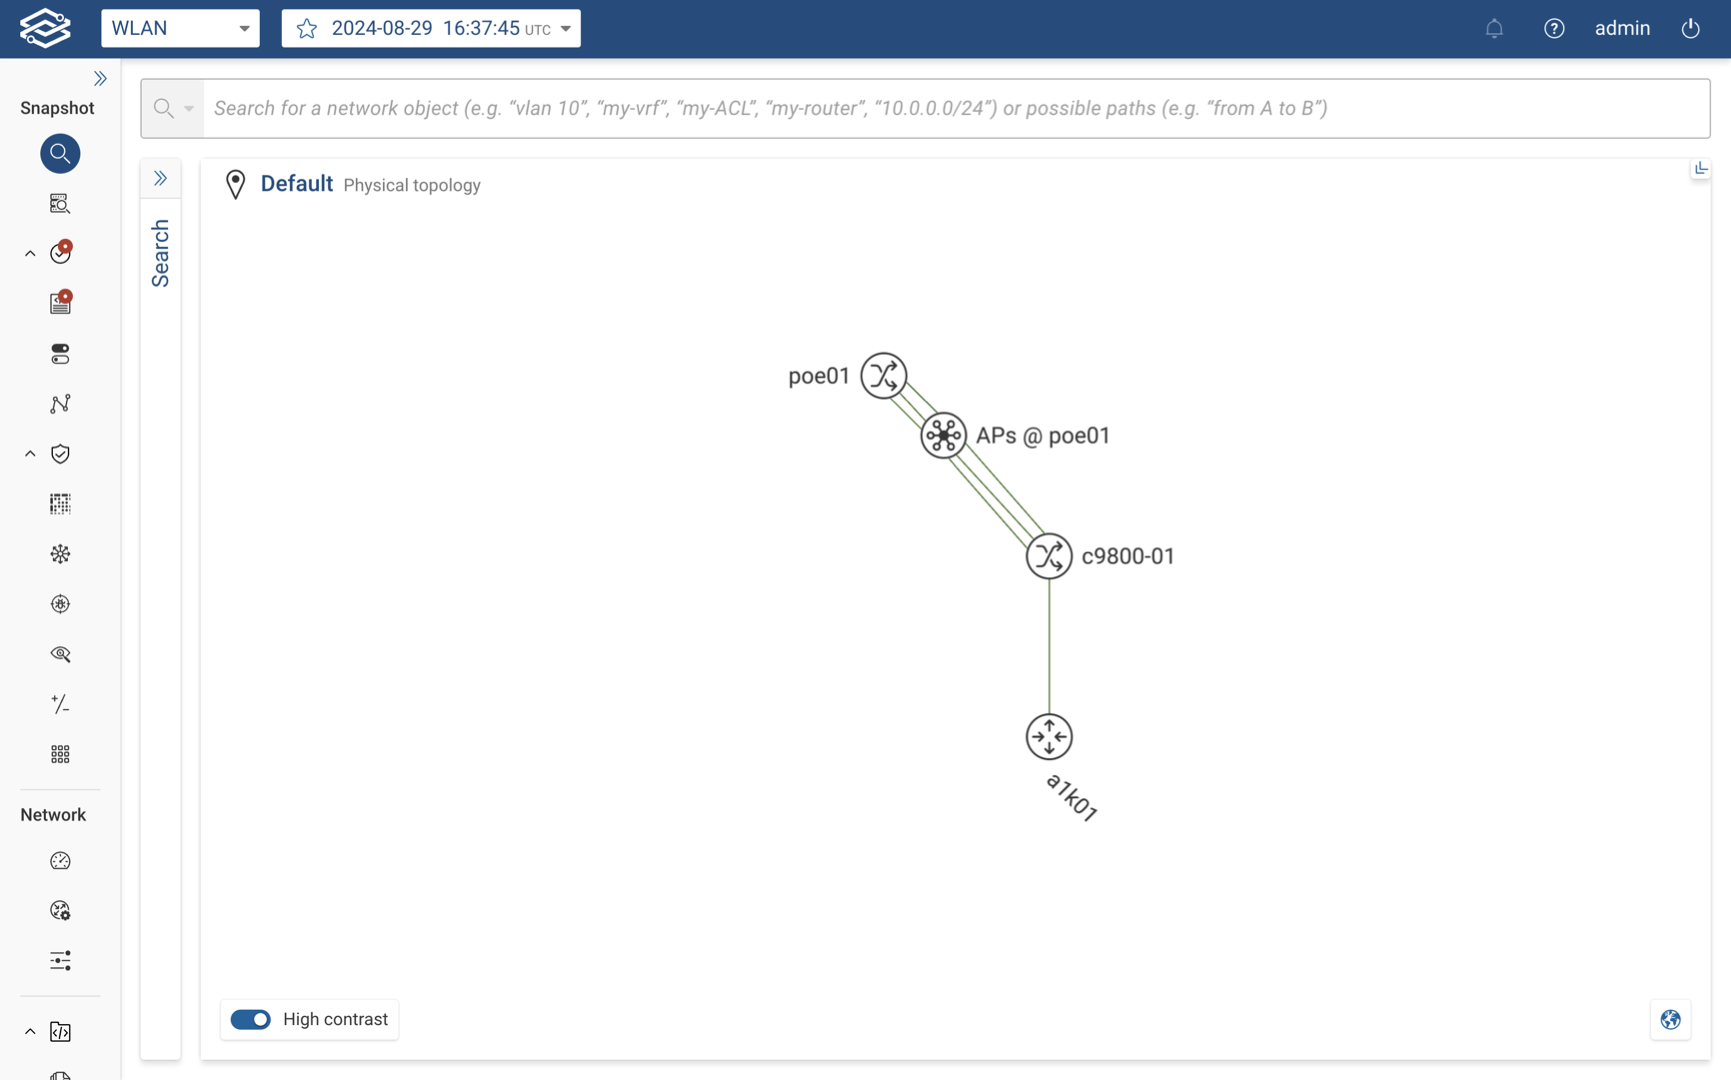
The High contrast toggle button in the lower left corner of the topology map allows you to increase the contrast. This option can be very useful with displays that cannot use a wide range of colors (e.g., big screens commonly found in NOCs or SOCs).
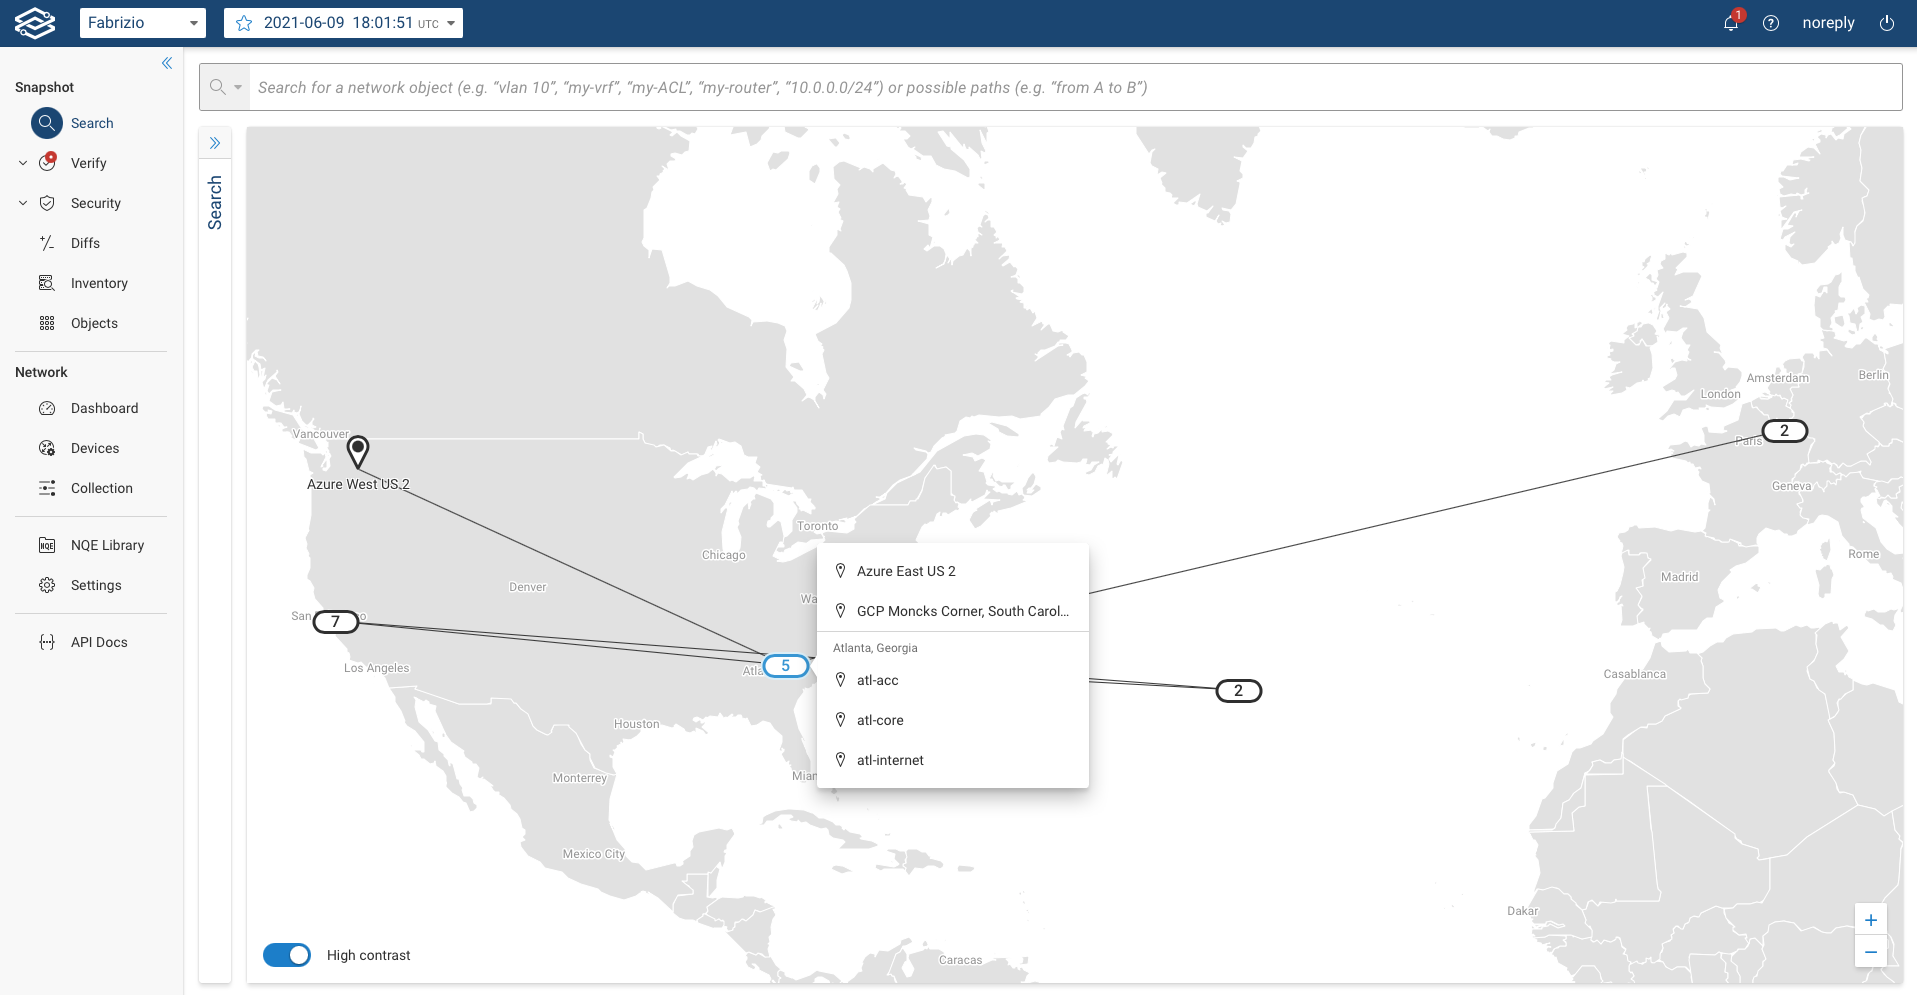
The interactive map view connects various locations highlighted in a location-based geographical map. Nearby locations are aggregated on the map based on the zoom level. Clicking an aggregated location marker will show an expanded list of locations.
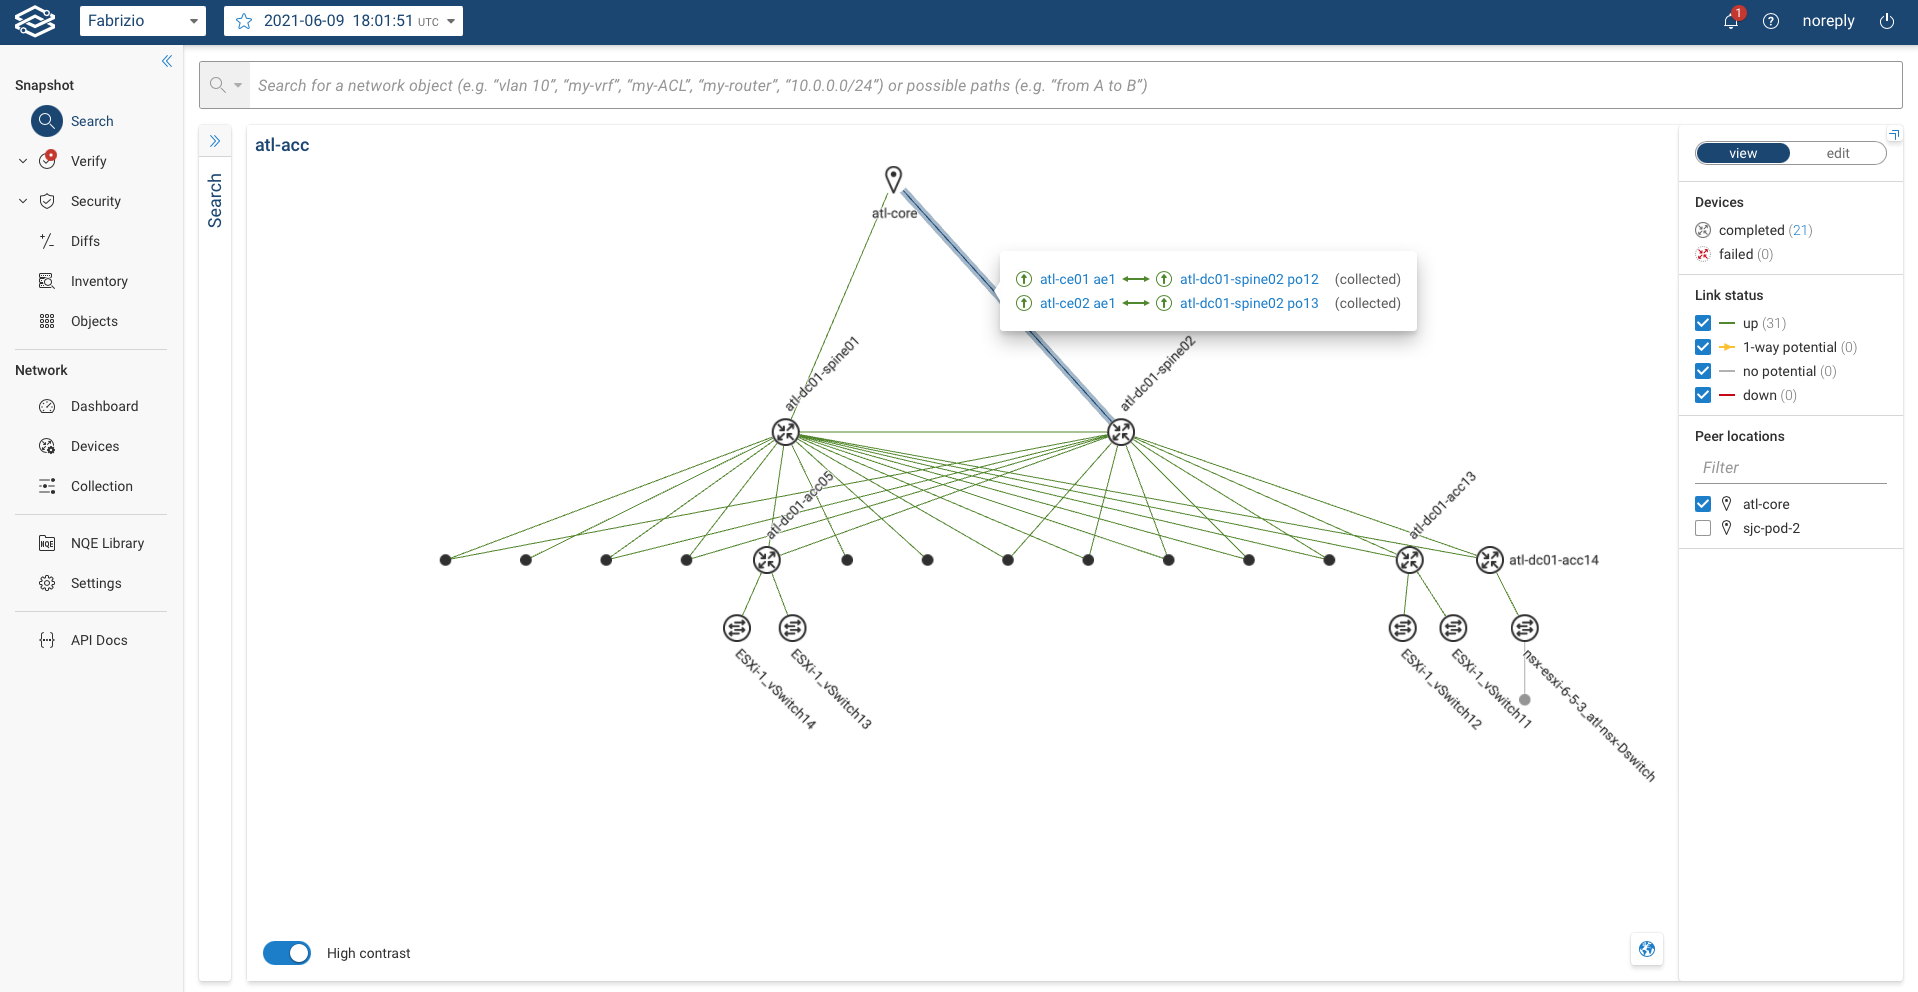
Selecting a particular location will zoom in on the site and show device connectivity. Users can zoom in or return to the map view using the Map view icon in the bottom right corner.
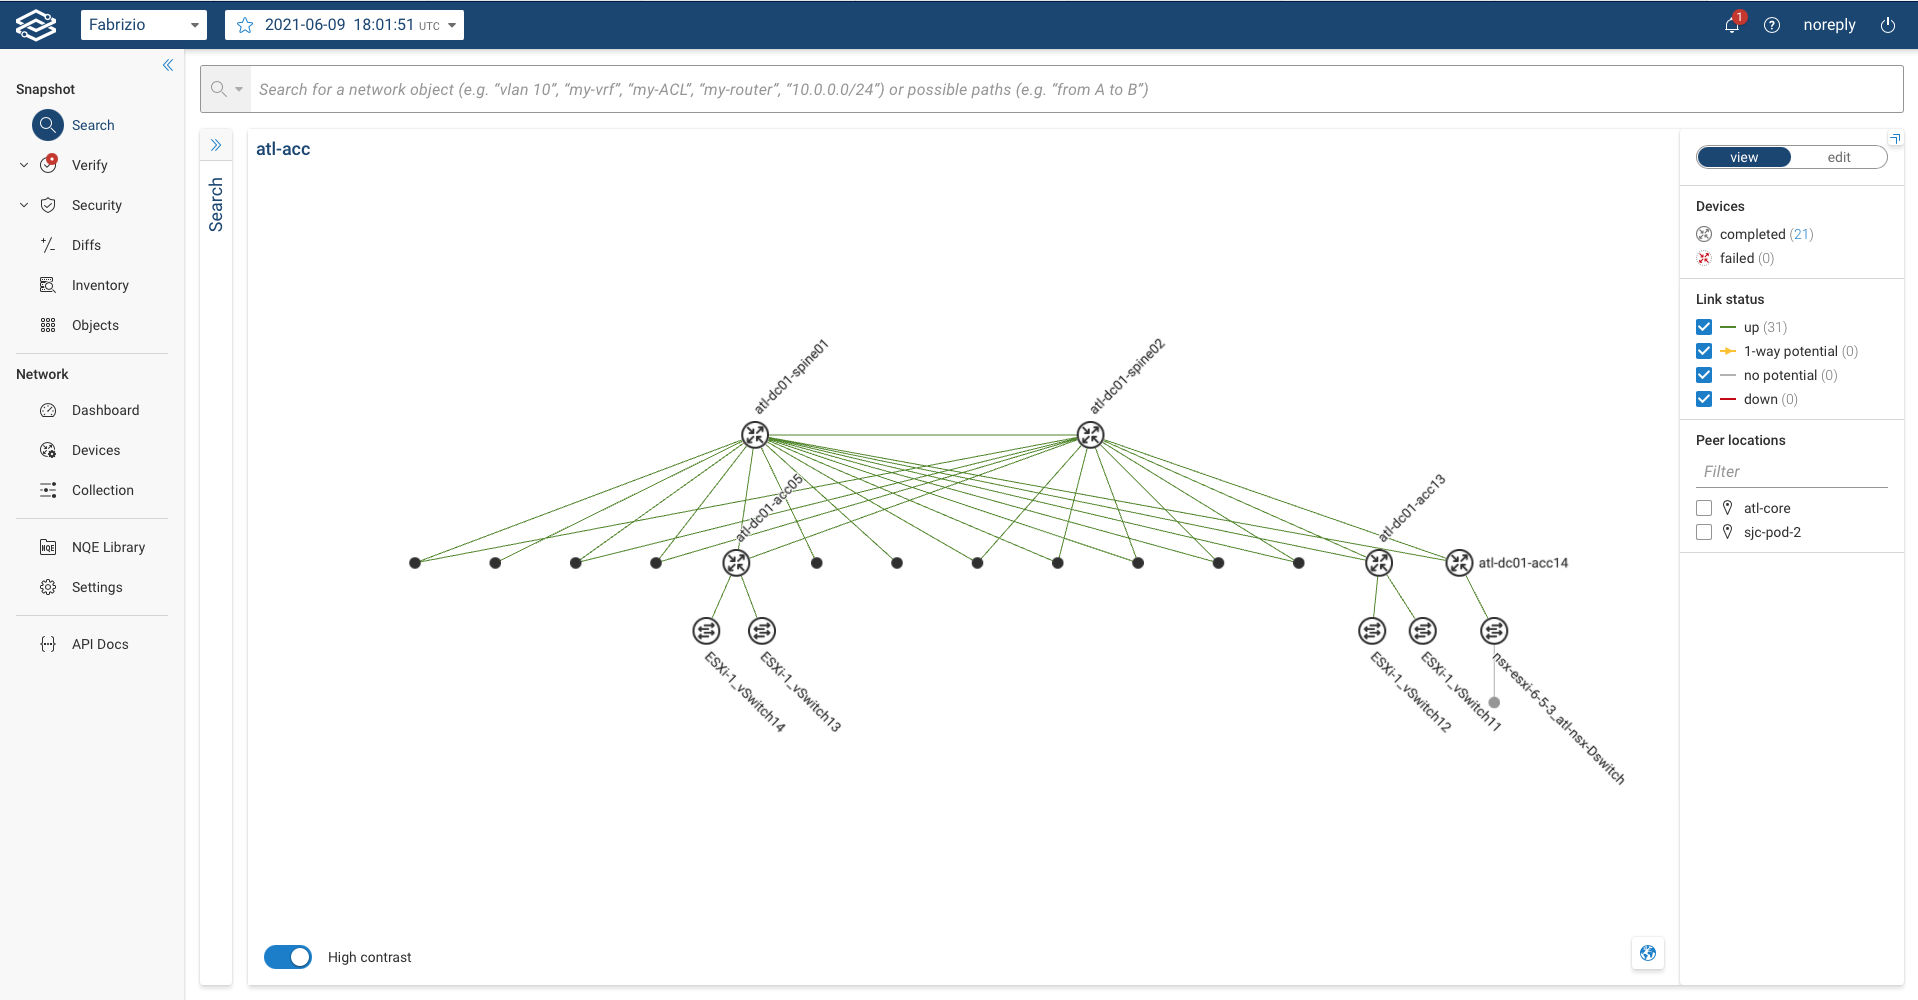
The local site view will provide peer locations to which Forward Enterprise has established a connection through link inferences. The peer site list is provided in the filter options. Here, users can select a peer location to the current site, and it will show links connected to the location.
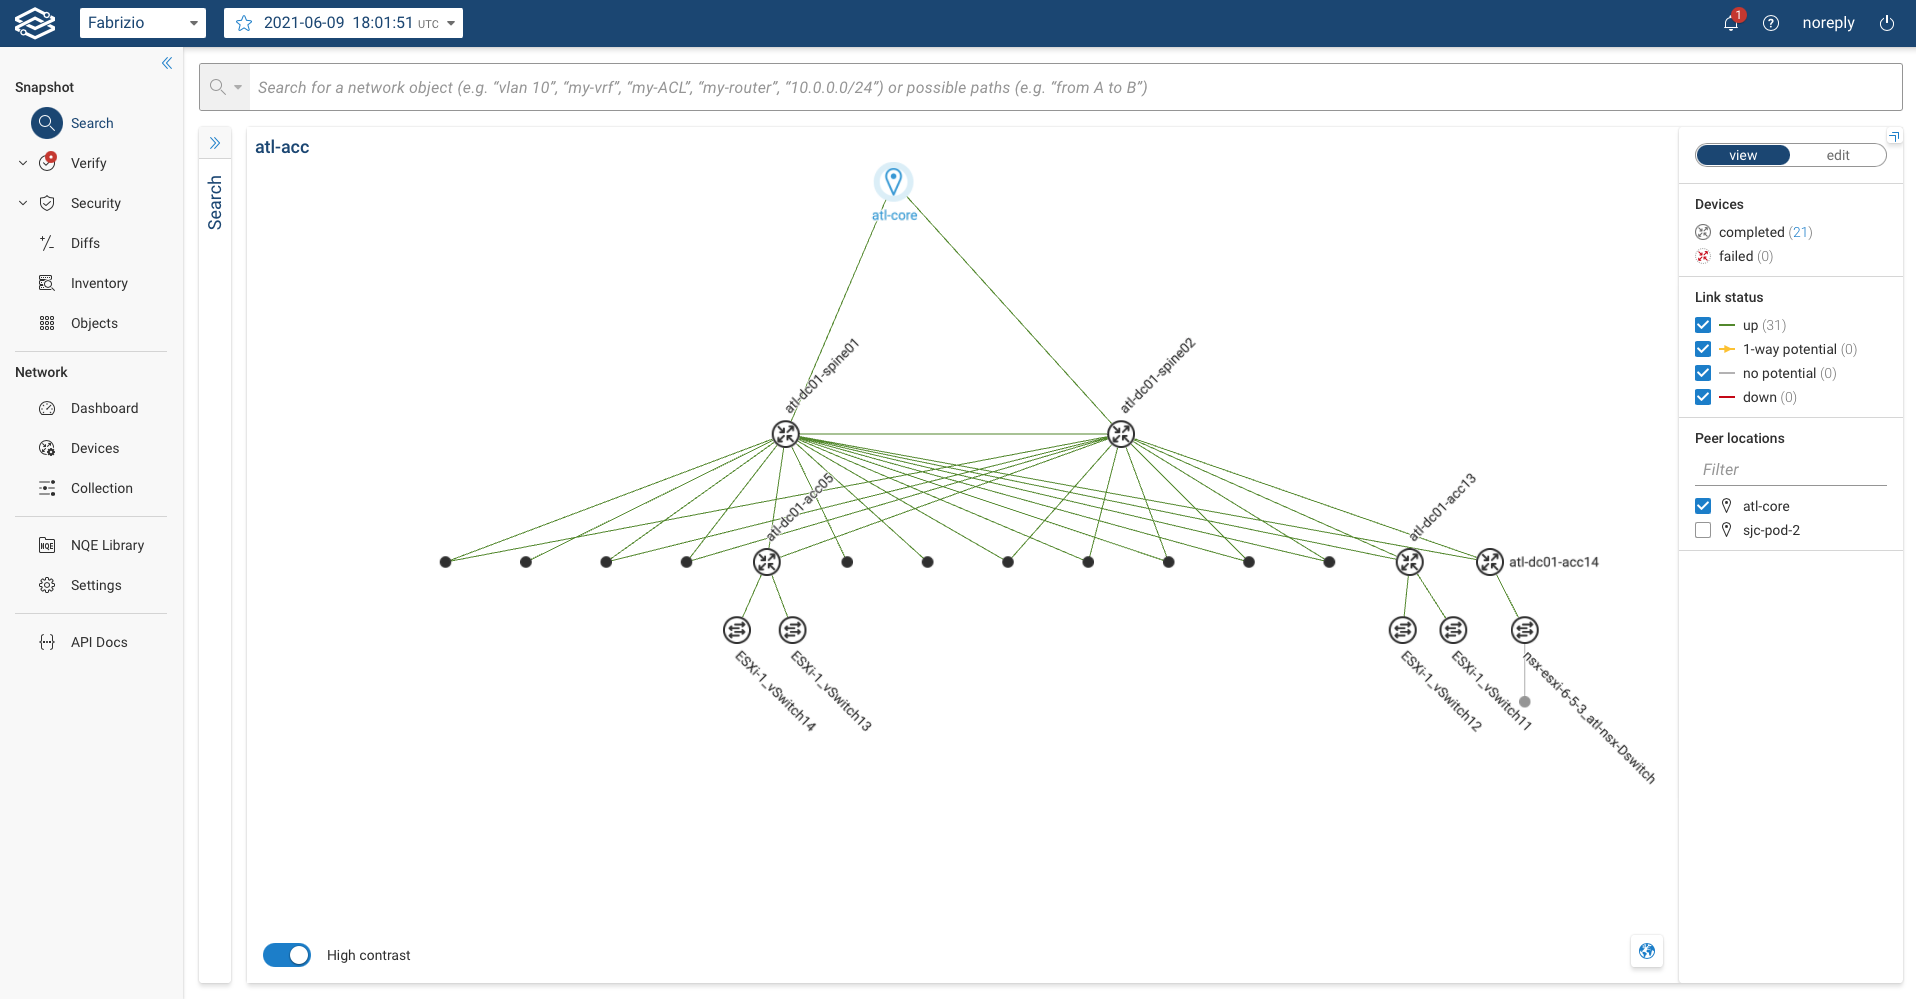
When users click on the link, it shows which interfaces connect two sites. Clicking one of the interfaces redirects users to the device to which the interface belongs.
Process of assigning location
To assign a location to a particular device or group of devices, follow the steps outlined below:
- Navigate to Network > Sources page
- Select the desired Devices
- Click on the Edit button. (This option will allow users to bulk edit device properties and locations).
The side drawer will pop up with options to configure for the desired devices where users can configure various parameters.
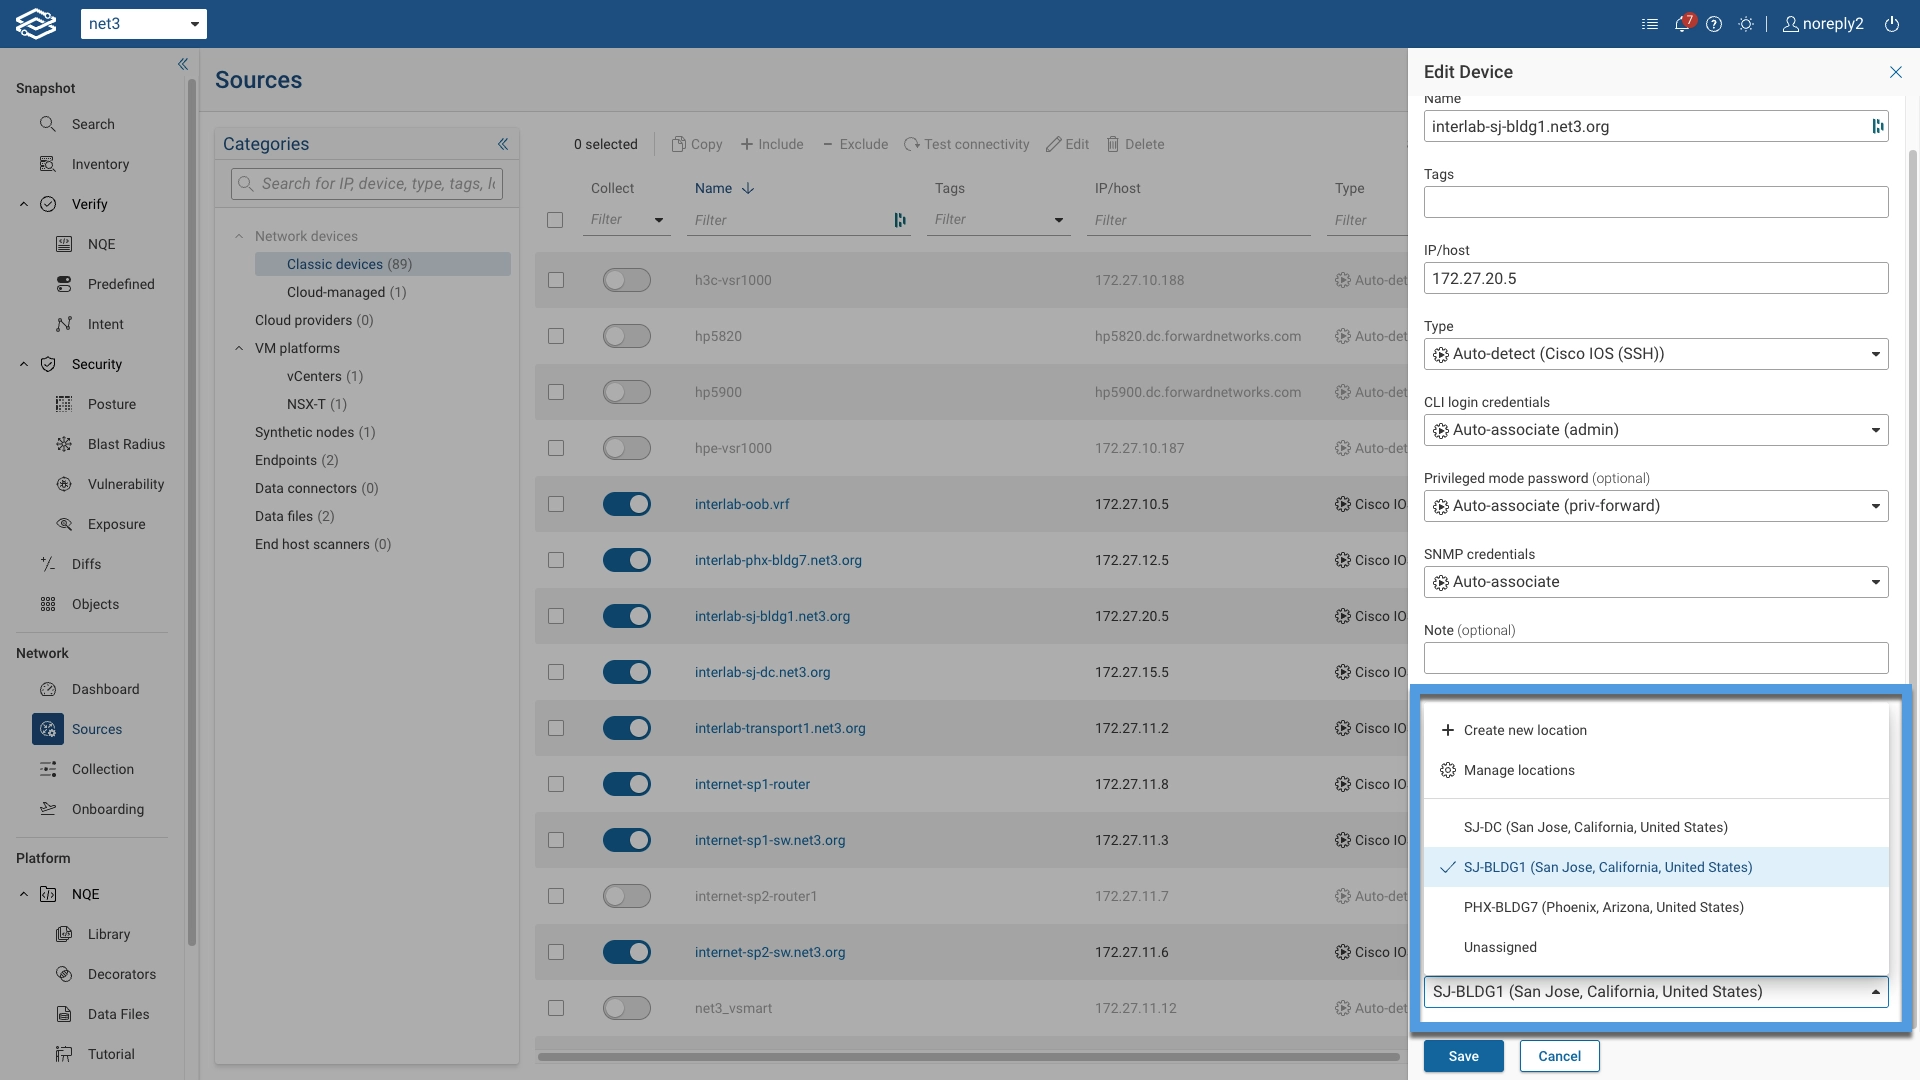
Under Location, the drop-down option will provide a configuration for Creating a new location and a list of all locations that have been created previously. By default, all devices will have an Unassigned location; hence, that option will be available in the drop-down when the user creates the location for the first time.
The geo coordinates of the default Unassigned location are: (32.36847, -42.52482) (latitude, longitude).
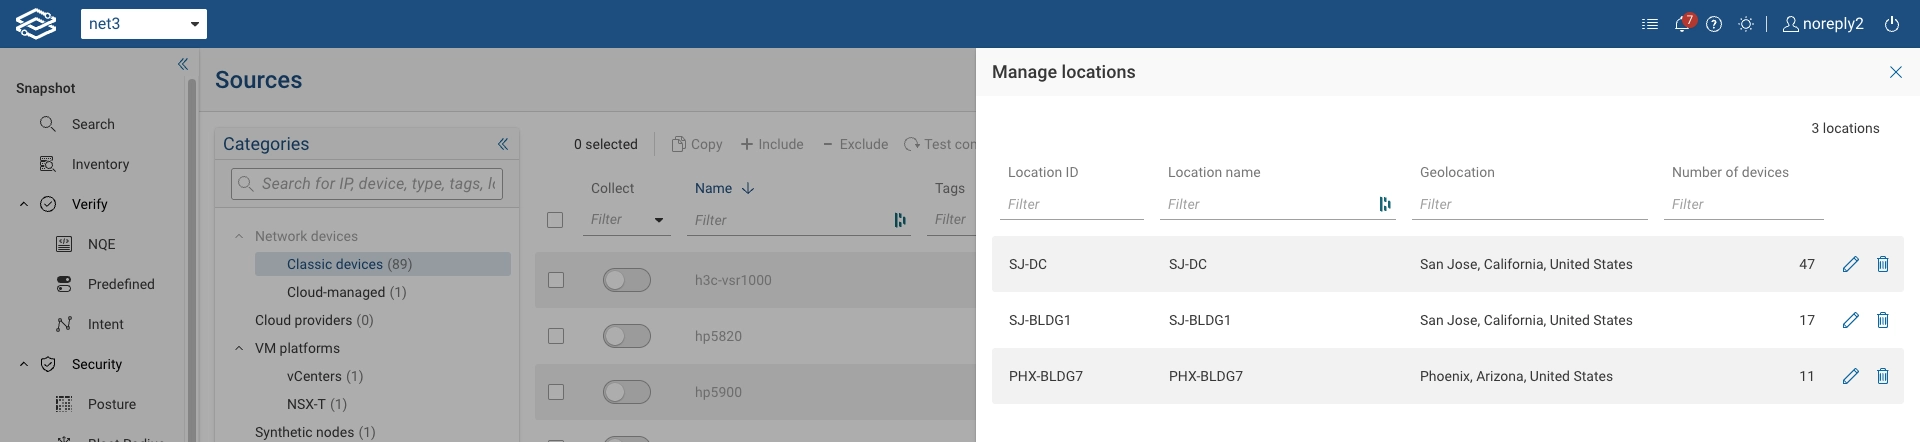
Users can also manage locations using the Manage Locations option. Within Manage Locations, users can edit the name, city, state, and Latitude/Longitude or delete the entire location.
Note that when the location-based topology view is enabled, the edit option for clusters is disabled (more information below).
Non-geographic location based topology
The Forward platform allows users to hide network location details in scenarios where topology location cannot be disclosed. In this case, the user will navigate to Settings > System > Org Preferences and turn on the Non-geographic locations feature under the Experimental Features section.
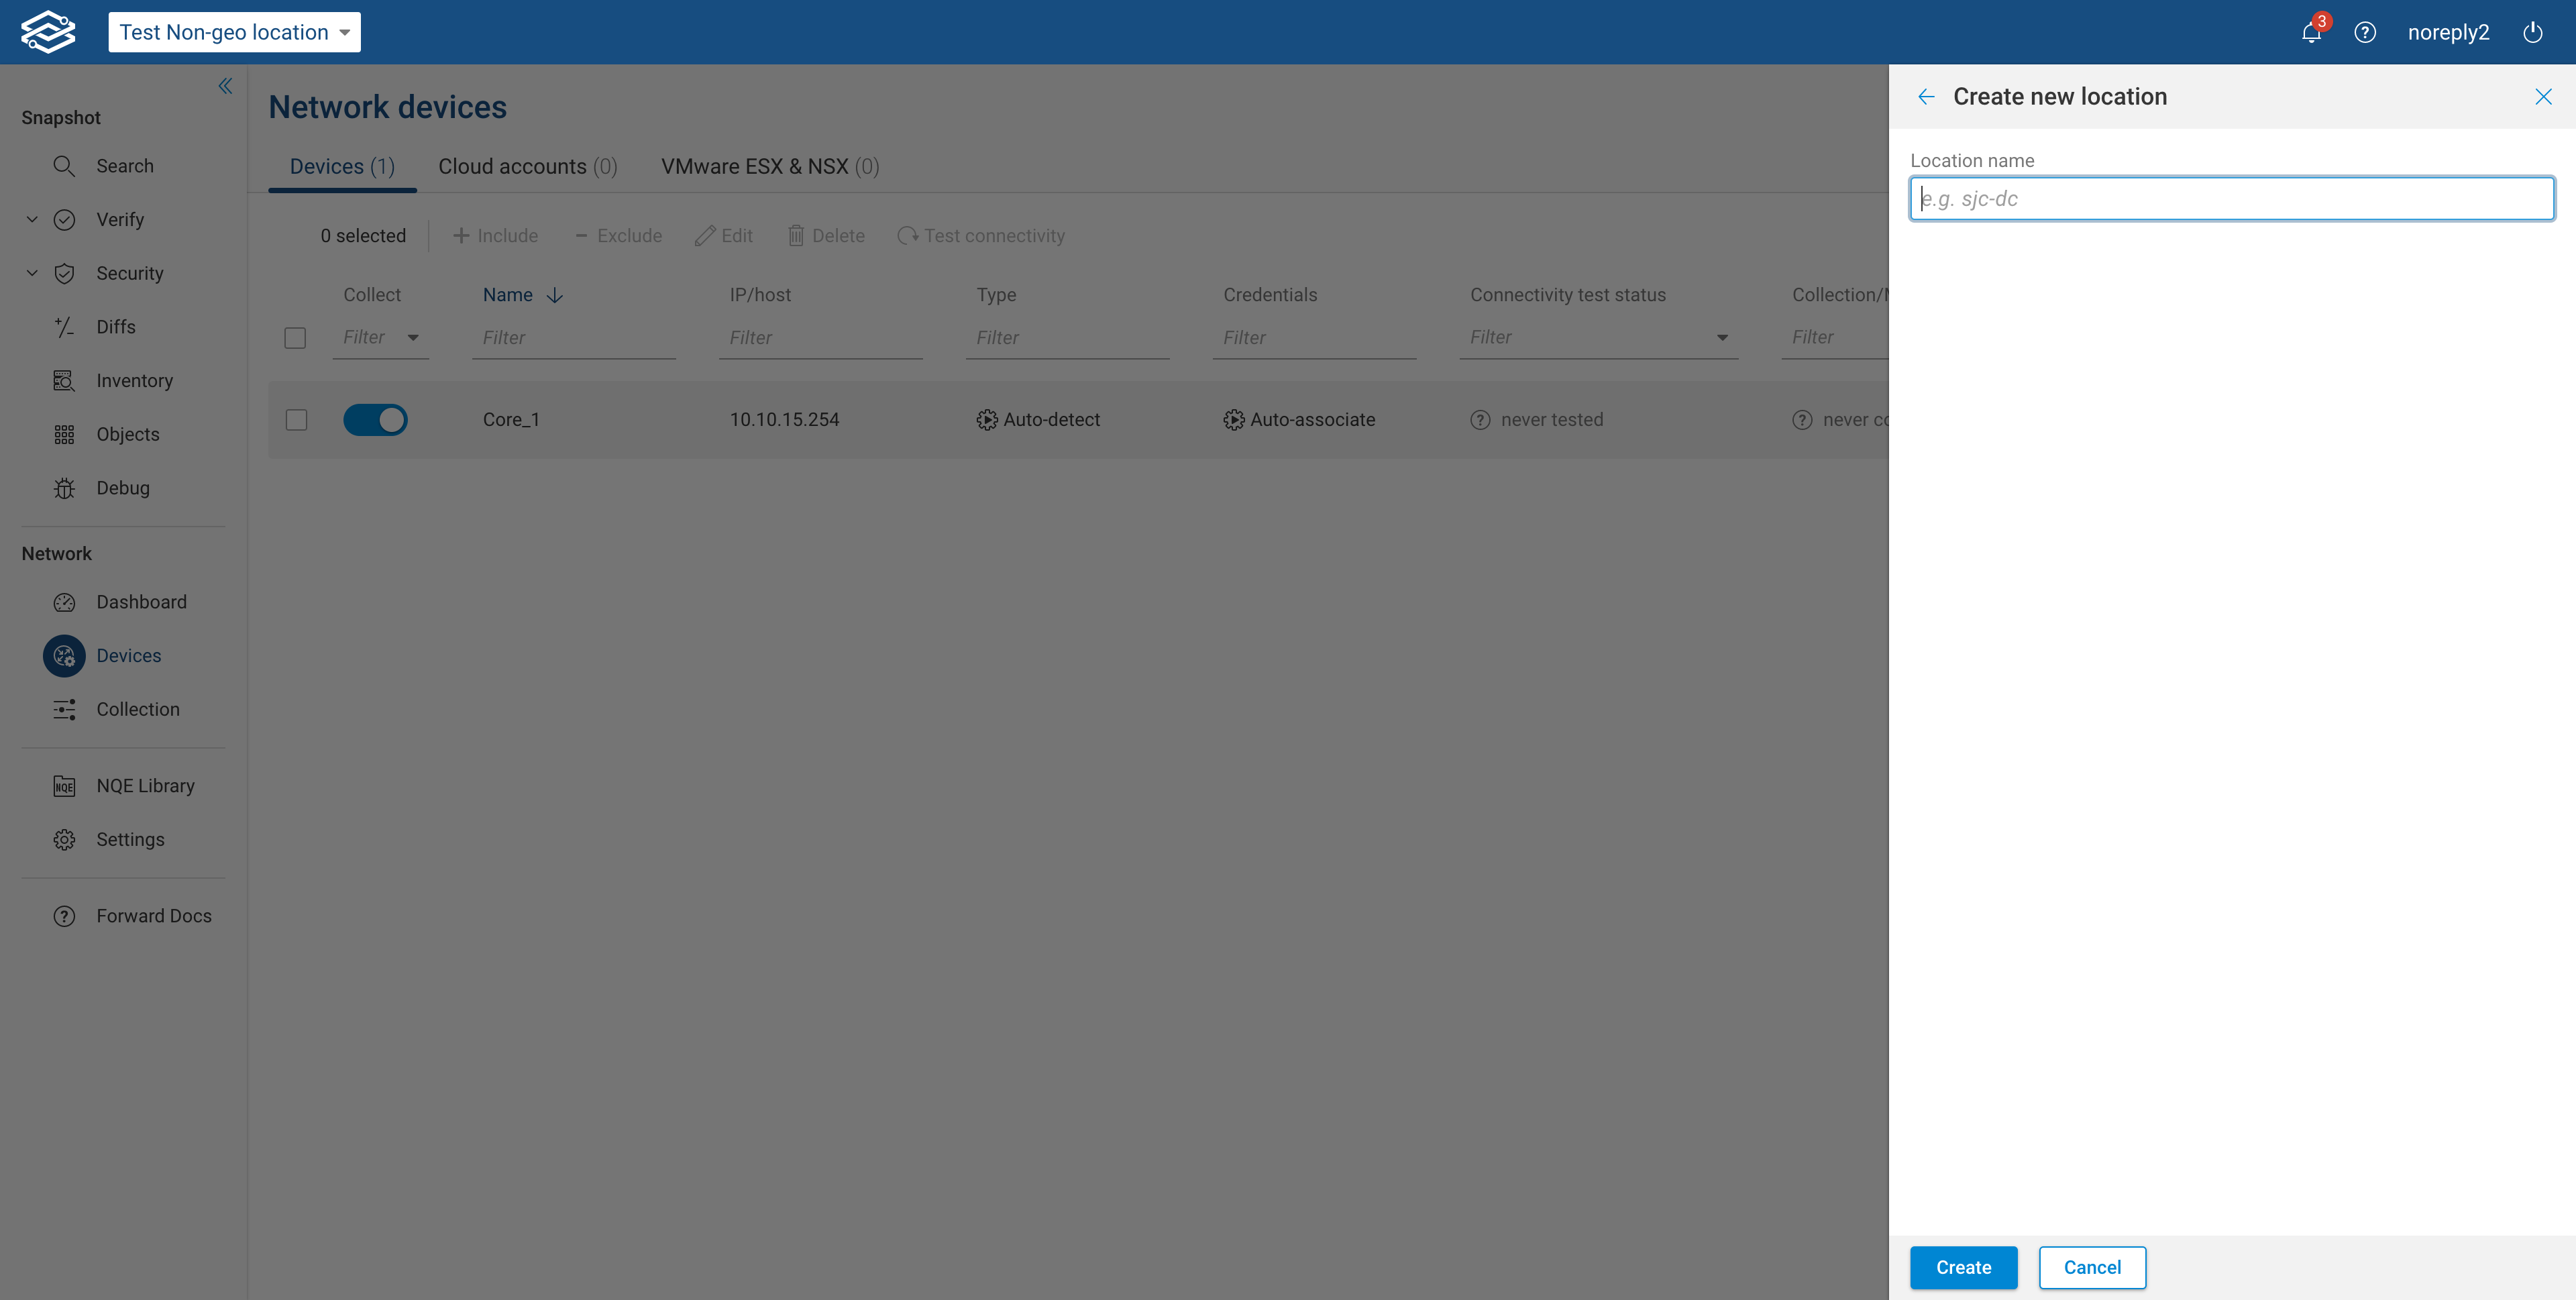
Once the feature is on, the user will have the topology view without a geographical map, which does not reveal the location of the devices, as shown in the image below.
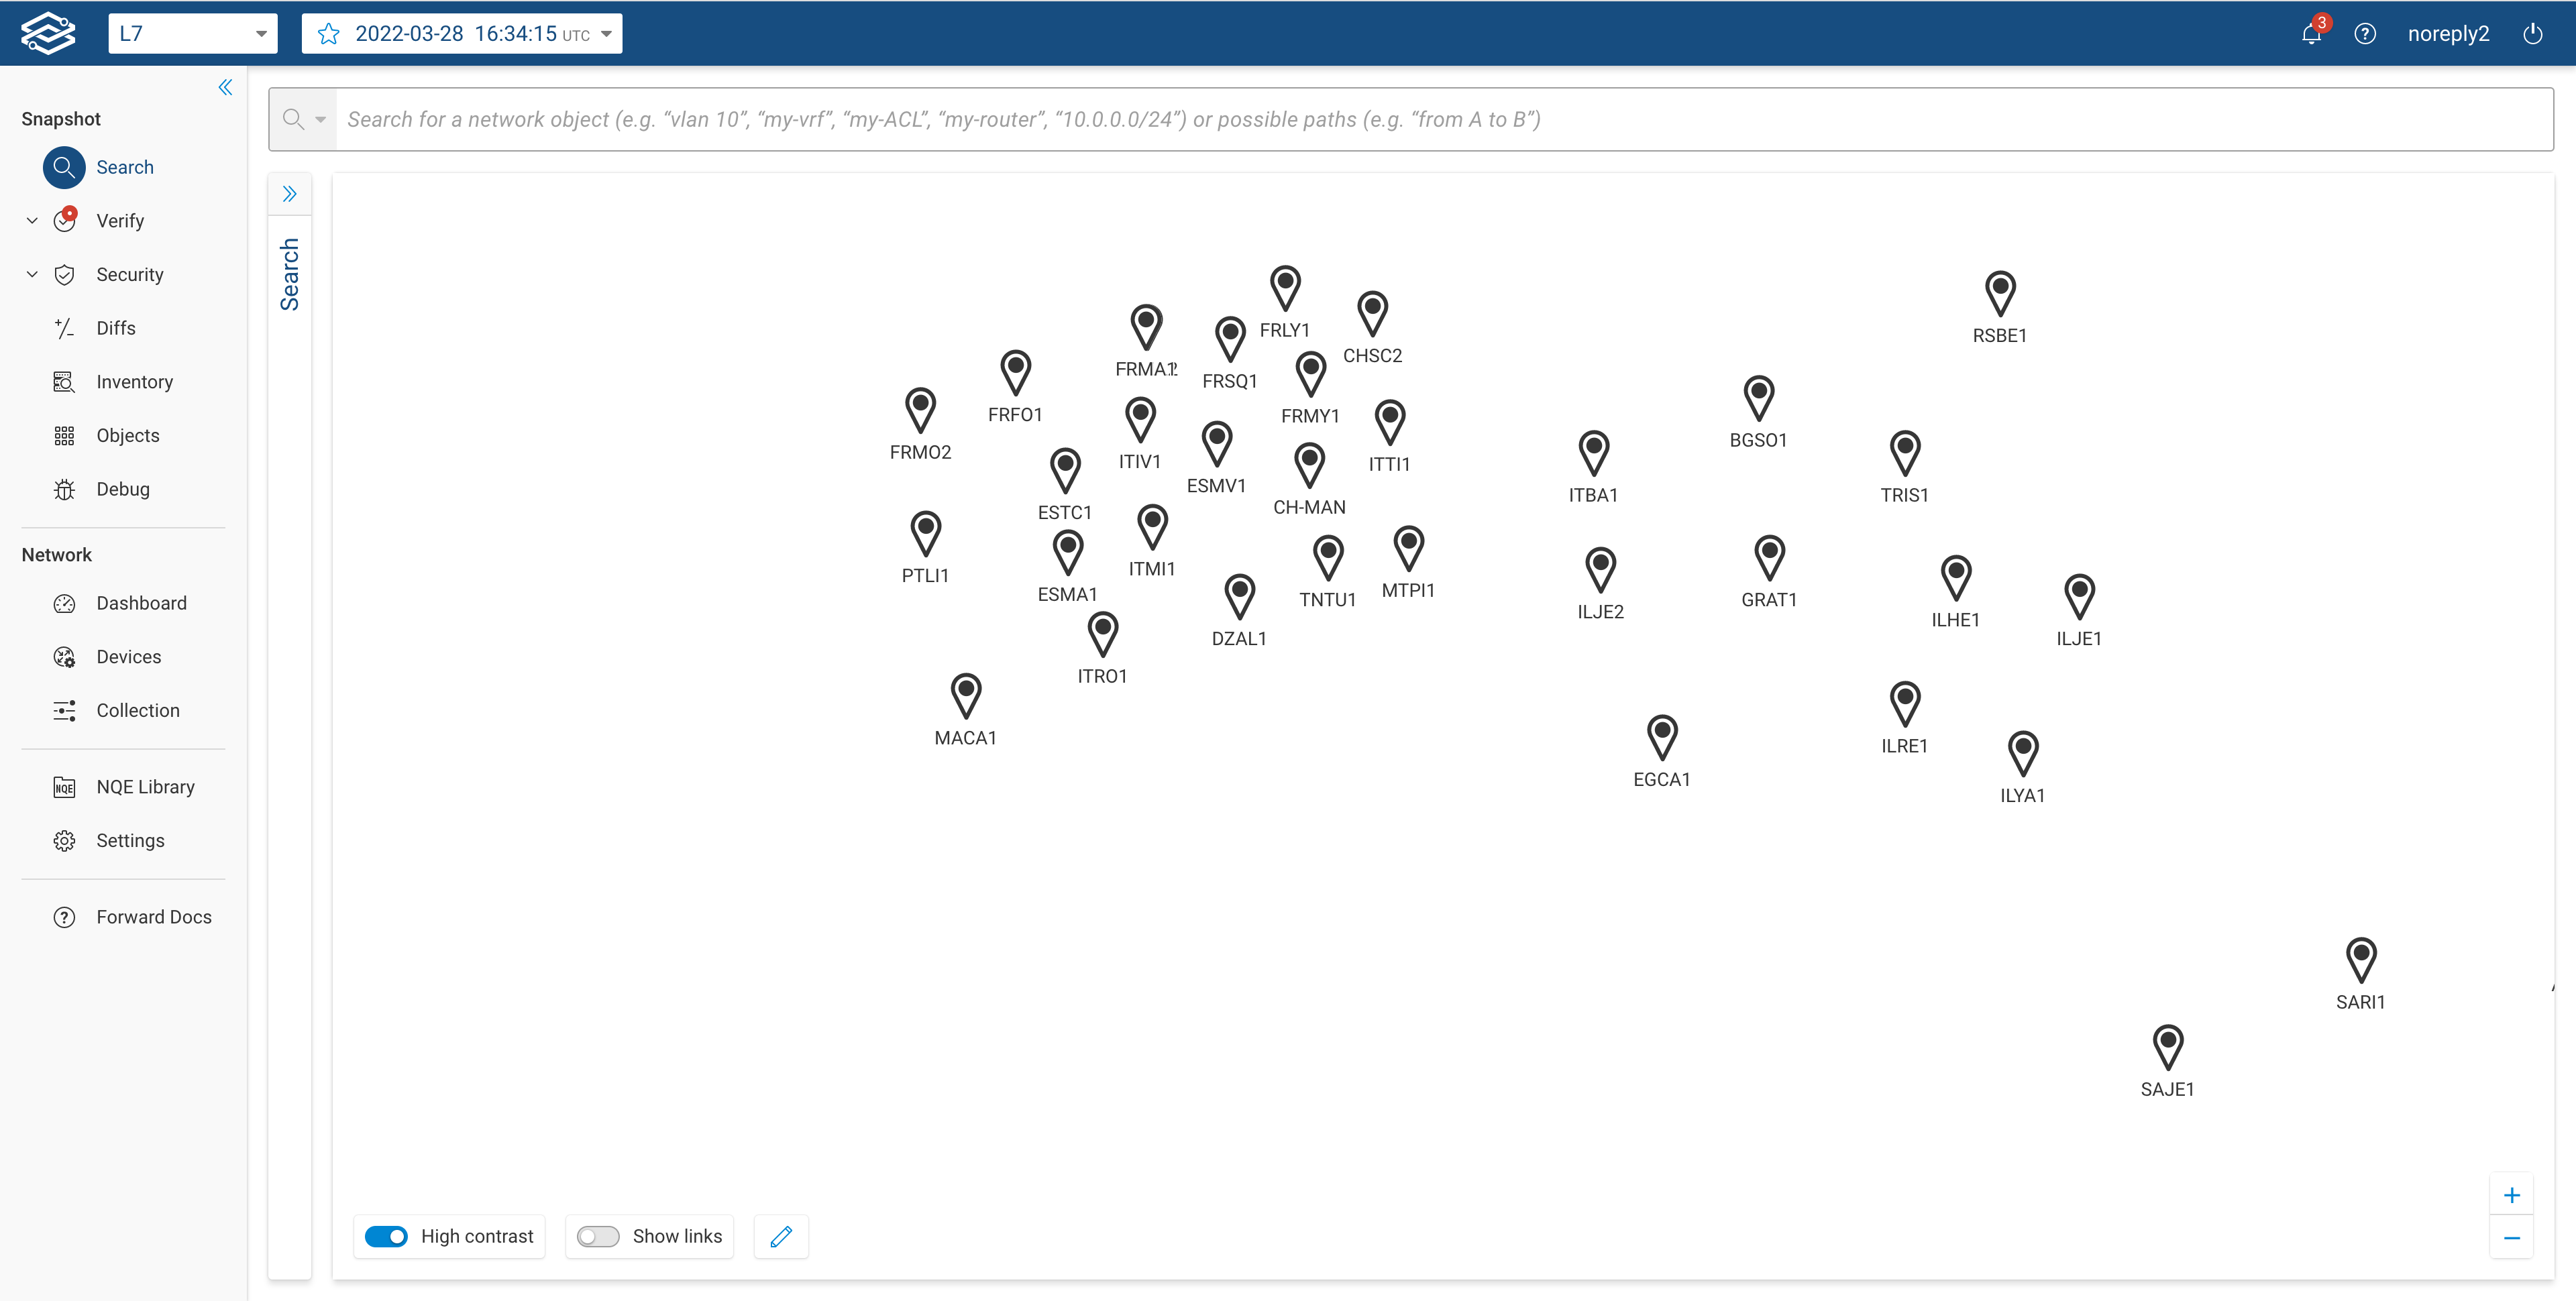
In edit mode, users can adjust the global topology layout by dragging the markers of user-defined locations.
Additionally, users will be able to configure a device's location with a name instead of coordinates or the name of the city, as shown below. This option is available under the devices page. Refer to the Process of Assigning Location section above for more information.
Device coloring
Users can add metadata to devices in the form of tags. Starting with release 22.7, the user can associate one or more tags to a device from the Network Device Inventory page, the device card, and the device popup when the device is selected in the topology. Additionally, the user can assign a color to a tag by clicking on the tag itself.
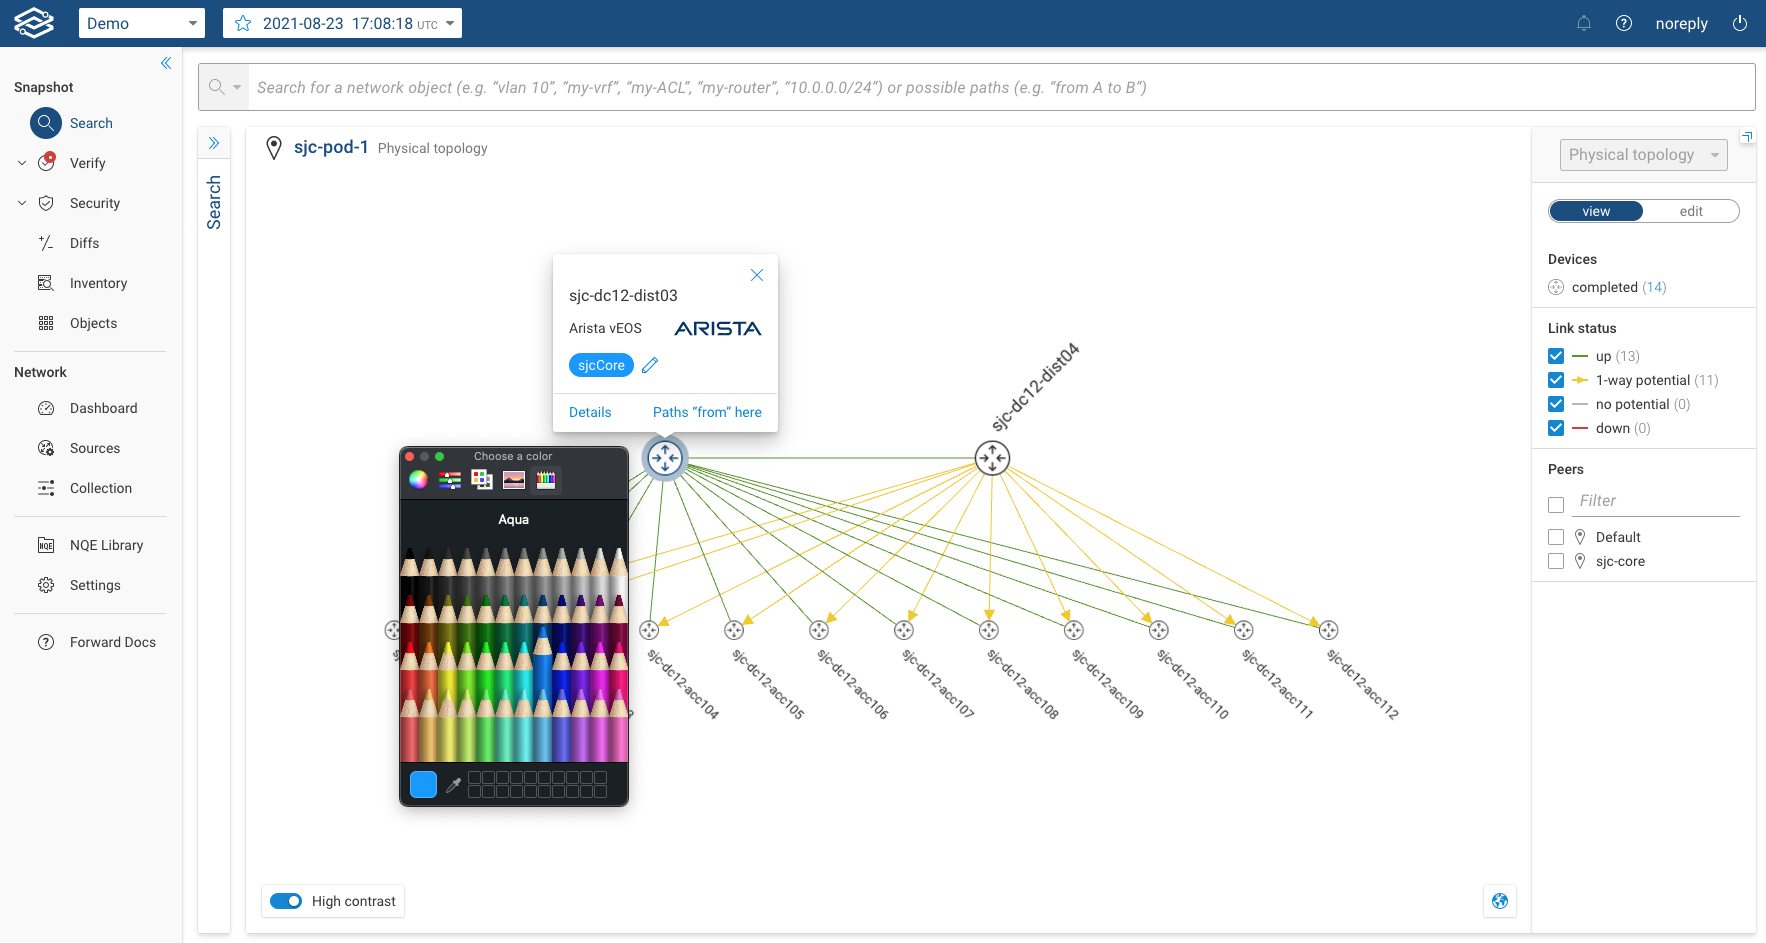
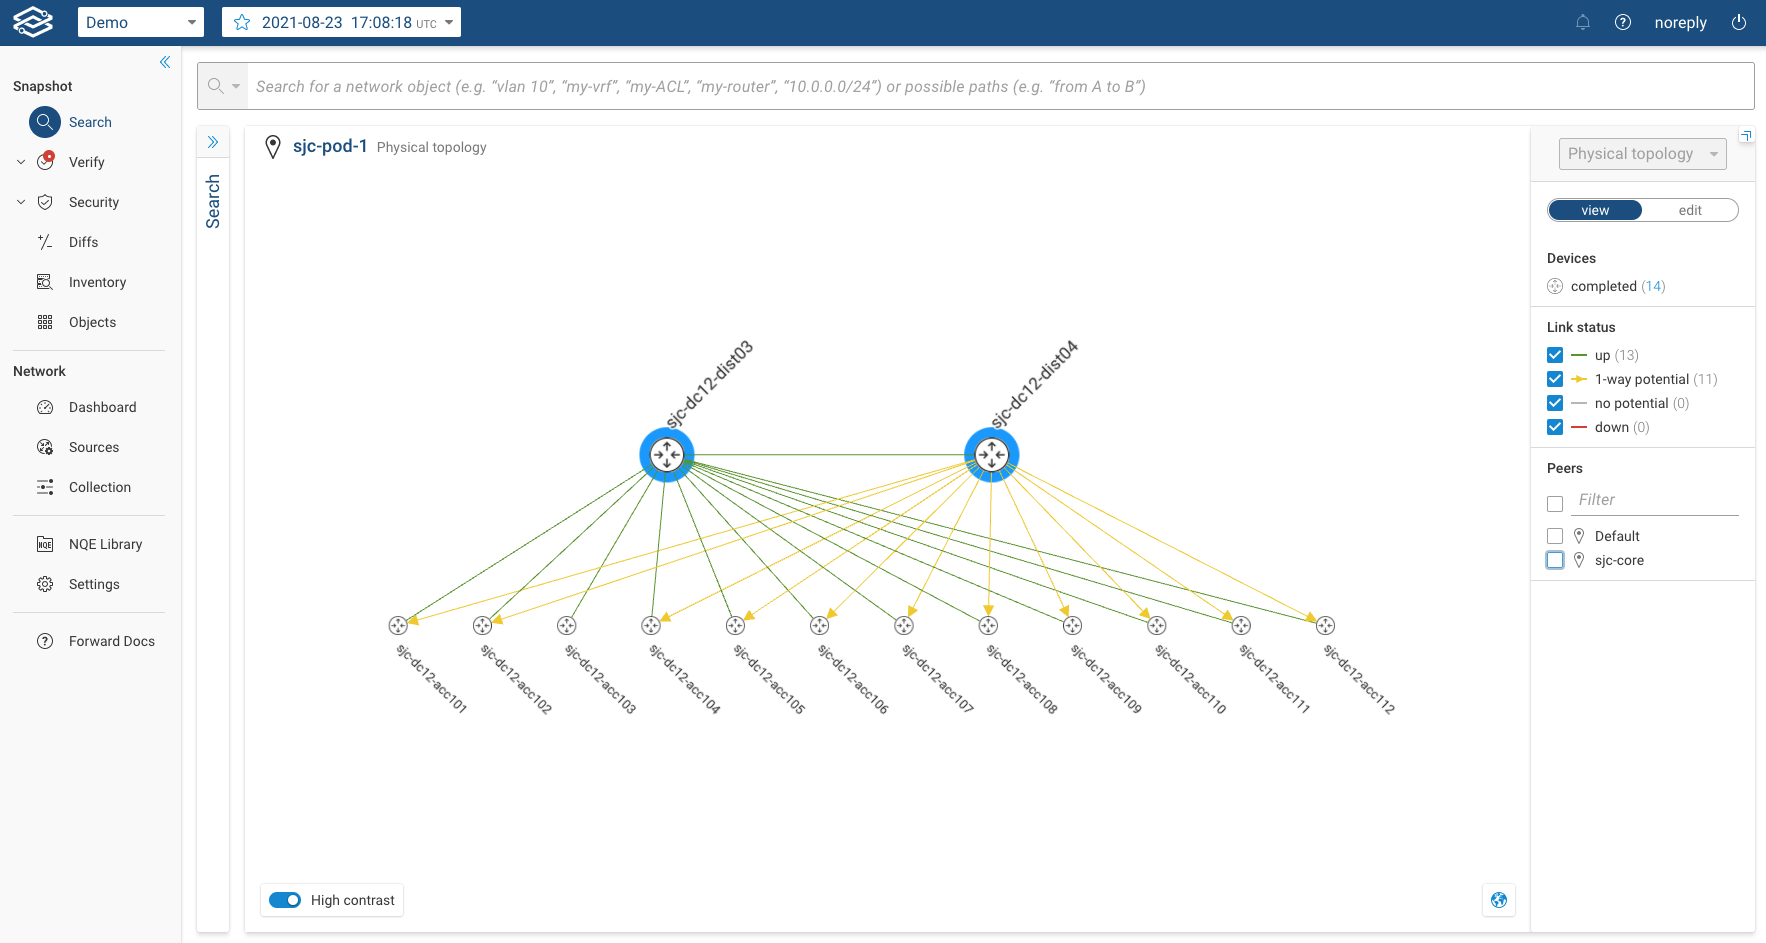
Once the tag has been assigned a color, all the devices with that tag will be displayed with a colored circle around their icons, as shown in the image:
A color can be added in bulk from the Inventory page by selecting one instance of the tag:

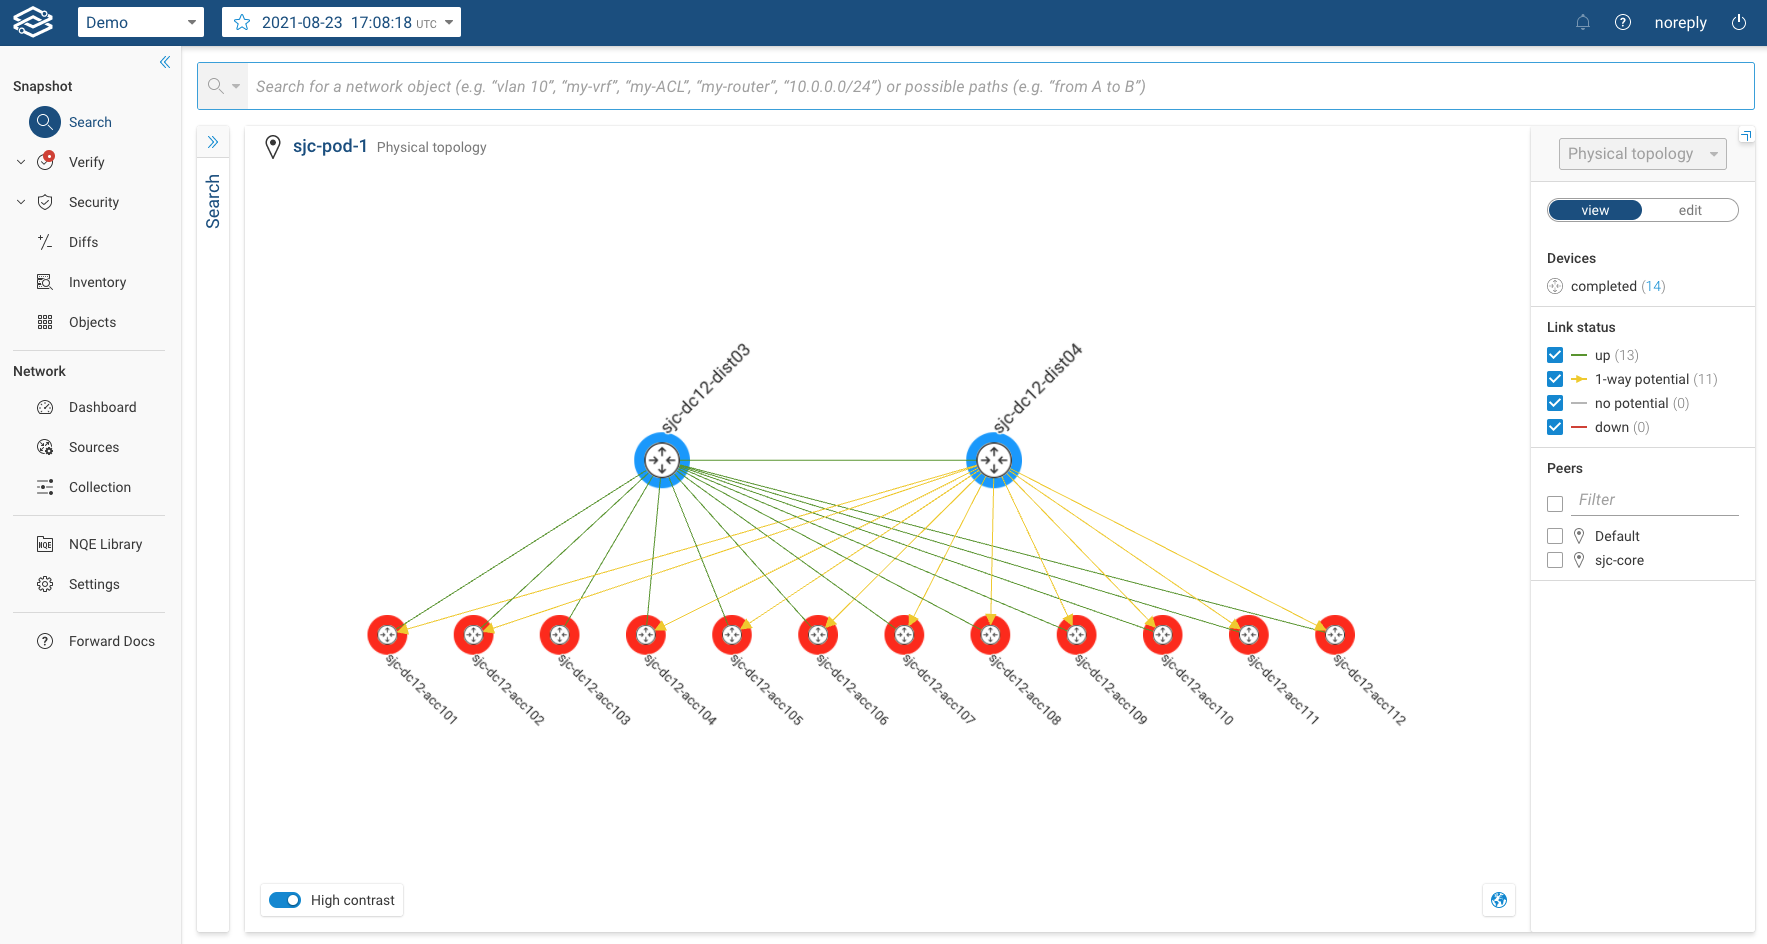
Here is an example of two tags with two different colors being shown in the location topology:
Edit options inside a location
The filter has two tabs: View and Edit.
- The view tab will allow users to select various filters such as link status, link type, peer locations, etc.
- The edit option will allow users to change location properties for the current map view. When users click on the Edit button, they see the following image.
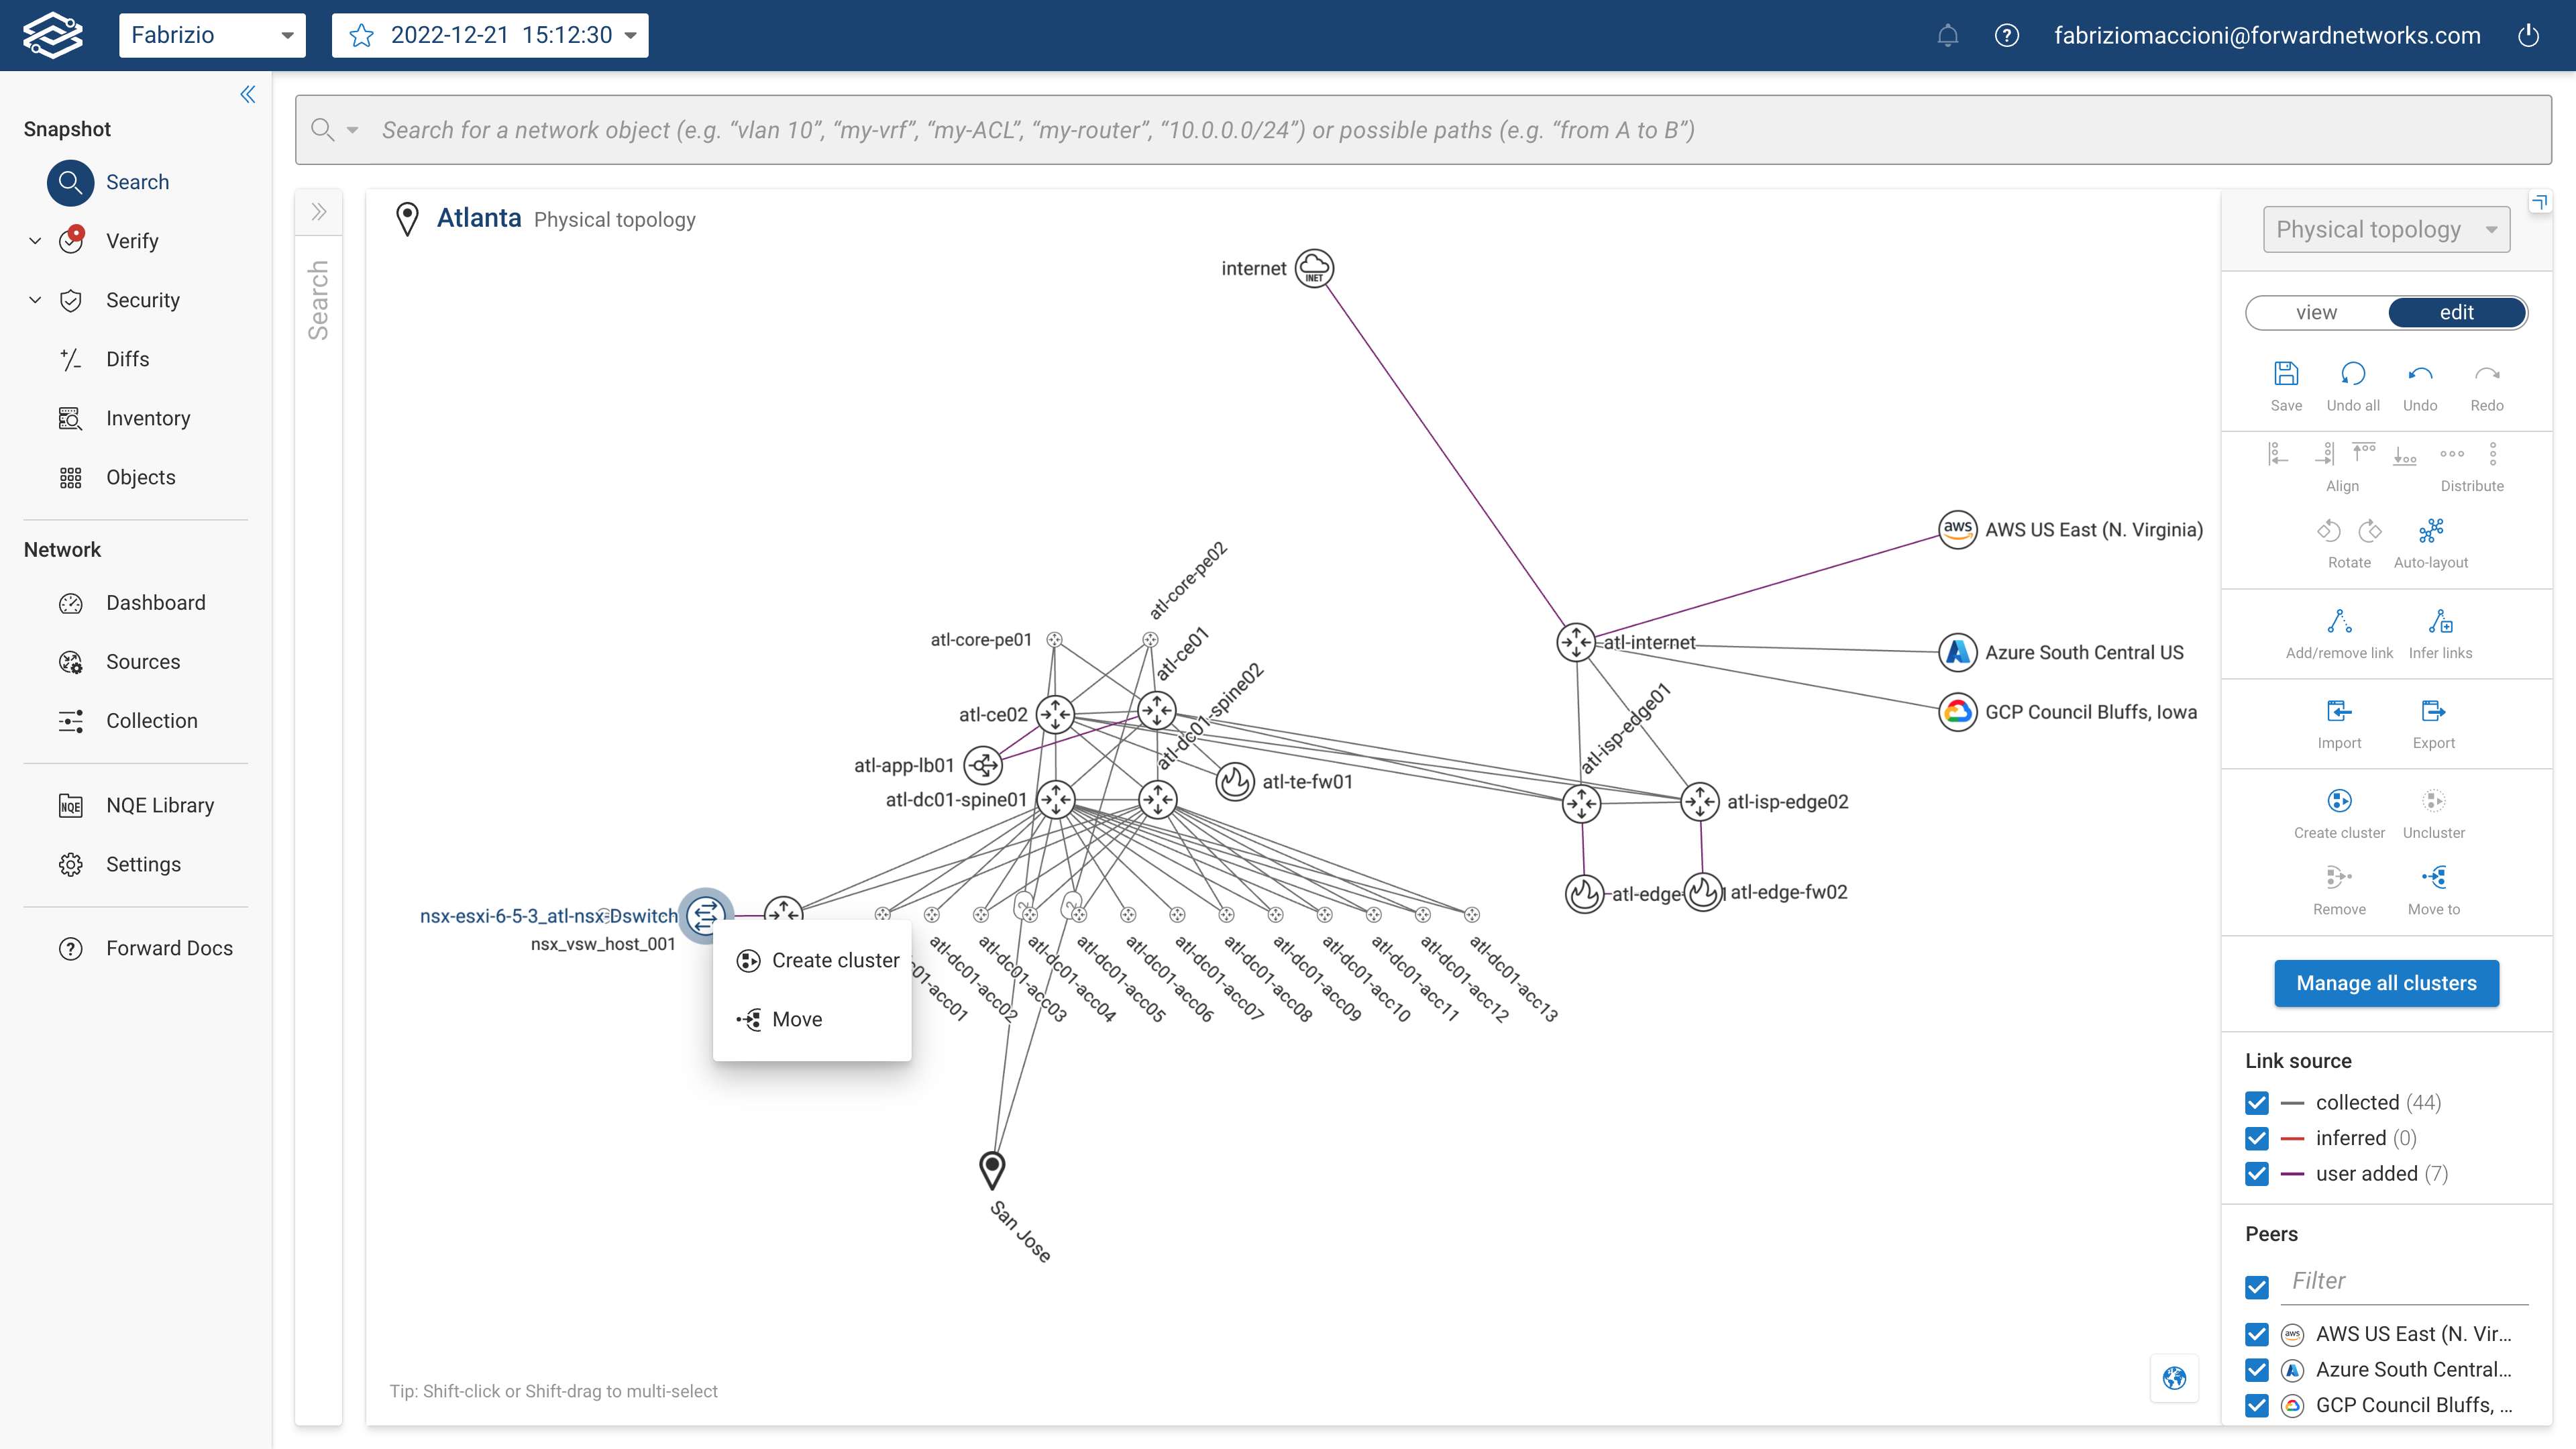
Users can do the following:
- Auto Layout
- Align selected devices
- Distribute selected devices horizontally or vertically
- Rotate selected devices
- Import/Export the location layout
- Manage device clusters
- Toggle peer visibility
Topology node bundling
In large networks, the Topology view can quickly become cluttered, making it difficult to navigate. To improve clarity and usability, virtual contexts and Access points (APs) are automatically bundled based on their connections. This ensures that the Topology remains organized and easy to manage, allowing users to monitor their network infrastructure effectively.
- Virtual Context Bundling: Virtual contexts are automatically bundled by their root device, meaning all contexts that share the same root are grouped into a single node. This prevents the Topology from becoming cluttered with individual virtual contexts.
- Access Point Bundling: Access points that share the same upstream device are automatically bundled into a single node (e.g., "APs @ Switch01"). APs connected to multiple devices are bundled according to their upstream connections, ensuring that the Topology remains clear and easy to interpret, even in large networks with many APs.
Managing virtual context bundling
By default, virtual contexts are automatically bundled by their root device. To manage these bundles, click on the root node in the Topology view and select View contexts. This opens a table listing all the virtual contexts associated with that bundle. You can choose to display specific contexts individually or re-bundle them.
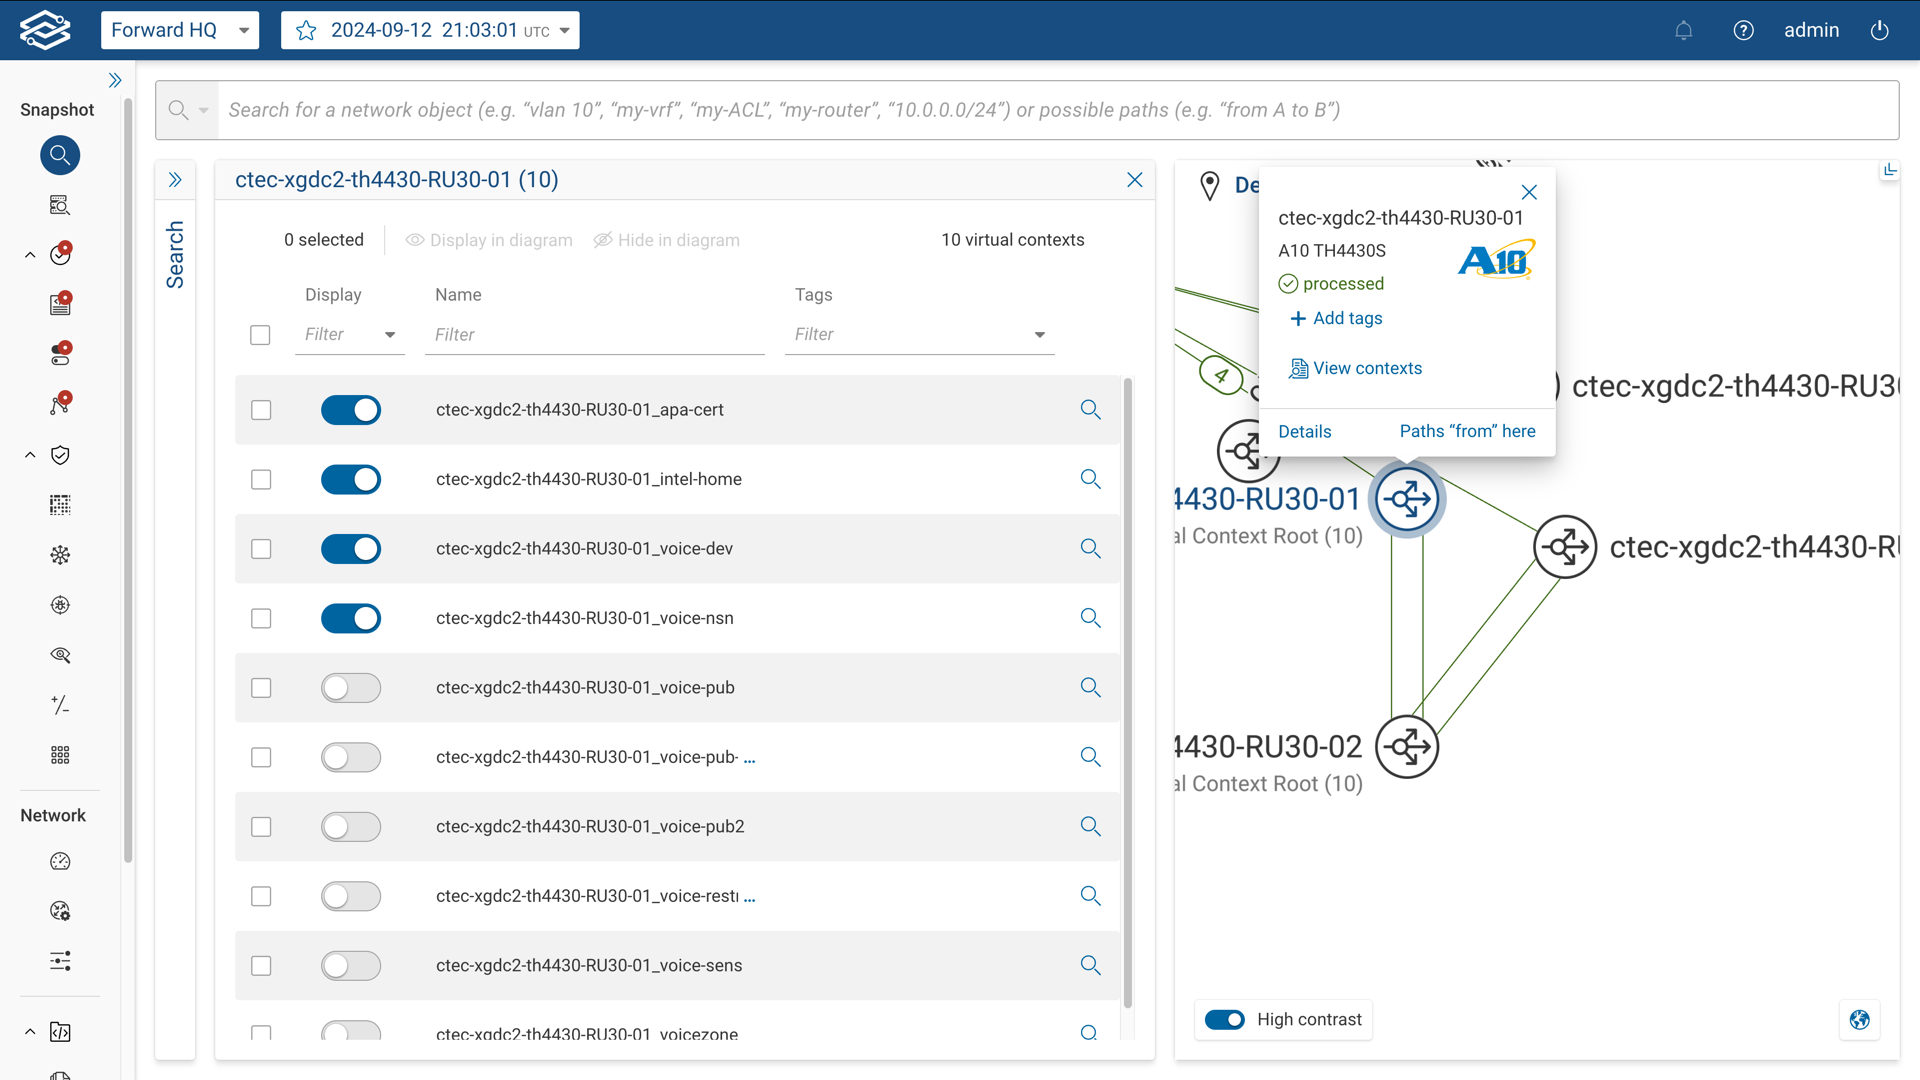
The table contains the following columns for each virtual context:
- Display: When enabled, the selected virtual context is removed from the bundle and displayed individually in the Topology view. Toggling this will re-add it to the bundle.
- Name: Displays the name of the virtual context.
- Tags: Displays tags assigned to the virtual context.
Managing access point bundling
Access Points are automatically bundled by default, just like virtual contexts. To manage these bundles, click on an AP bundle node in the Topology view. This opens a table listing all APs associated with that bundle. You can choose to display specific APs individually or re-bundle them. Similarly, selecting an unbundled AP node and clicking on View more APs will display the same table of associated APs.
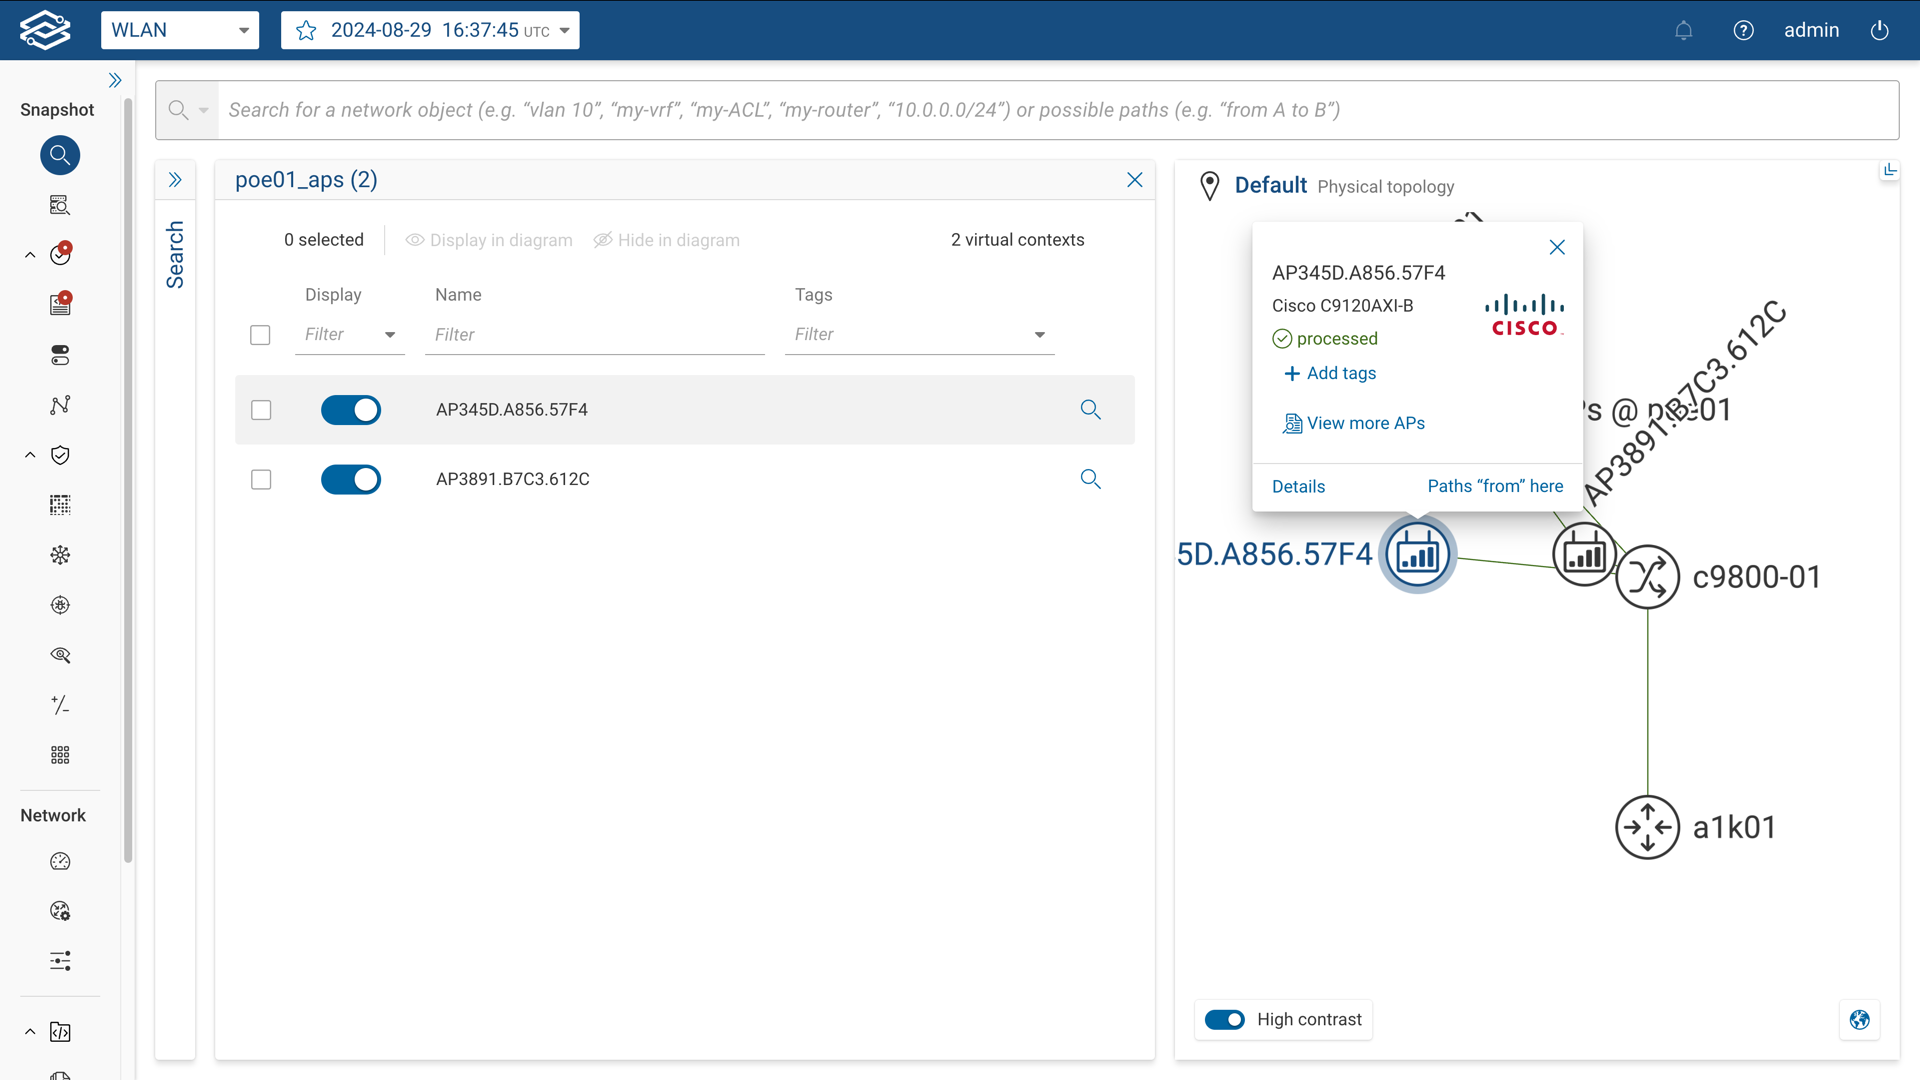
The table contains the following columns for each AP:
- Display: When enabled, the selected AP is removed from the bundle and displayed individually in the Topology view. Toggling this will re-add the AP to the bundle.
- Name: Displays the name of the AP.
- Tags: Displays tags assigned to the AP.